Variants & options
How to Bulk Create Product Options
Last updated
Add a new option (like Color, Size, or Material) to many products at once. EditEngine, the bulk editor for Shopify, lets you append the option and its values across every matched product in a single run — and choose whether to also generate variants for every value combination.
Create Product Options is an action, not a value edit. Each matched product gets one new option appended to its existing options list. Products that already have three options (Shopify's per-product limit) will be skipped at apply time.
Two distinct strategies live behind the Variant strategy dropdown. Leave as is keeps your variant count flat; Create variants multiplies it. Pick deliberately — the difference is significant.
Step 1: Pick the Create Product Options action
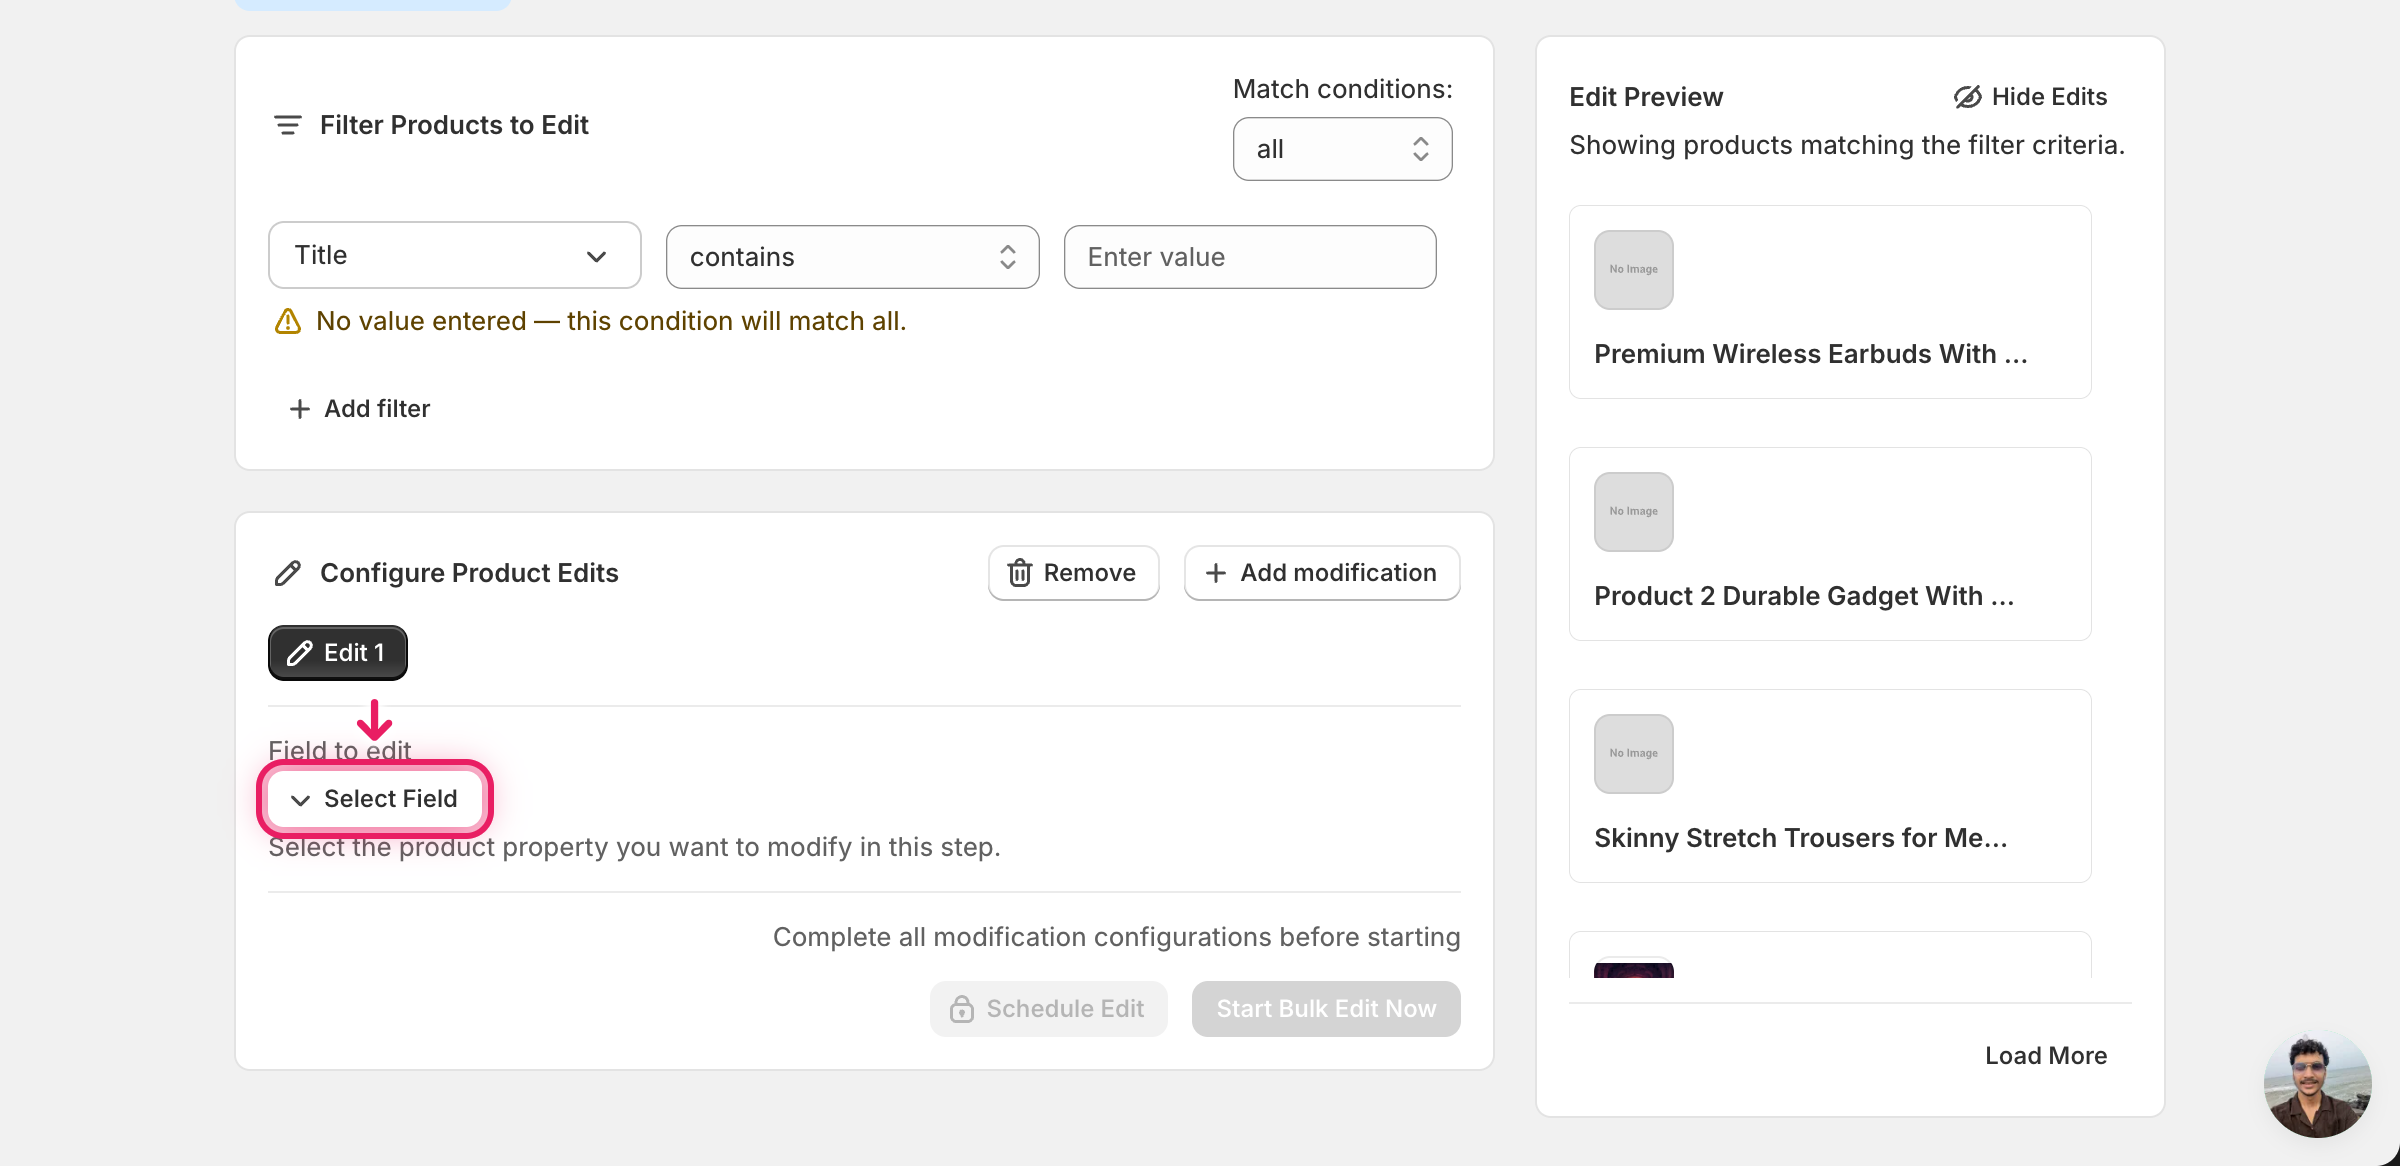
In the Configure Product Edits panel, click Select Field.
The Select Field modal opens. Create Product Options lives under Product Fields, near the other option-related entries.
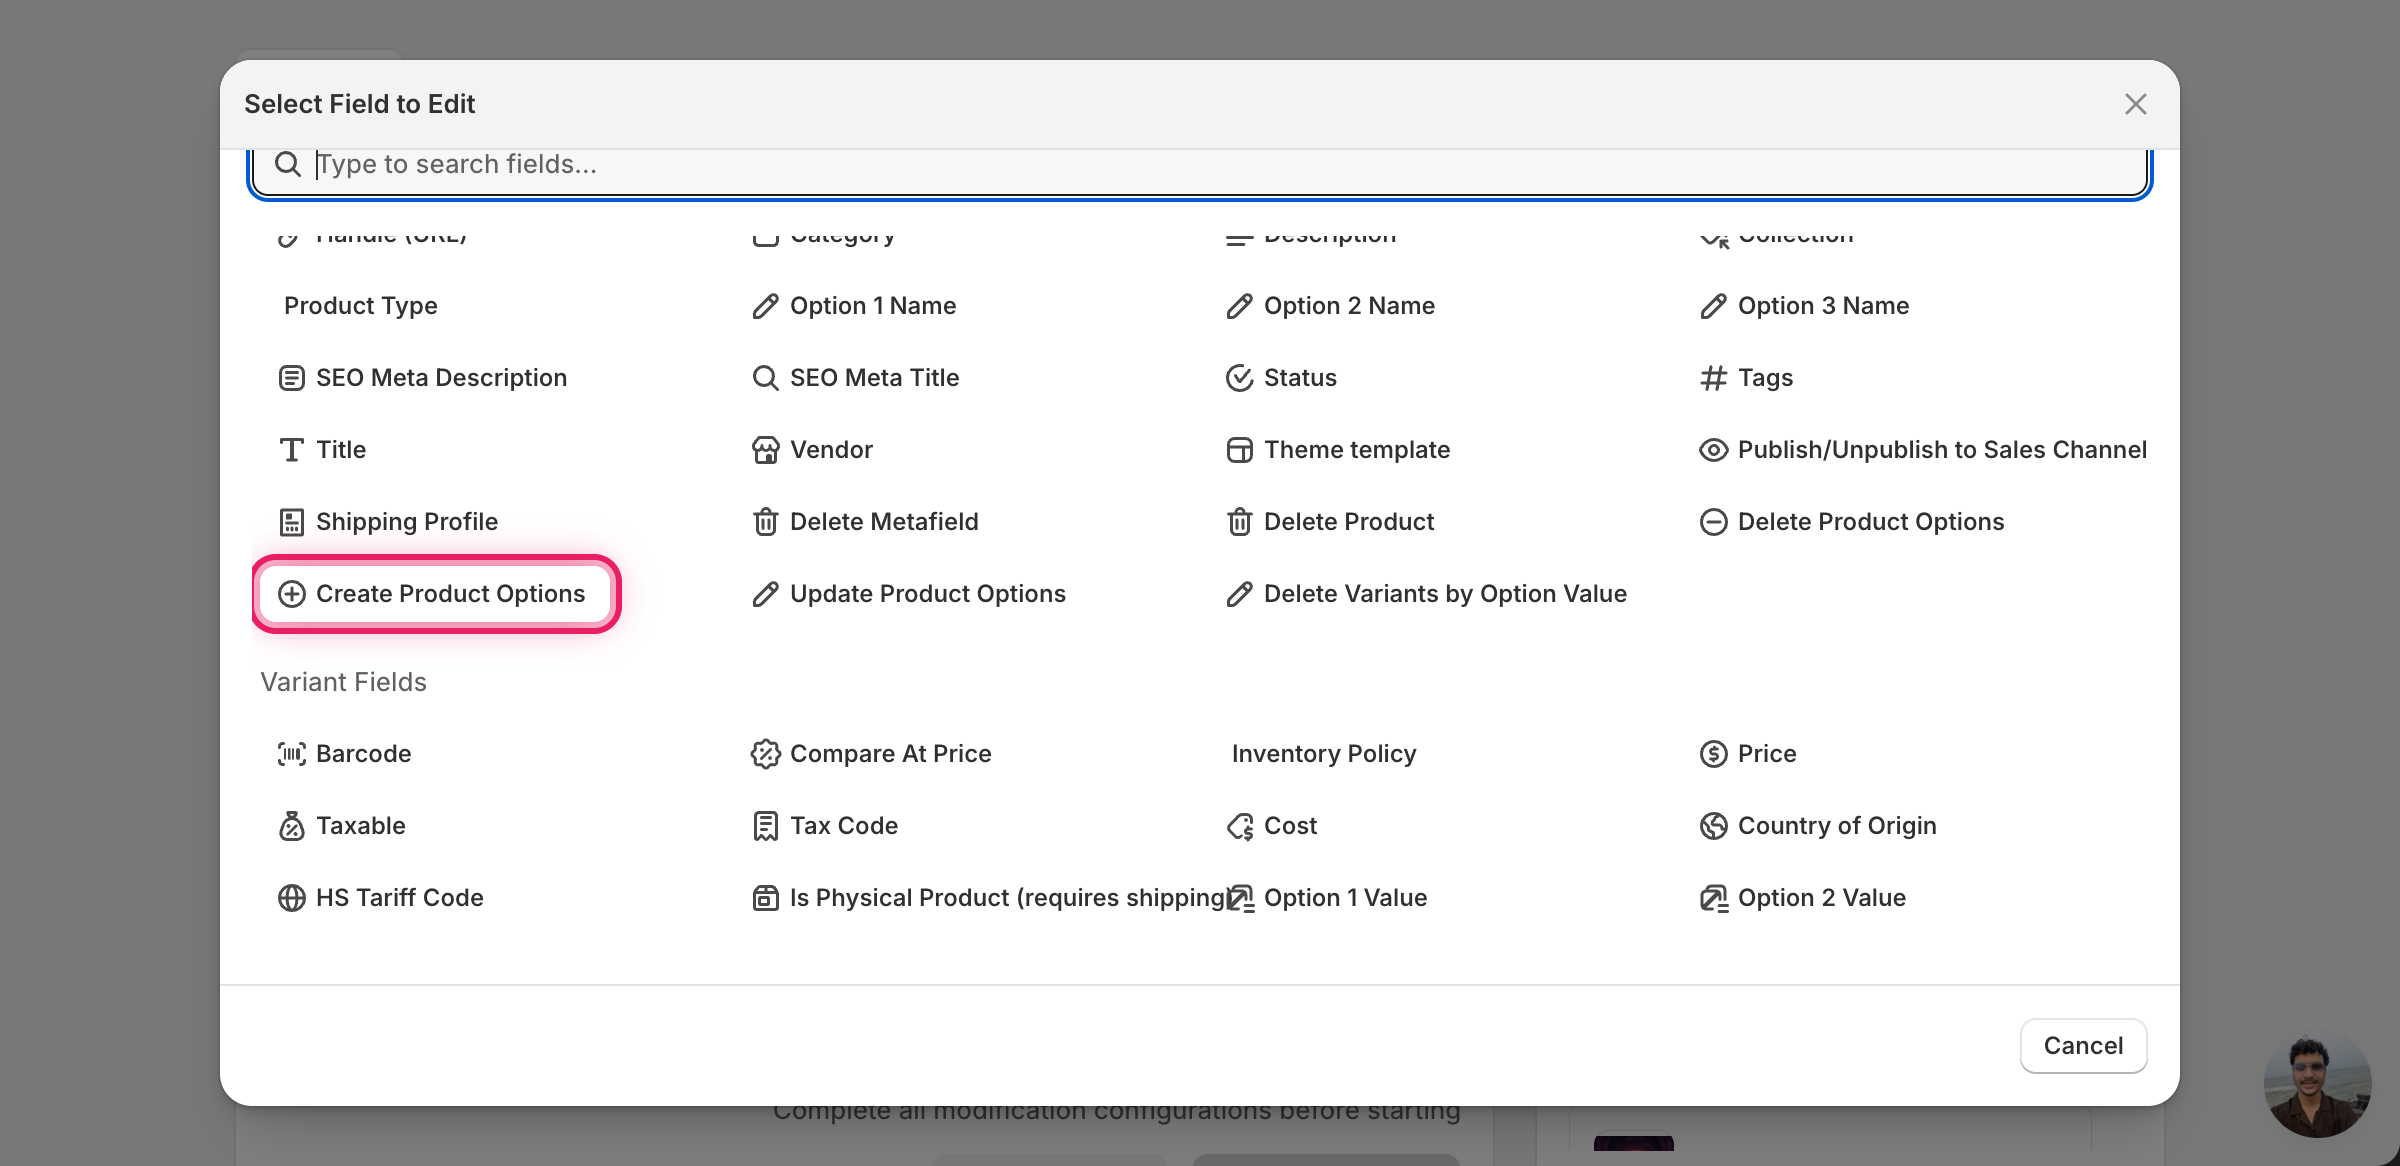
Click Create Product Options. The configuration panel switches to a form with four inputs: Option name, Values, Position (optional), and Variant strategy.

Step 2: Enter the option name and values
Option name — what the option will be called on the storefront (e.g. Color, Size, Material). Single text input.
Values — the values for that option, separated by commas or new lines. Red, Blue, Green and a three-line list with one value per line both work.
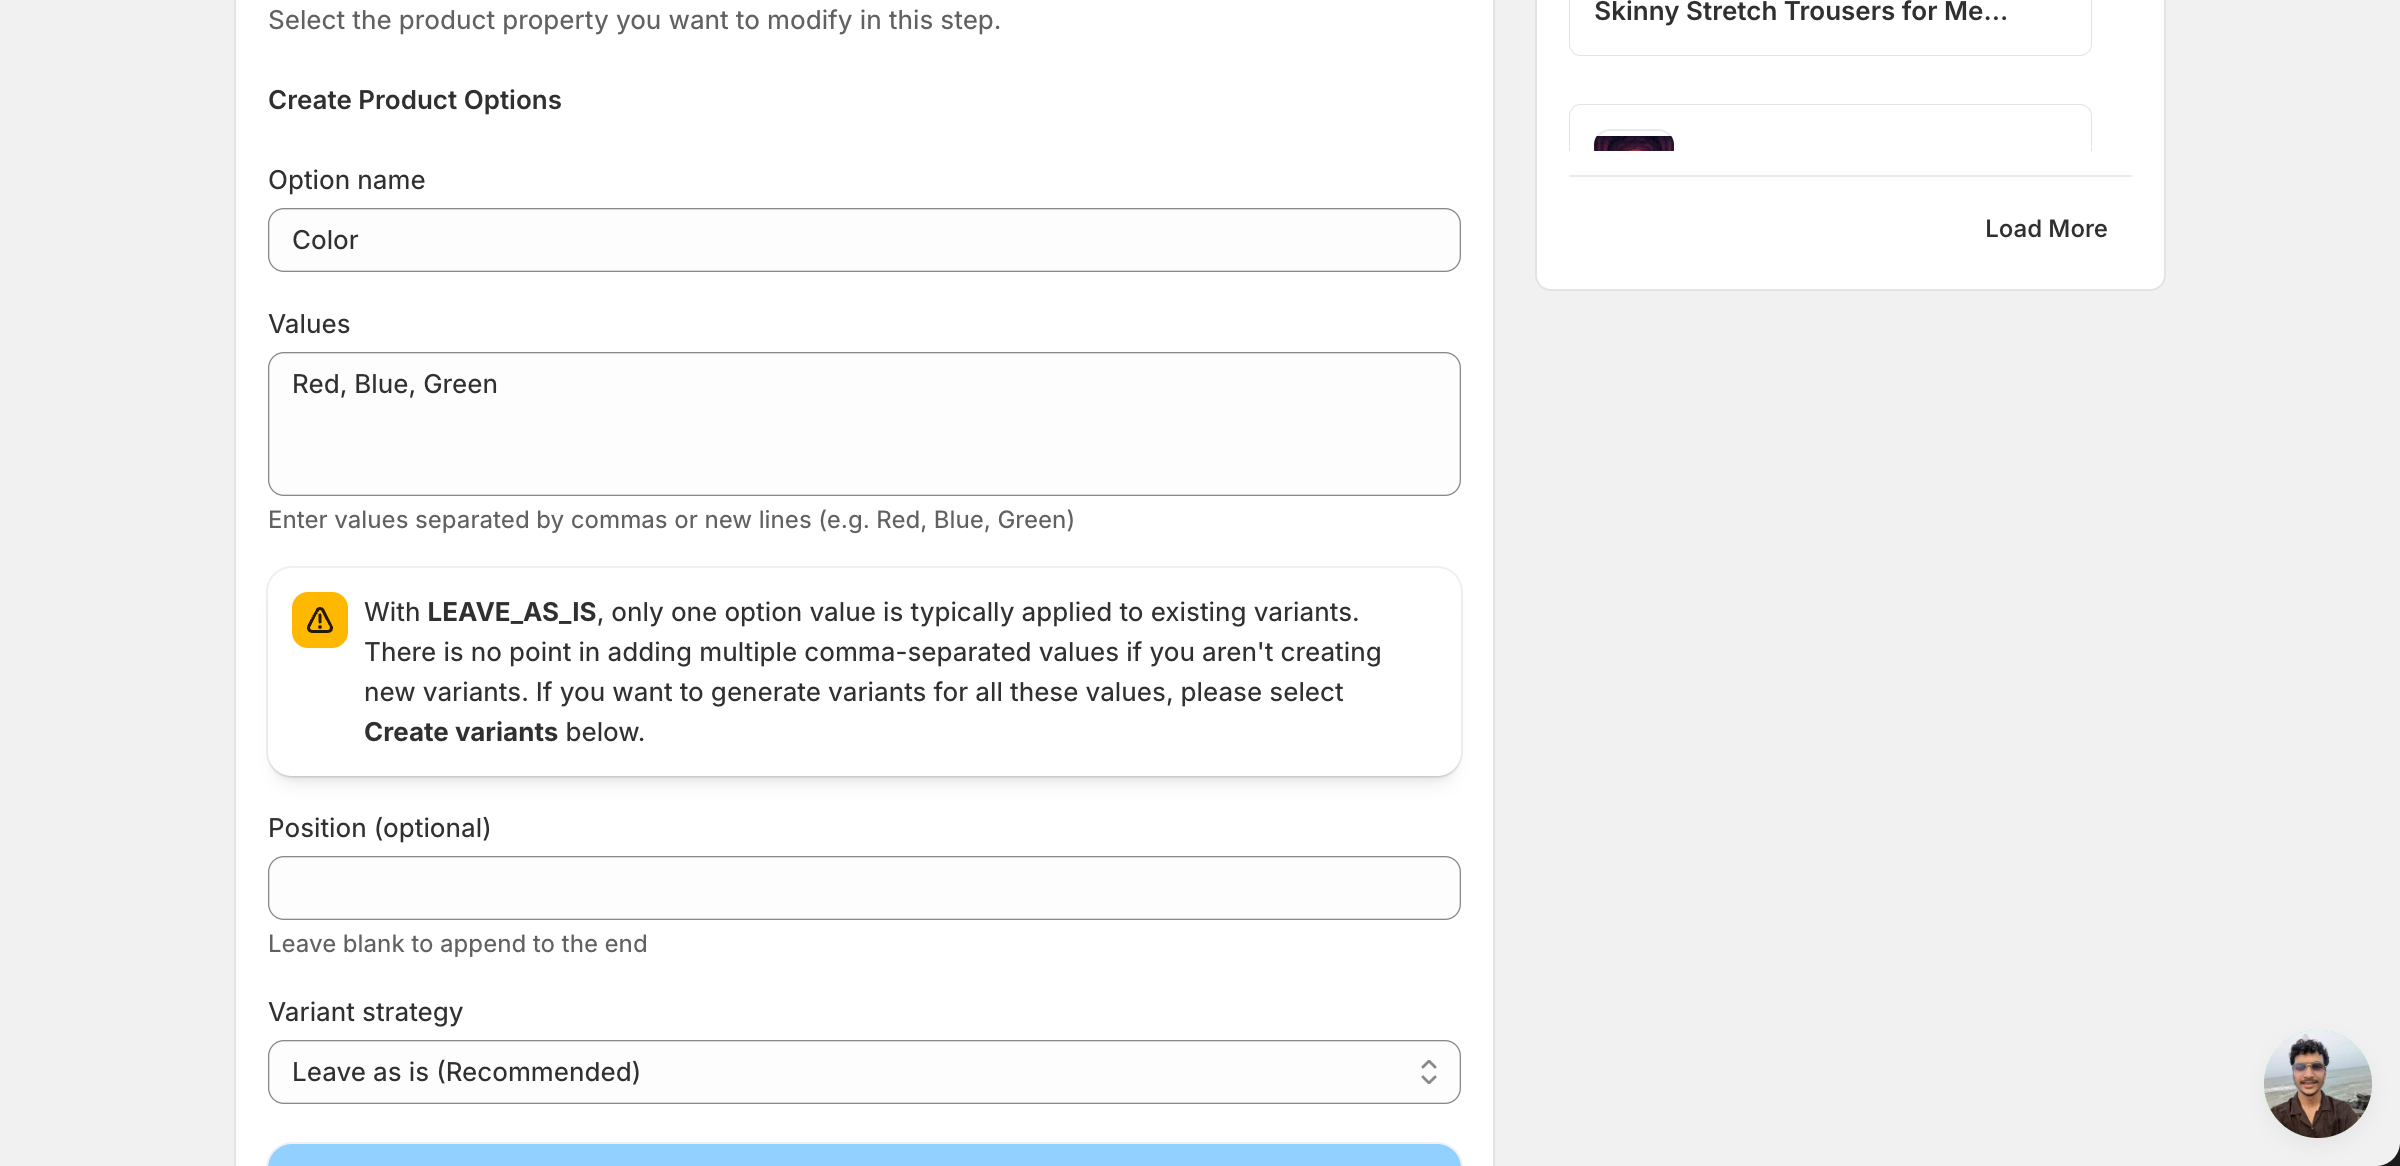
The yellow banner above is important: with the default Leave as is strategy, only the first value (Red) actually attaches to existing variants. The other values (Blue, Green) become defined option values on the product but no variants are created for them. If you want variants for every value, switch the strategy in Step 4.
Position (optional) — leave blank to append the option to the end of the product's option list. Type 1, 2, or 3 if you want it inserted at a specific slot.
Step 3: Choose a variant strategy
Two options. They behave very differently.
Leave as is (Recommended)
Adds the option to each product but does not create new variants. Existing variants get the new option attached with the first value as a default. Variant count stays the same.
Use this when:
- You're standardising option names across a catalogue (e.g. adding a
Materialoption you'll fill in later). - You don't want to multiply your variant count.
- Products have many existing variants and you'd risk hitting Shopify's per-product variant limit.
Create variants
Generates new variants for every combination of the values you entered.

Use this when:
- Each product currently has one variant and you want to expand it (e.g. one T-shirt → Red / Blue / Green variants).
- You're confident the matched products won't blow past Shopify's 2048 variant per product limit.
Warning: combinatorial growth is real. A product with 10 sizes × 5 colors × 4 materials = 200 variants. Add another 5-value option with Create variants and you're at 1000. Filter aggressively before running this.
Step 4: Run the edit
Hit Start Bulk Edit Now. Every matched product gets the option added with the values and strategy you picked.
What happens to each product:
- Option appended to the product's options list (or inserted at the position you specified).
- Existing variants get the new option attached. Under Leave as is, they all get the first value; under Create variants, Shopify generates the full combination set.
- Products that already have 3 options are skipped — Shopify allows a maximum of three options per product.
- Products that already have an option with the same name are skipped to avoid duplicates.
After the run
- The change is reversible from the History page using Undo, which removes the option (and any variants created with Create variants) from the affected products.
- Run Leave as is first, then a follow-up edit (Update Product Options or per-variant edits) to set the right value on each variant. That two-step workflow is safer than going straight to Create variants when you have many variants already.
- Filter your run to the smallest reasonable set first — for instance, products in a specific collection or with a specific tag — and confirm the count in Edit Preview before clicking run.
Frequently asked questions
How do I add a new option like Color to many Shopify products at once?
In EditEngine, open the Configure Product Edits panel, click Select Field, and pick Create Product Options under Product Fields. Enter the option name (for example Color), list its values separated by commas or new lines, optionally set a position, choose a variant strategy, then click Start Bulk Edit Now to apply it across every matched product in one run.
Will bulk creating a product option add new variants to my Shopify products?
Only if you choose the Create variants strategy, which generates a variant for every combination of the values you entered. The default Leave as is strategy keeps your variant count flat: existing variants get the new option attached with the first value as a default, while the other values become defined option values without variants.
Why were some Shopify products skipped when I bulk added an option?
Two cases cause skips at apply time. Products that already have three options are skipped, because Shopify allows a maximum of three options per product. Products that already have an option with the same name are also skipped to avoid duplicates. Skipped products are left untouched while the rest of the run continues.
Can I undo a bulk Create Product Options run in Shopify?
Yes. The change is reversible from EditEngine's History page using Undo, which removes the newly added option — and any variants generated by the Create variants strategy — from the affected products. Even so, filter your run to the smallest reasonable set and confirm the count in Edit Preview before clicking run.
How do I avoid hitting Shopify's variant limit when bulk creating options?
Combinatorial growth adds up fast: 10 sizes by 5 colors by 4 materials is already 200 variants, and Shopify caps each product at 2048 variants. Run Leave as is first, then follow up with Update Product Options or per-variant edits. Filter aggressively and confirm the matched product count in Edit Preview before running.