Products
How to Bulk Edit Vendor
Last updated
Vendor is the supplier or brand name attached to each product. Storefront filters, vendor-grouped reports, and search facets all key off this field, so messy vendor data (northstarcycles, Northstar Cycles, North-Star Cycles) splits one brand across three buckets. This guide shows how to clean that up across many products at once with EditEngine, the bulk editor for Shopify.
Vendor is a product field. One vendor per product, so each matched product gets a single update — no per-variant Vendor.
Step 1: Open EditEngine and click Select Field
In the Configure Product Edits panel, click Select Field.
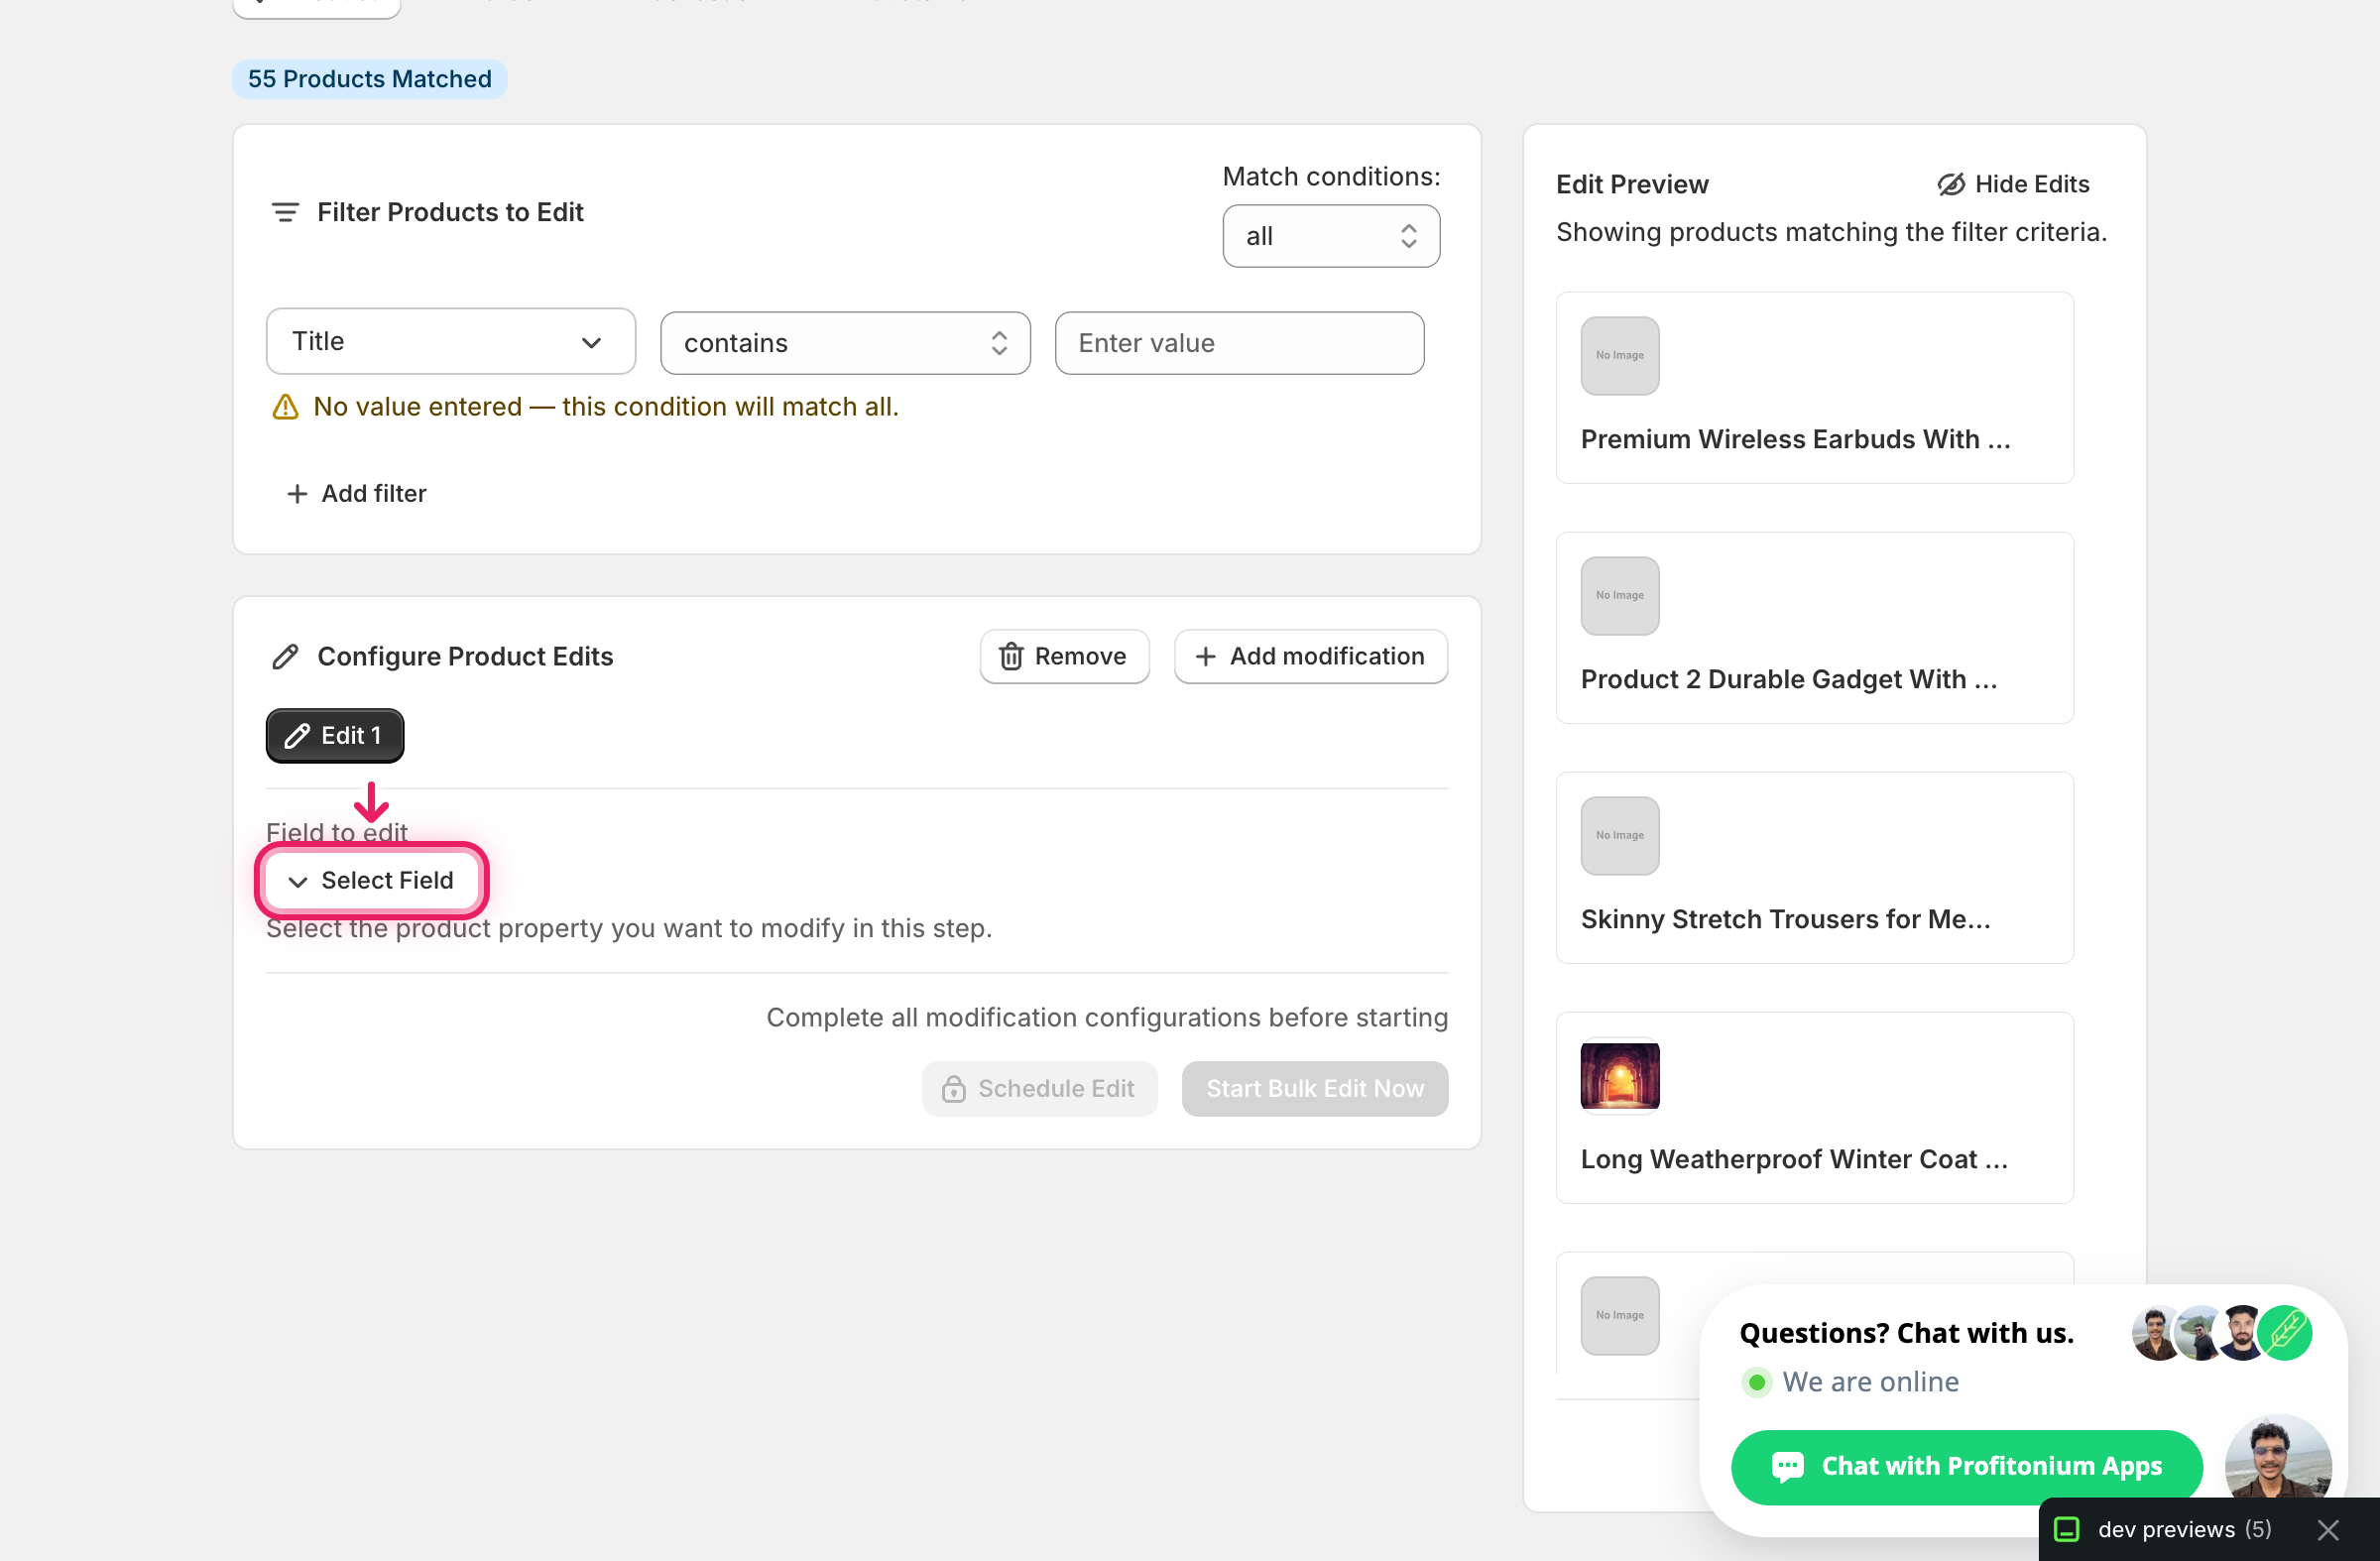
The Select Field to Edit modal opens.
Step 2: Pick Vendor
Vendor lives under Product Fields. You can also type vendor into the search box at the top.
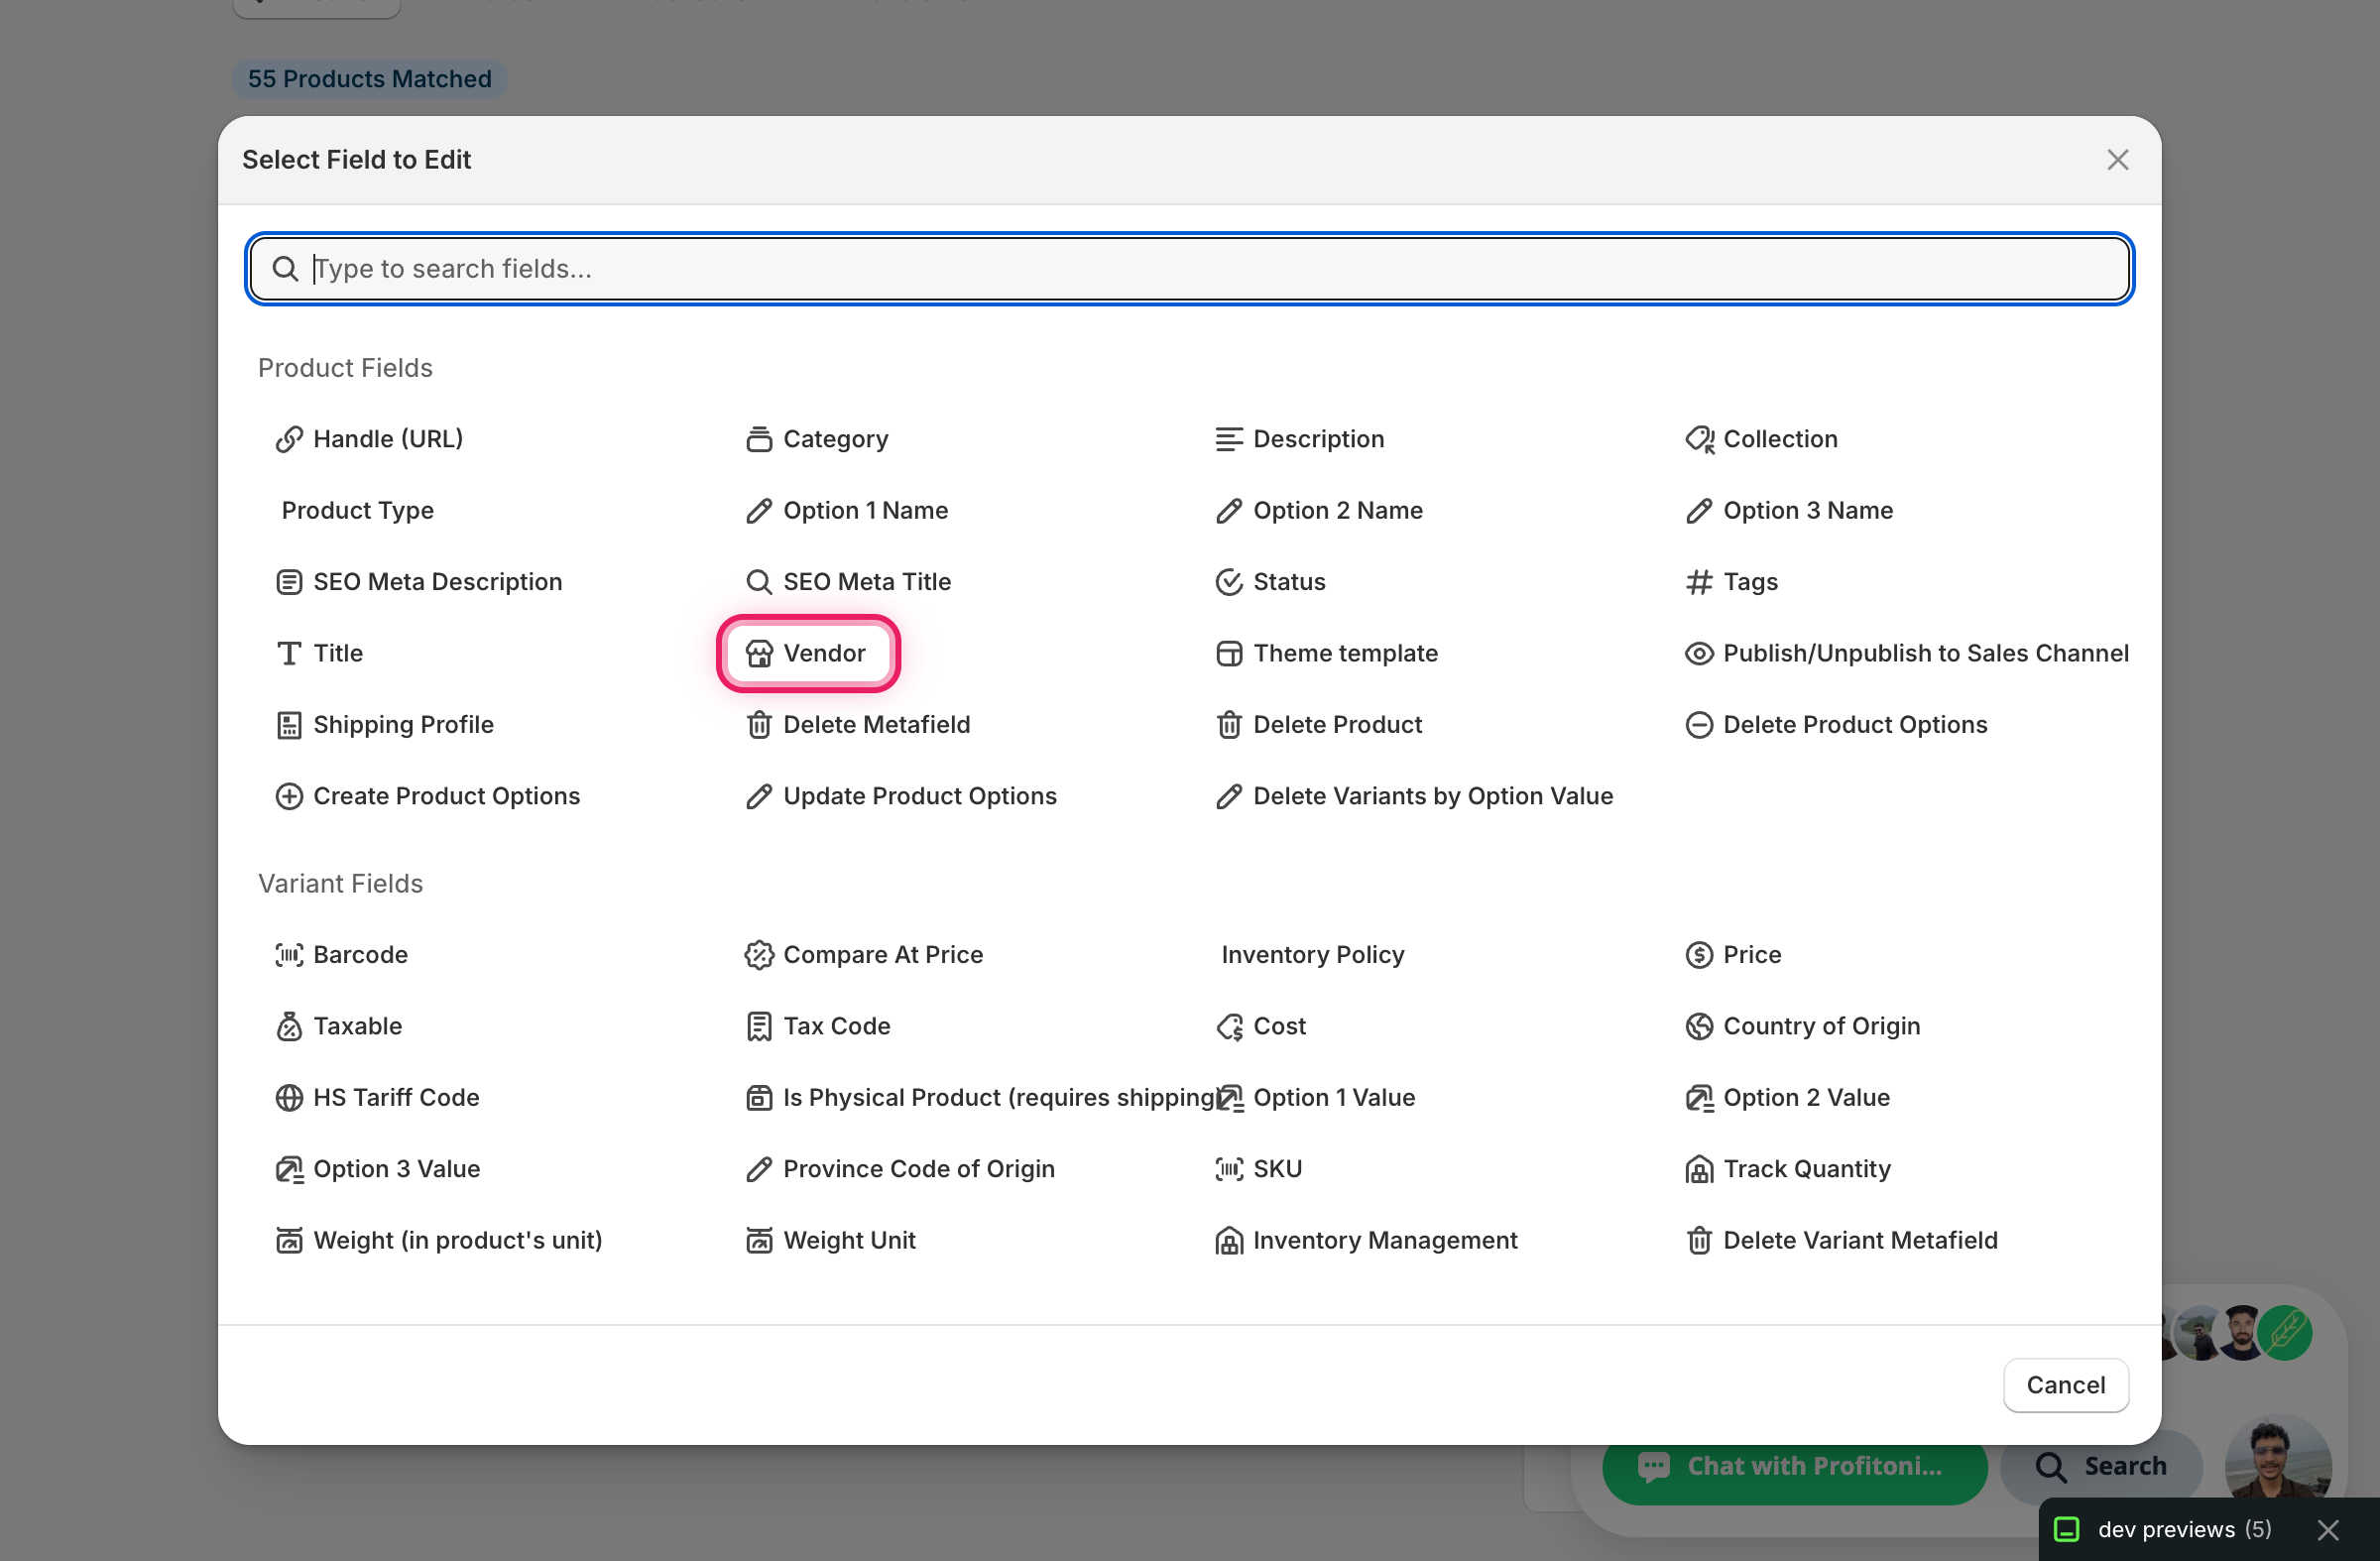
Click Vendor. The configuration panel switches to a How to edit Vendor dropdown defaulting to Set text to value, with an empty value input below.
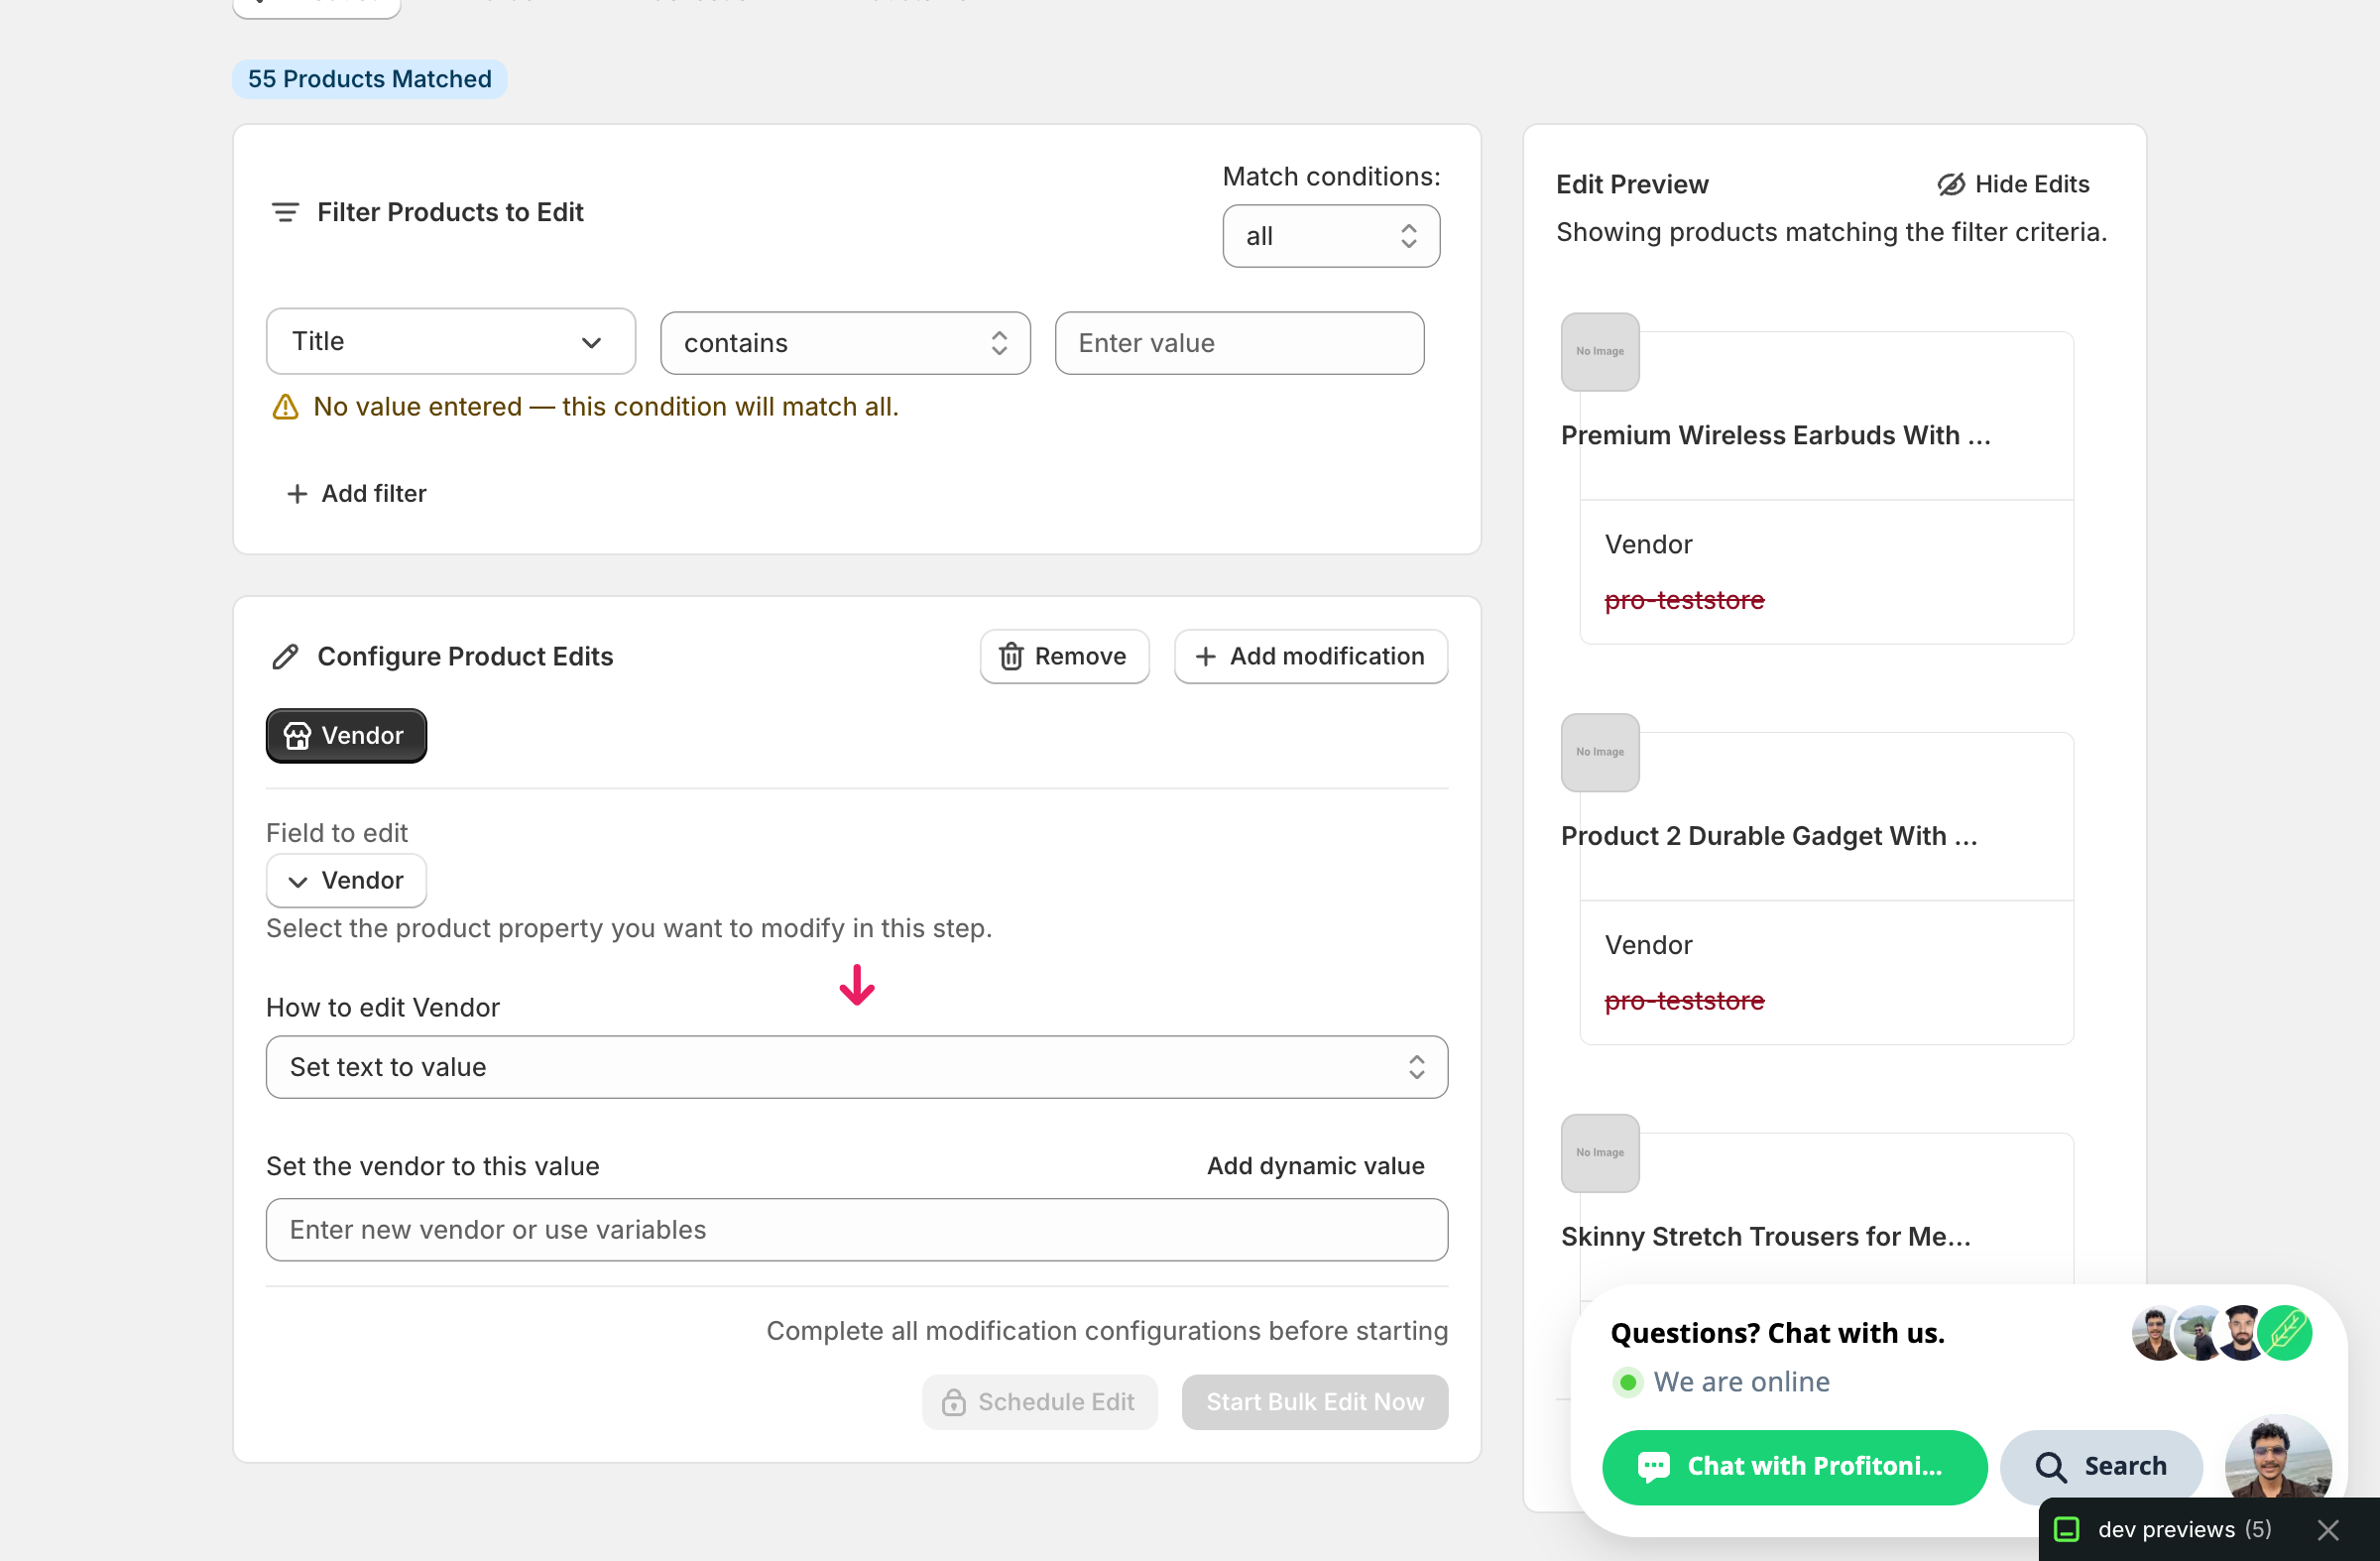
Step 3: Choose how to change the vendor
Open How to edit Vendor to pick an action. Nine are available.
Direct value
- Set text to value — every matched product gets this exact vendor.
Adjust the existing vendor
- Add text to end — append text (e.g.
Inc.). - Add text to beginning — prepend (e.g.
Brand:). - Remove text from end — strip a suffix.
- Remove text from beginning — strip a prefix.
- Search/Replace — swap one substring for another, optionally case-insensitive. The cleanup workhorse.
- Limit length of text — cap the vendor at N characters.
- Remove text from a word to the end — find a word, delete it and everything after.
- Remove text up to and including a word — find a word, delete it and everything before.
The inputs change based on what you pick.
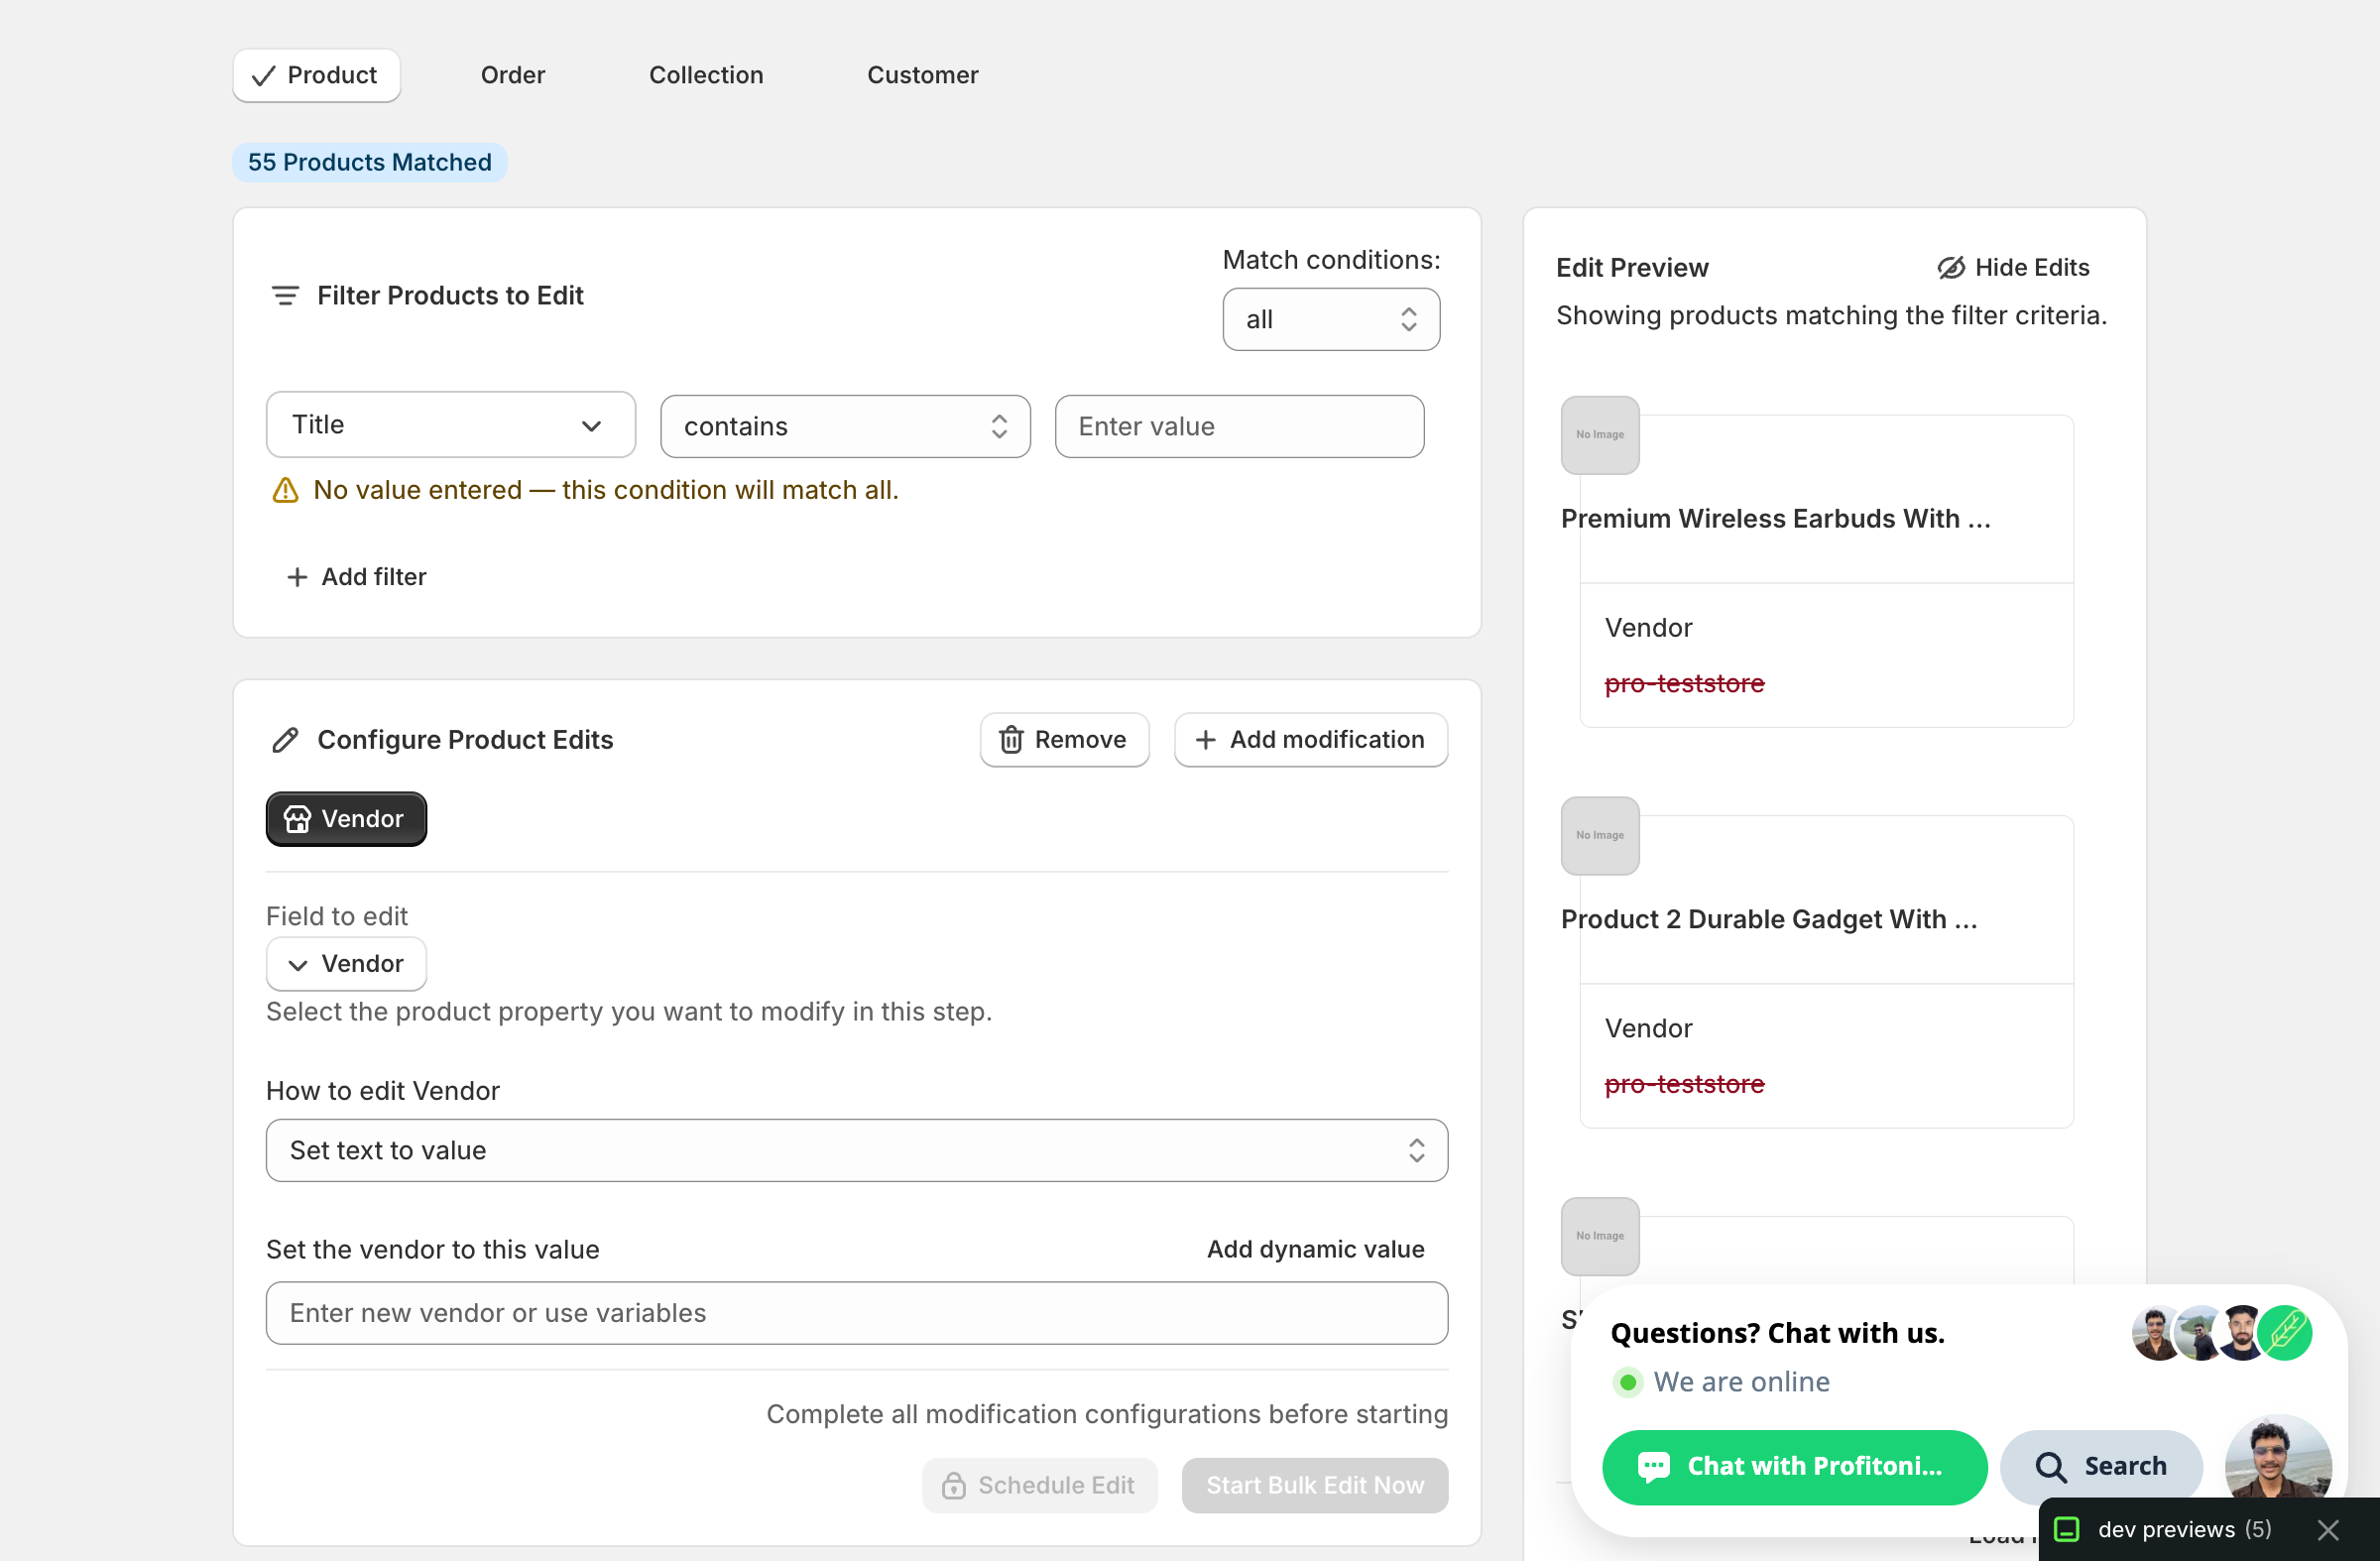
Step 4: Enter the value
Set text to value
Type the new vendor in the Set the vendor to this value input.

Once a value is entered, Start Bulk Edit Now lights up and the Edit Preview on the right shows the proposed change for every matched product.
Use dynamic values to keep vendors unique per product. Click Add dynamic value above the input. A modal opens letting you pick from product fields (Title, Vendor, Tags, Type, Handle, Category…) and metafields, with optional capitalization (UPPER, lower, Title Case).
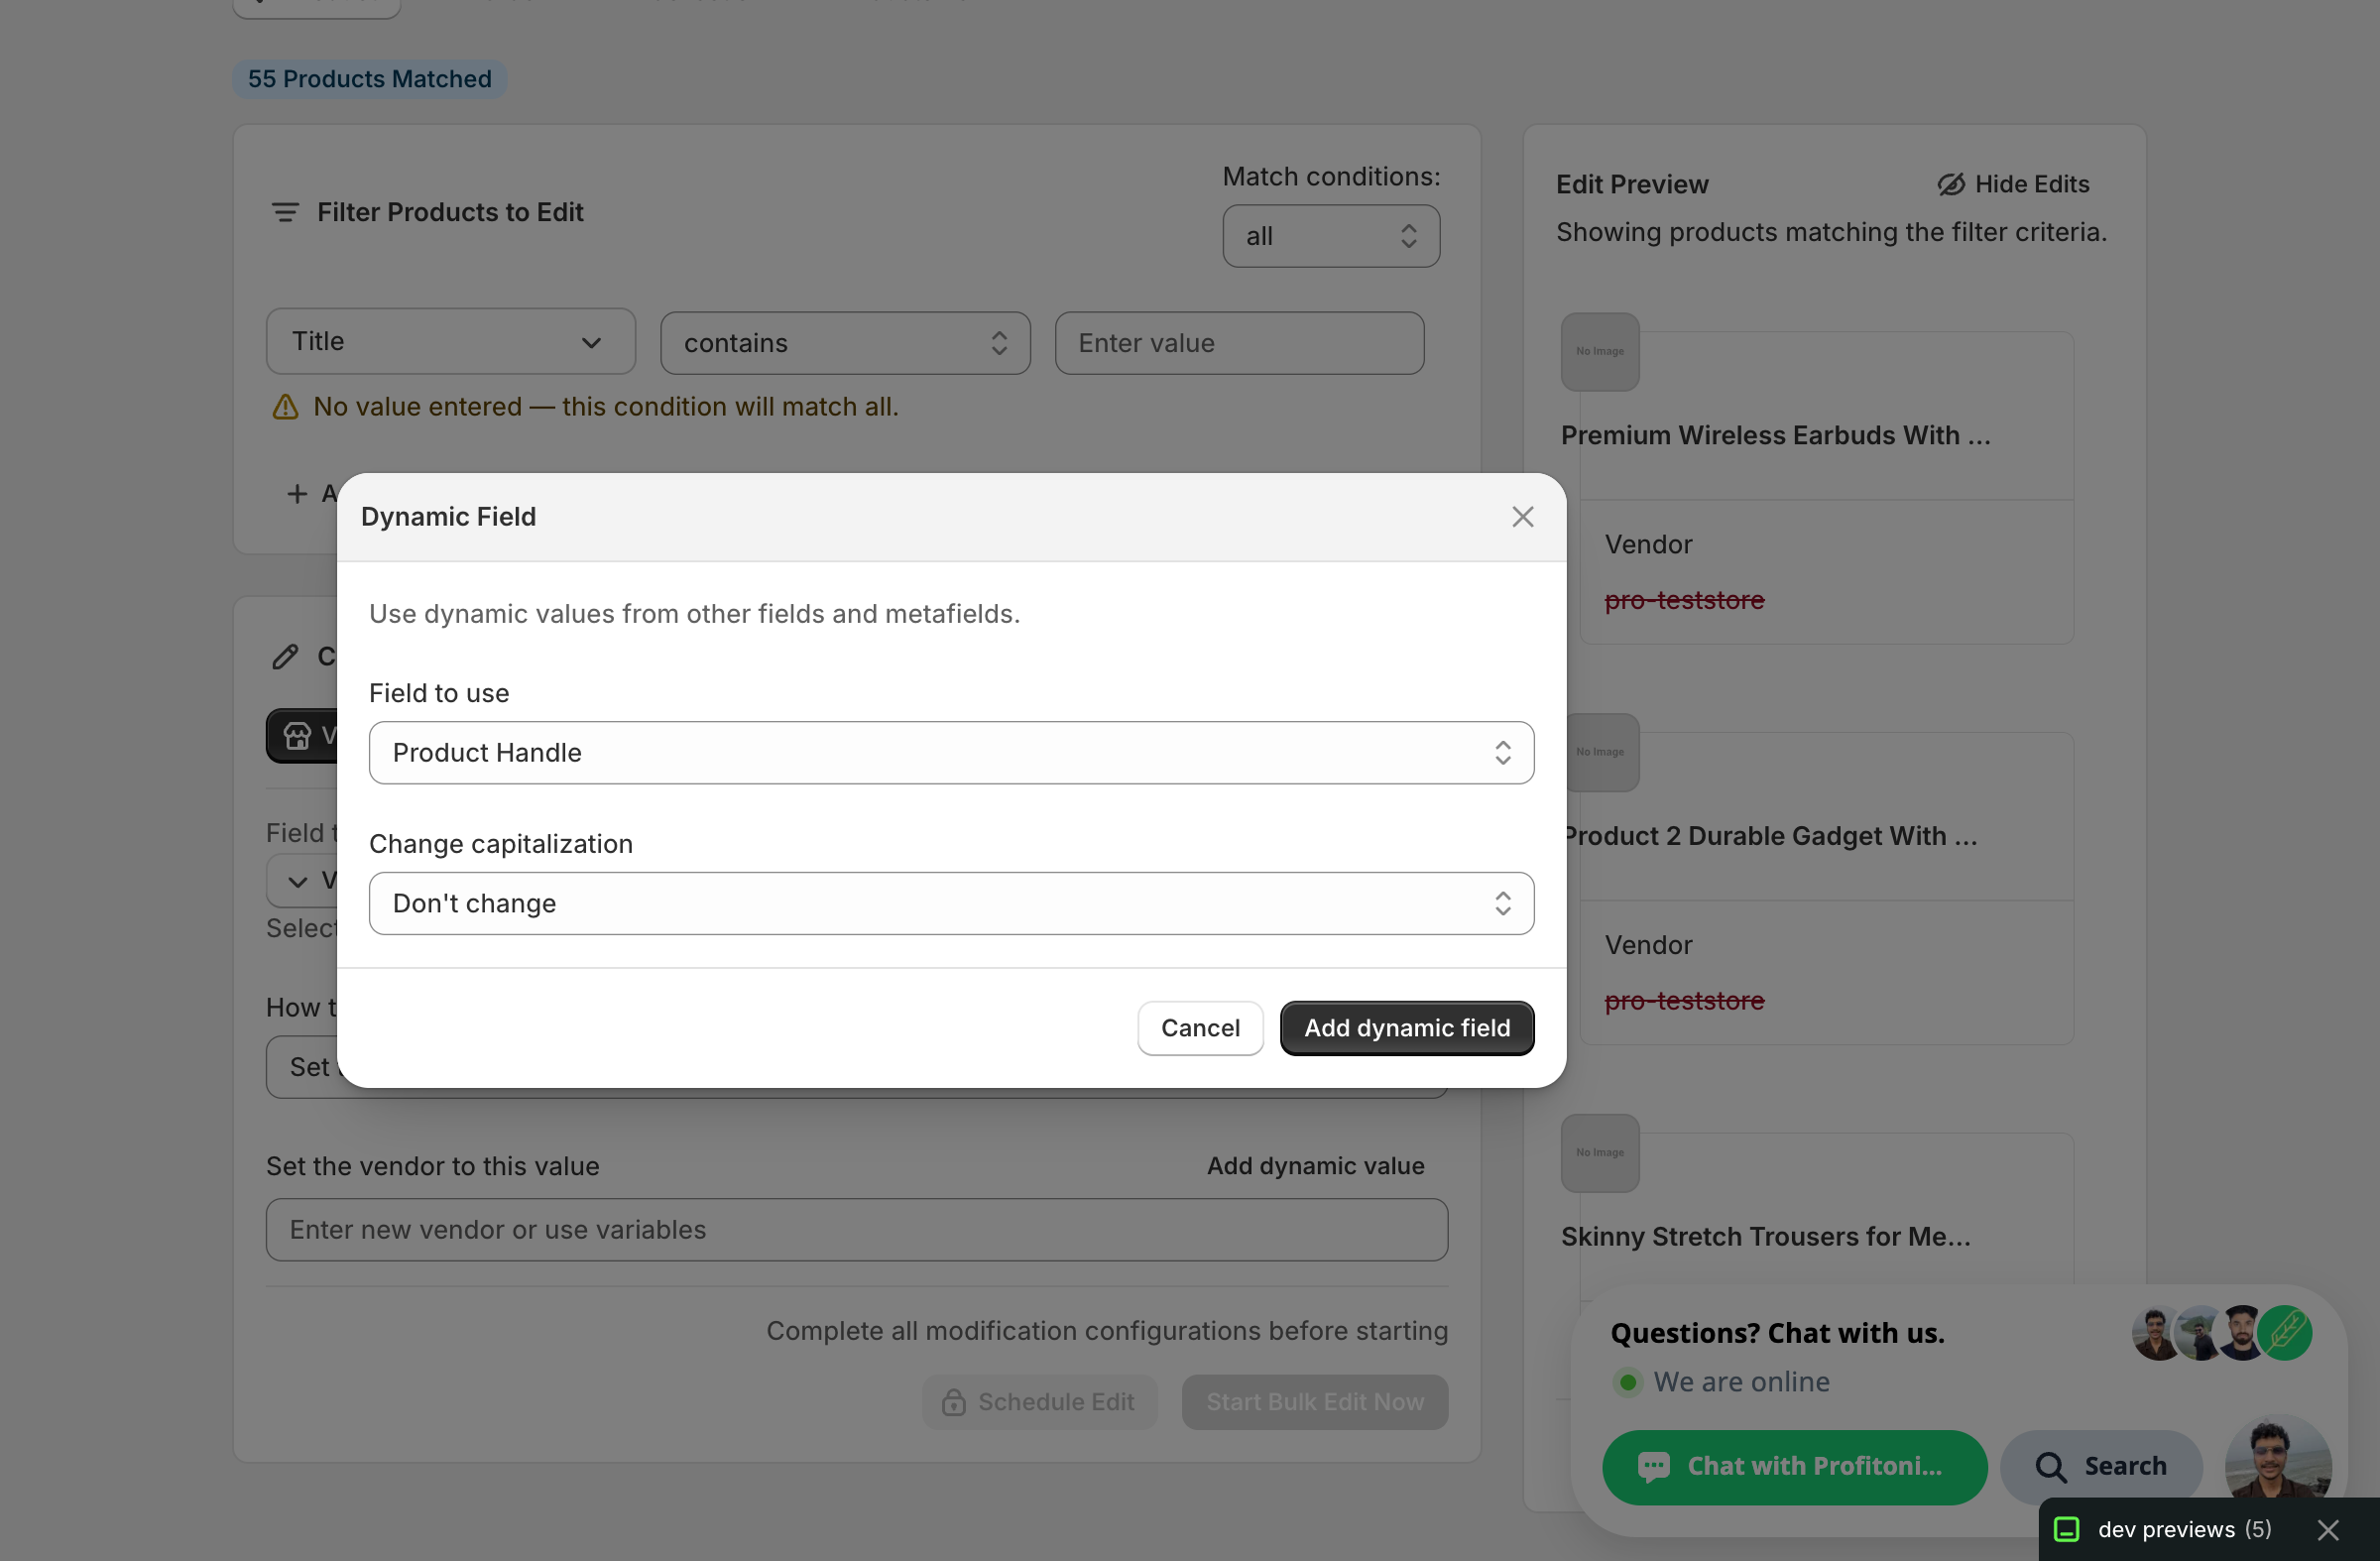
Picking Product Title inserts the token {{product.title}} at the cursor. Combine with literal text — for example, {{product.title}} alone copies each product's title into the vendor slot, useful when you've staged temporary vendors and want to back-fill from titles.
Setting a literal value with no dynamic token across many products gives every product the same vendor. That's usually what you want when consolidating brand names — but be deliberate, because storefront vendor filters will collapse to a single bucket.
Search/Replace
Two inputs — what to look for, and what to replace it with — plus a Case insensitive checkbox.
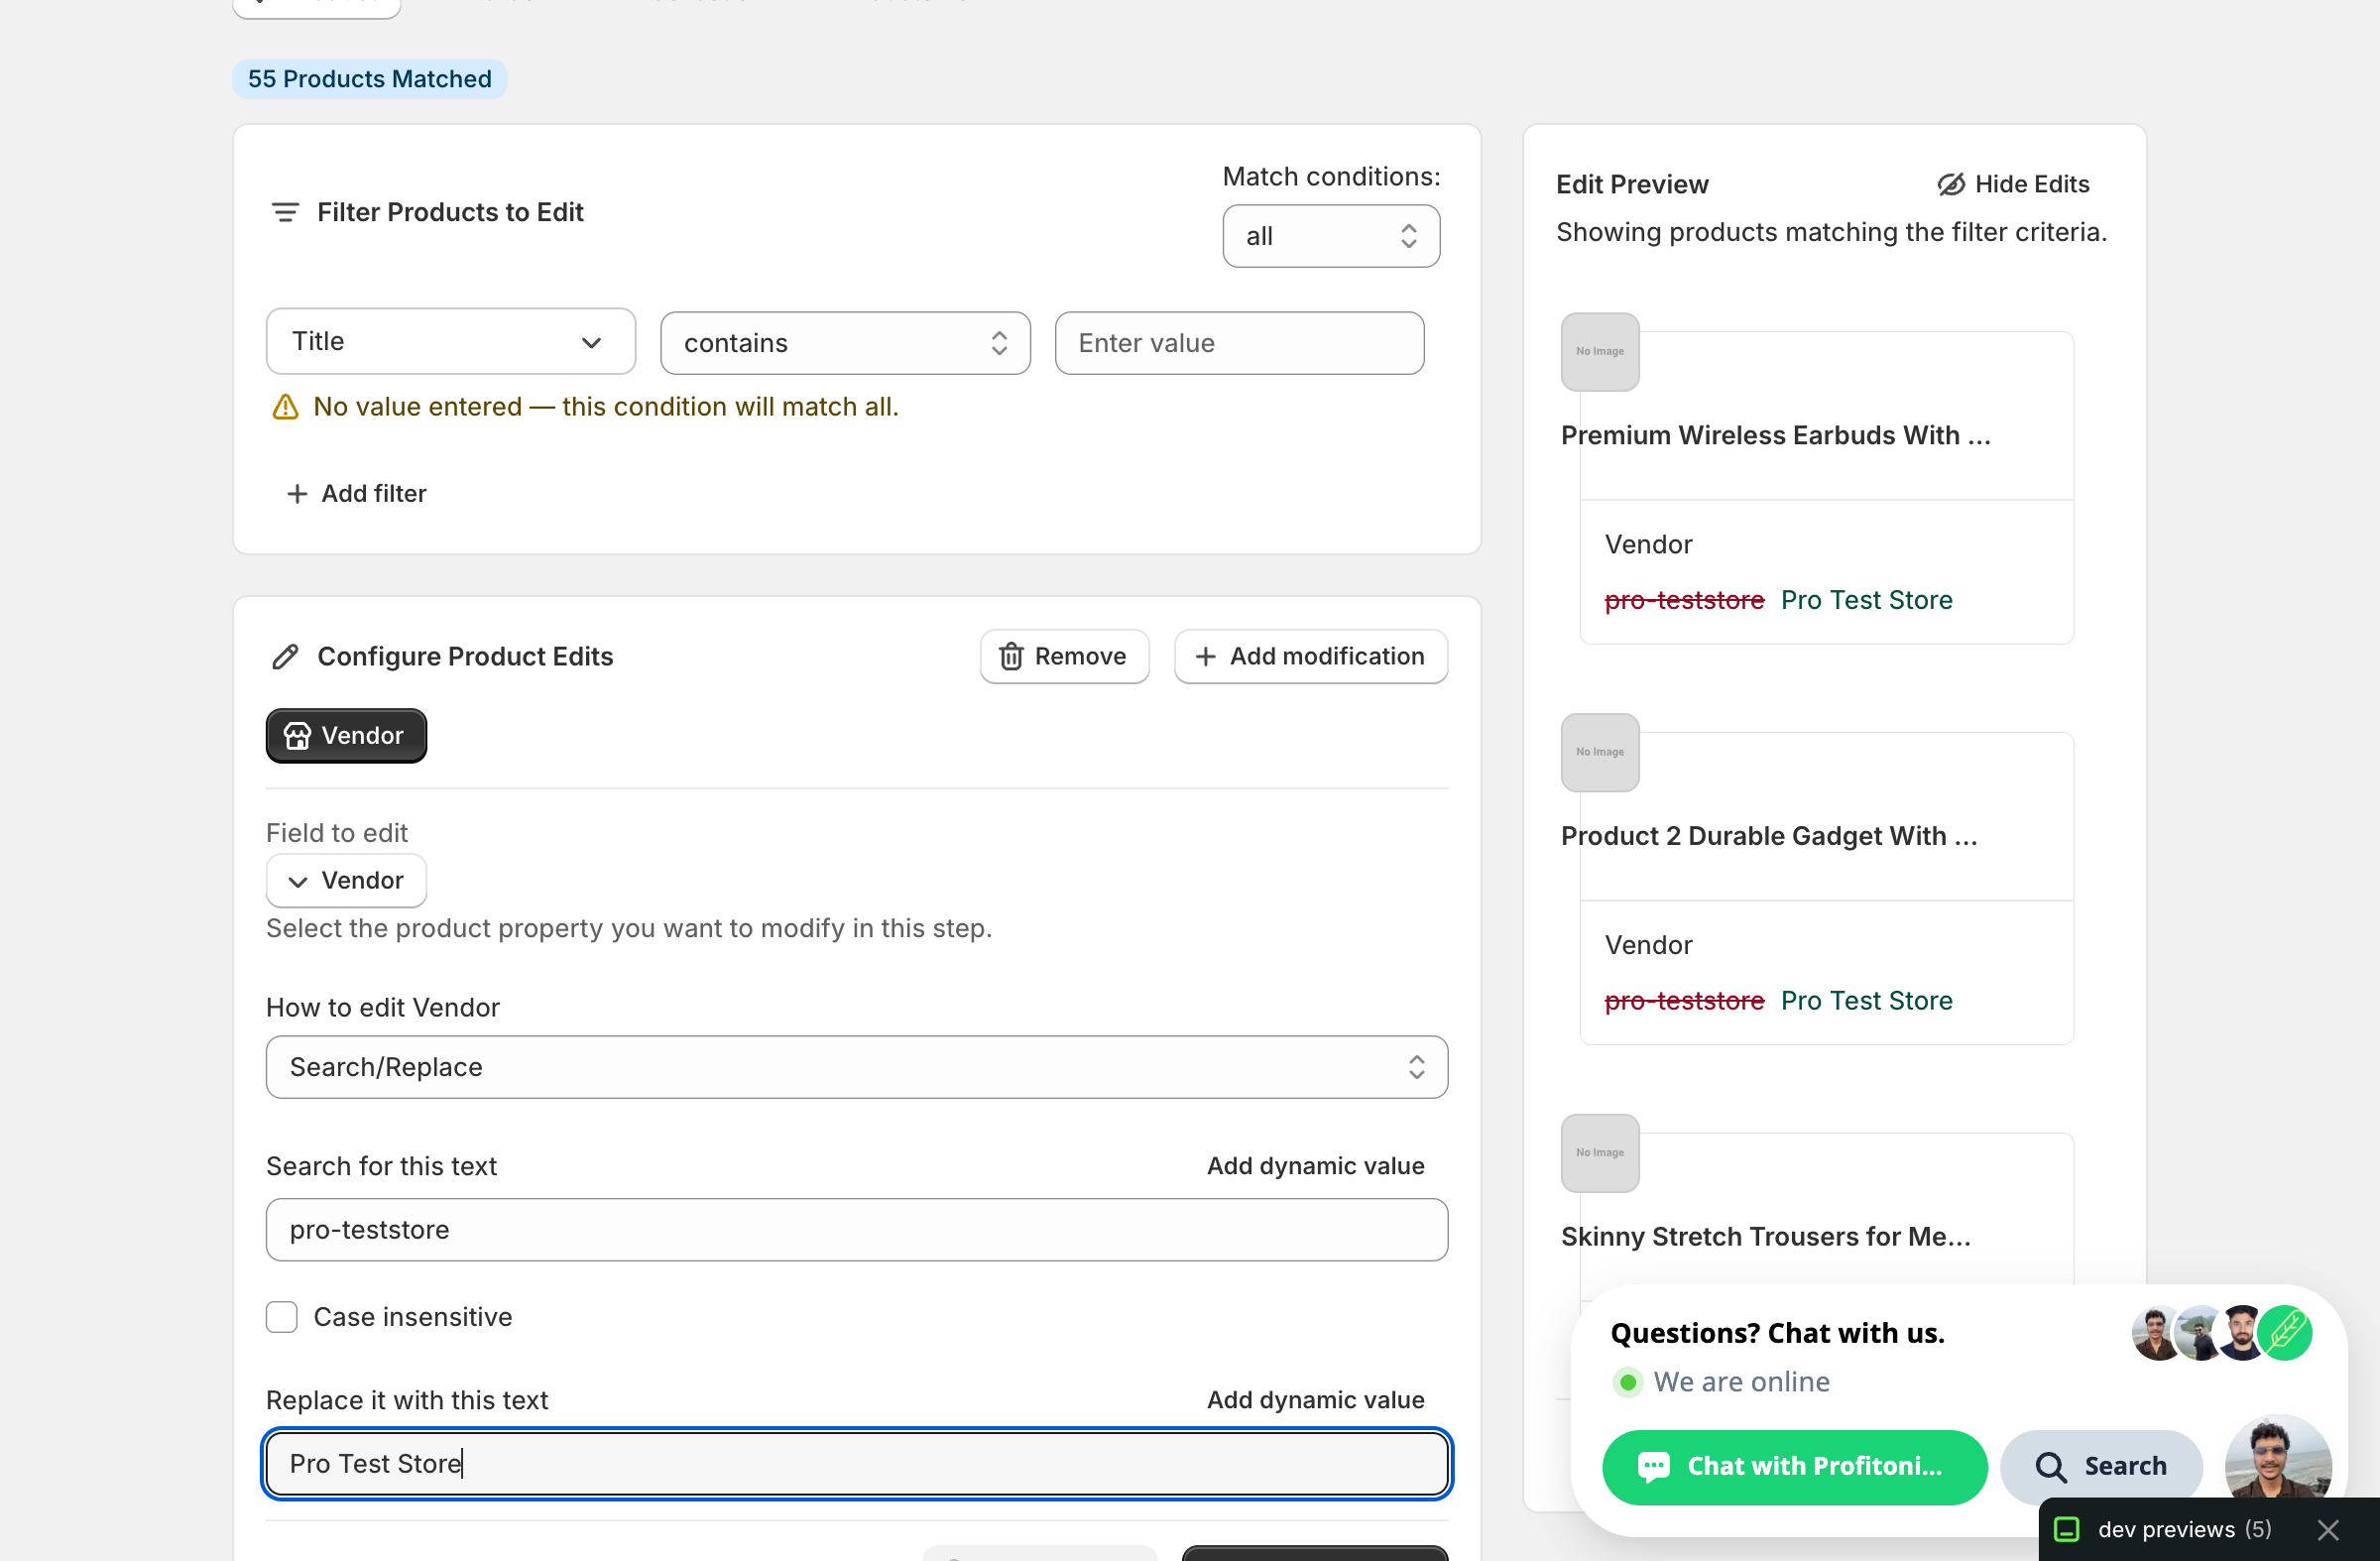
This is the most useful action for vendor cleanup: fix a typo, normalize casing, or swap a temporary placeholder for the real brand name across the whole catalog. Leave the replace field blank to delete the matched text outright.
Tick Case insensitive when you want proteststore, ProTestStore, and PROTESTSTORE all caught by one rule.
Add / Remove text from end or beginning
A single input. Whatever you type gets appended, prepended, or stripped from the matching end of every vendor. Handy for adding a corporate suffix ( Inc., Ltd.) across a brand line, or stripping one that snuck in.
Limit length of text
A number input plus two checkboxes:
- If the text is trimmed, include '...' at the end — adds an ellipsis when truncation happens.
- Don't trim the text in the middle of a word — pulls the cut back to the previous word boundary so vendors don't end mid-word.
Shopify accepts up to 255 characters for vendor, but most themes display it in tight spaces, so capping much lower keeps storefronts tidy.
Remove text from a word to the end / up to and including a word
A single input — the marker word. Everything from that word onward (or up to and including it) is stripped. Useful when vendors share a trailing or leading boilerplate phrase like (Discontinued) or Brand:.
After the run
- Vendor changes are reversible from the History page using Undo.
- The Edit Preview on the right resolves the proposed new vendor per product before you run — scan it, then click Start Bulk Edit Now.
- Search/Replace and the Add/Remove actions are not idempotent. Re-running them keeps modifying the vendor — running
Add text to end → " Inc."twice producesInc. Inc.. Use the History undo if you re-run by accident. - Empty vendors are allowed by Shopify. If your storefront filters or reports rely on Vendor, an empty value will drop the product out of those views, so avoid clearing unless that's intentional.
Frequently asked questions
How do I change the vendor name on many Shopify products at once?
In EditEngine, click Select Field in the Configure Product Edits panel and pick Vendor under Product Fields. Choose one of nine actions — set a value, add or remove text, Search/Replace, limit length, or strip around a marker word — enter the value, scan the Edit Preview, and click Start Bulk Edit Now.
How can I fix inconsistent vendor spellings across my Shopify catalog?
Search/Replace is the cleanup workhorse. Enter the messy spelling in the search field and the correct brand name in the replace field — for example northstarcycles to Northstar Cycles. Tick Case insensitive so variants like proteststore, ProTestStore, and PROTESTSTORE are all caught by one rule across the whole catalog.
Can I undo a bulk vendor edit in Shopify?
Yes. Vendor changes are reversible from the History page using Undo. That matters because Search/Replace and the Add/Remove actions are not idempotent — running Add text to end with " Inc." twice produces " Inc. Inc." — so use the History undo rather than trying to re-run your way out.
Is it safe to clear the vendor field on Shopify products in bulk?
Shopify allows empty vendors, so the run will succeed. But storefront filters, vendor-grouped reports, and search facets all key off this field, and an empty value drops the product out of those views. Avoid clearing Vendor with EditEngine unless that is intentional, and check the Edit Preview first.