Pricing
How to Bulk Edit Compare At Price
Last updated
The compare-at price is the strike-through "regular" price most Shopify themes show next to the live price — the one that makes a discount look like a discount. With EditEngine's bulk editor for Shopify, you can set or clear it across hundreds of variants in one pass: type a fixed amount, raise/lower by a number or a percent, derive it from the current price for sale prep, or wipe it entirely.
Compare At Price is a variant field. Each product variant has its own value. EditEngine runs the action once per matched variant — three variants on a product means three updates.
No compare-at price means no strike-through. When this field is empty (the default for most products), themes hide the discount badge and just show the regular price.
Step 1: Open the field picker
In the Configure Product Edits panel, click Select Field.
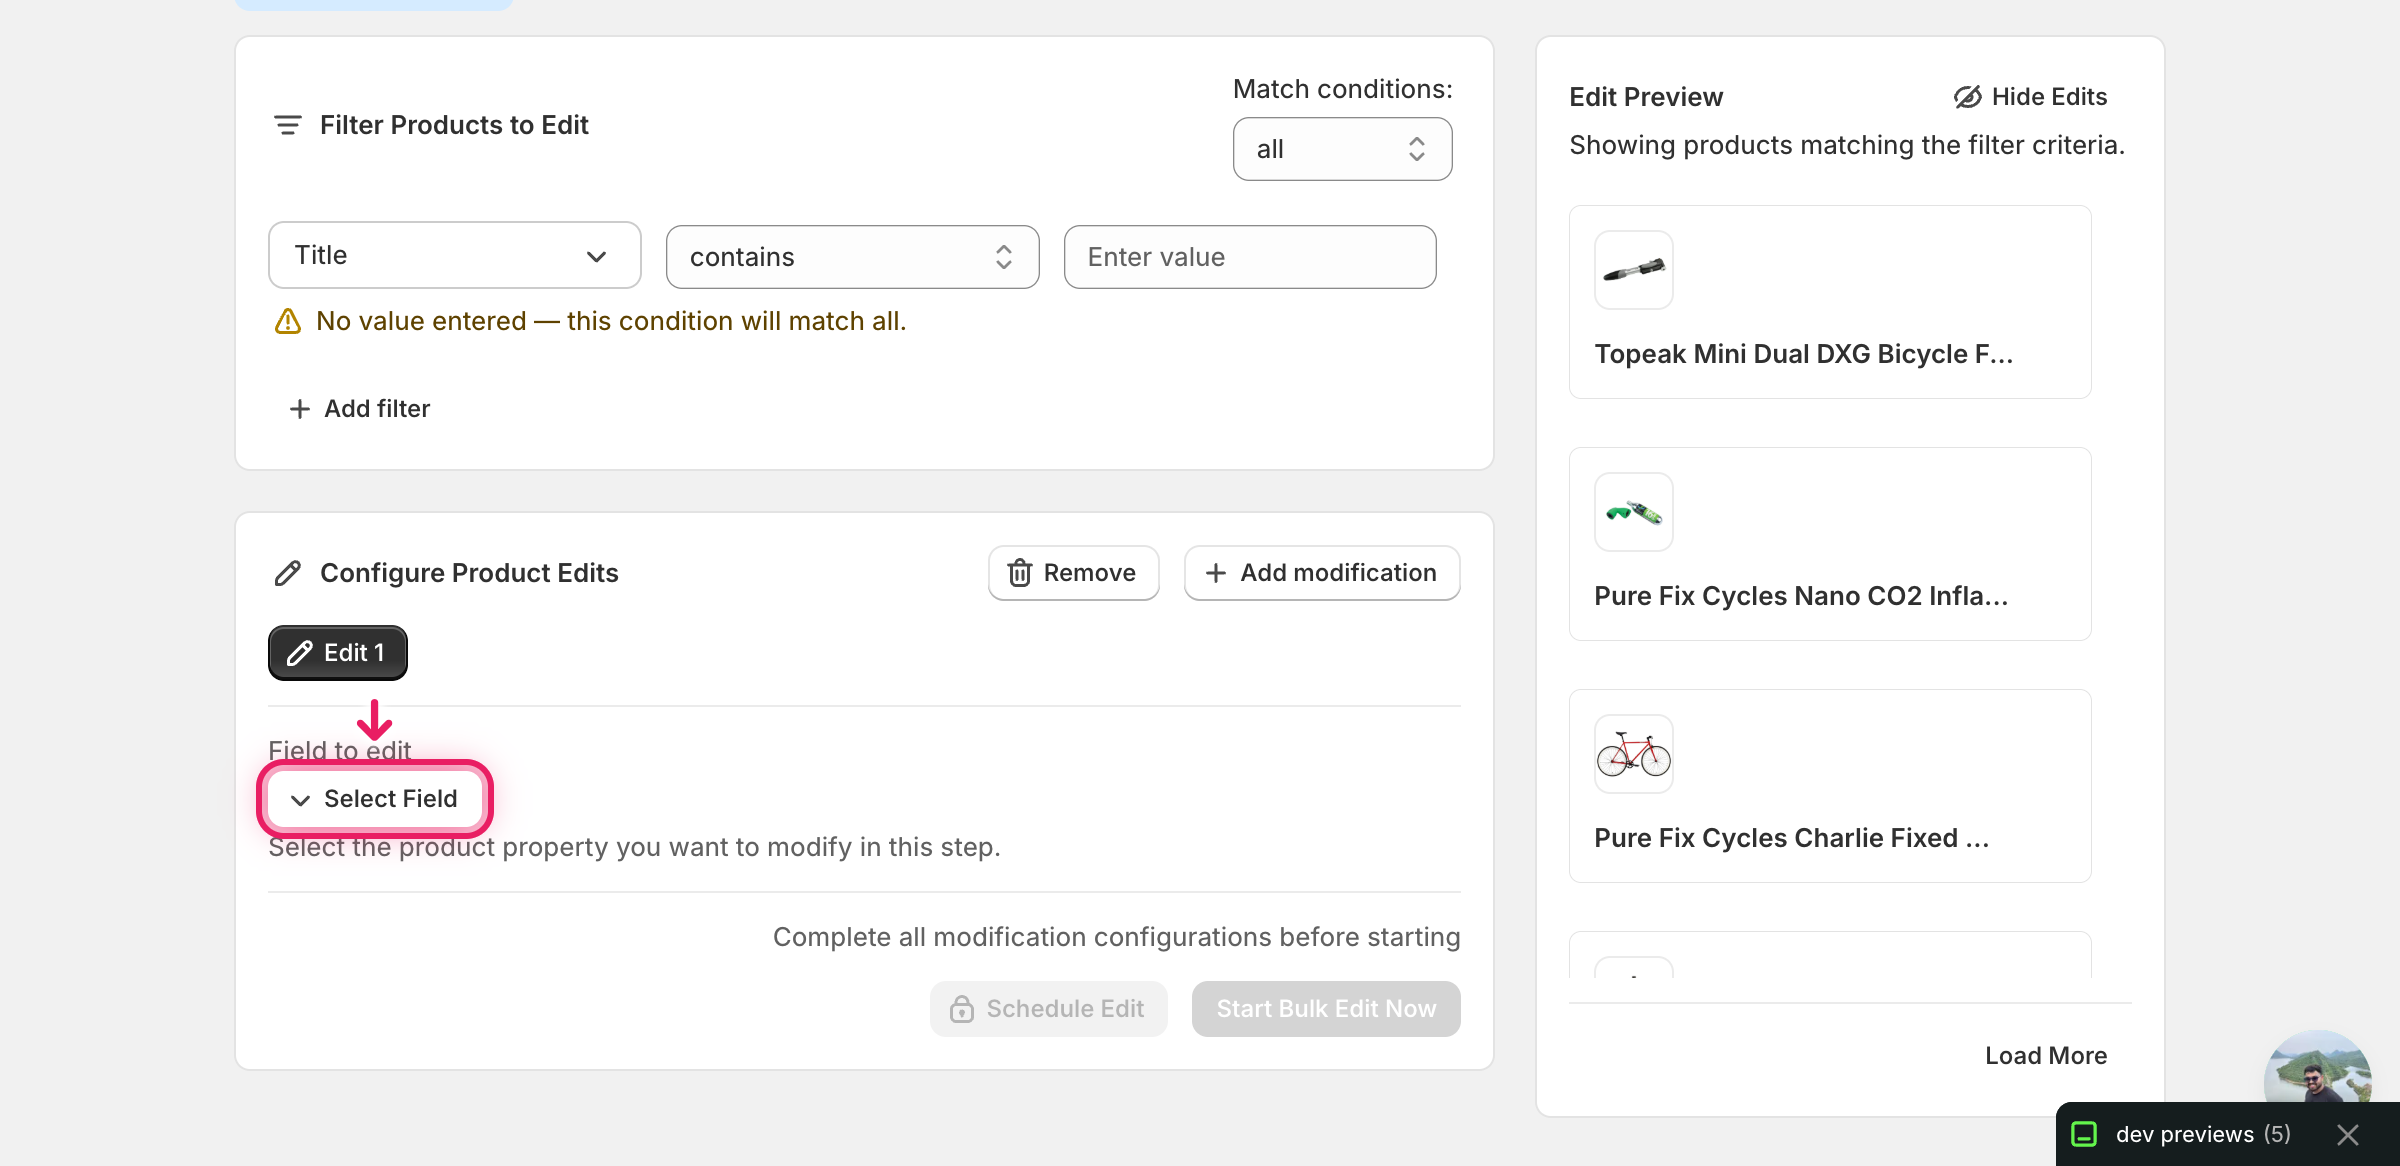
The field picker opens as a modal listing every editable Shopify product and variant field grouped by section.
Step 2: Pick Compare At Price
Compare At Price lives under Variant Fields. Type compare in the search box at the top of the modal to jump straight to it.
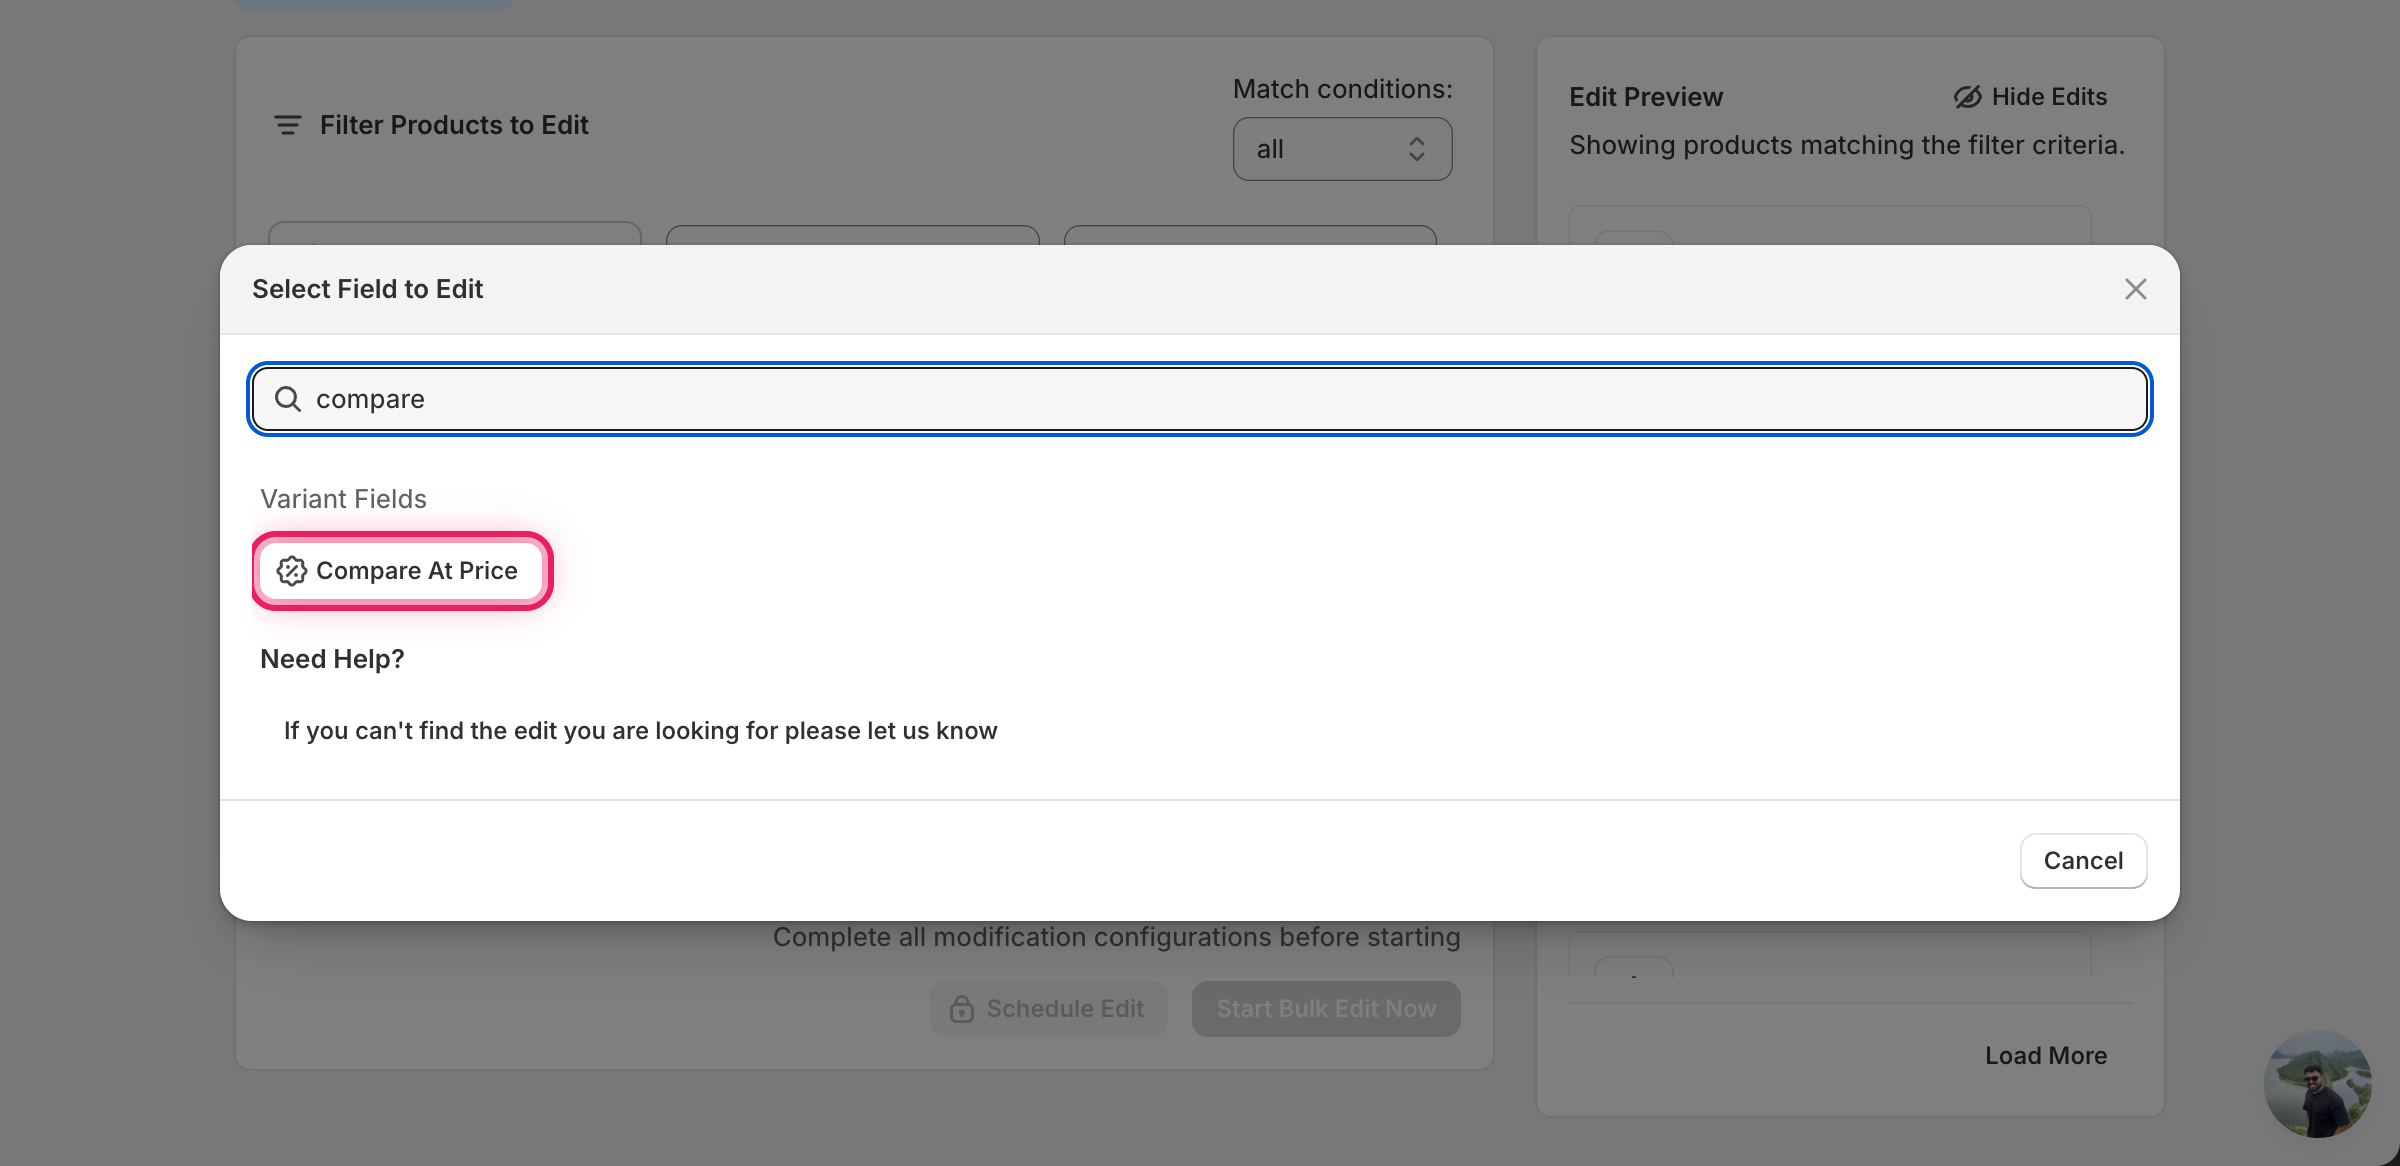
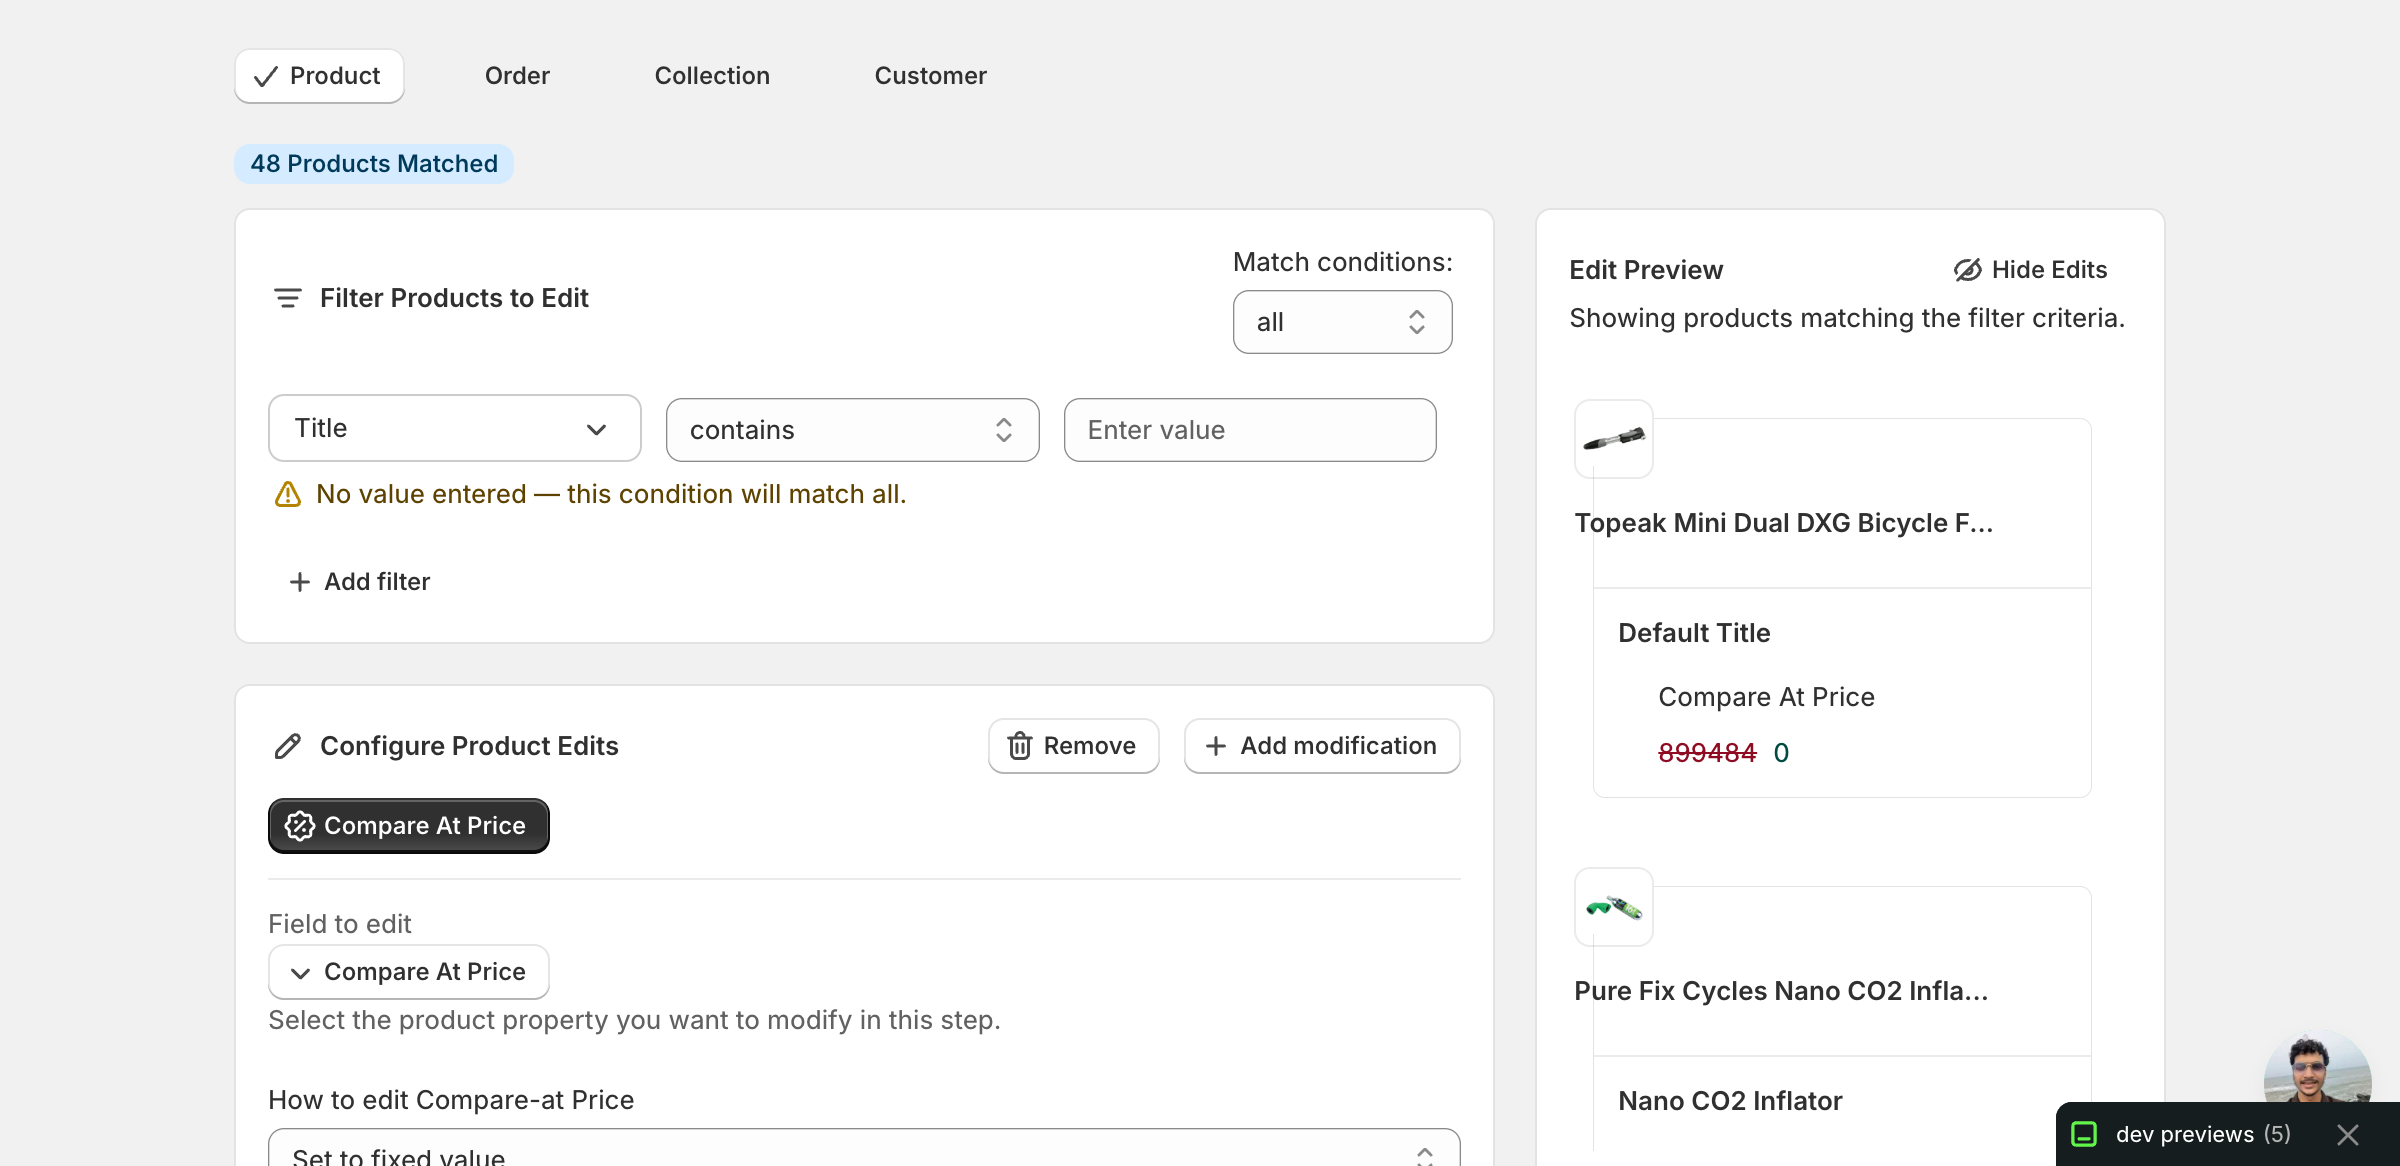
Click Compare At Price. The modal closes and the configuration panel switches to a How to edit Compare-at Price dropdown.
Step 3: Choose how to change it
Eight actions are available:
Direct value
- Set to fixed value — every matched variant gets this exact compare-at price.
- Set to null/blank — clear the compare-at price. The strike-through disappears from the storefront.
Adjust the existing compare-at price
- Increase by amount — add a flat amount in your store currency.
- Decrease by amount — subtract a flat amount.
- Increase by percent — raise by a %.
- Decrease by percent — lower by a %.
Derive from another field
- Set as percent of Price field — set compare-at = X% of the variant's current price. Pick a number above 100 to show a discount (e.g. 150% turns the price into a "33% off" display).
- Set as percent of Cost field — set compare-at = X% of the variant's cost (margin-driven MSRP).
The inputs below the dropdown change to match the action you picked.
Step 4: Enter the value (and optional rounding)
Set to fixed value
A single currency-prefixed number input. Type the new compare-at price.
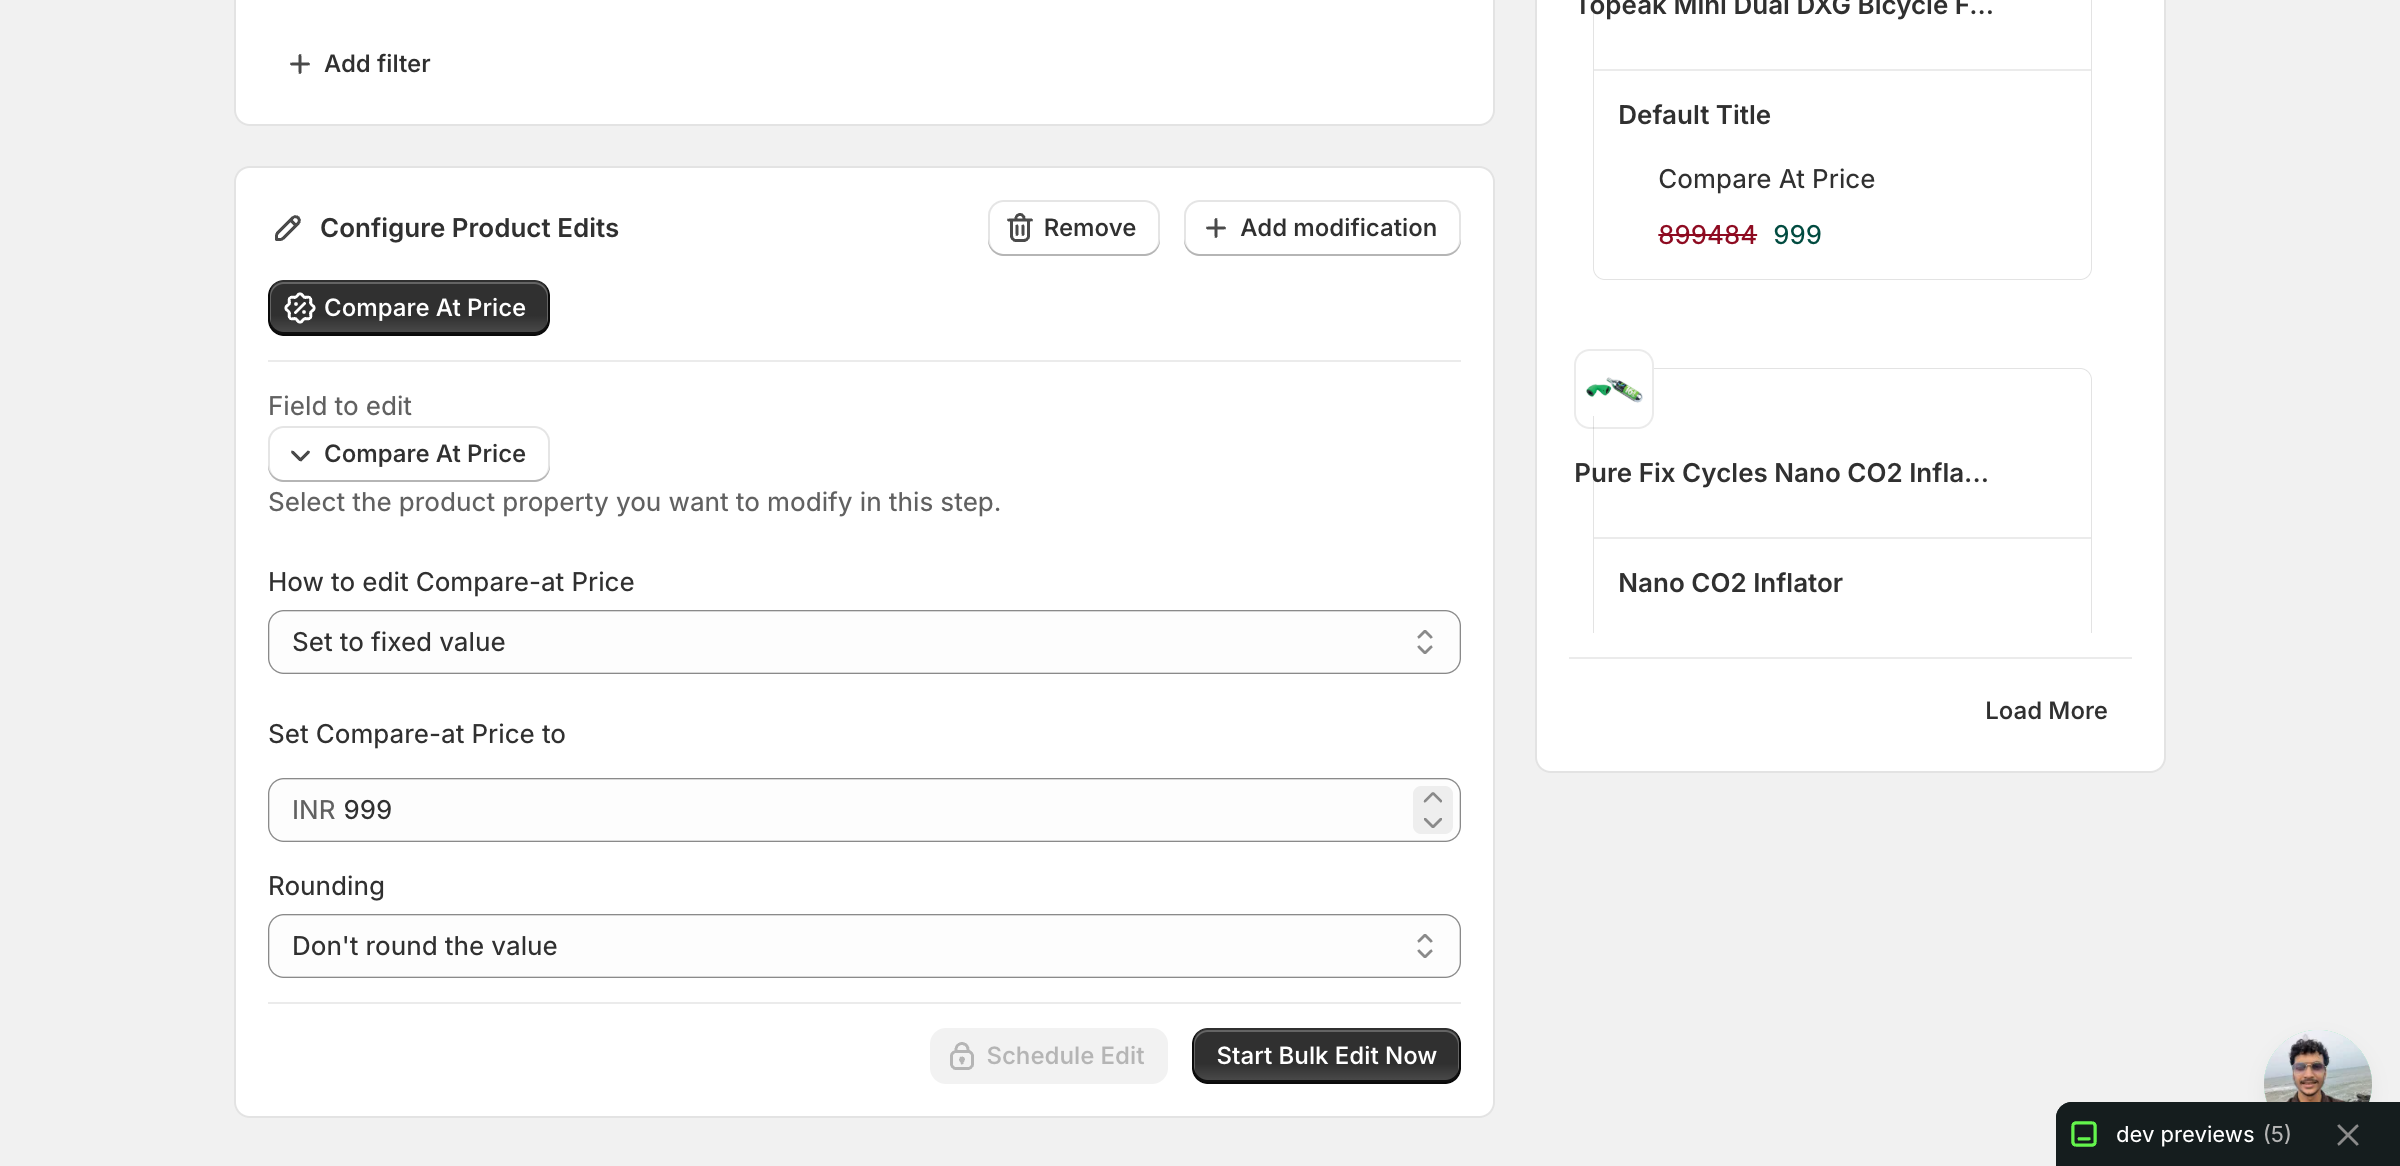
The currency prefix matches your store's currency. Below the value, a Rounding dropdown lets you snap the result:
- End prices in .99 — common retail anchor
- End prices in .95 / .90 — same idea, different ending
- Round whole number — drops decimals
- Round whole number up — always rounds up
- Round decimals — to nearest cent
- Custom ending — pick your own decimal (e.g.
0.78for.78endings) - Don't round the value — default; output is whatever the math produces
Increase / Decrease by amount or percent
A single number input. Amount uses the currency prefix, percent uses a % suffix. The same Rounding dropdown applies.
Set as percent of Price field (or Cost)
A percent input plus a help line under it explaining what gets skipped.
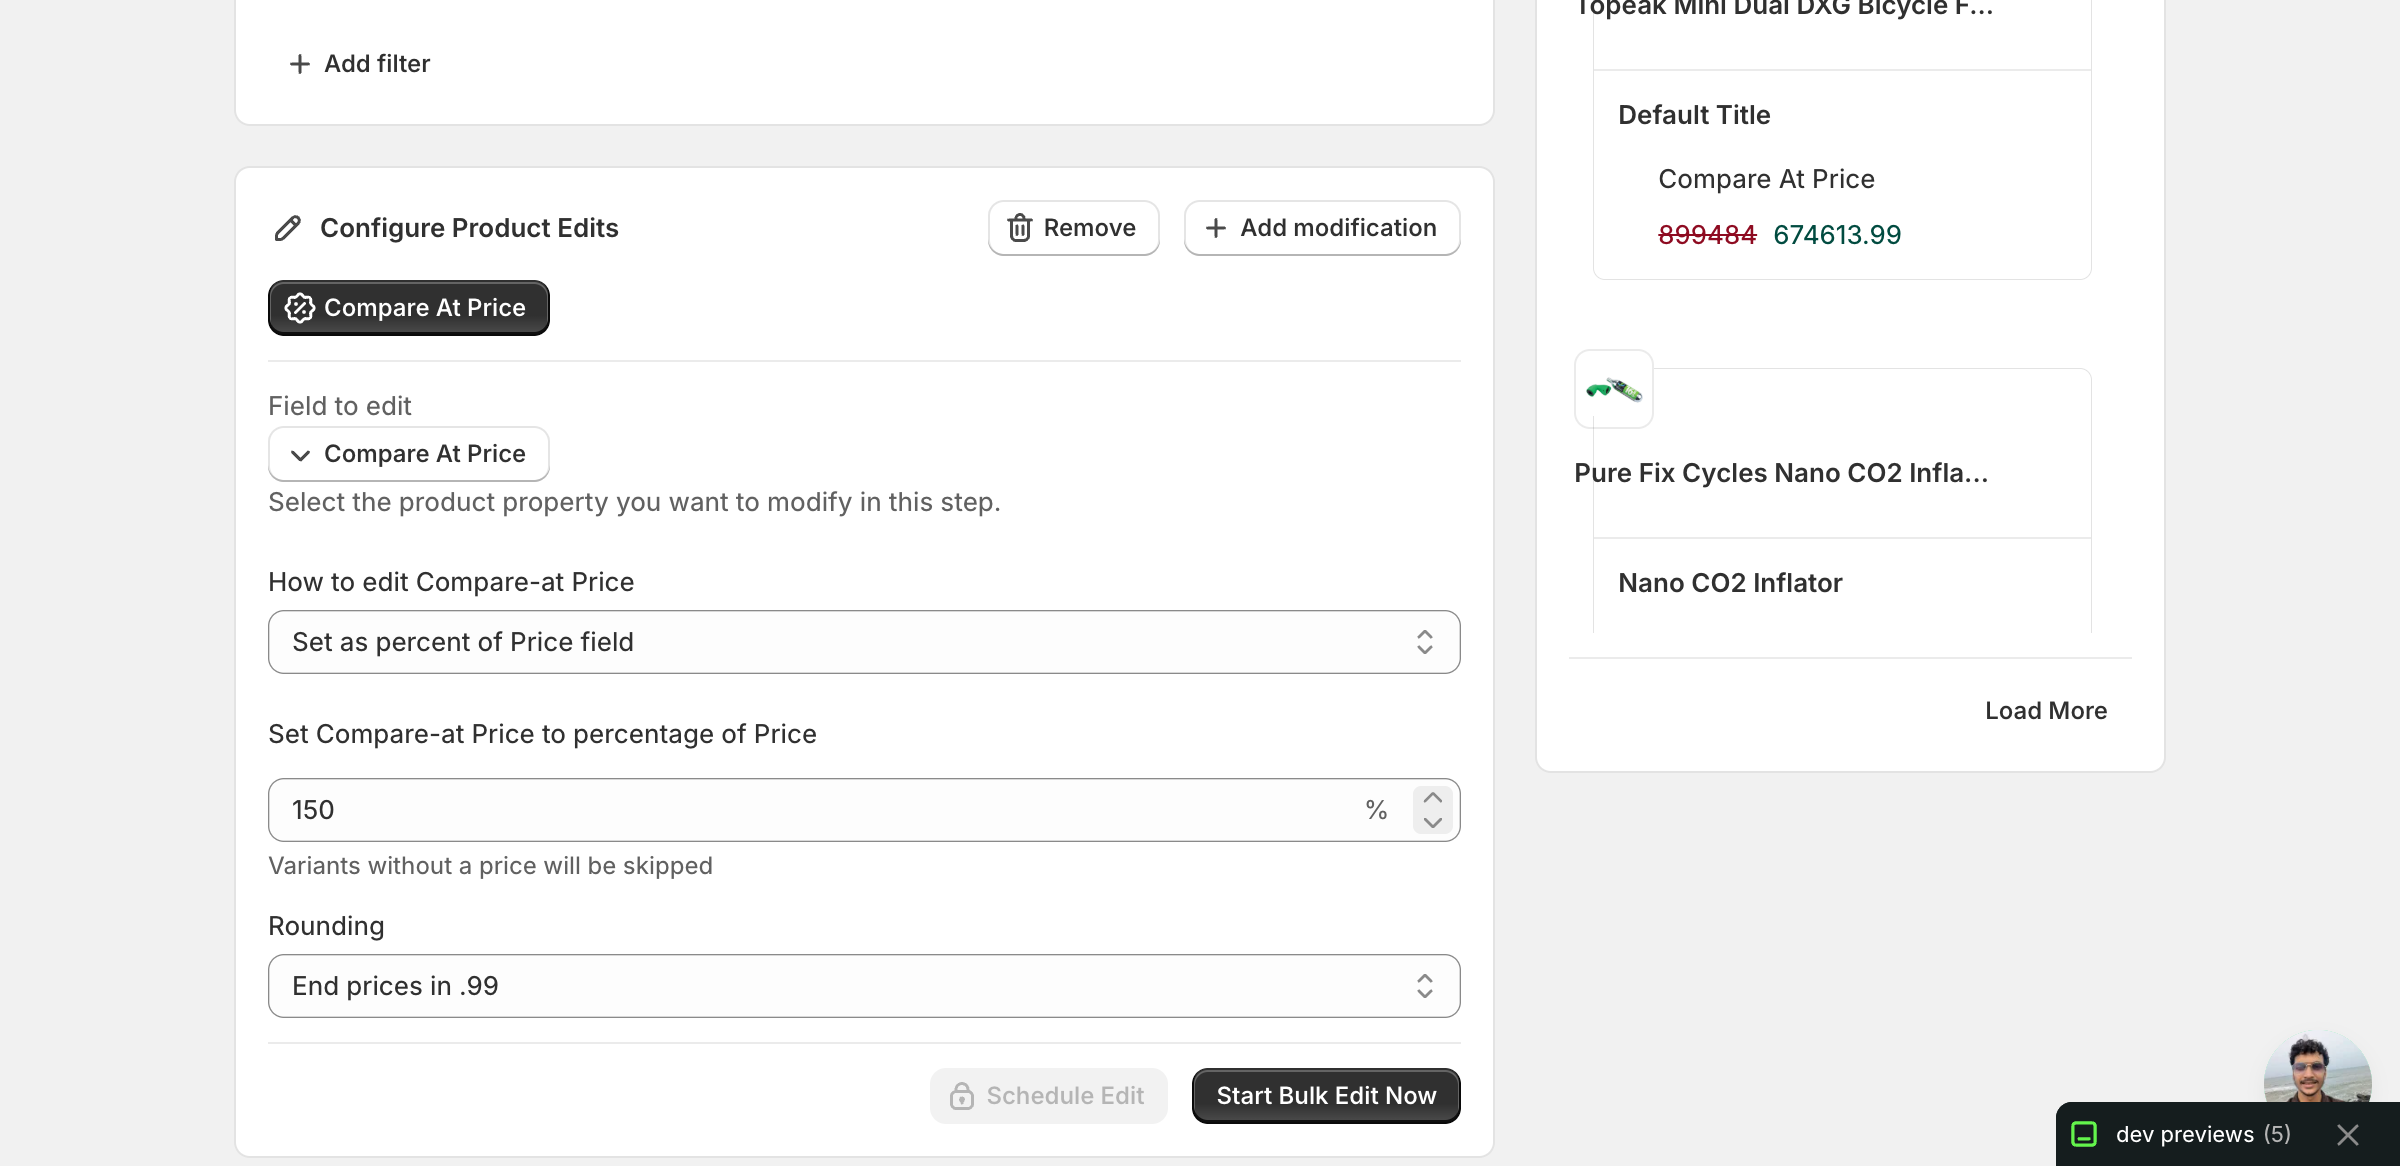
Pick a percent and (optionally) a rounding option. Skip behaviour:
- Price-based: variants without a price are skipped — their compare-at price stays as-is.
- Cost-based: variants without a cost value are skipped.
Numbers above 100 produce a compare-at price higher than the live price — the typical sale-prep setup. Numbers under 100 produce a compare-at price lower than the live price; most themes will hide the strike-through entirely in that case because it'd look like a price hike.
Use the Edit Preview on the right to spot which variants resolve and which get skipped before you run.
Set to null/blank
No input — the panel just confirms what the action does.
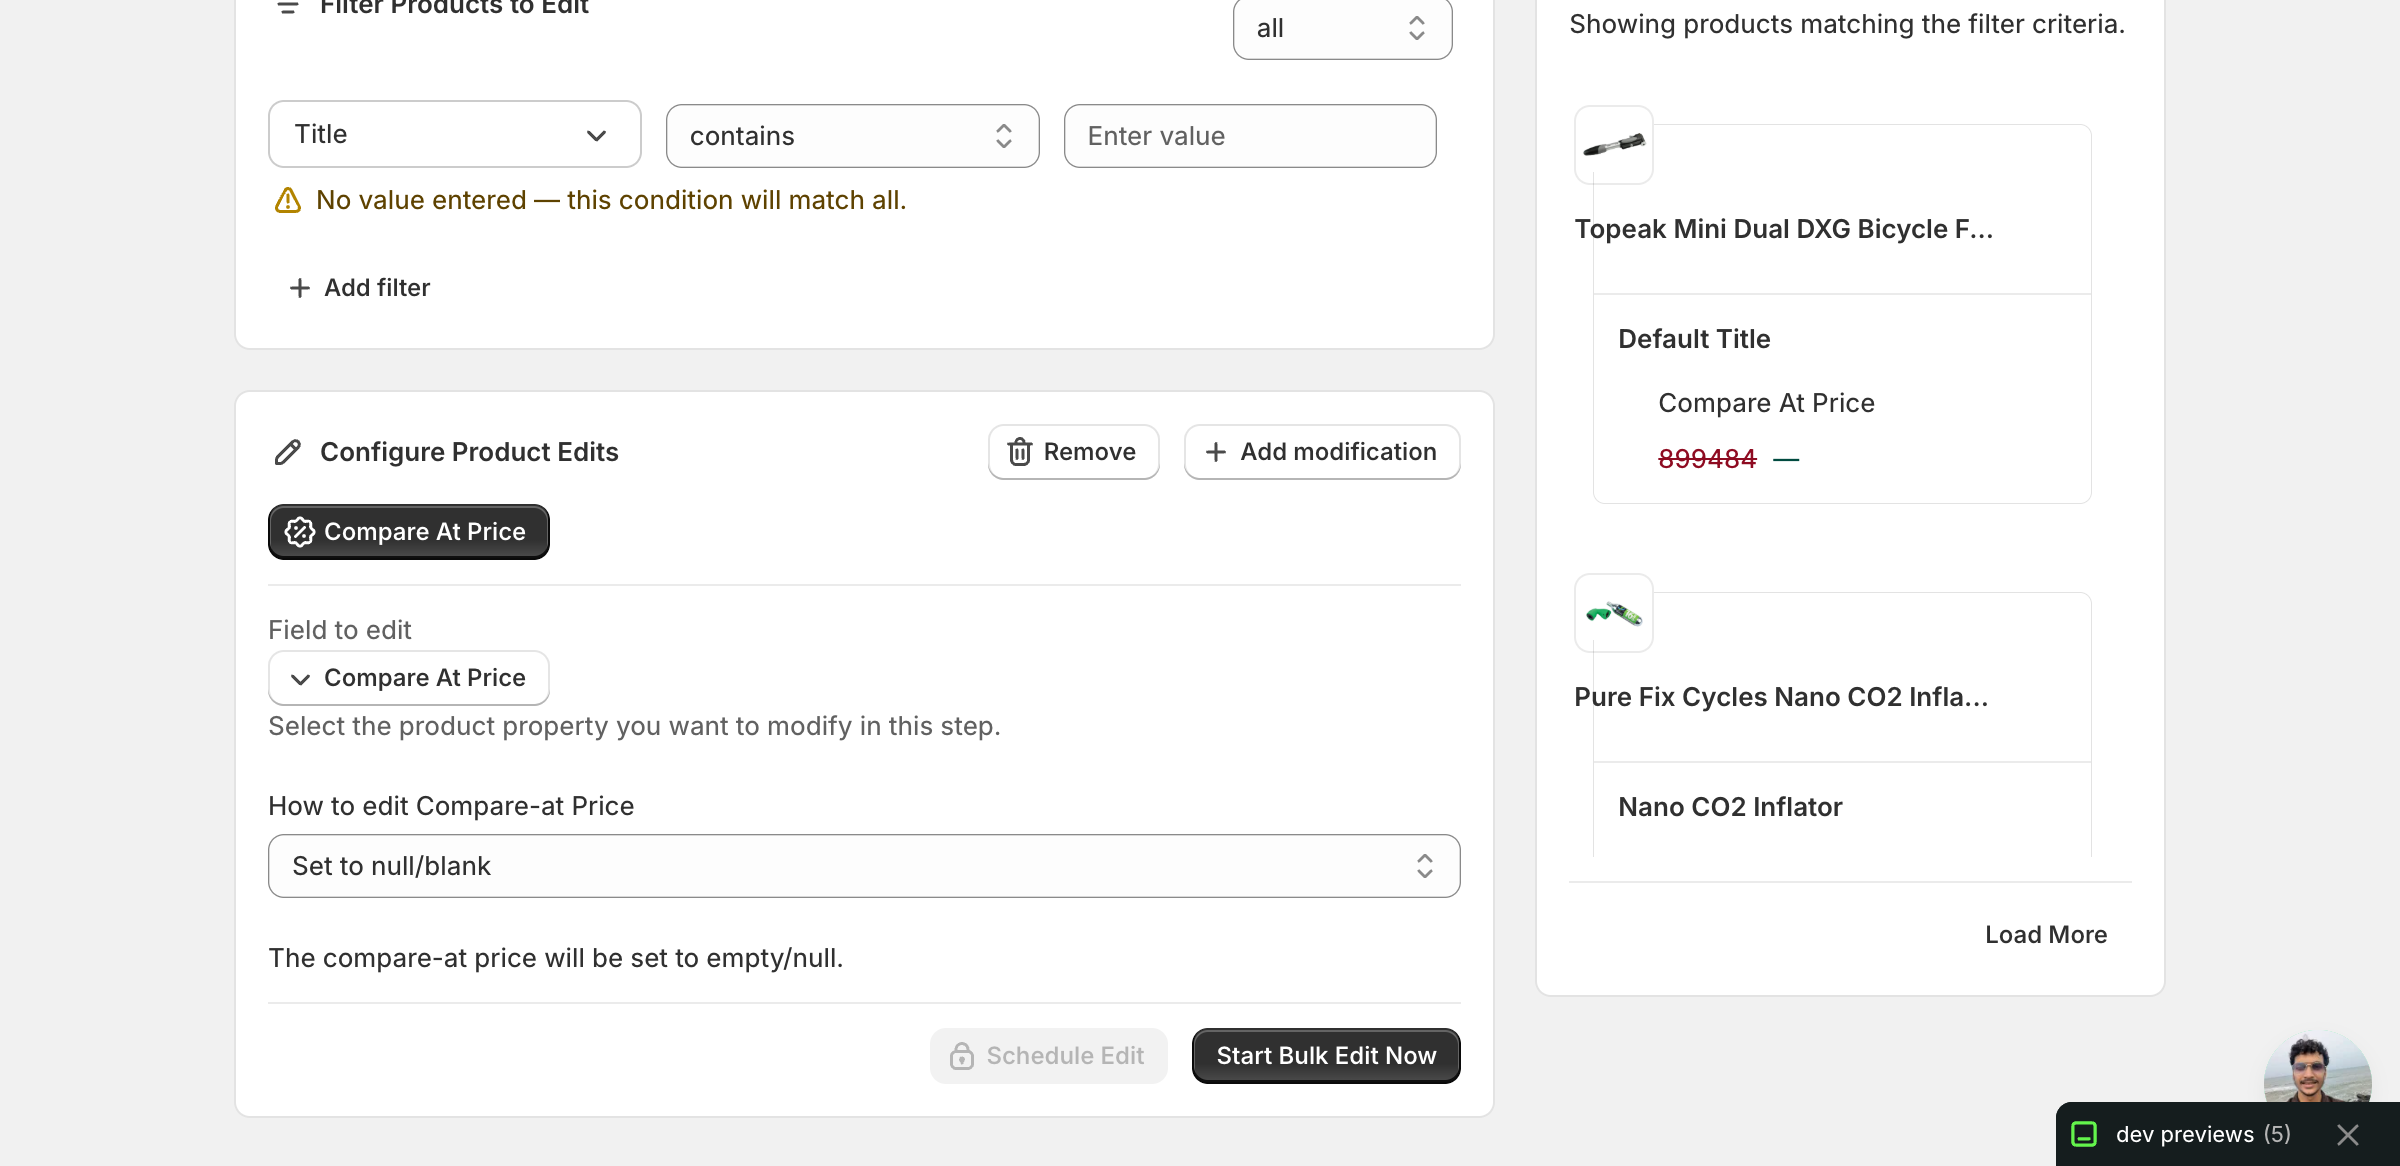
This wipes the compare-at price. The strike-through will disappear from your storefront. Use it when a sale ends and you want to remove the "was vs now" display without touching the live price.
Step 5: Filter, preview, and run
The Filter Products to Edit panel at the top scopes which products get touched. Add as many filter rows as you need — by tag, vendor, collection, current price, etc. Set Match conditions to all (every row must match) or any (one row is enough). The 48 Products Matched counter at the top updates as you change filters.
The Edit Preview on the right shows the before/after for the first batch of matched variants — old compare-at price struck through, new value next to it. Skim it to make sure the math looks right and nothing unexpected got swept in.
When you're happy with the preview, click Start Bulk Edit Now at the bottom of the configure panel. Larger jobs may take a minute or two depending on how many variants are involved.
After the run
- Compare-at price changes are reversible from the History page using Undo.
- For percent-style actions, re-running the same edit re-applies the change. A 10% raise re-run produces another 10% raise — these aren't idempotent.
- Setting the compare-at price below the live price usually does nothing visible on the storefront — most themes only display the strike-through when compare-at is greater than price. If your sale isn't showing up, check the relationship between the two values.
- Clearing the compare-at price (
Set to null/blank) doesn't change what customers pay — it just removes the discount visual.
Frequently asked questions
How do I add a sale strikethrough to all my Shopify products at once?
With EditEngine's bulk editor, pick Compare At Price under Variant Fields and choose Set as percent of Price field with a number above 100 — 150% turns the current price into a "33% off" display. Or type a fixed compare-at value. Themes show the strike-through when compare-at is greater than the price.
How do I remove compare-at prices from all Shopify variants after a sale?
Choose Set to null/blank. It wipes the compare-at price on every matched variant, so the strike-through disappears from your storefront without touching the live price or changing what customers pay. Use it when a sale ends and you want to remove the "was vs now" display in one EditEngine run.
Can I undo a bulk compare-at price edit in Shopify?
Yes. Compare-at price changes are reversible from EditEngine's History page using Undo. Be careful with percent-style actions though — re-running the same edit re-applies the change, so a 10% raise re-run produces another 10% raise. These actions aren't idempotent, and Undo is the way back if you double-apply.
Why is my Shopify sale strikethrough not showing after a bulk edit?
Most themes only display the strike-through when the compare-at price is greater than the live price. Setting compare-at below the price usually does nothing visible — and percent-of-price values under 100 produce exactly that. If your sale isn't showing up, check the relationship between the two values on the affected variants.
Which Shopify variants get skipped when deriving compare-at from price or cost?
With Set as percent of Price field, variants without a price are skipped and their compare-at price stays as-is; with Set as percent of Cost field, variants without a cost value are skipped. The Edit Preview on the right shows which variants resolve and which get skipped before you run.