Variants & options
How to Bulk Edit Province Code of Origin
Last updated
Set or rewrite the Province Code of Origin on many product variants at once with EditEngine, the bulk editor for Shopify. Province Code of Origin is the sub-national code (state, province, prefecture) that pairs with Country of Origin on customs paperwork — ON for Ontario, CA for California, NY for New York, and so on.
Province Code of Origin is a variant field. Each variant has its own value, so the edit runs once per matched variant. A product with three variants gets three updates.
It only takes effect when Country of Origin is set to a country that has provinces. Shopify treats this as a free-text two-letter ISO 3166-2 subdivision code. There's no built-in dropdown — you type the code. If Country of Origin is
US, typeCAfor California; if it'sCA(Canada), typeONfor Ontario; if Country of Origin is blank or set to a country without subdivisions Shopify cares about, the code is stored but ignored on customs declarations.
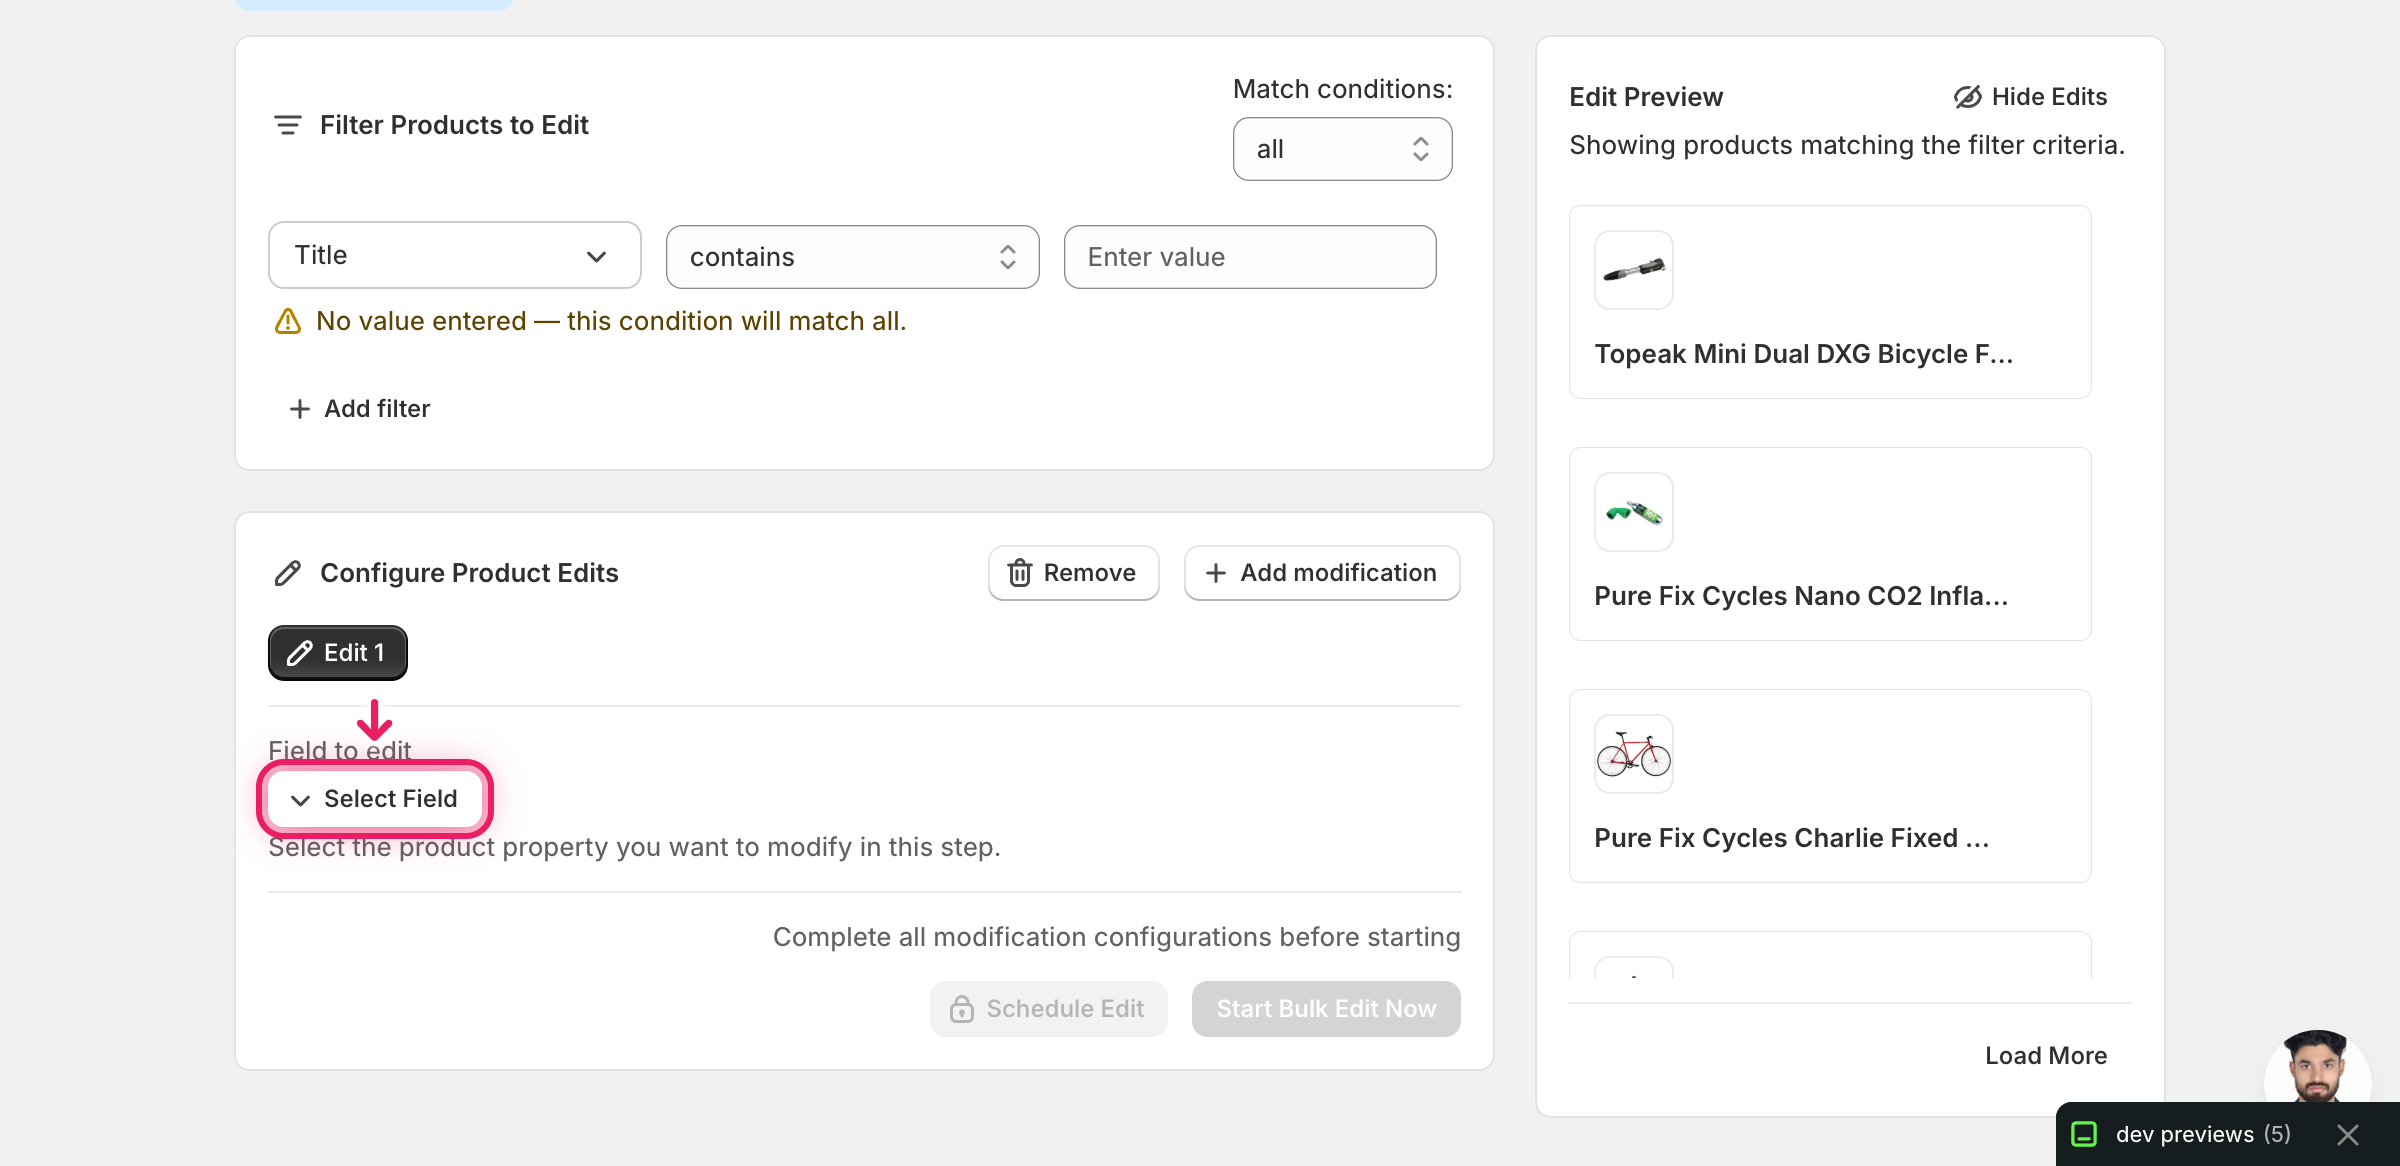
Step 1: Open the Select Field modal
In the Configure Product Edits panel, click Select Field.
Step 2: Pick Province Code of Origin
Province Code of Origin lives under Variant Fields in the Select Field modal. Use the search box at the top if it's faster — typing province filters the list down to this entry.
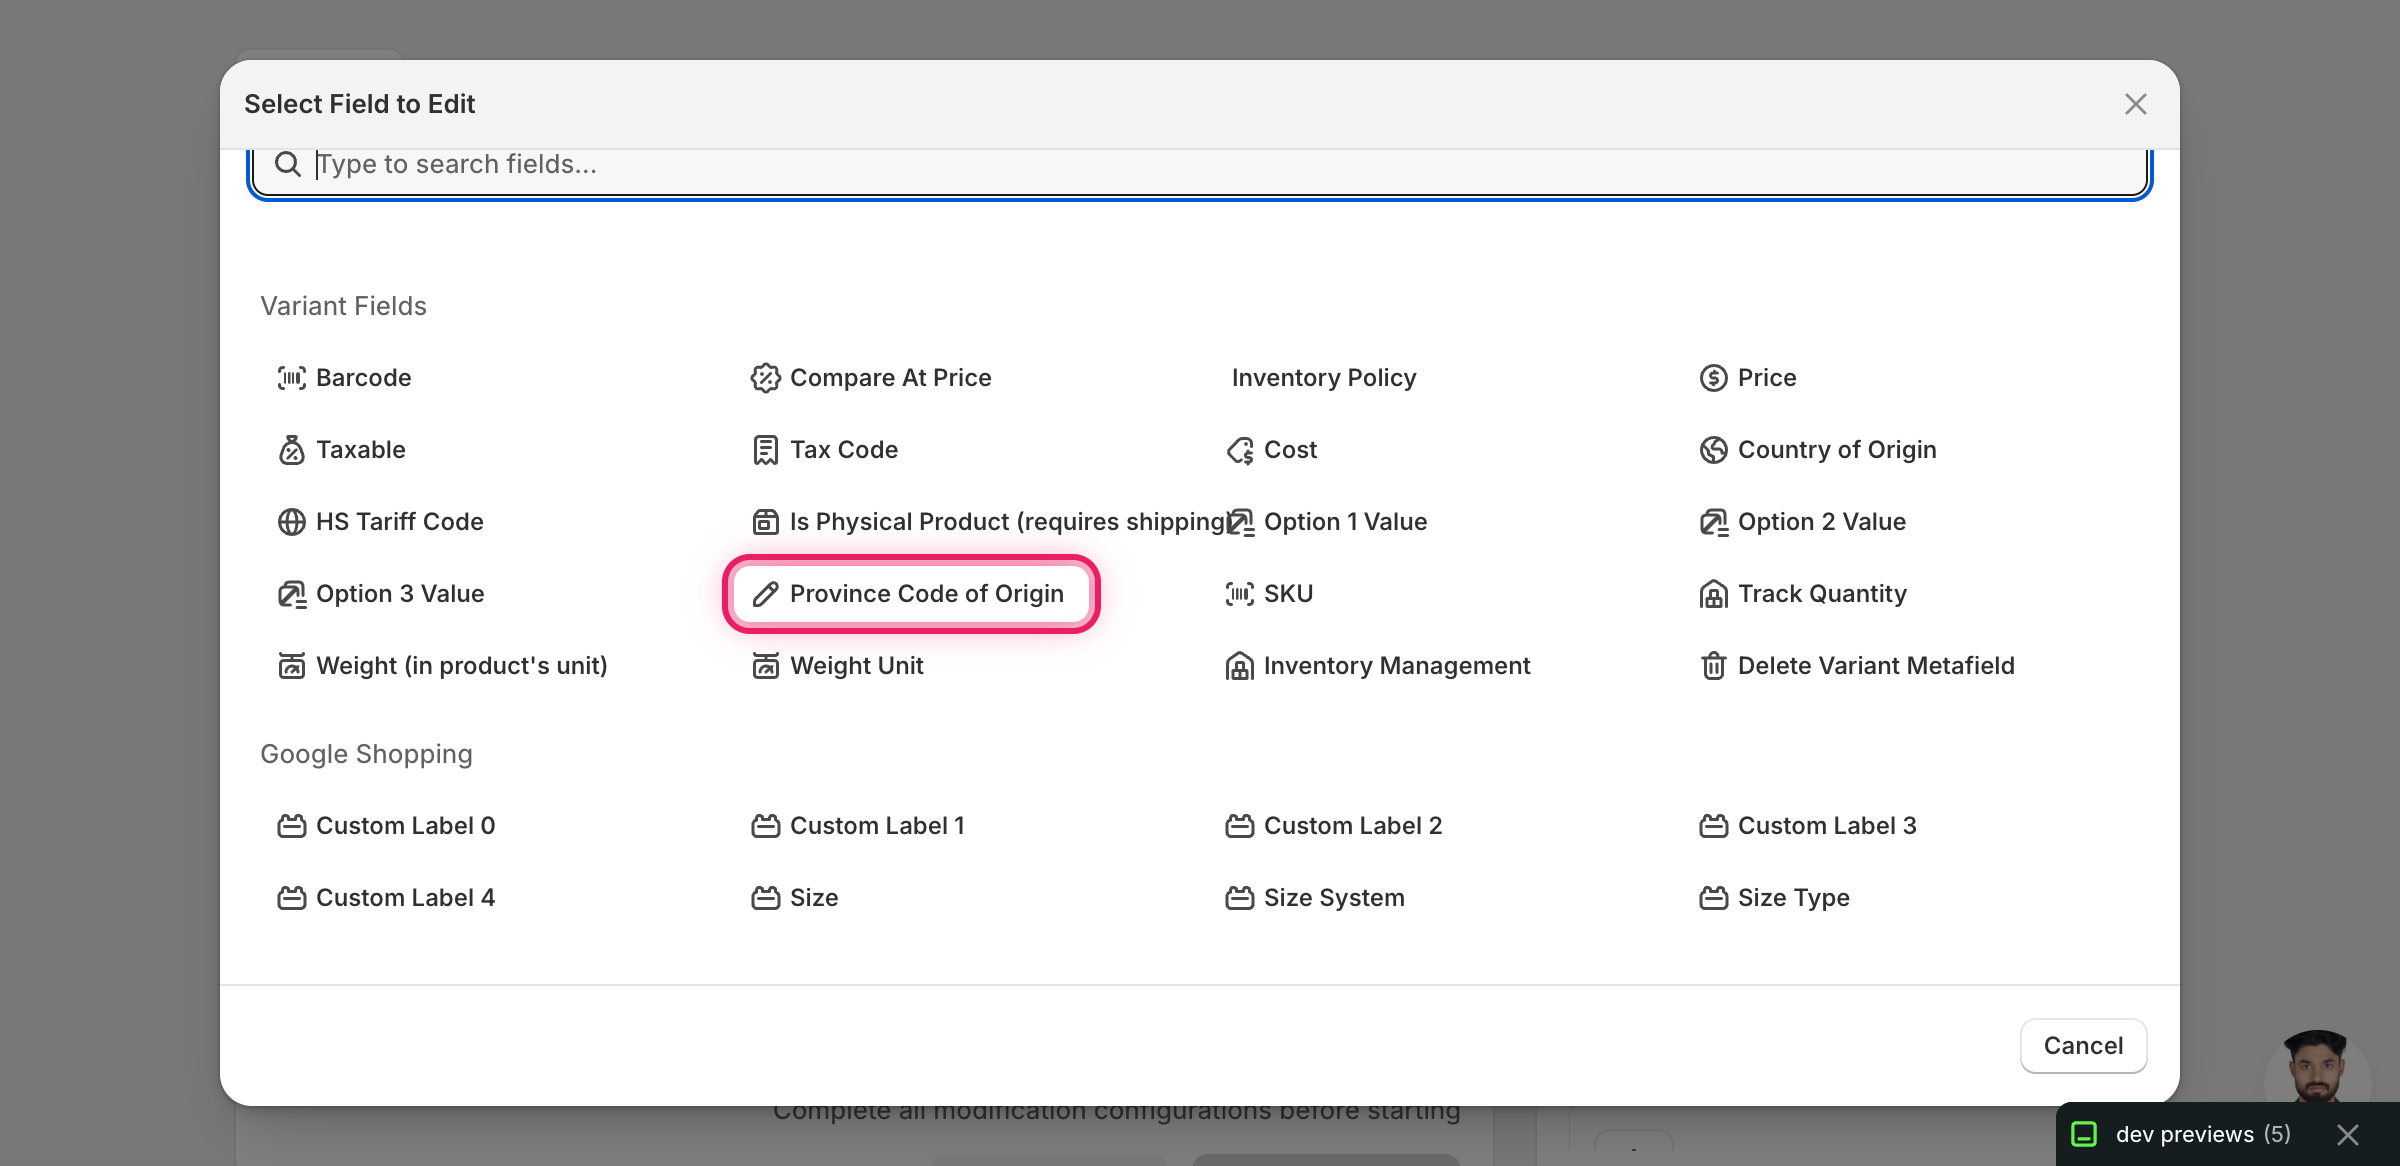
Click Province Code of Origin. The modal closes and the configuration panel switches to the editor for this field, defaulting to Set text to value.
Step 3: Choose how to change the code
Province Code of Origin is treated as a free-form text field, so EditEngine exposes the full set of text actions:
Direct value
- Set text to value — replace every matched variant's code with the one you type. The most common choice.
Adjust the existing code
- Add text to end — append text to whatever's already there.
- Add text to beginning — prepend text.
- Remove text from end / Remove text from beginning — strip a known prefix or suffix.
- Search/Replace — swap one substring for another, optionally case-insensitive.
- Limit length of text — cap the length (rarely useful here — codes are 2–3 chars).
- Remove text from a word to the end / Remove text up to and including a word — surgical strips around a marker word.
For most catalogs, Set text to value is the right action. The other actions exist if you've previously set codes in a non-standard format and need to clean them up.
Step 4: Enter the code
Set text to value
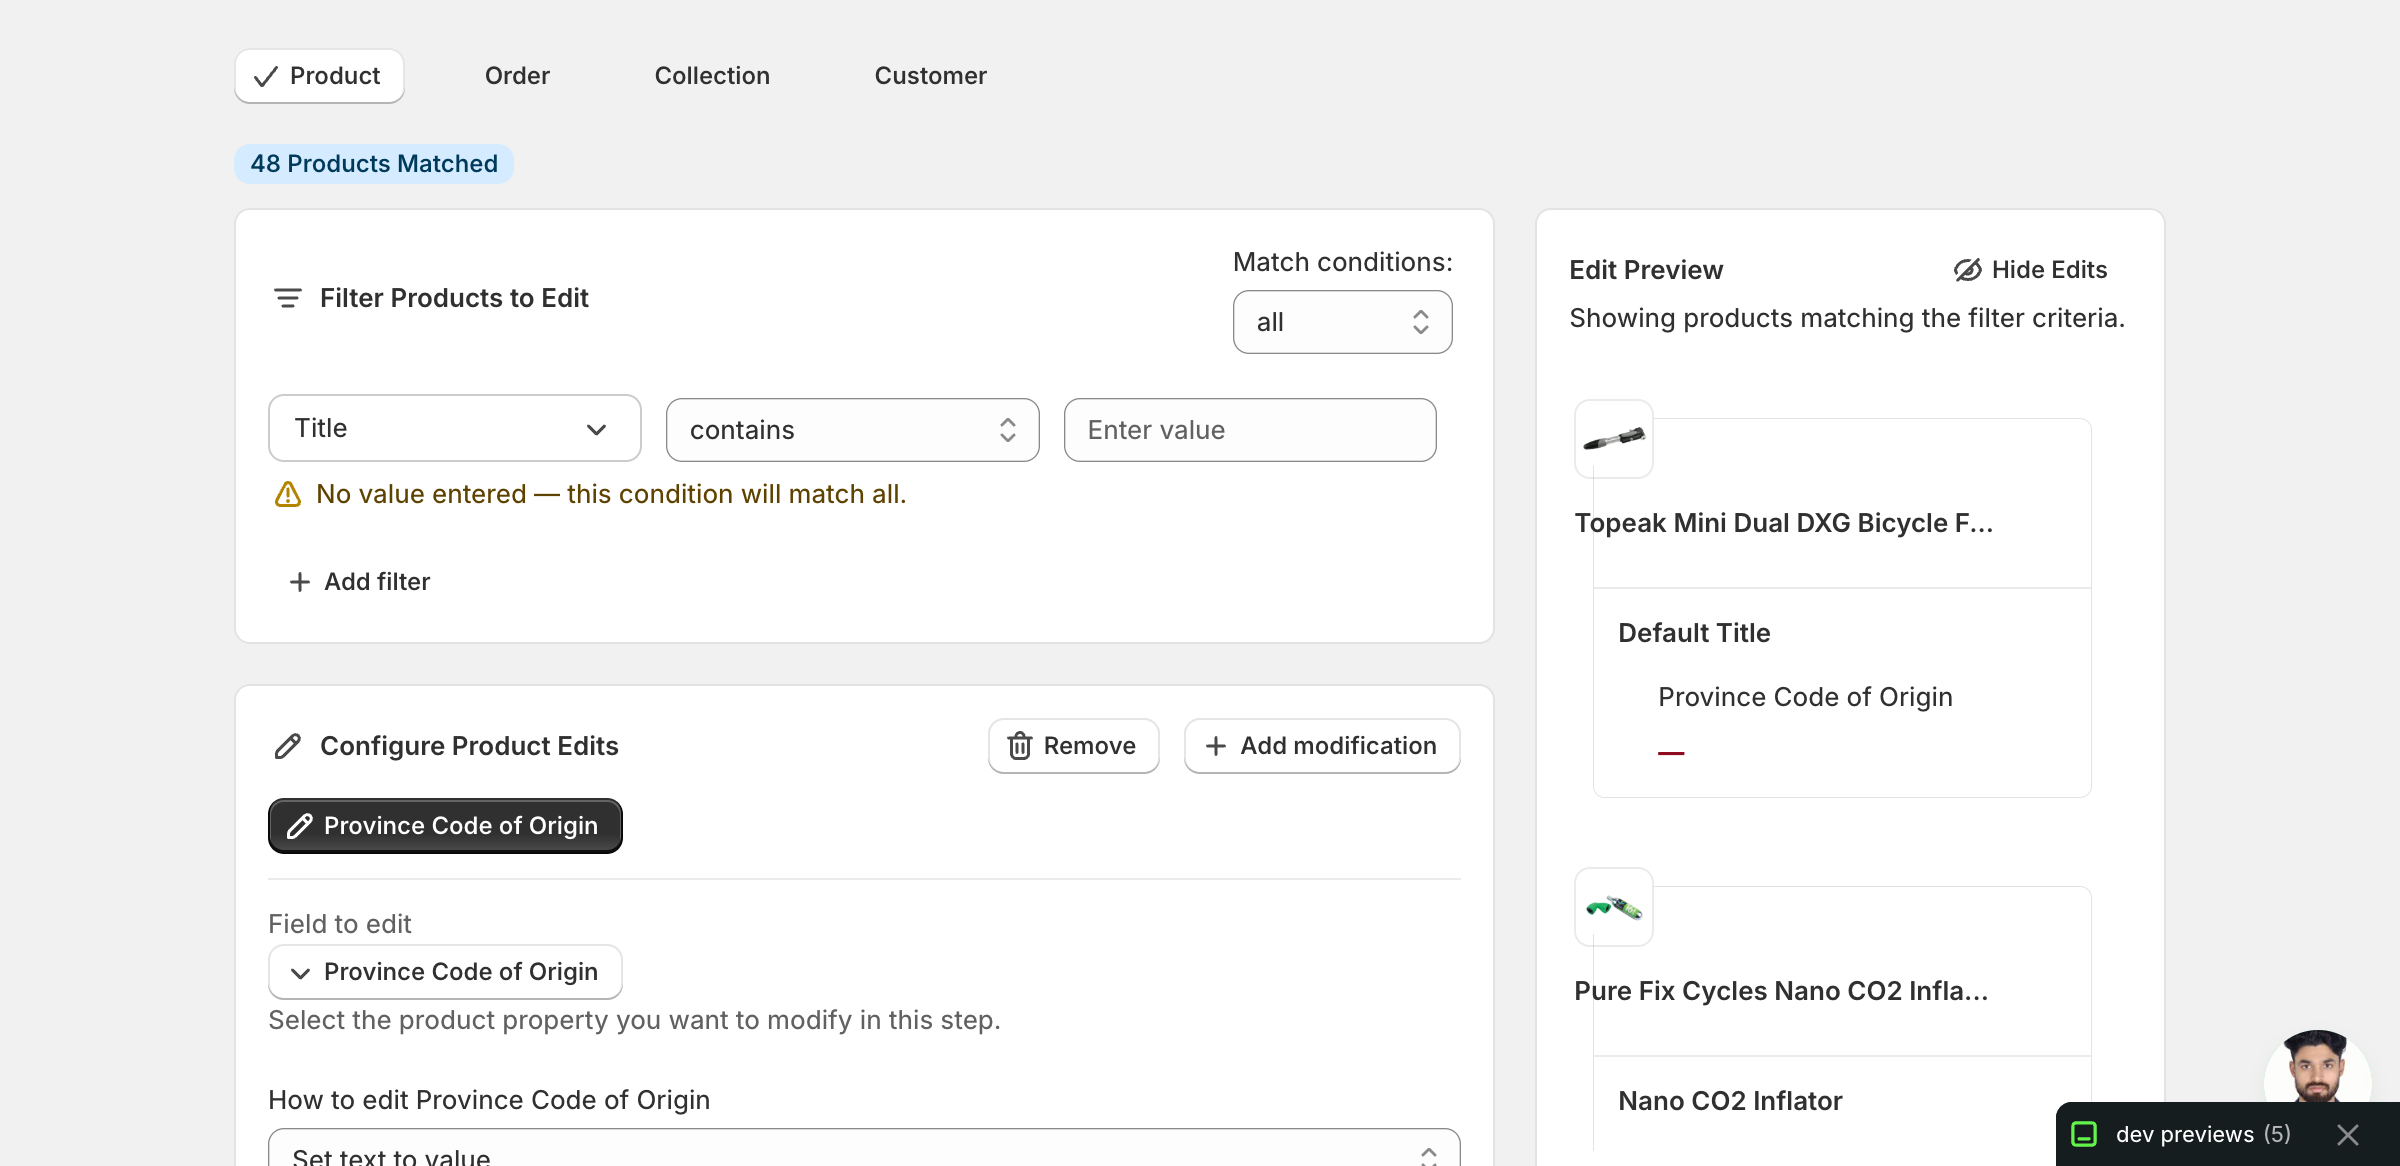
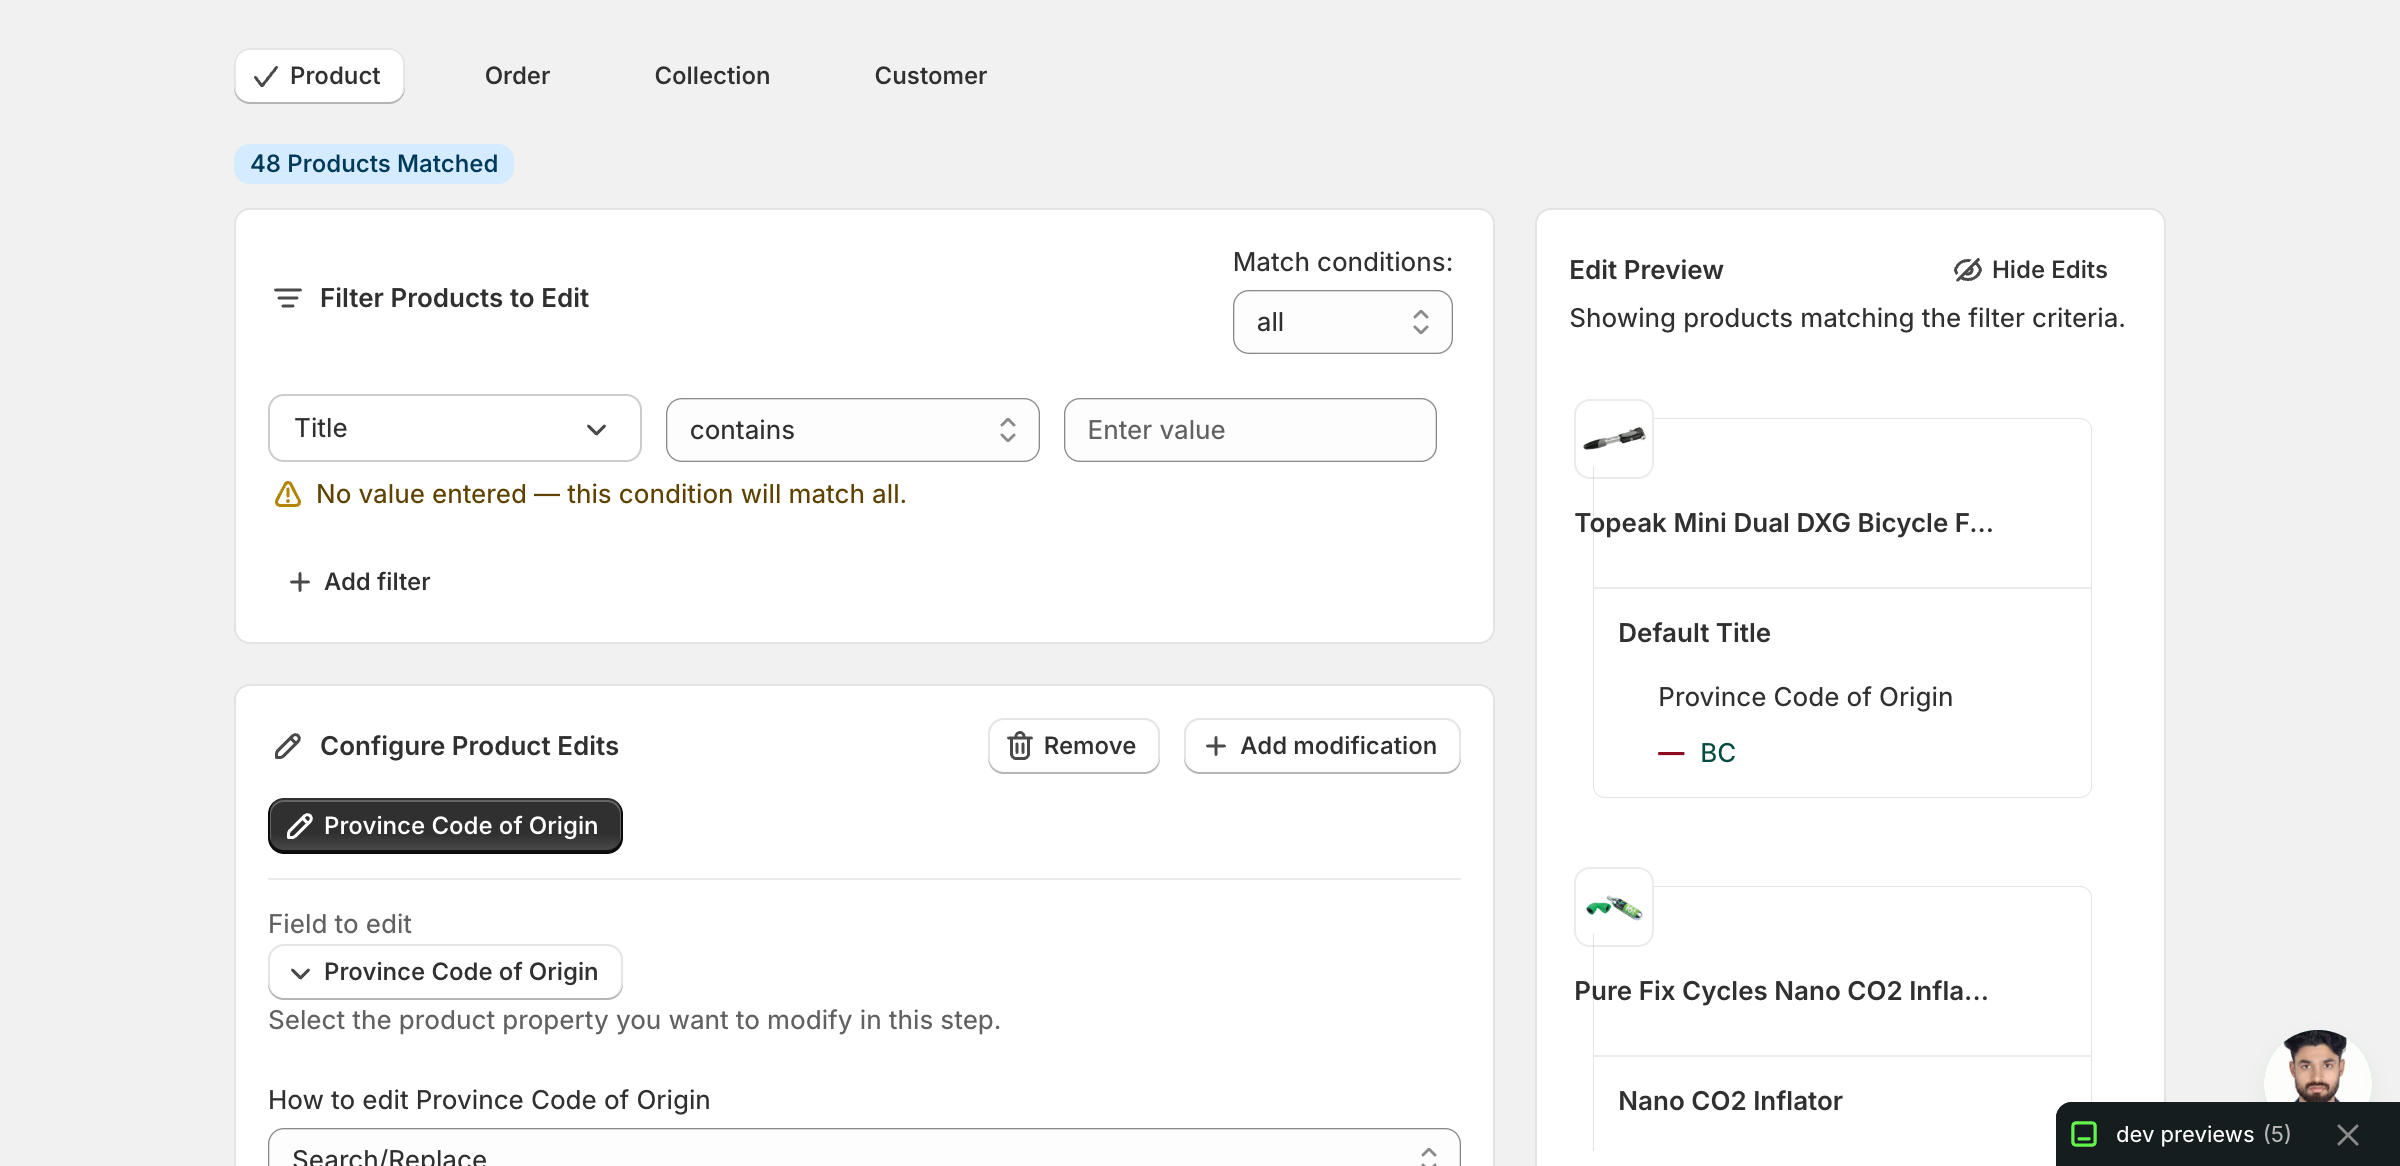
Type the two- or three-letter subdivision code in Set the province code of origin to this value. The Edit Preview on the right resolves the change for every matched variant before you commit.
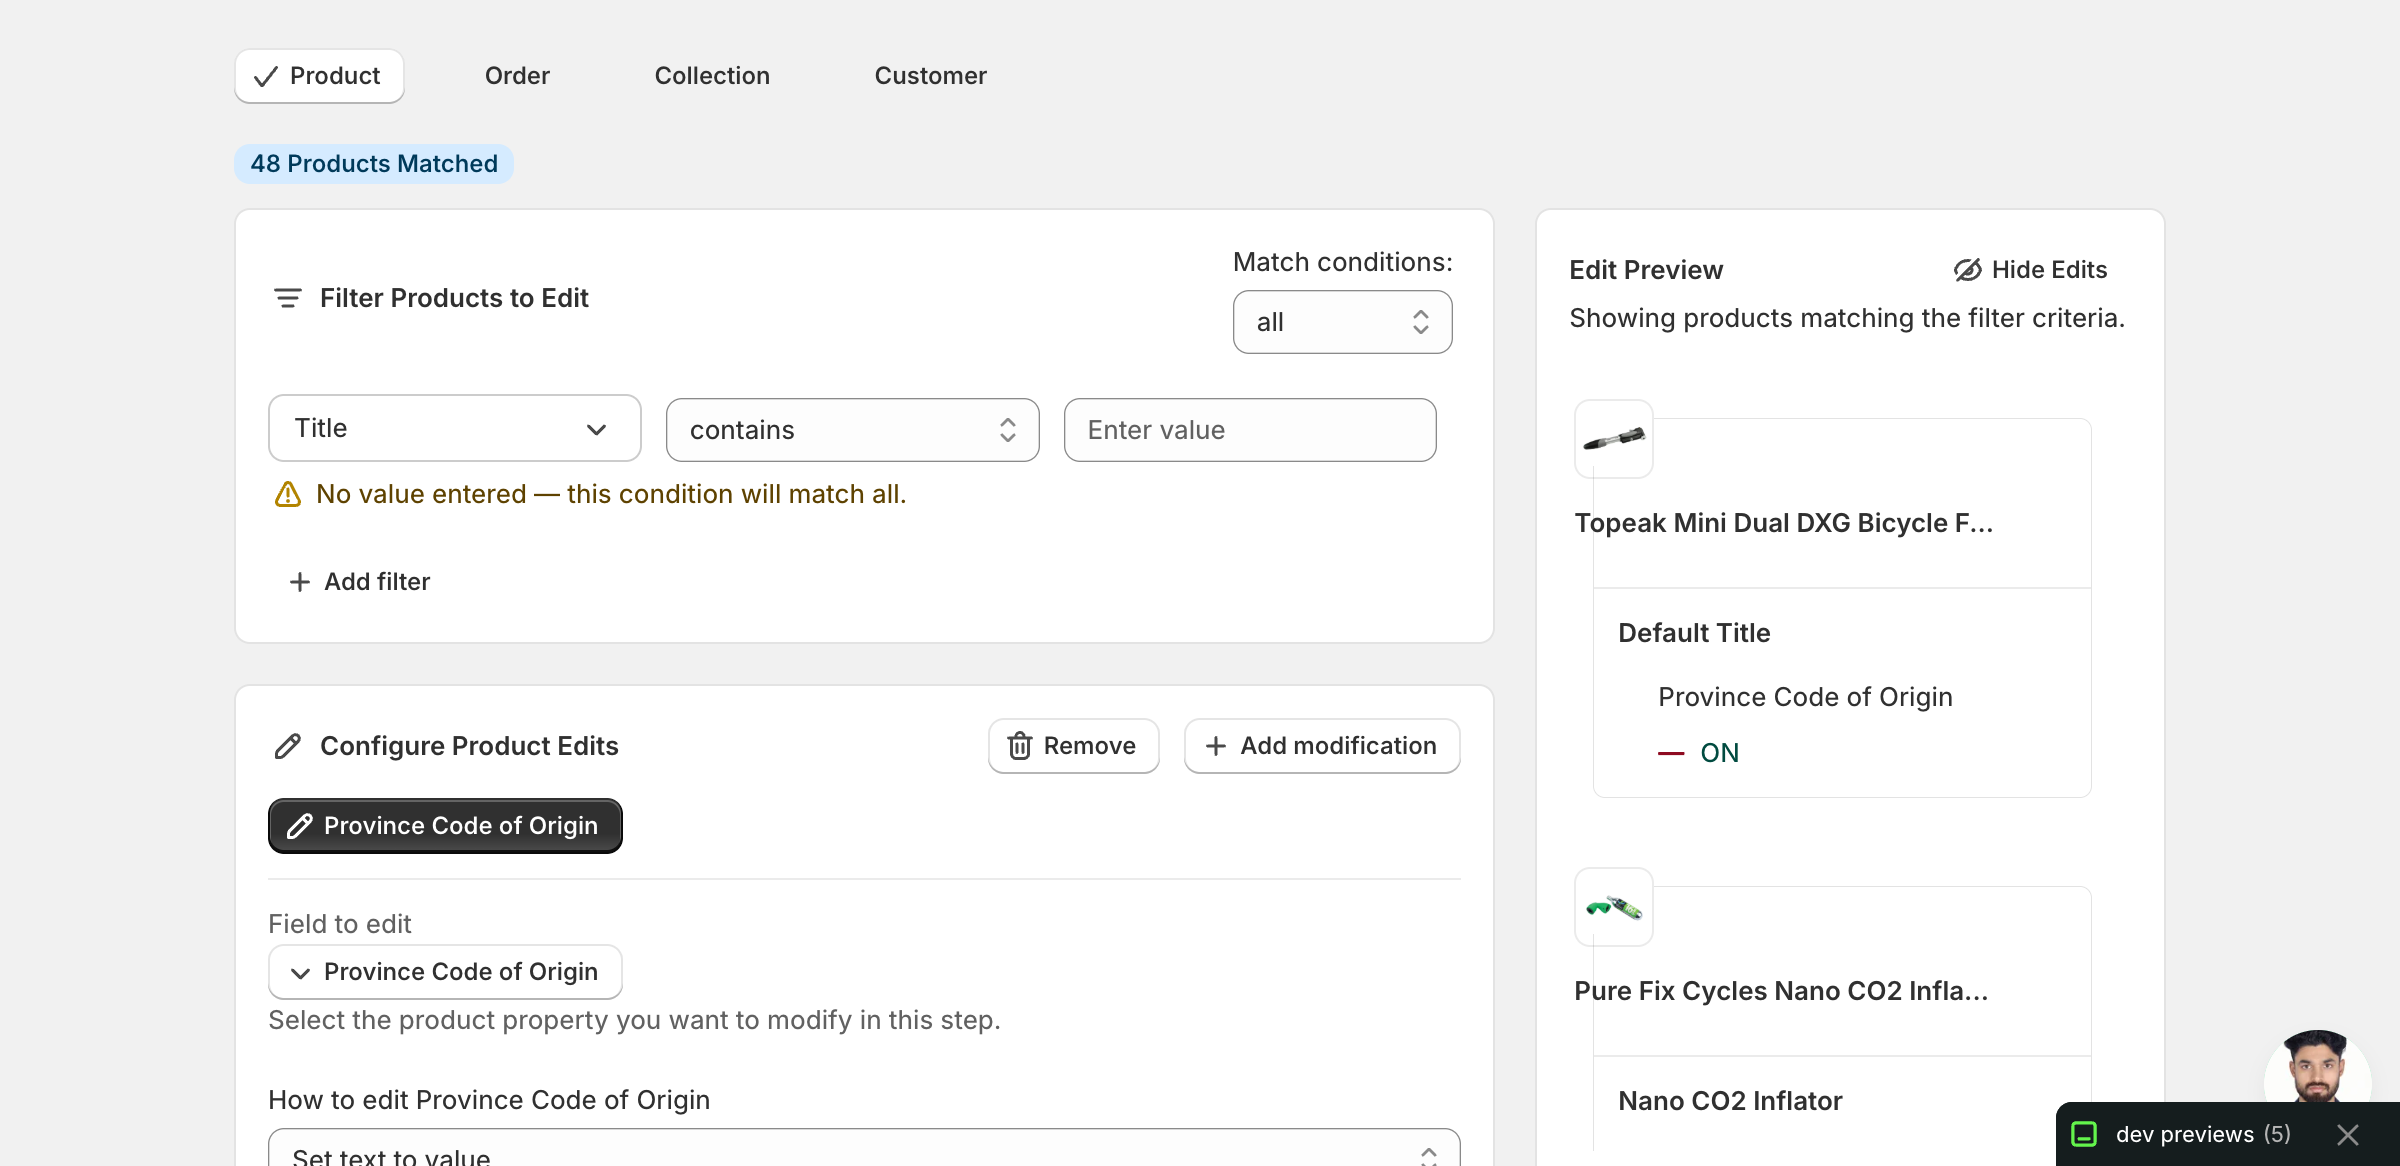
In this example, every matched variant gets ON (Ontario). Existing values appear with a strikethrough — variants that were blank show only — next to the new code.
Use the standard ISO 3166-2 subdivision code, not the full name. Shopify expects two letters for US states and Canadian provinces (
CA,NY,ON,QC), and varies for other countries. TypingCaliforniaorOntariowill be stored as-is and won't match Shopify's customs logic.
Pair with Country of Origin first. A province code without a matching country is ignored on customs declarations. If you're cleaning up customs data, run the Country of Origin edit before this one (or schedule them in the same batch).
Search/Replace
Use this when you've already set codes but need to fix a typo or normalise format across the catalog. Two inputs appear — the text to find and what to replace it with — plus a Case insensitive checkbox.
Leave the replace field blank to delete the matched text outright. Useful when you want to clear a stray code without touching the rest of the value.
Add / Remove from end or beginning
Each takes a single text input. Whatever you type gets appended, prepended, or stripped from the matching end of every code. Most stores won't need these for a 2-letter code, but they're handy if a CSV import accidentally wrapped values in quotes or padding.
Step 5: Filter, preview, then run
Use the Filter Products to Edit panel above the editor to narrow which variants get the new code — by vendor, type, tags, country (via the existing Country of Origin filter), or any combination. Without a filter the edit runs against your whole catalog.
The Edit Preview on the right resolves the change per variant before you commit. Old values appear with a strikethrough next to the new code; variants already set to the chosen code show no change.
When the preview looks right, click Start Bulk Edit Now. EditEngine queues the change and runs through the matched variants. Schedule Edit queues the same run for a future time if you'd rather not apply it immediately.
After the run
- Province Code of Origin changes are reversible from the History page using Undo. Shopify exposes this as a direct write, so the prior value is restored cleanly.
- The action is idempotent. Re-running the same edit on already-correct variants produces no further change.
- Variants whose Country of Origin doesn't recognise the province code still accept the value — Shopify just ignores it on customs declarations.
- Province Code of Origin only matters for variants you ship across borders. Digital goods, gift cards, and store-pickup-only items use the value when present but don't need it.
Frequently asked questions
How do I bulk edit the province code of origin on Shopify variants?
In EditEngine's Configure Product Edits panel, click Select Field, pick Province Code of Origin under Variant Fields, choose Set text to value, and type the two- or three-letter subdivision code. The Edit Preview resolves the change for every matched variant before you commit, then Start Bulk Edit Now applies it across the catalog.
Can I undo a province code of origin bulk edit in Shopify?
Yes. Province Code of Origin changes are reversible from EditEngine's History page using Undo. Shopify exposes the field as a direct write, so the prior value is restored cleanly. The action is also idempotent — re-running the same edit on already-correct variants produces no further change.
What format does Shopify expect for the province code of origin?
Shopify treats it as a free-text two-letter ISO 3166-2 subdivision code — CA for California, NY for New York, ON for Ontario, QC for Quebec. Type the code, not the full name: typing California or Ontario is stored as-is but won't match Shopify's customs logic. EditEngine saves exactly what you enter.
Why is my Shopify province code of origin ignored on customs declarations?
The code only takes effect when Country of Origin is set to a country that has provinces. If Country of Origin is blank or doesn't match, Shopify stores the code but ignores it on customs declarations. EditEngine recommends running the Country of Origin edit first, or scheduling both in the same batch.
Does the province of origin edit update every variant of a Shopify product?
Yes. Province Code of Origin is a variant field — each variant has its own value, so the edit runs once per matched variant. A product with three variants gets three updates. Use EditEngine's Filter Products to Edit panel to narrow by vendor, type, tags, or country; without a filter it runs against your whole catalog.