Variants & options
How to Bulk Update Product Options
Last updated
Update an existing product option across many products at once with EditEngine — the Bulk Editor for Shopify. Use this action to rename an option (for example, "Color" → "Colour" across your catalog) or add new values to an option (for example, add "XL" and "XXL" to every "Size" option).
This is an action, not a value edit. It targets a product option by name — every matched product that has an option with that exact name gets updated. Products without that option are skipped.
Case-sensitive. "Color" and "color" are different. Type the option name exactly as it appears on your products.
Step 1: Open the Select Field picker
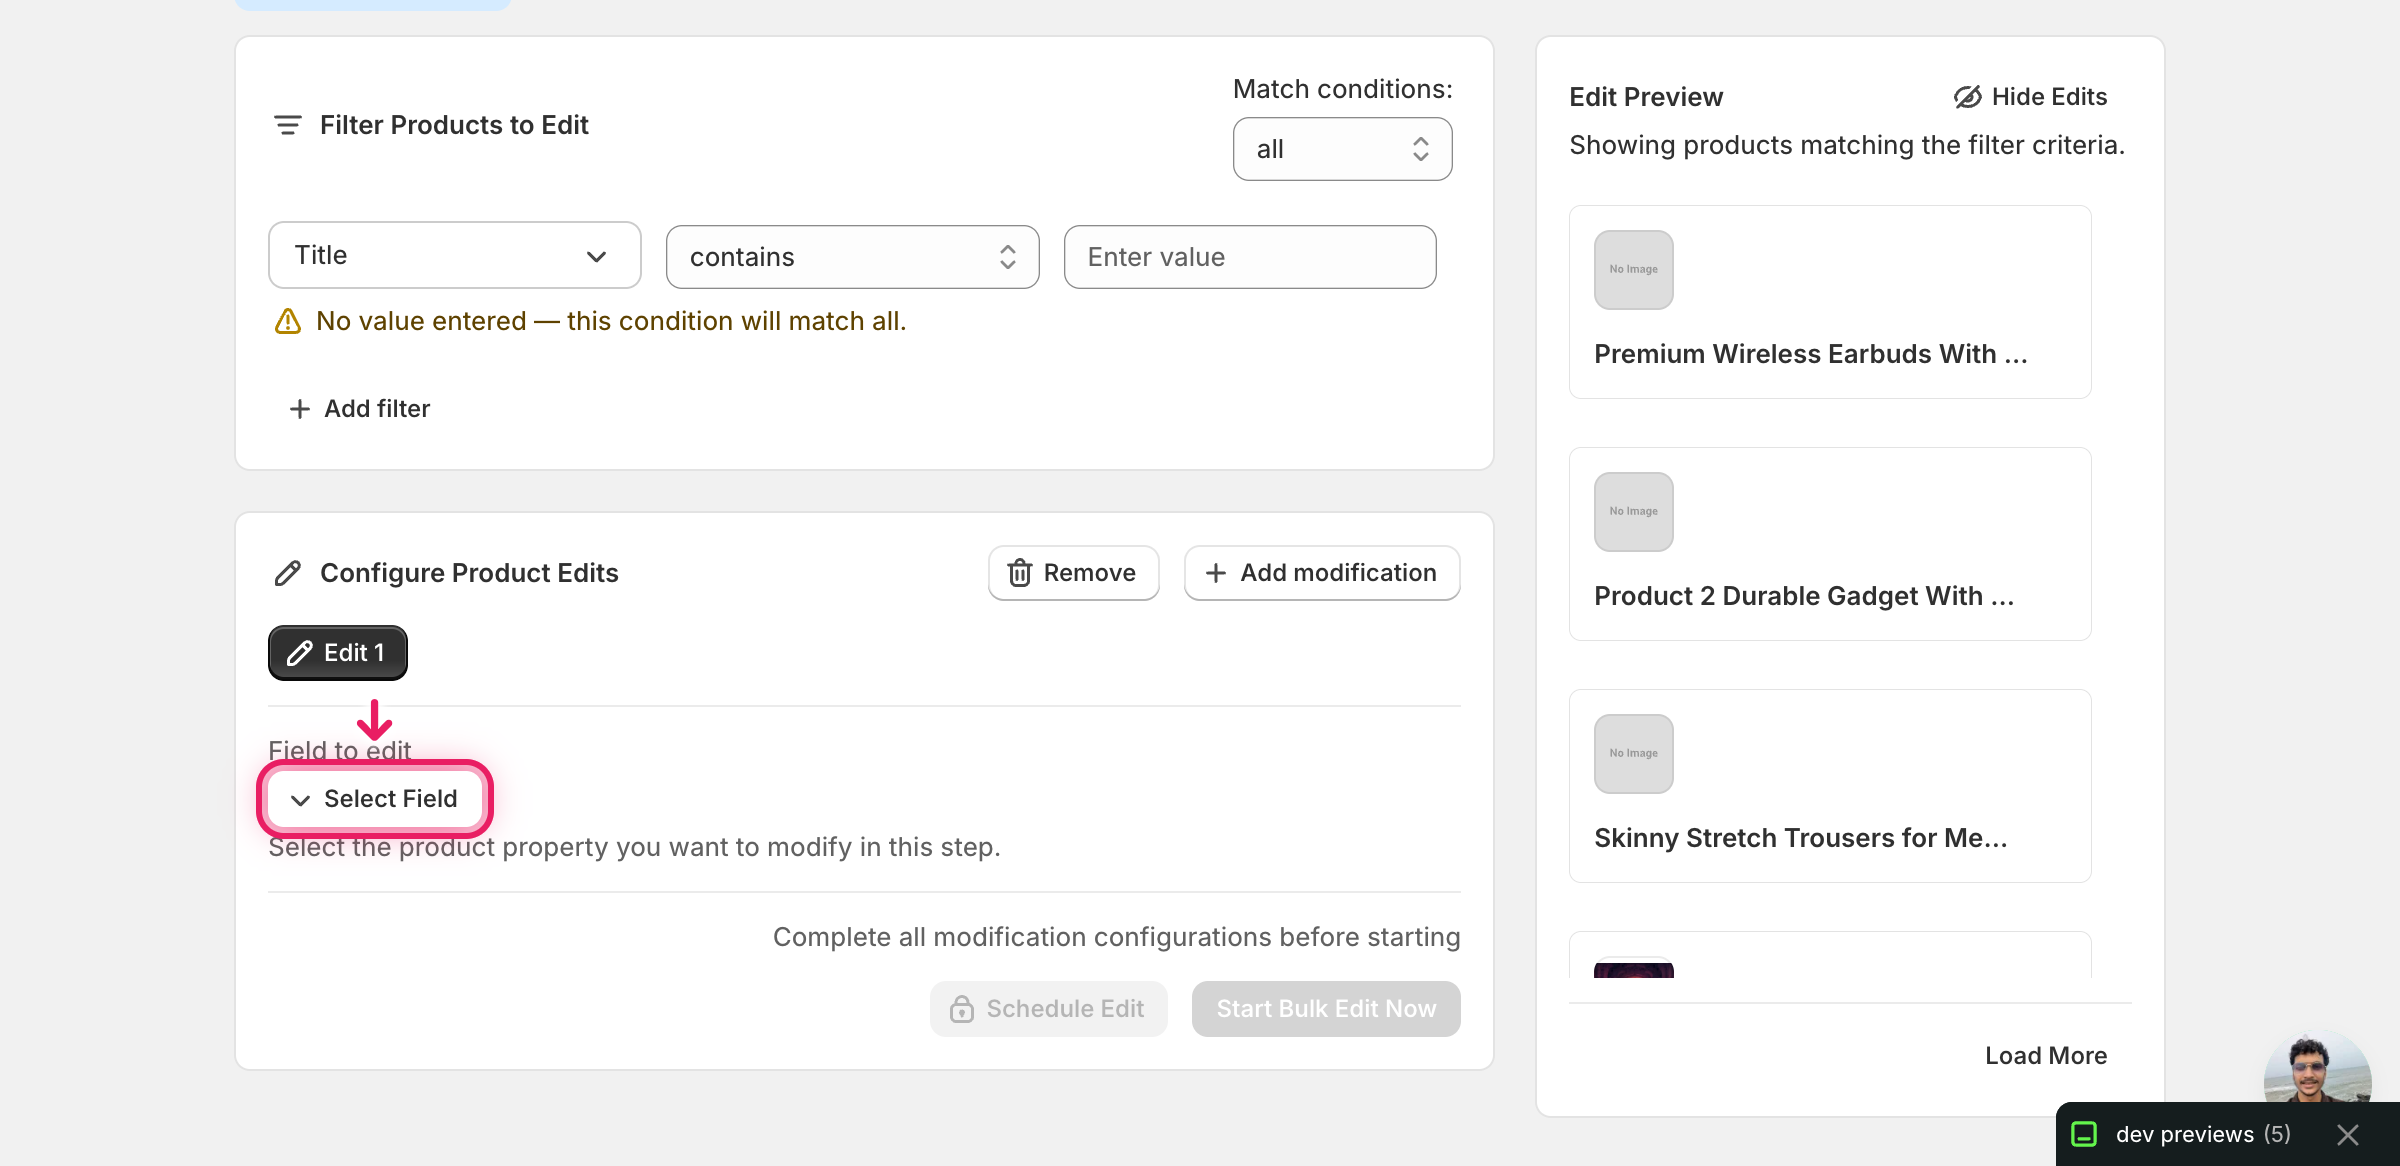
In the Configure Product Edits panel, click Select Field.
Step 2: Pick Update Product Options
The picker opens grouped by Product Fields, Variant Fields, Google Shopping, and metafield definitions. Update Product Options sits under Product Fields, near Create Product Options and Delete Product Options.
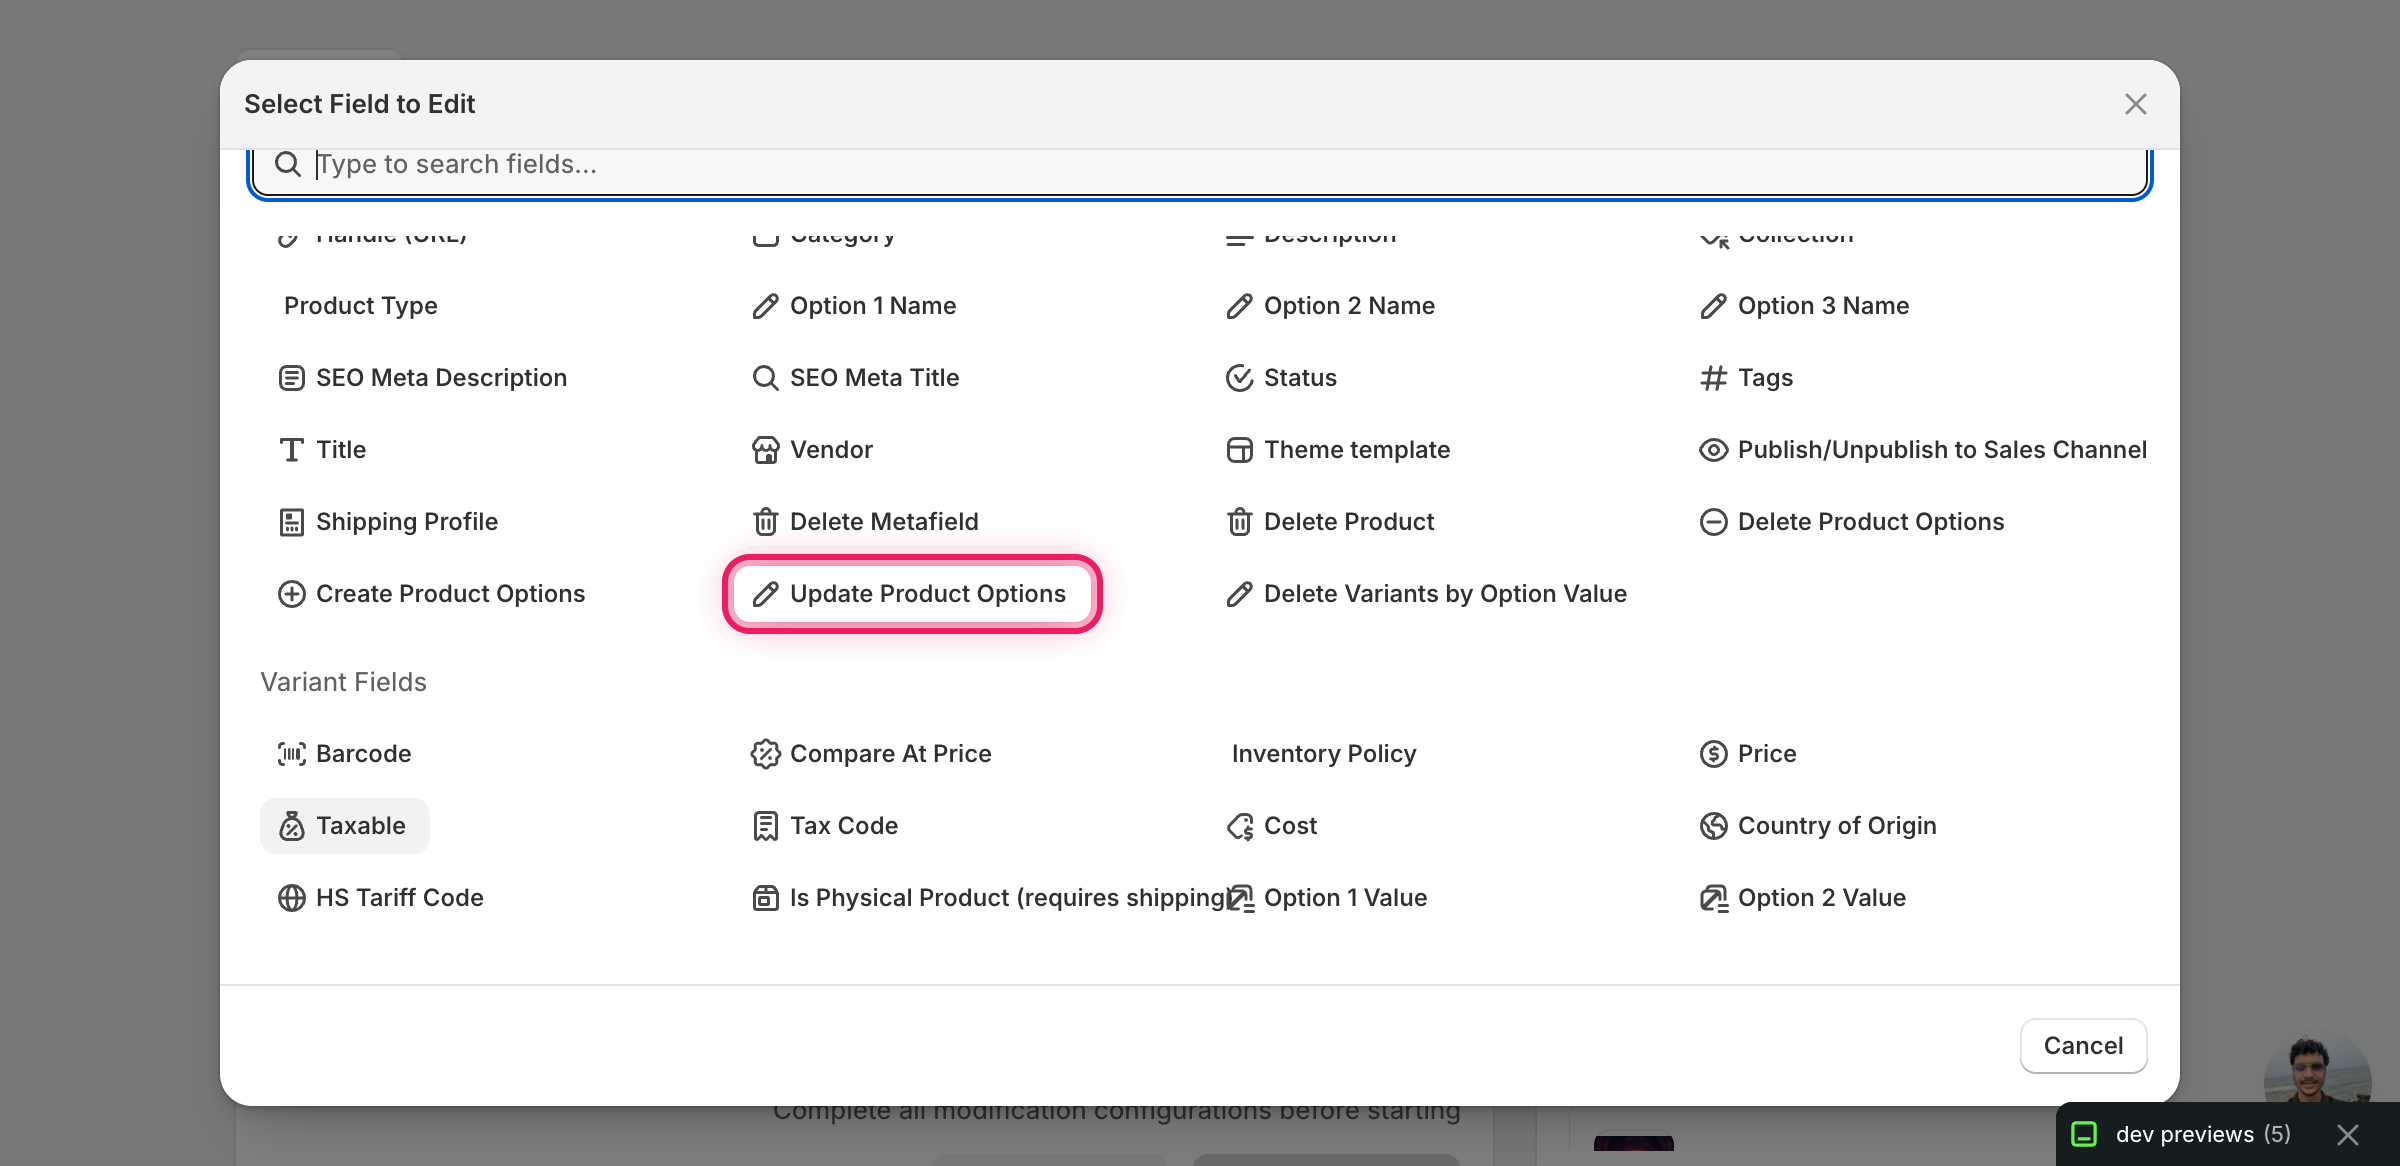
Click it. The configuration panel switches to Update Product Options with an Action Type dropdown defaulting to Rename Option.
Step 3: Choose what to do
The Action Type dropdown has two choices. They drive different inputs.
- Rename Option — change an option's name. The values stay the same.
- Add Values to Option — append one or more new values to an existing option. Existing values are kept.
Pick one, then fill in the inputs that appear.
Rename Option
Two text inputs:
- Option Name to Update — the current name, exactly as it sits on your products (case-sensitive).
- New Option Name — what you want to rename it to.
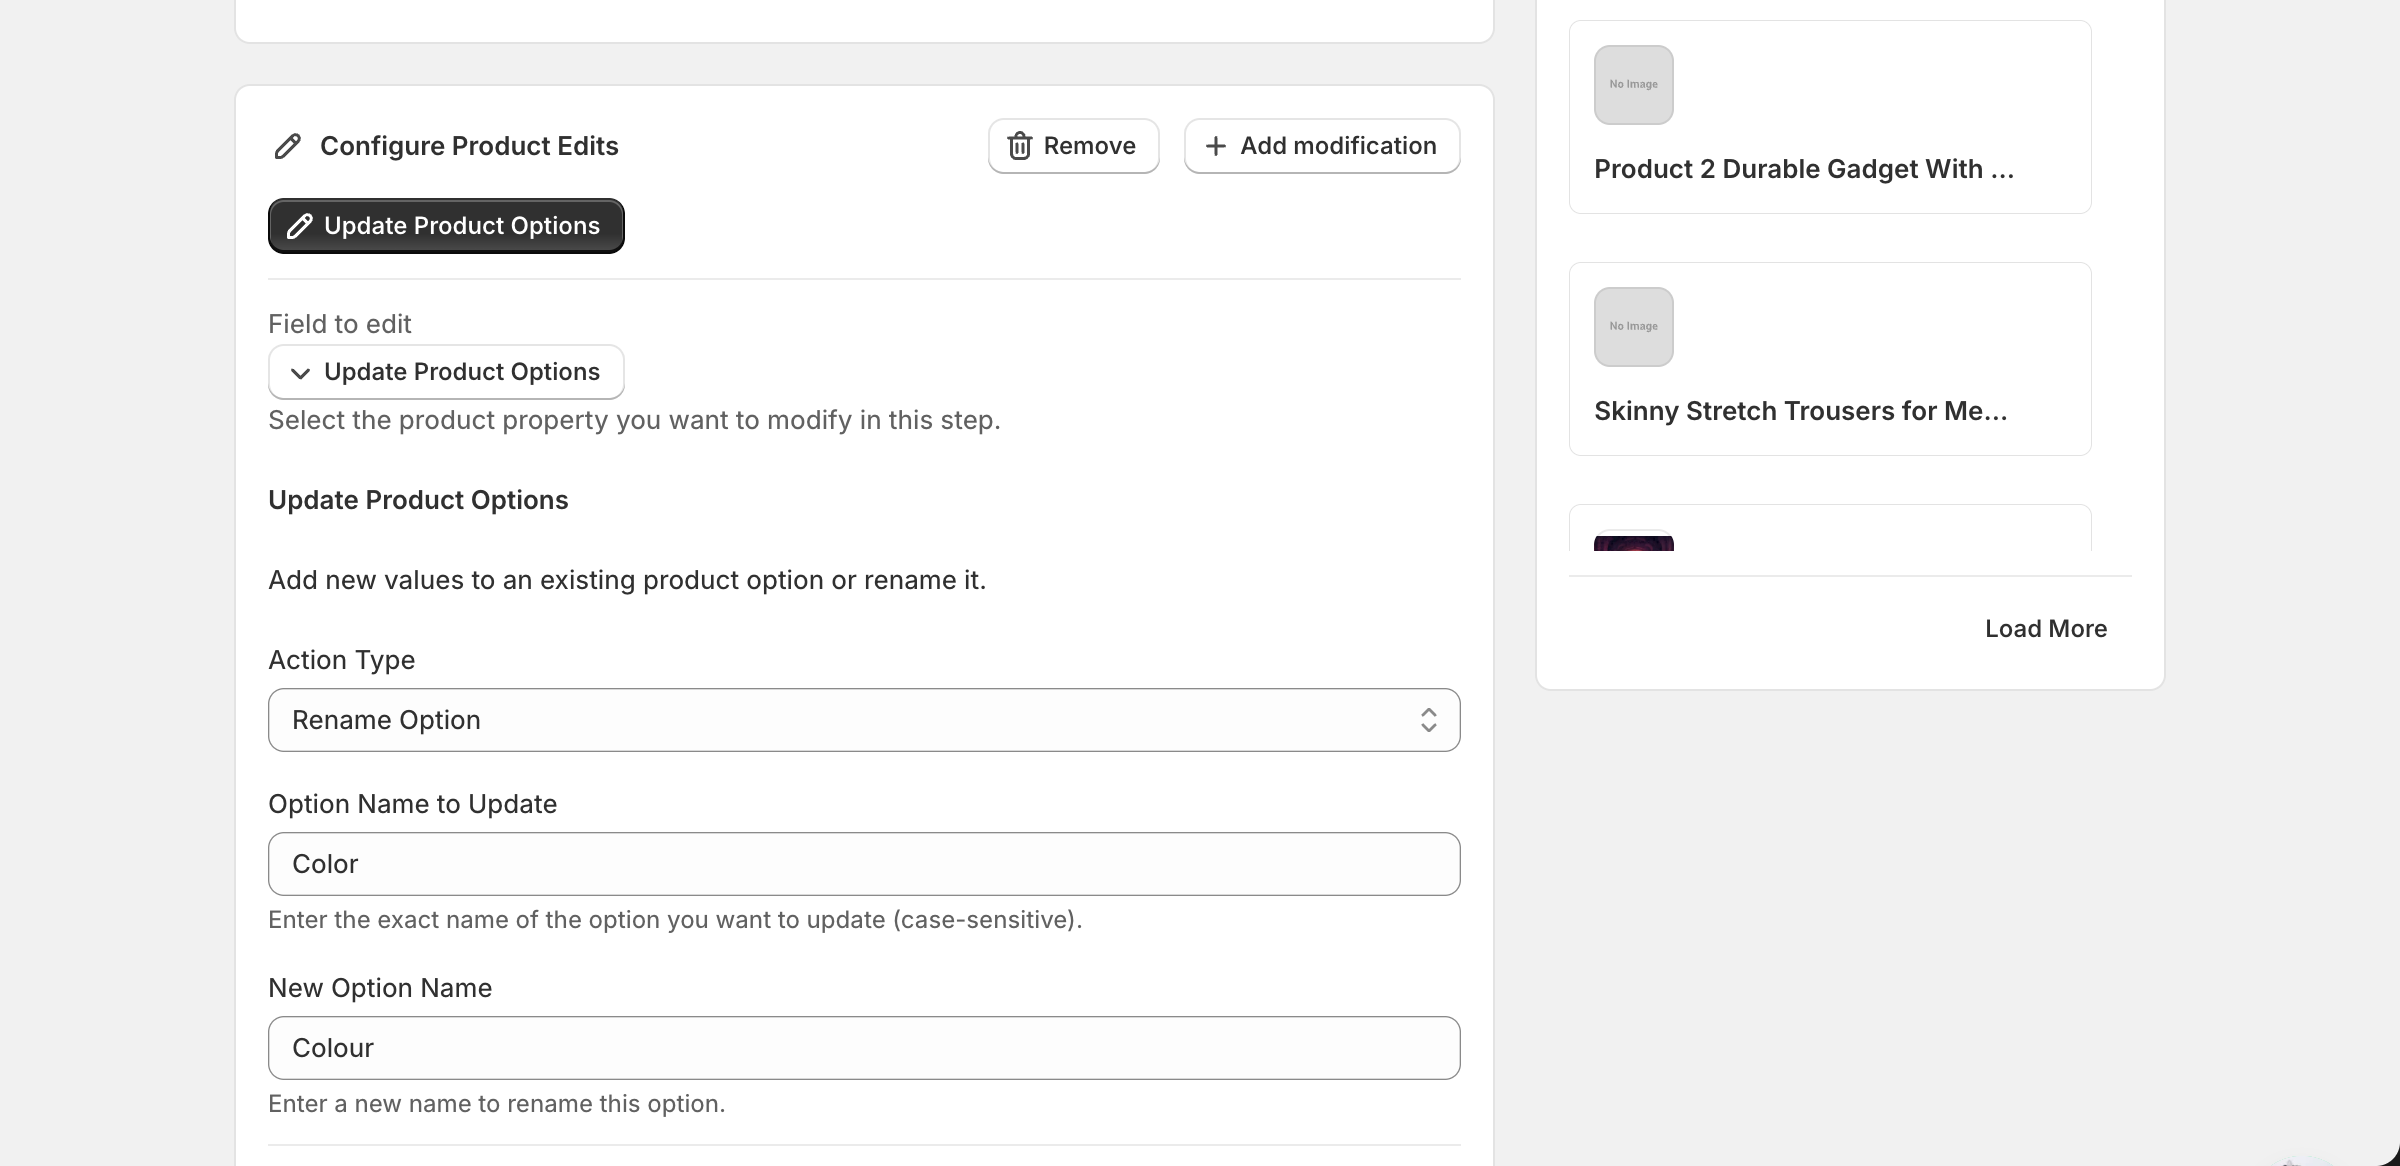
In this example, every matched product that has an option named Color will get that option renamed to Colour. Products with no Color option are skipped.
Add Values to Option
Two inputs:
- Option Name to Update — the existing option's name (case-sensitive).
- Values to Add — a comma- or newline-separated list of new values.
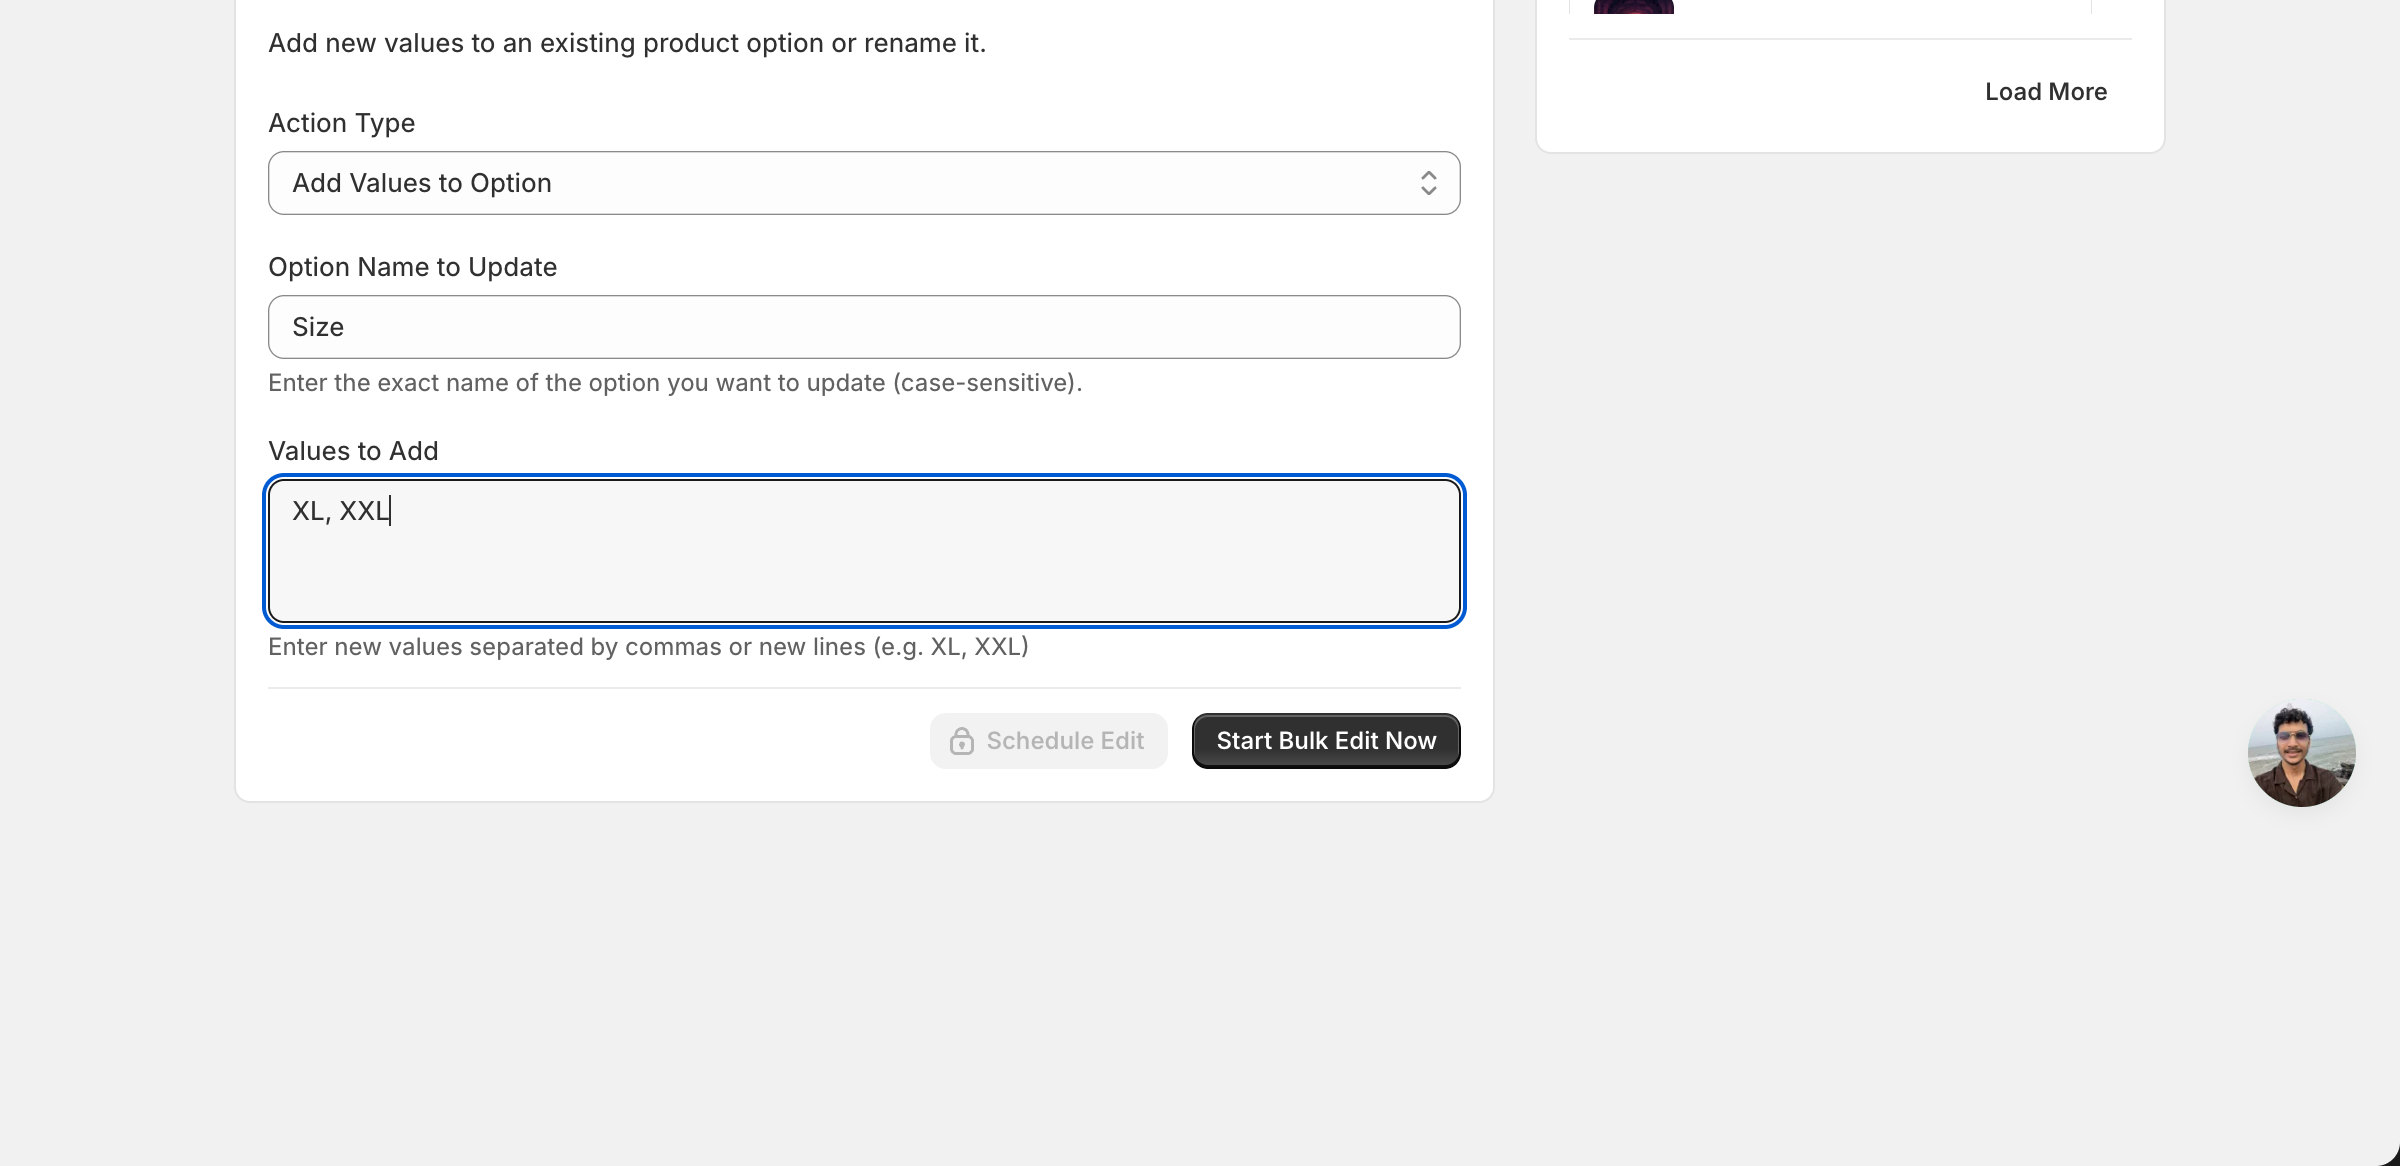
Adding XL, XXL to Size gives every matched product that has a Size option two new variant values appended. Existing values (S, M, L, etc.) are not touched.
No new variants are created. Adding option values just expands the list of allowed values for that option. To create the variant rows themselves, use Create Product Options instead, or edit the products in Shopify after the values are added.
Step 4: Filter, preview, run
Above the configuration panel, the Filter Products to Edit section narrows down which products are touched. The Edit Preview on the right shows which products in your filter currently match — useful for confirming you're only hitting the right catalog slice before running anything.
When everything looks right, click Start Bulk Edit Now. EditEngine queues a bulk job, applies the change to every matching product, and writes a record to History.
After the run
- The change is logged on the History page. Option updates can be reverted by creating a new edit — for example, rename
Colourback toColor, or run a separate edit to remove specific values. - Products without a matching option name are silently skipped — they don't fail the run, they just aren't touched. If counts seem off, check the option name spelling and case.
- Renames don't break existing variants. Variant option values (Red, Blue, Small) stay attached to the renamed option.
Frequently asked questions
How do I rename a product option like Color to Colour across my whole Shopify catalog?
Use EditEngine's Update Product Options action under Product Fields. Choose Rename Option, type the current name in Option Name to Update — exactly as it appears on your products, since matching is case-sensitive — and enter the new name. Every matched product with that option gets it renamed in one run, and variant values stay attached to the renamed option.
How can I add values like XL and XXL to the Size option on many Shopify products?
Pick Update Product Options in EditEngine and set the Action Type to Add Values to Option. Enter Size as the option name and list XL, XXL in Values to Add, separated by commas or new lines. The new values are appended to every matched product that has a Size option; existing values like S, M, and L are not touched.
Does adding option values in bulk create new variants in Shopify?
No. Adding option values only expands the list of allowed values for that option — no new variant rows are created. If you need the variants themselves, use the Create Product Options action instead, or edit the products in Shopify admin after the values have been added.
Why did some Shopify products not get updated when I bulk edited an option?
The action targets an option by its exact name, and matching is case-sensitive — Color and color are different. Products without an option of that name are silently skipped; they do not fail the run, they just are not touched. If counts seem off, check the option name spelling and case.
Can I preview which Shopify products a bulk option update will touch?
Yes. The Filter Products to Edit section narrows down which products are touched, and the Edit Preview shows which products in your filter currently match before you run anything. When you click Start Bulk Edit Now, EditEngine queues a bulk job, applies the change to every matching product, and writes a record to the History page.