Products
How to Bulk Edit Status
Last updated
A product's status decides whether shoppers can see it. Use the EditEngine bulk editor to switch many products between Active, Draft, Archived, or Unlisted in a single run — no Shopify spreadsheet exports, no clicking each product one by one.
Status is a product field. One status per product (variants don't have a status), so each matched product gets a single update.
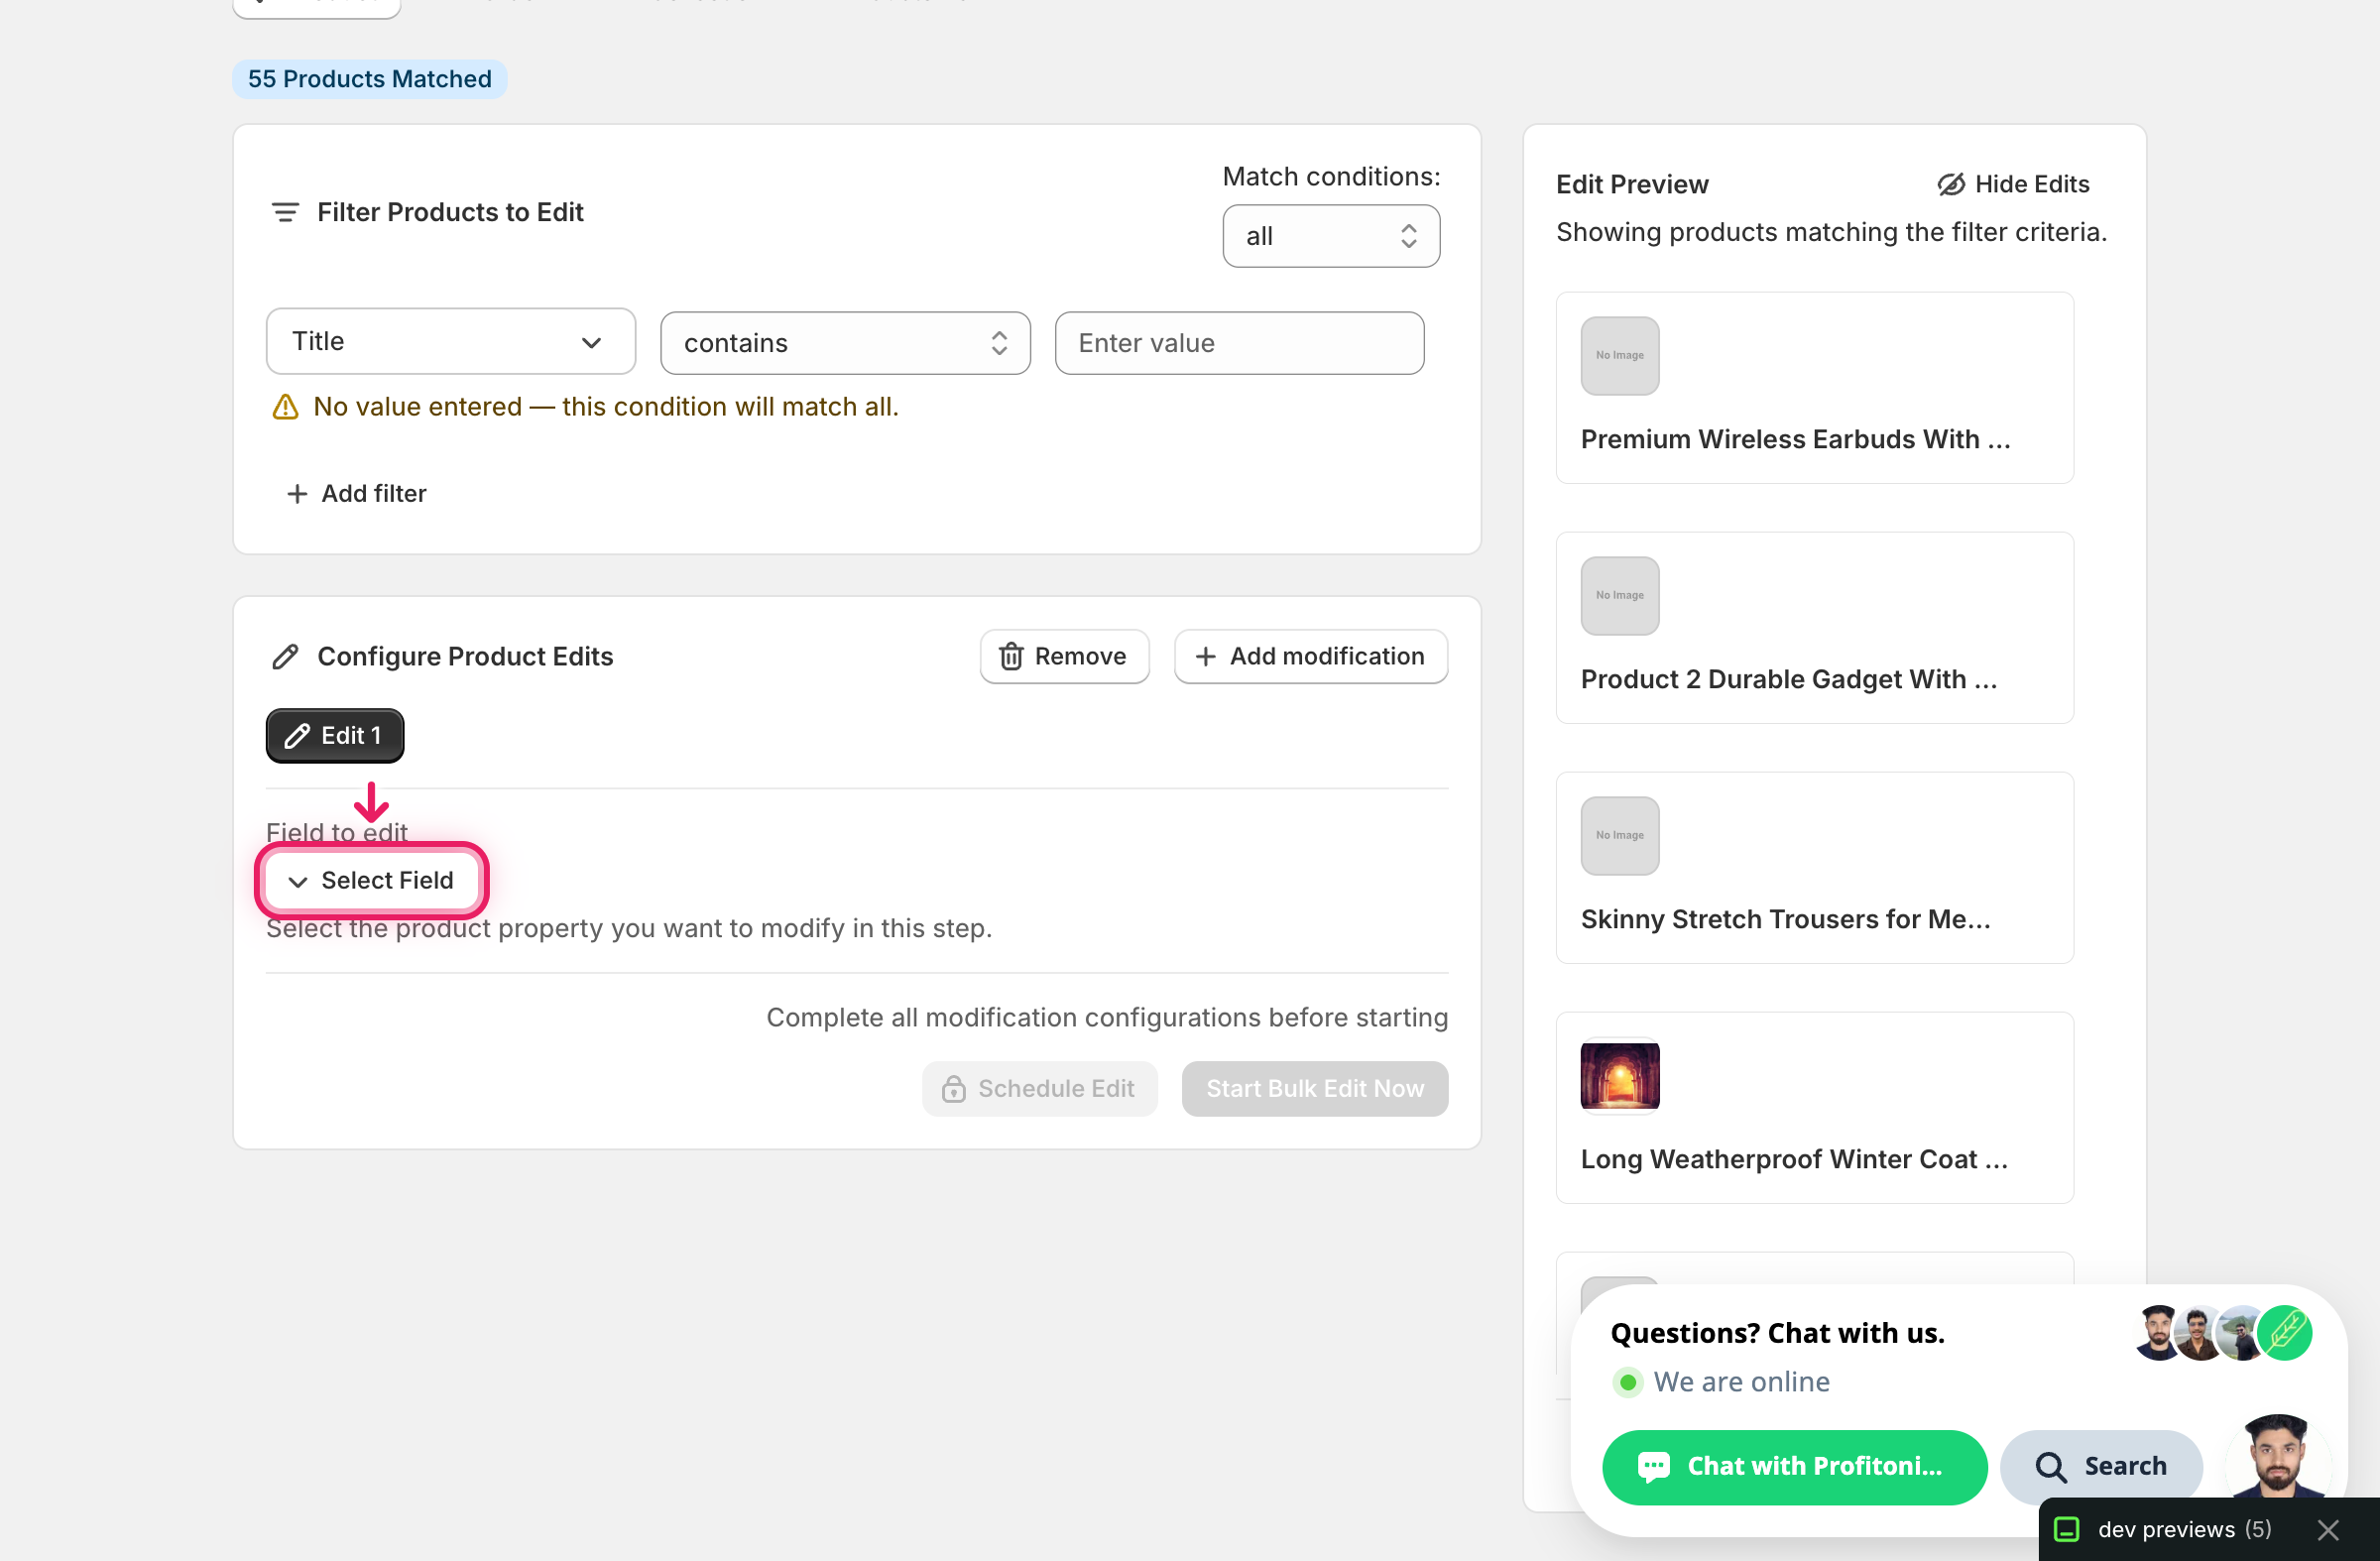
Step 1: Pick the Status field
In the Configure Product Edits panel, click Select Field.
The Select Field modal opens. Status lives under Product Fields.
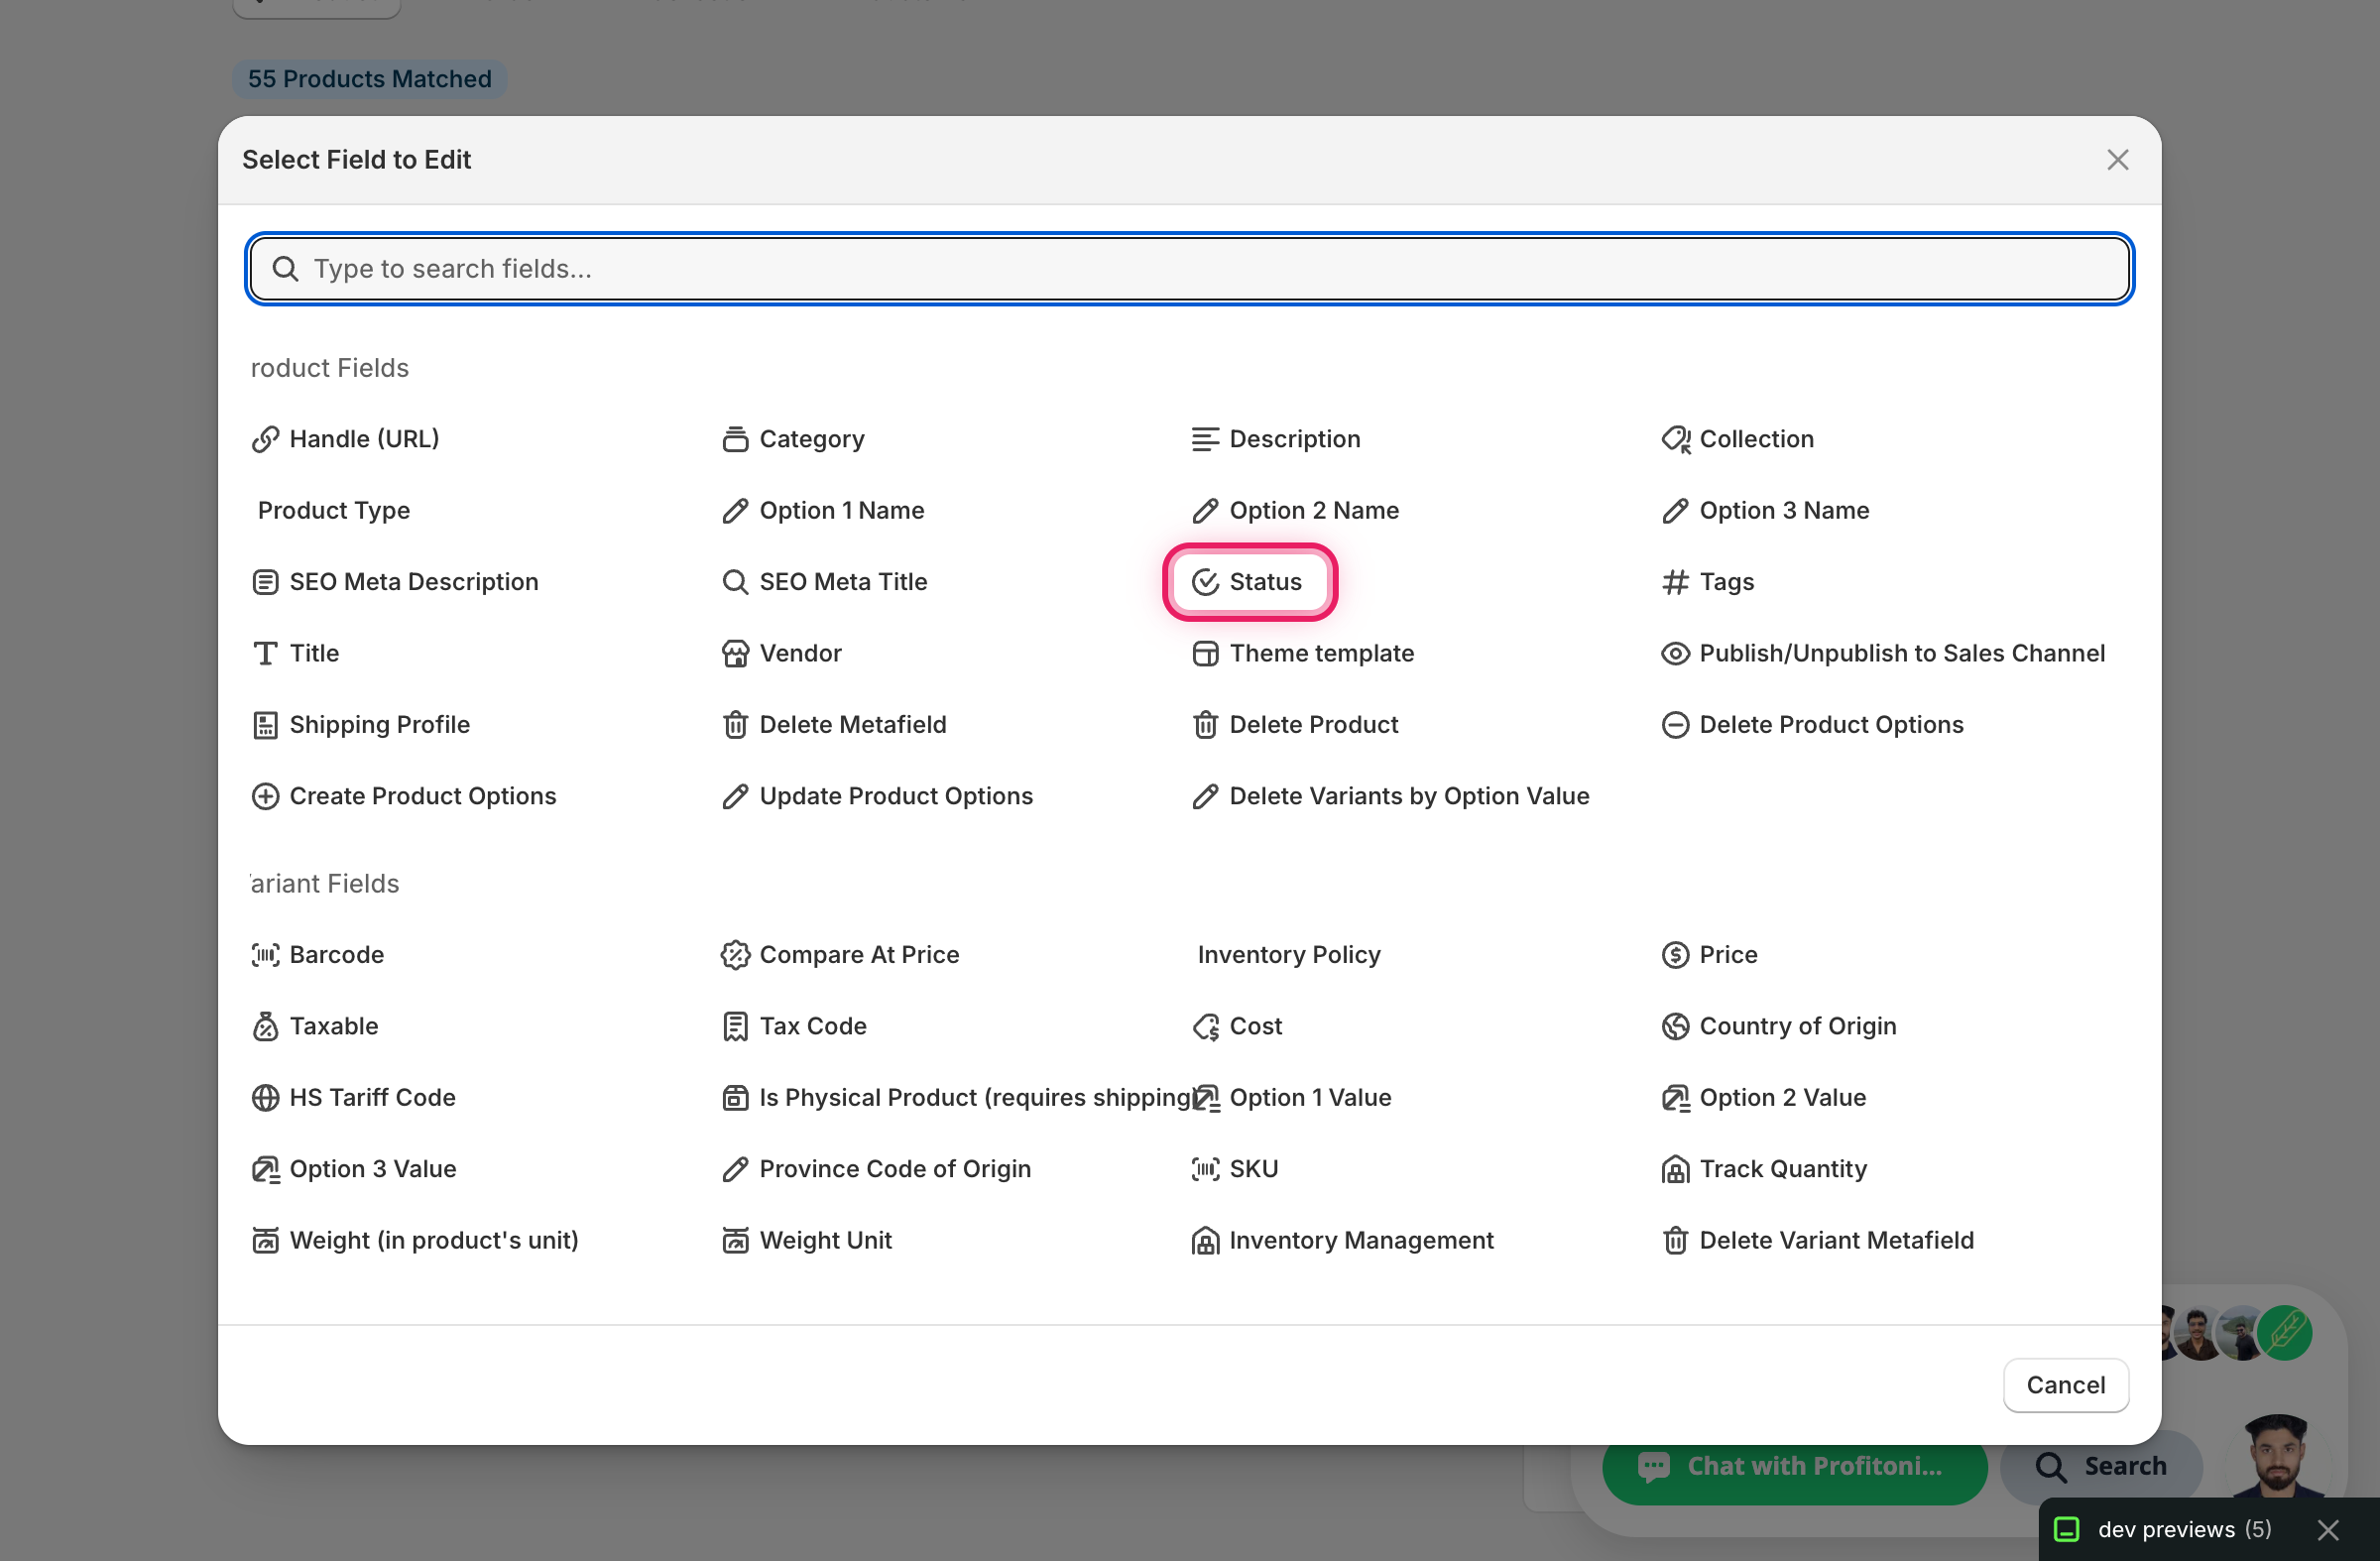
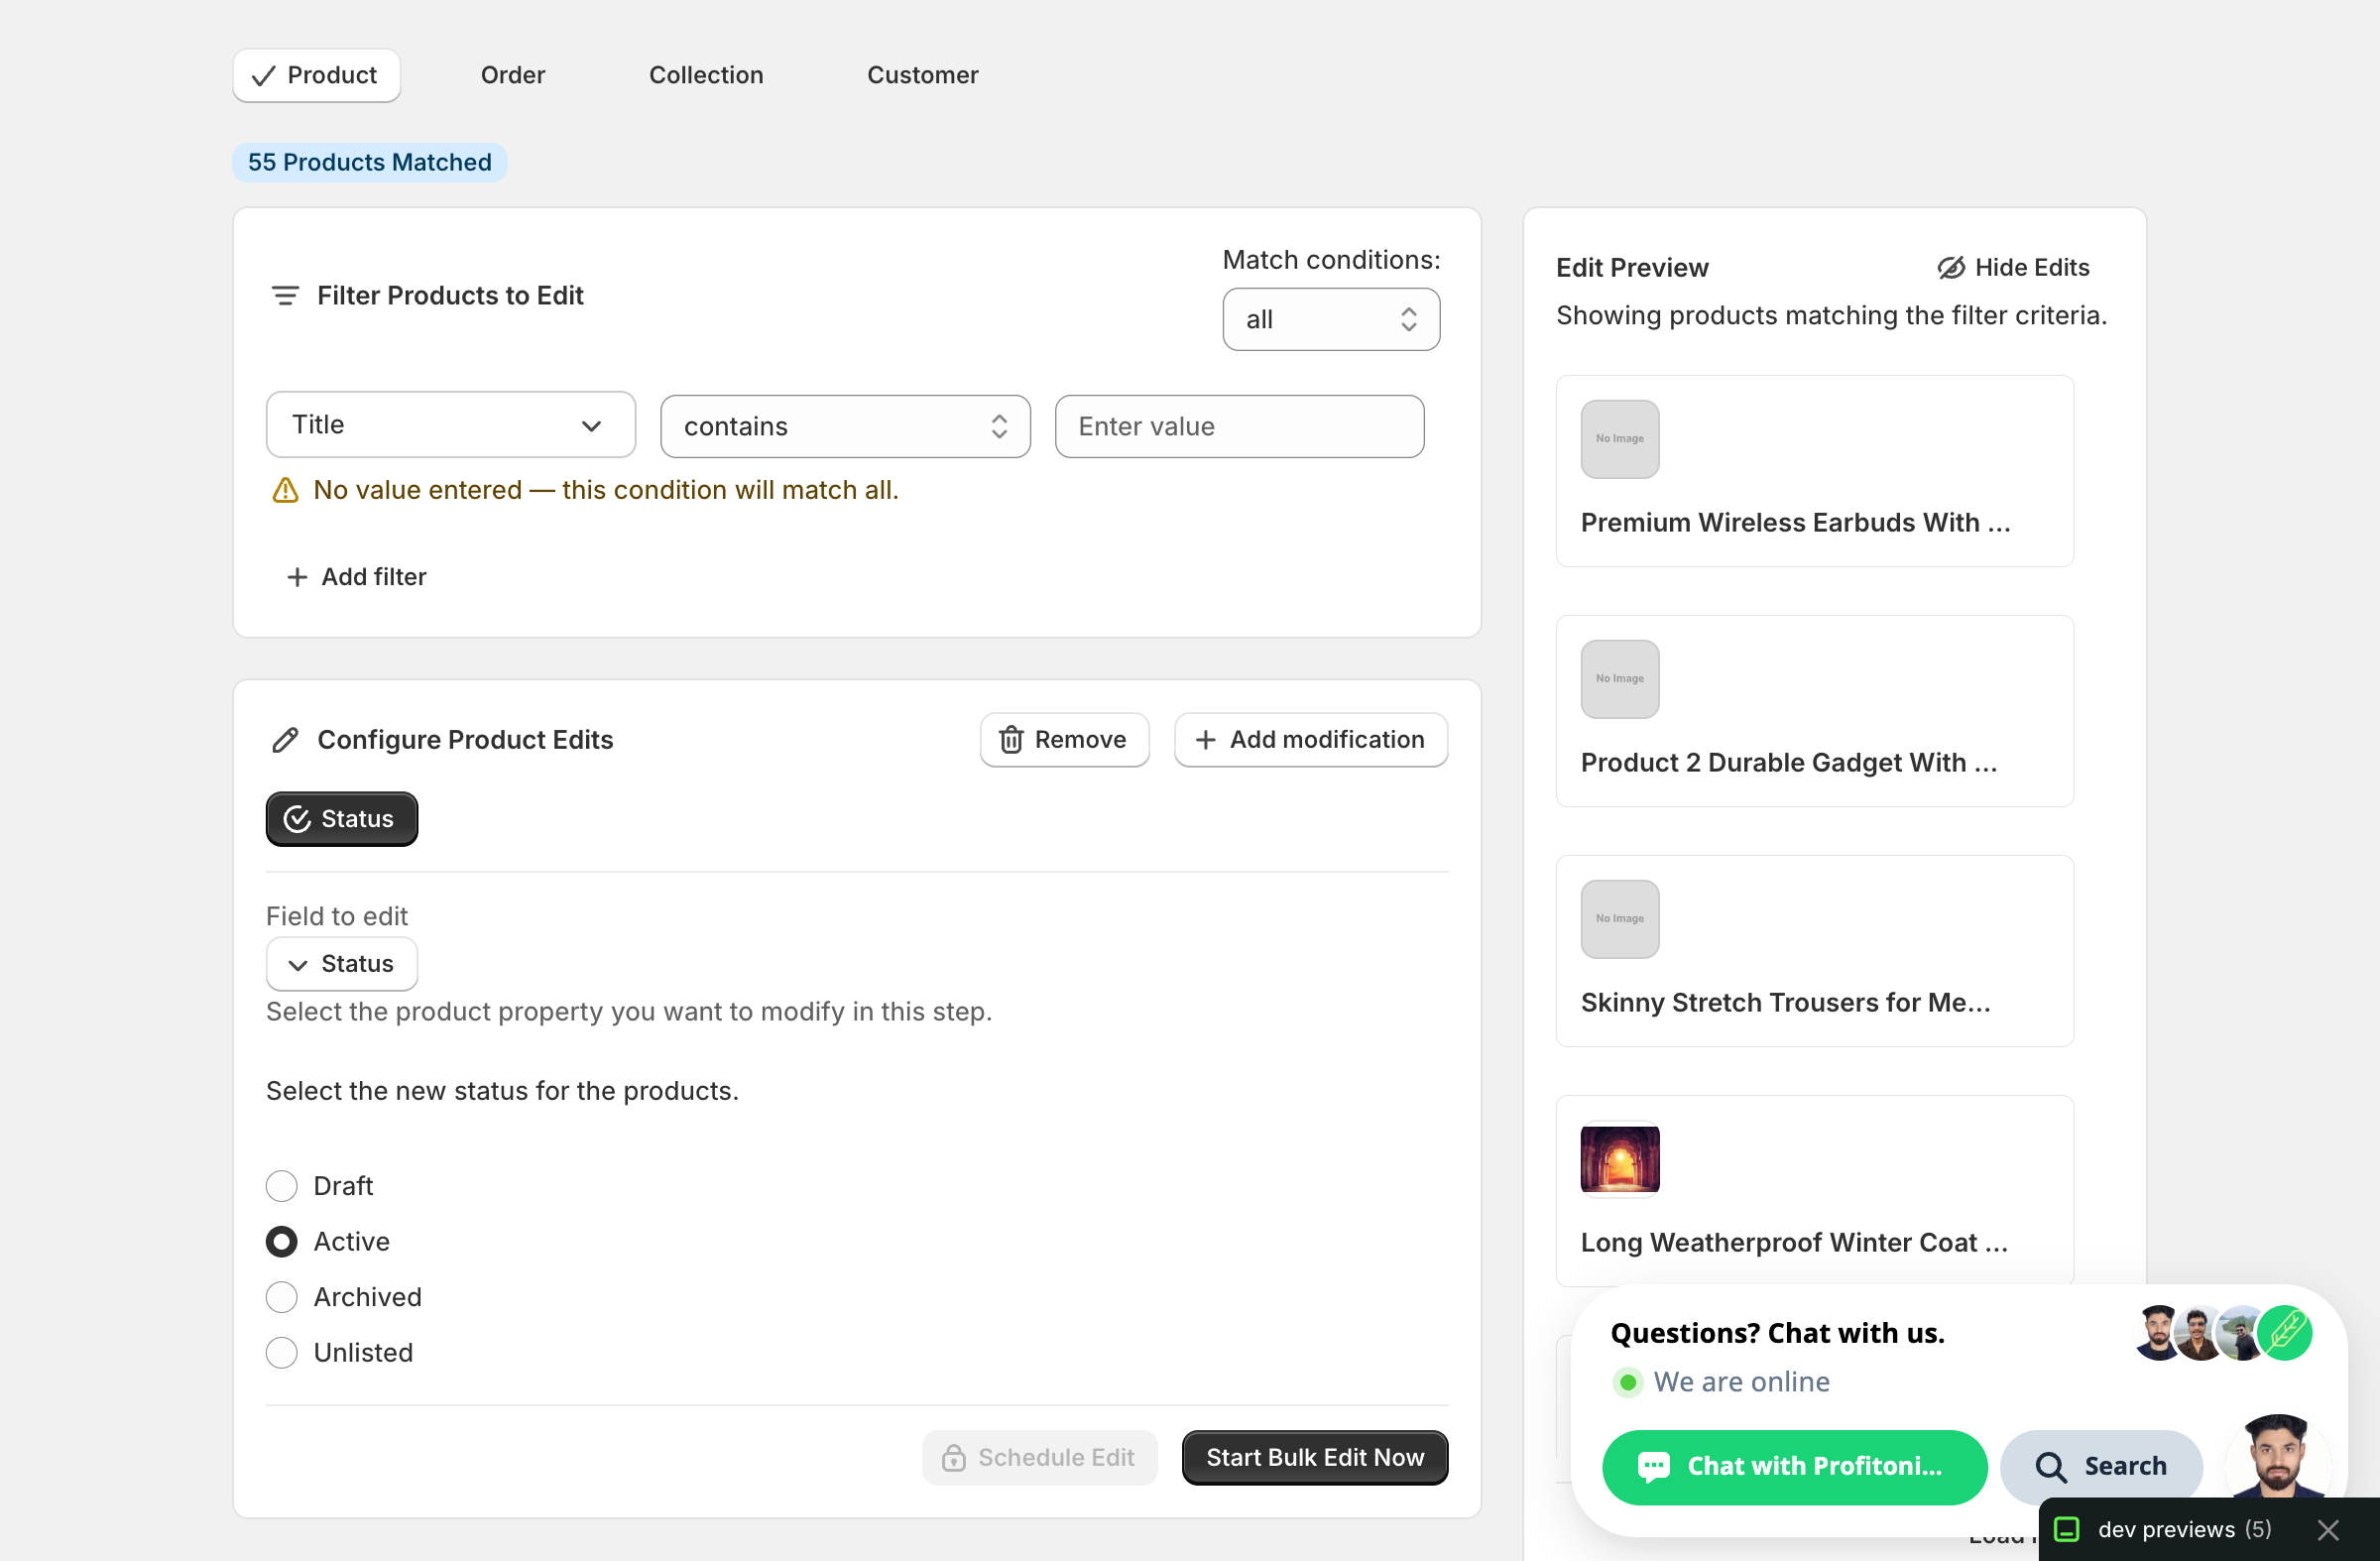
Click Status. The configuration panel switches to a Status chooser with four radio options.
Step 2: Pick the new status
There's only one action here — set the status to a value. Pick one of the four options:
- Draft — product is hidden from the storefront and sales channels. Use this to take items off-sale while you finish editing them.
- Active — product is published and orderable on every channel it's enabled for. The default for most products.
- Archived — product is hidden everywhere and removed from active inventory views, but the record stays for reporting and re-activation later. Better than deleting if you might bring it back.
- Unlisted — product is hidden from search and collections but accessible if someone has the direct URL. Only relevant on stores that use unlisted products; many Shopify plans treat this the same as Draft.
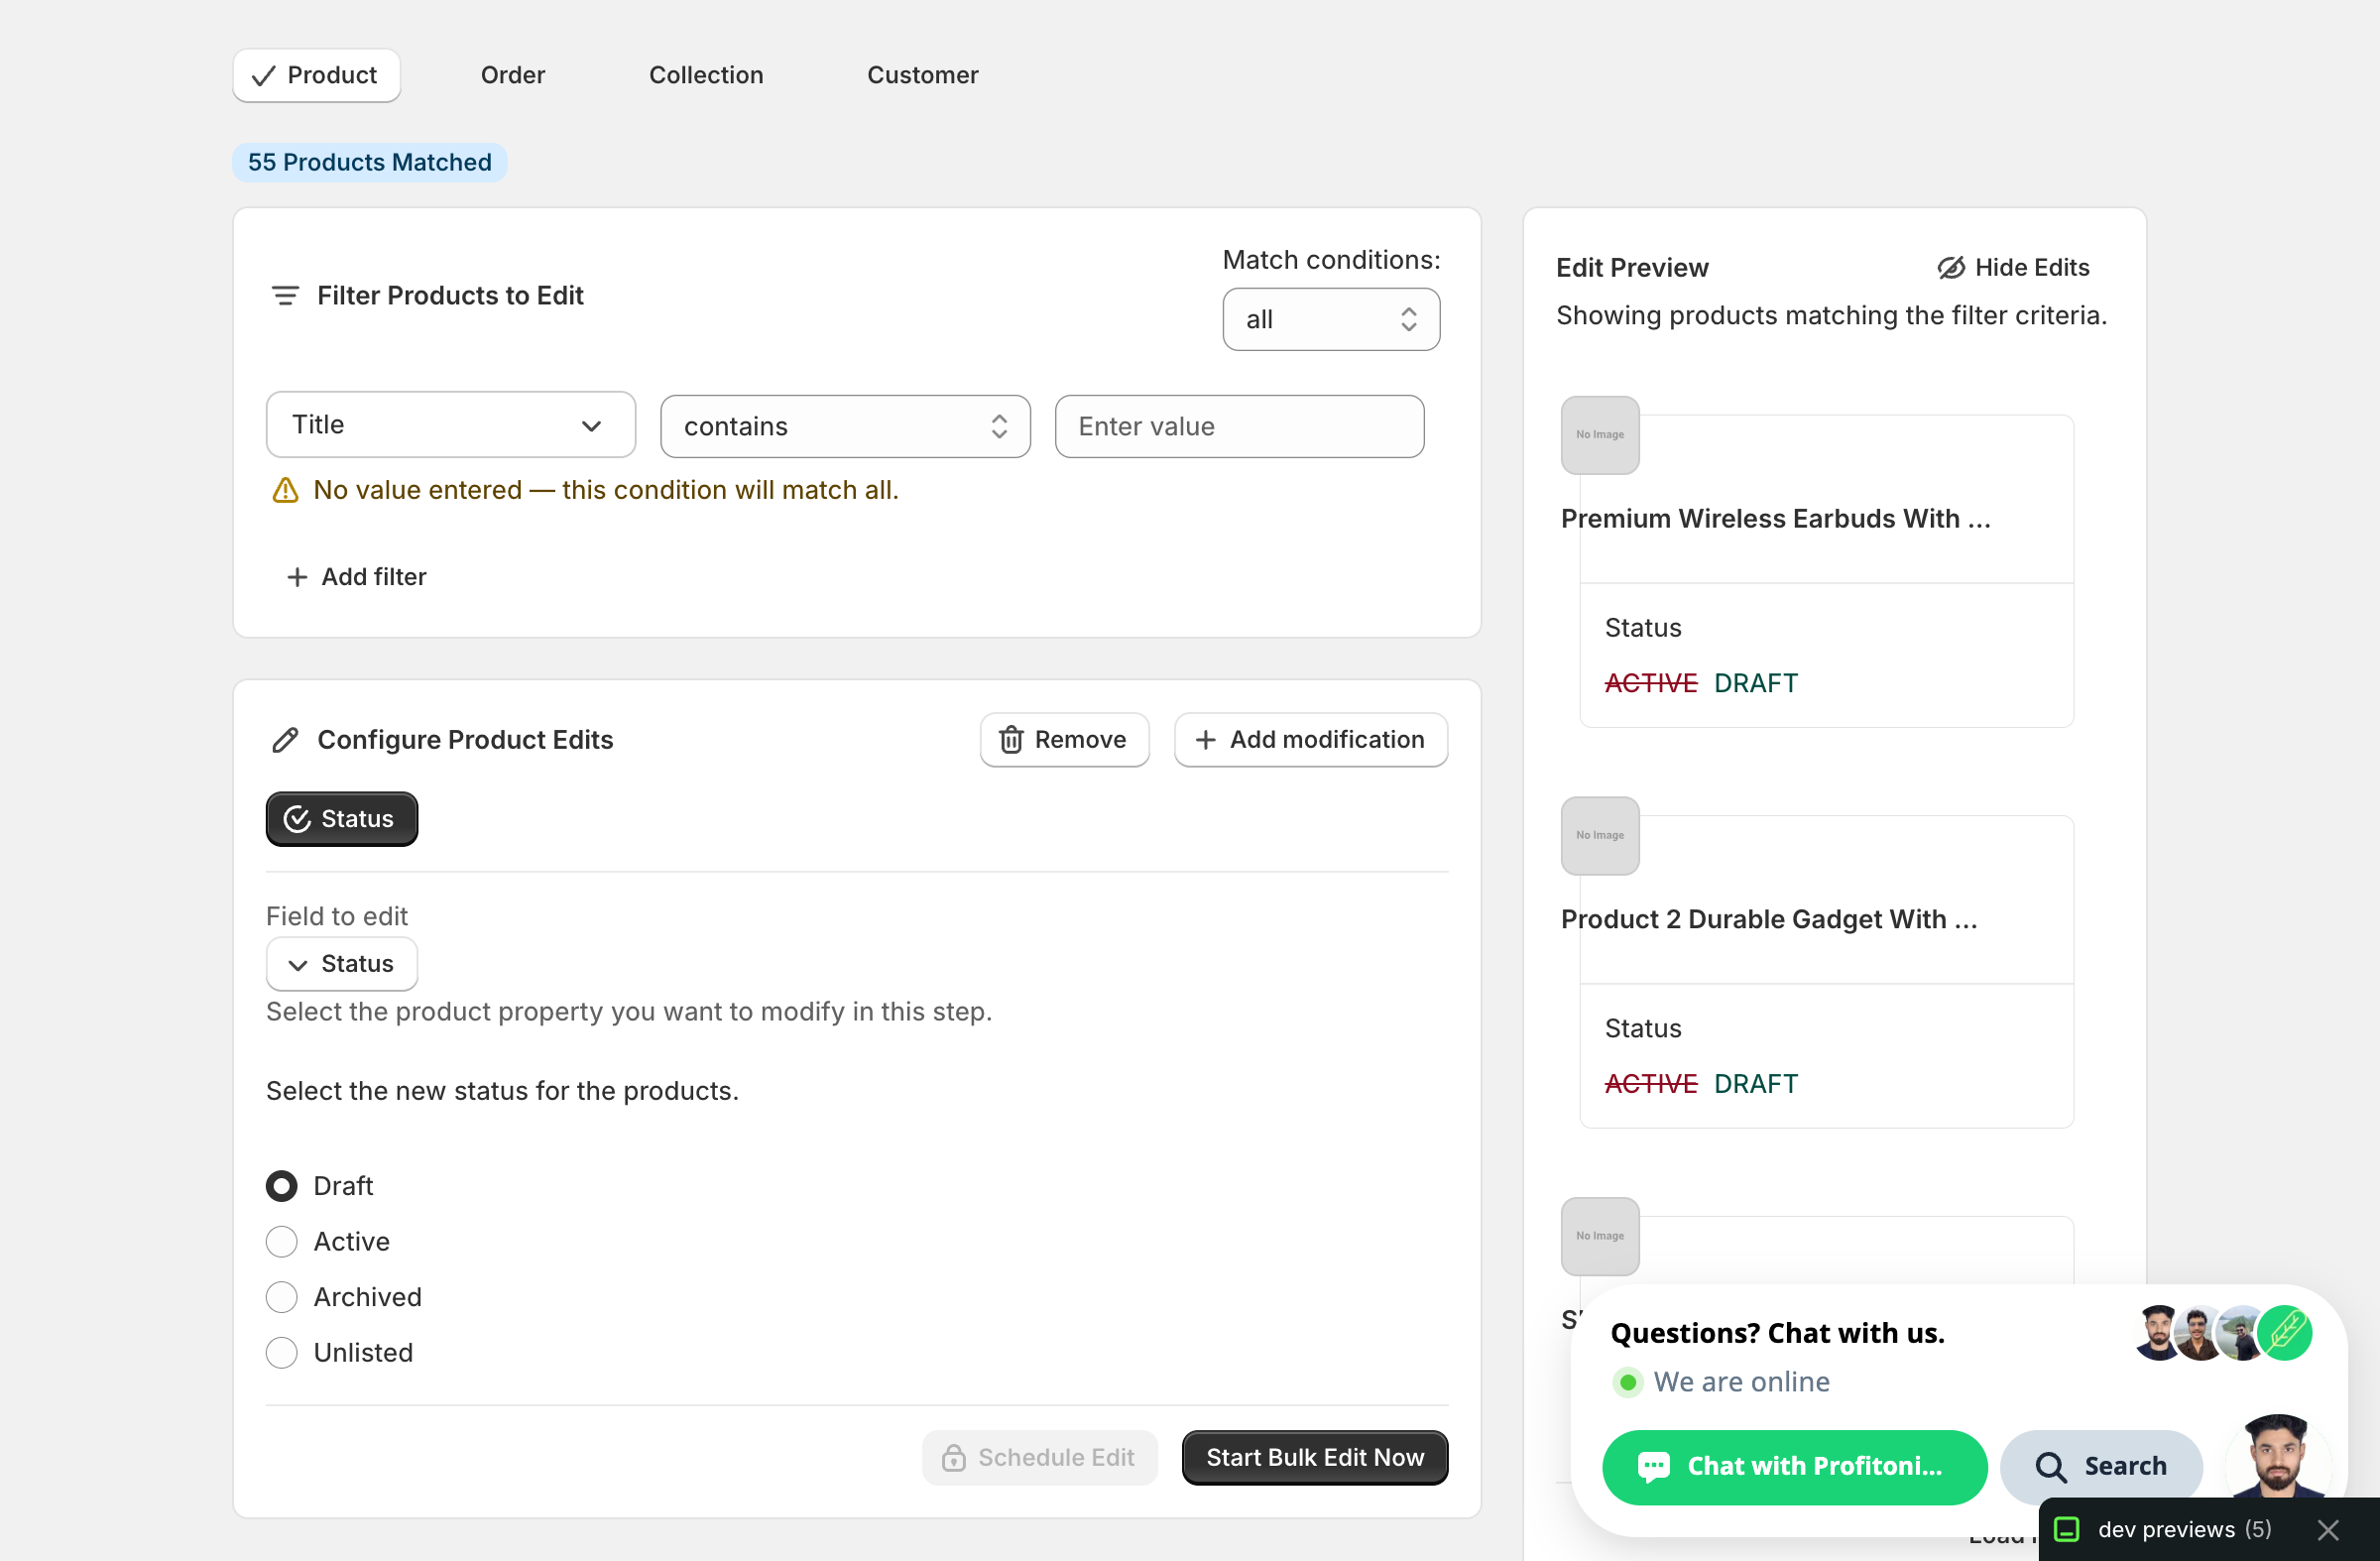
The Edit Preview on the right resolves the change for every matched product so you can confirm before running. Each card shows the current status struck through with the new status next to it.
Active and Draft are the two you'll use most. Archive when you're winding products down. Unlisted is rarely the right pick — most merchants want Draft.
Step 3: Run the edit
Once you've picked a status, the Start Bulk Edit Now button activates. Click it to apply the change to every product matched by your filter.
You can also click Schedule Edit to run it later — handy for kicking off a sale at midnight or unpublishing seasonal items on a set date.
After the run
- Status changes are reversible from the History page using Undo — your original statuses are stored, so flipping a batch from Active to Draft and back is one click.
- Switching to Draft, Archived, or Unlisted removes products from the storefront immediately. Customers in checkout for those products may hit errors; pick a low-traffic time if you're moving live SKUs.
- Switching to Active publishes the products to every sales channel they're already enabled for. It does not add channels — if a product was never enabled on, say, the Online Store, setting it Active won't fix that.
- Re-running the same edit is safe — setting an already-Draft product to Draft is a no-op.
Tip for Shopify merchants new to bulk editing: combine Status with the filter conditions at the top of the page (price ranges, vendor, tags, collection membership) so you only flip the products you actually mean to. The Edit Preview shows exactly which products will change before you click run.
Frequently asked questions
How do I change the status of hundreds of Shopify products at once?
In EditEngine, open the Configure Product Edits panel, click Select Field, and choose Status under Product Fields. Pick Draft, Active, Archived, or Unlisted, then click Start Bulk Edit Now to apply the change to every product matched by your filter — no spreadsheet exports and no clicking each product one by one.
Can I undo a bulk status change in Shopify?
Yes. Status changes are reversible from EditEngine's History page using Undo. Your original statuses are stored, so flipping a batch from Active to Draft and back is one click. Re-running the same edit is also safe — setting an already-Draft product to Draft is a no-op.
Should I set old Shopify products to Draft or Archived?
Use Draft to take items off-sale while you finish editing them. Archived hides the product everywhere and removes it from active inventory views, but the record stays for reporting and re-activation later — better than deleting if you might bring it back. Use Archived when you're winding products down for good.
Does setting a Shopify product to Active publish it to every sales channel?
No. Setting Active publishes the product to every sales channel it's already enabled for, but it does not add channels. If a product was never enabled on the Online Store, setting it Active won't fix that — channel availability has to be granted separately.
Can I schedule a Shopify bulk status change to run at a specific time?
Yes. Instead of clicking Start Bulk Edit Now, click Schedule Edit to queue the run for later — handy for kicking off a sale at midnight or unpublishing seasonal items on a set date. Since moving products to Draft removes them from the storefront immediately, pick a low-traffic time for live SKUs.