Products
How to Bulk Edit SEO Meta Title
Last updated
The SEO meta title is the headline Google and other search engines show in the results page, and what browsers put in the tab. Shopify falls back to the product title when this field is blank, so most stores benefit from setting it explicitly. This EditEngine guide shows how to set it outright, append a brand or location, find-and-replace boilerplate, or trim long titles down to the recommended 70 characters — across as many products as you need in one bulk edit.
SEO Meta Title is a product field. One value per product (variants don't have their own SEO title), so each matched product gets a single update.
EditEngine is shopify app, bulk editor for product fields, so all the actions below run server-side and respect Shopify's product update rules.
Step 1: Pick the SEO Meta Title field
In the Configure Product Edits panel, click Select Field.

The Select Field modal opens. SEO Meta Title lives under Product Fields.
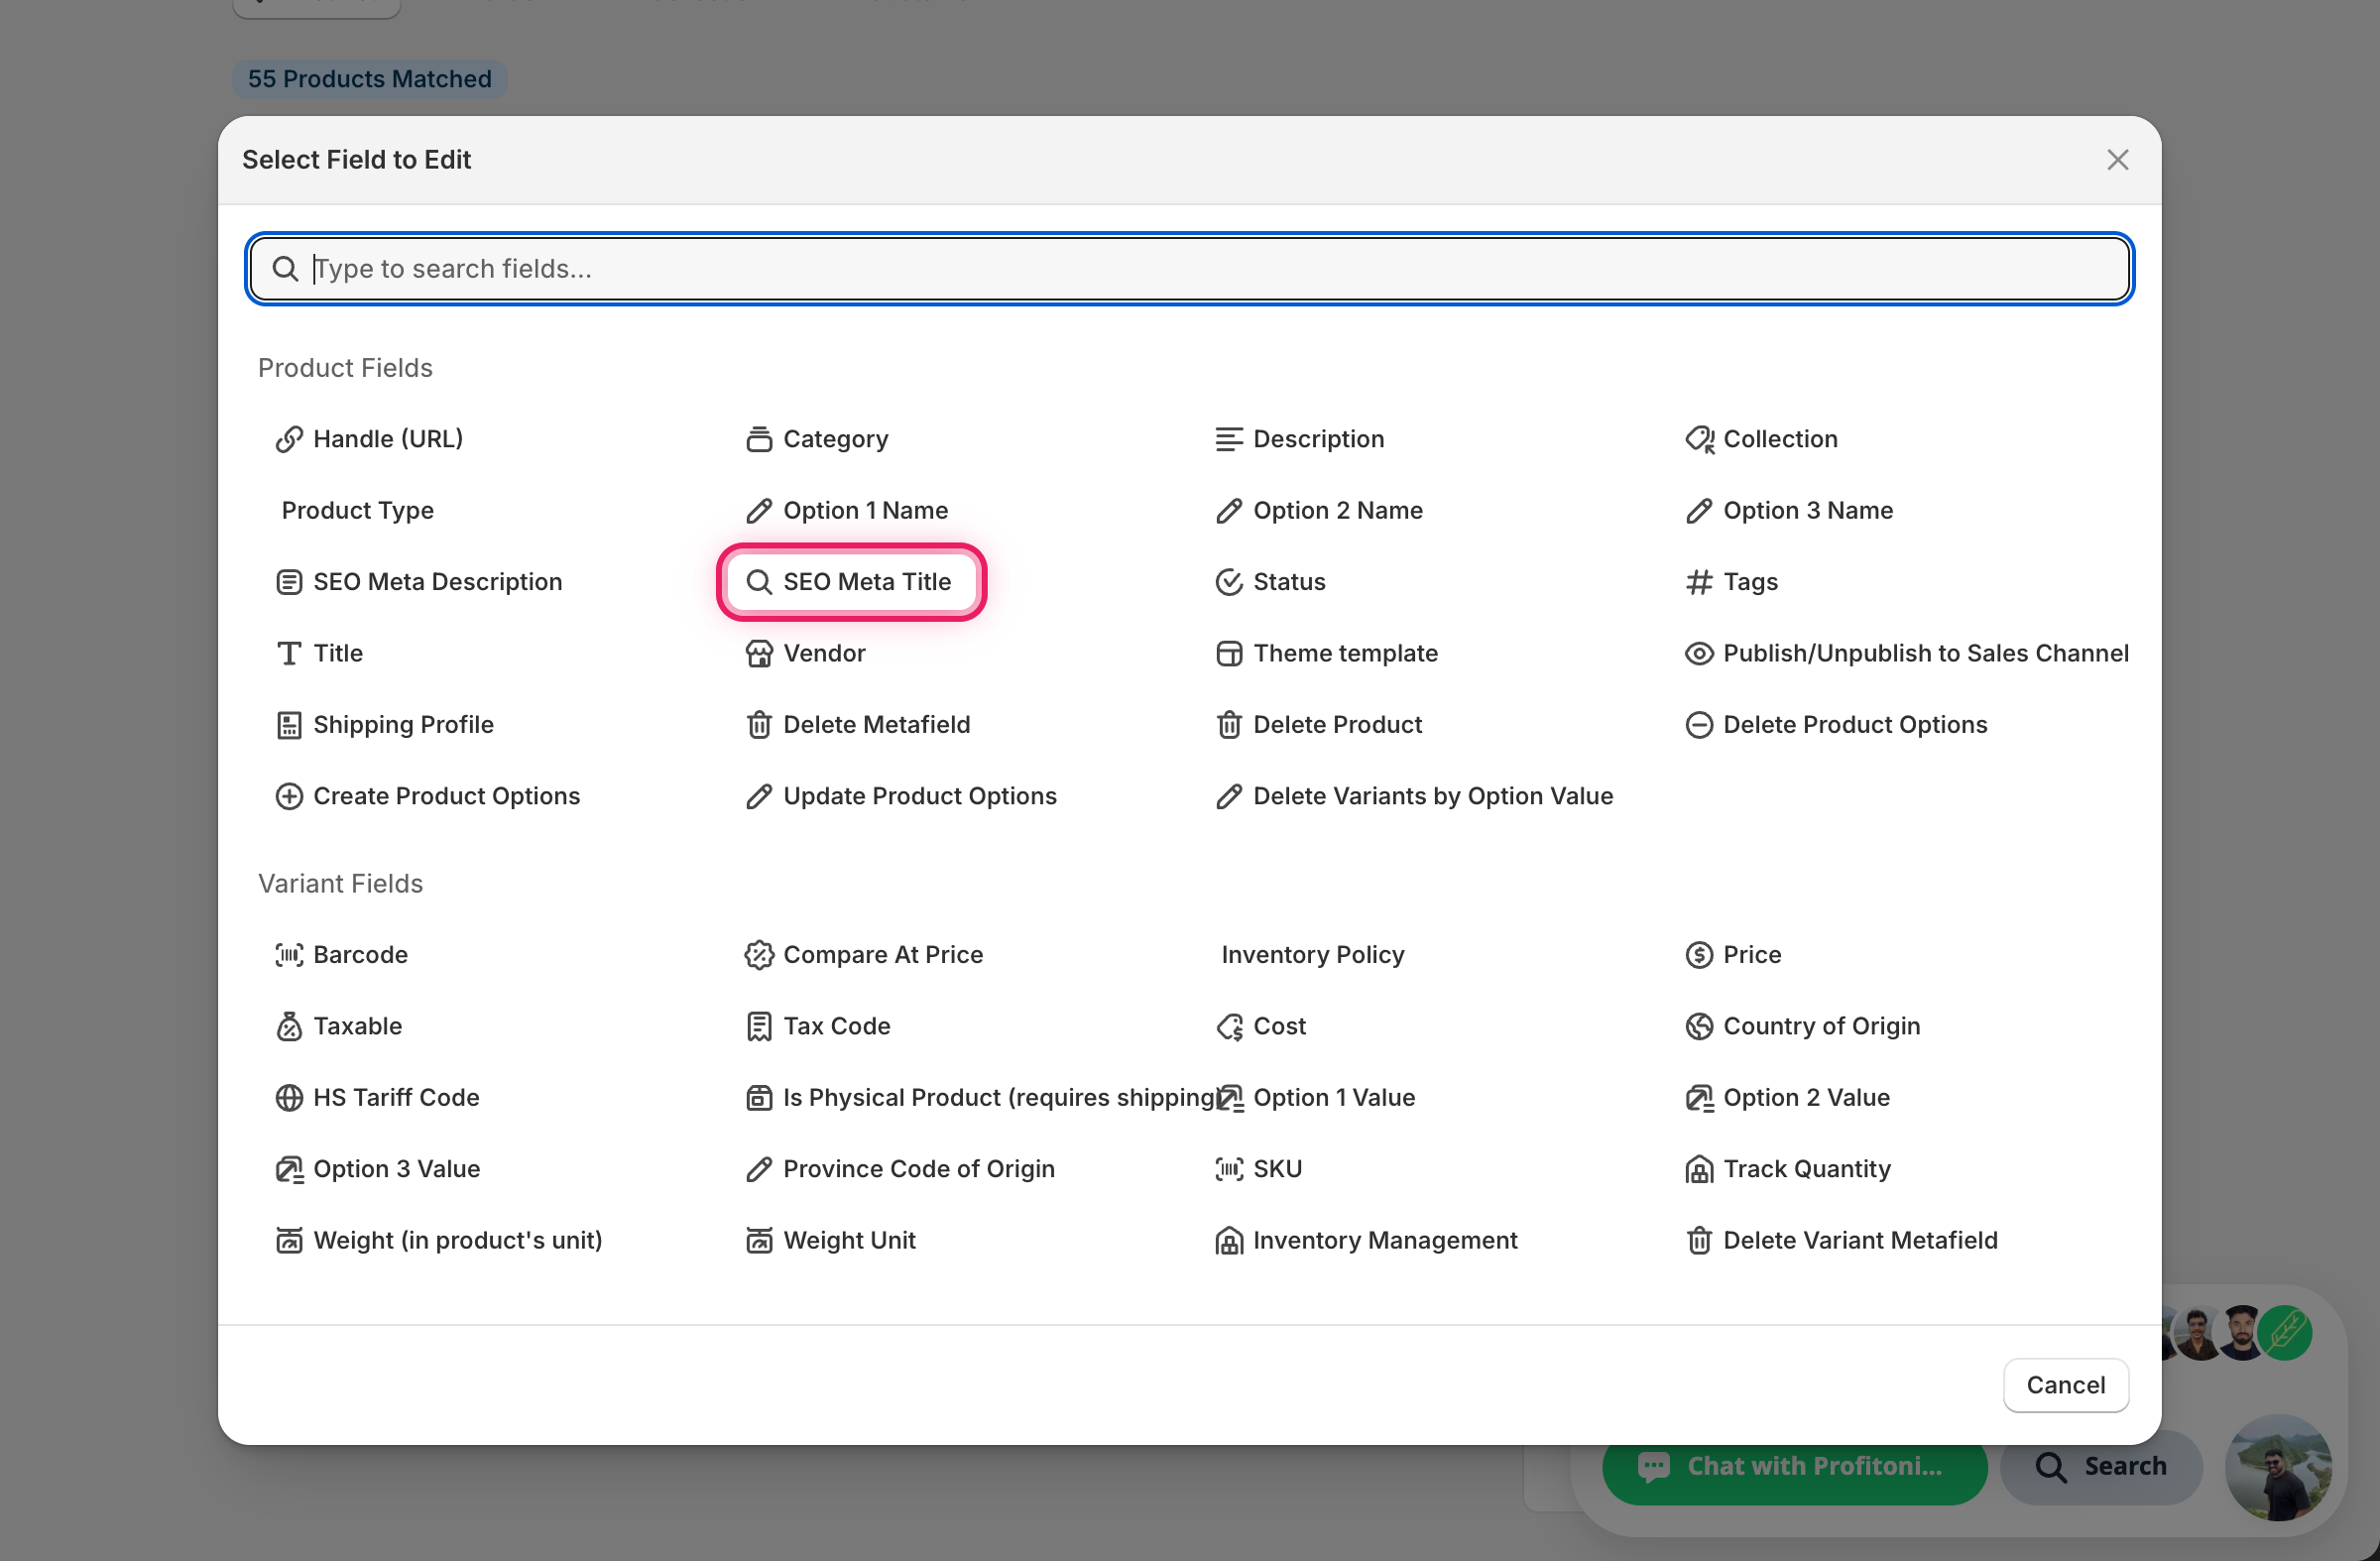
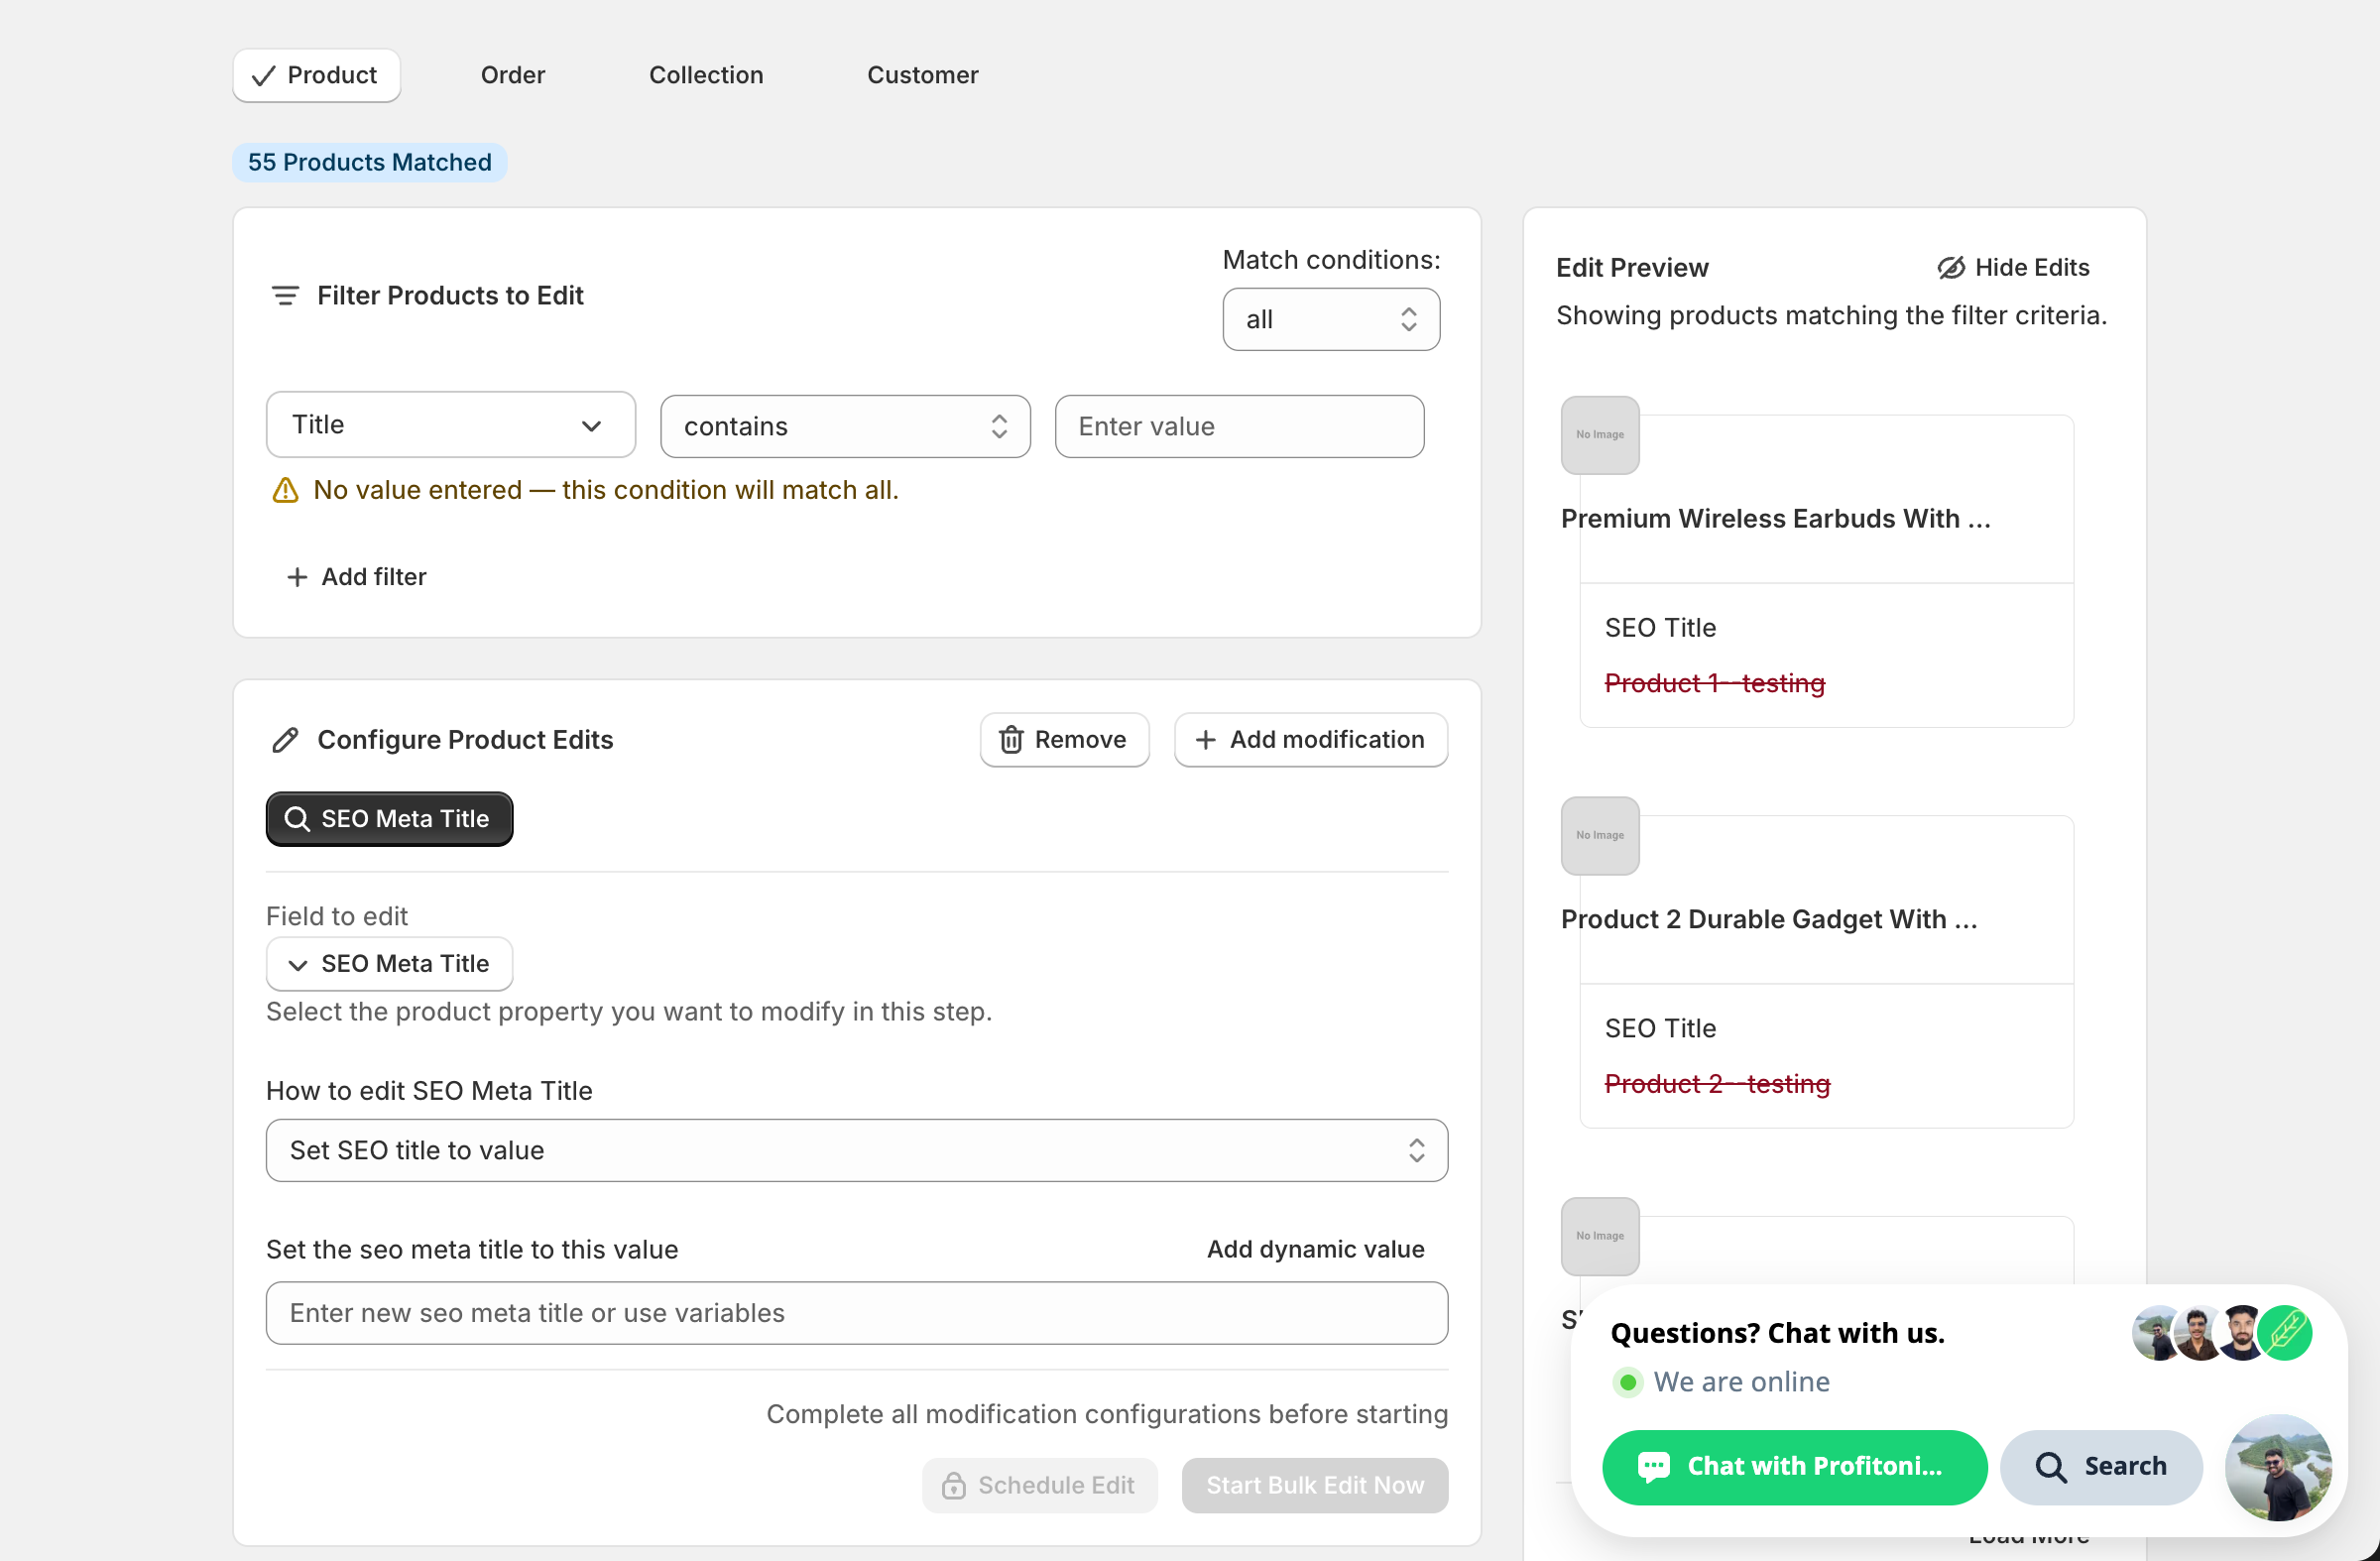
Click SEO Meta Title. The configuration panel switches to a How to edit SEO Meta Title dropdown defaulting to Set SEO title to value, plus a value input. The Edit Preview on the right starts showing the current SEO title for each matched product struck through, so you can see what's being replaced.
Step 2: Choose how to change the SEO meta title
Nine actions are available.
Direct value
- Set SEO title to value — every matched product gets this exact SEO title. Pair with a dynamic value (see Step 3) so each product still gets a unique result.
Adjust the existing SEO title
- Add text to end — append text (e.g.
| Free Shipping). - Add text to beginning — prepend (e.g.
Buy). - Remove text from end — strip a suffix.
- Remove text from beginning — strip a prefix.
- Find text and replace — swap one substring for another, optionally case-insensitive.
- Limit length of text — cap the title at N characters (defaults to 70).
- Remove text from a word to the end — find a word, delete it and everything after.
- Remove text up to and including a word — find a word, delete it and everything before.
The inputs change based on what you pick.
Step 3: Enter the value
Set SEO title to value
Type the new SEO title in the Set the seo meta title to this value input. Search engines typically display the first ~60 characters before cutting off, so aim short and frontload the keywords that matter.
Use dynamic values to keep titles unique. Click Add dynamic value above the input. A modal opens letting you pick from product fields (Title, Vendor, Tags, Type, Handle, SEO Title, SEO Description, Category, Variant Count, Description HTML...) and metafields, with optional capitalization (UPPER, lower, Title Case).
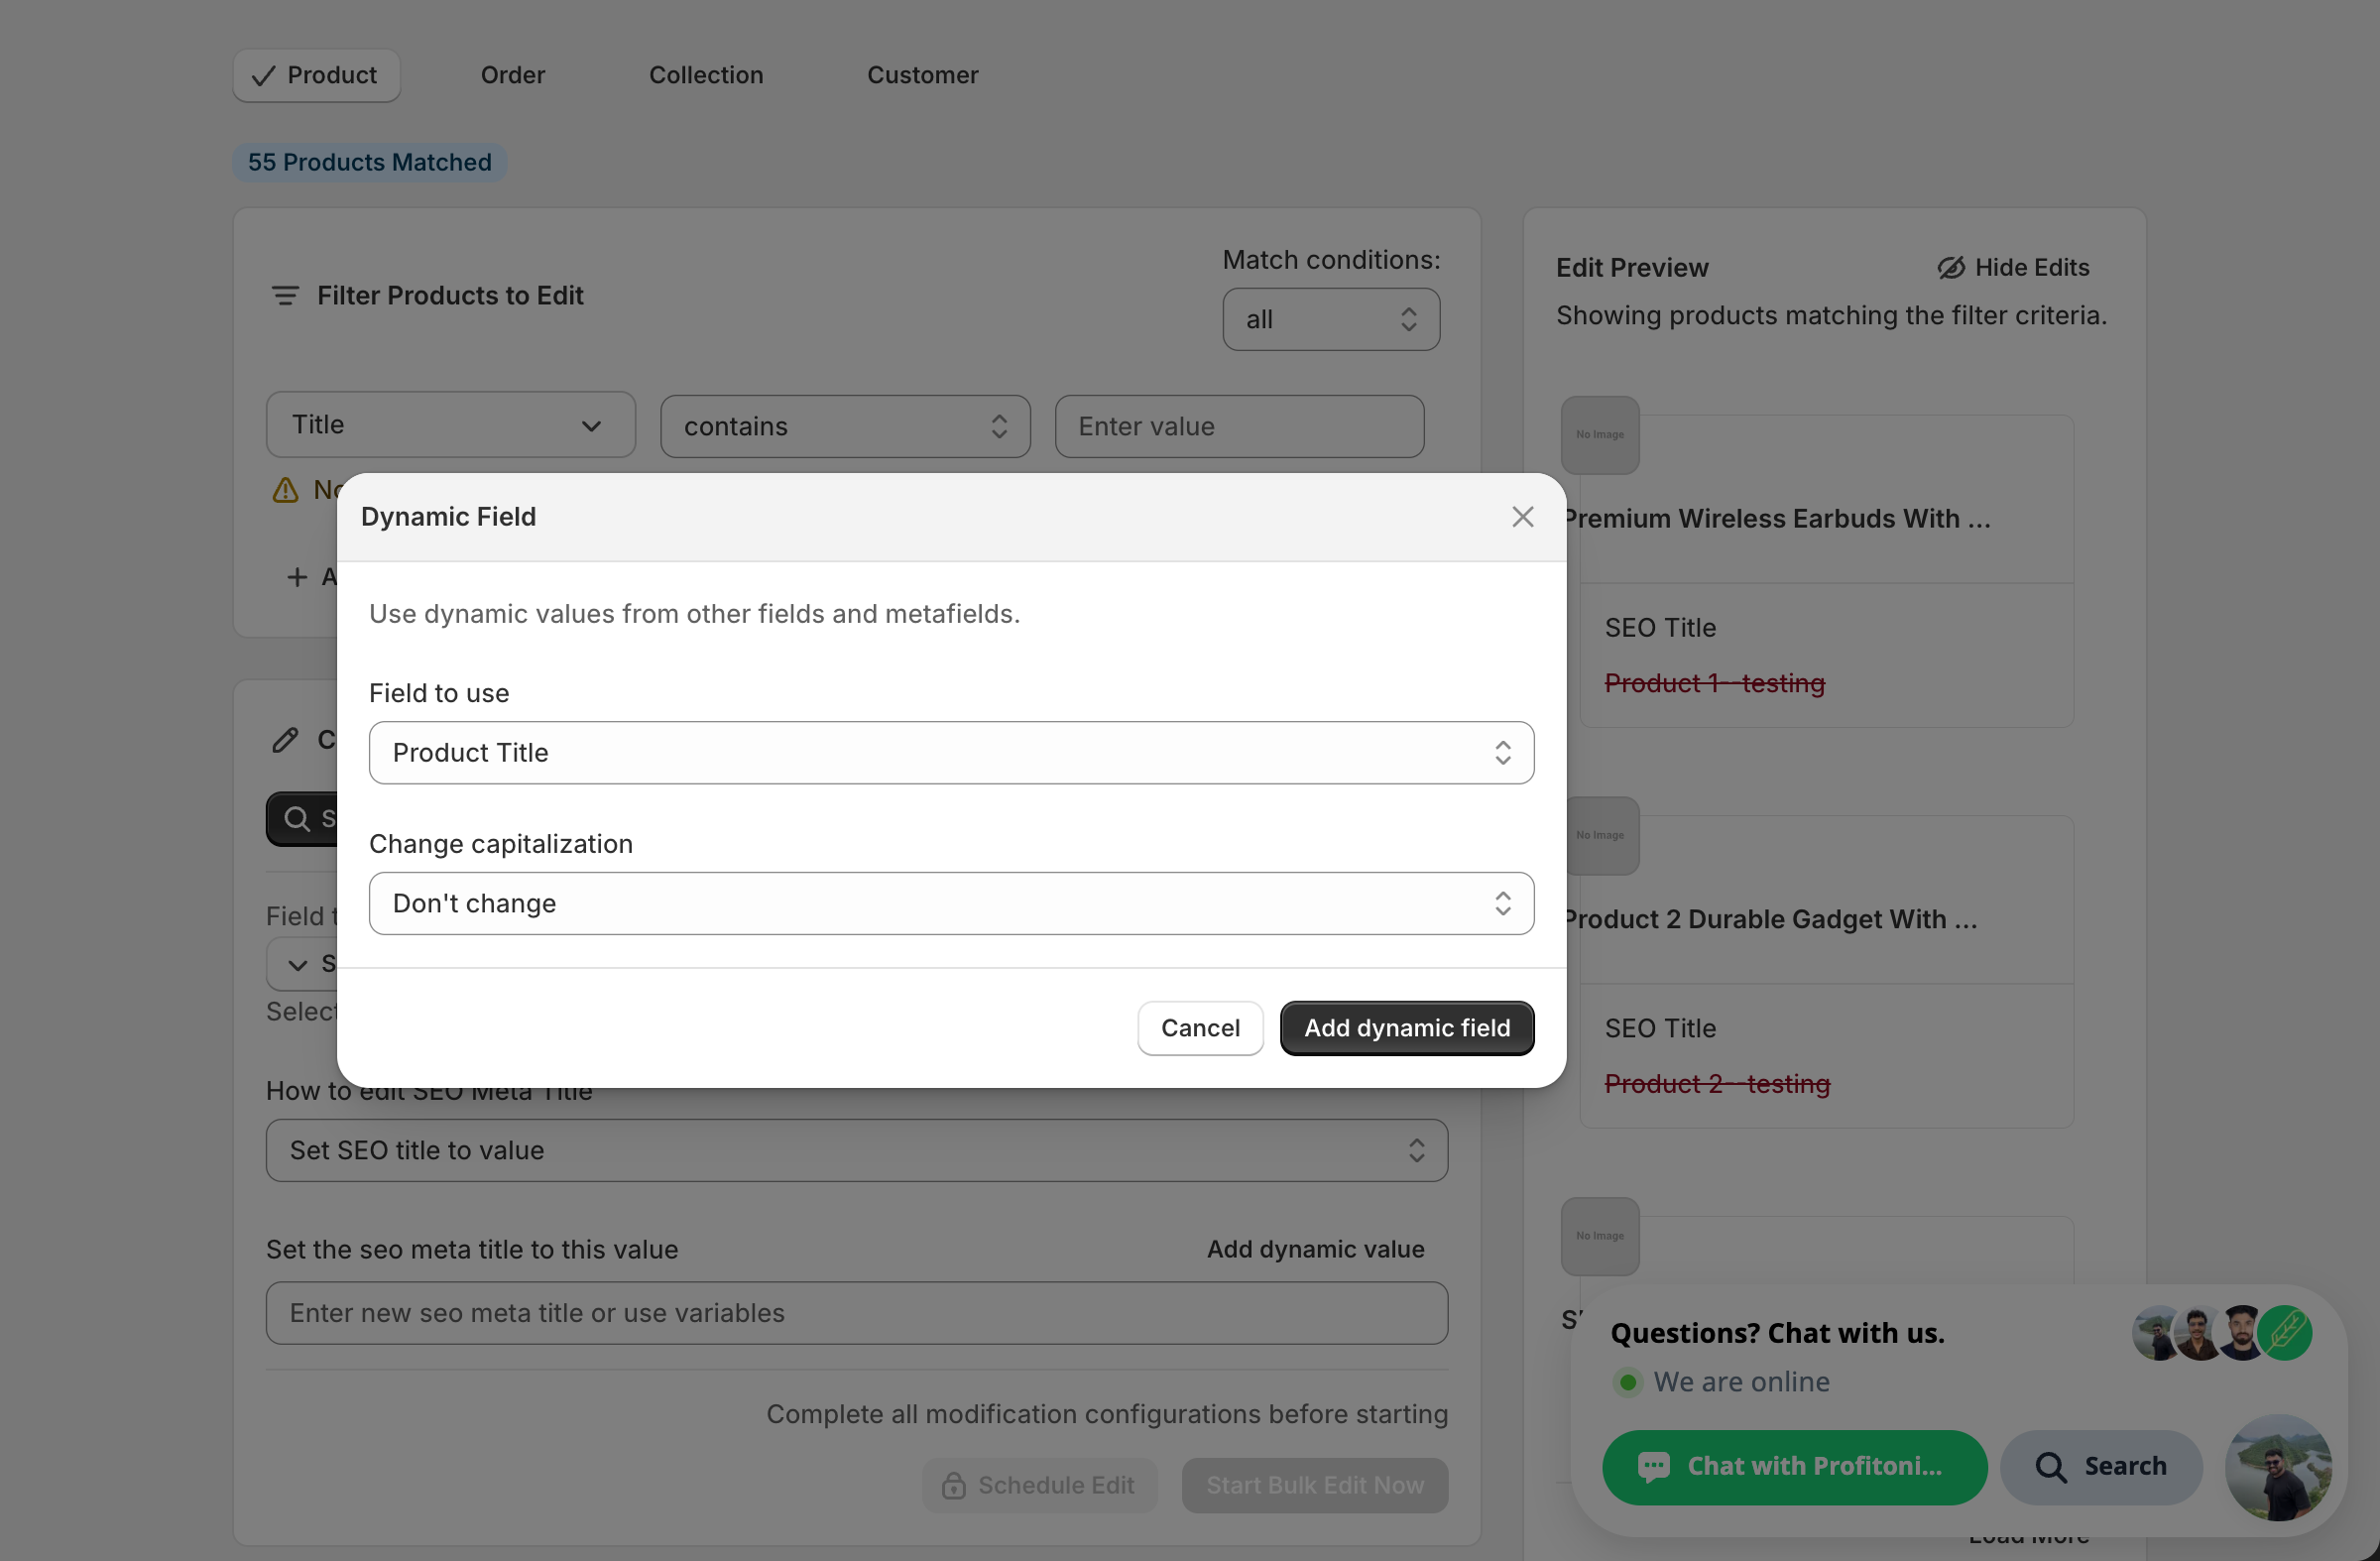
Picking Product Title inserts the token {{product.title}} at the cursor. Combine it with literal text — a brand name, a category, a value prop — to compose unique SEO titles per product.
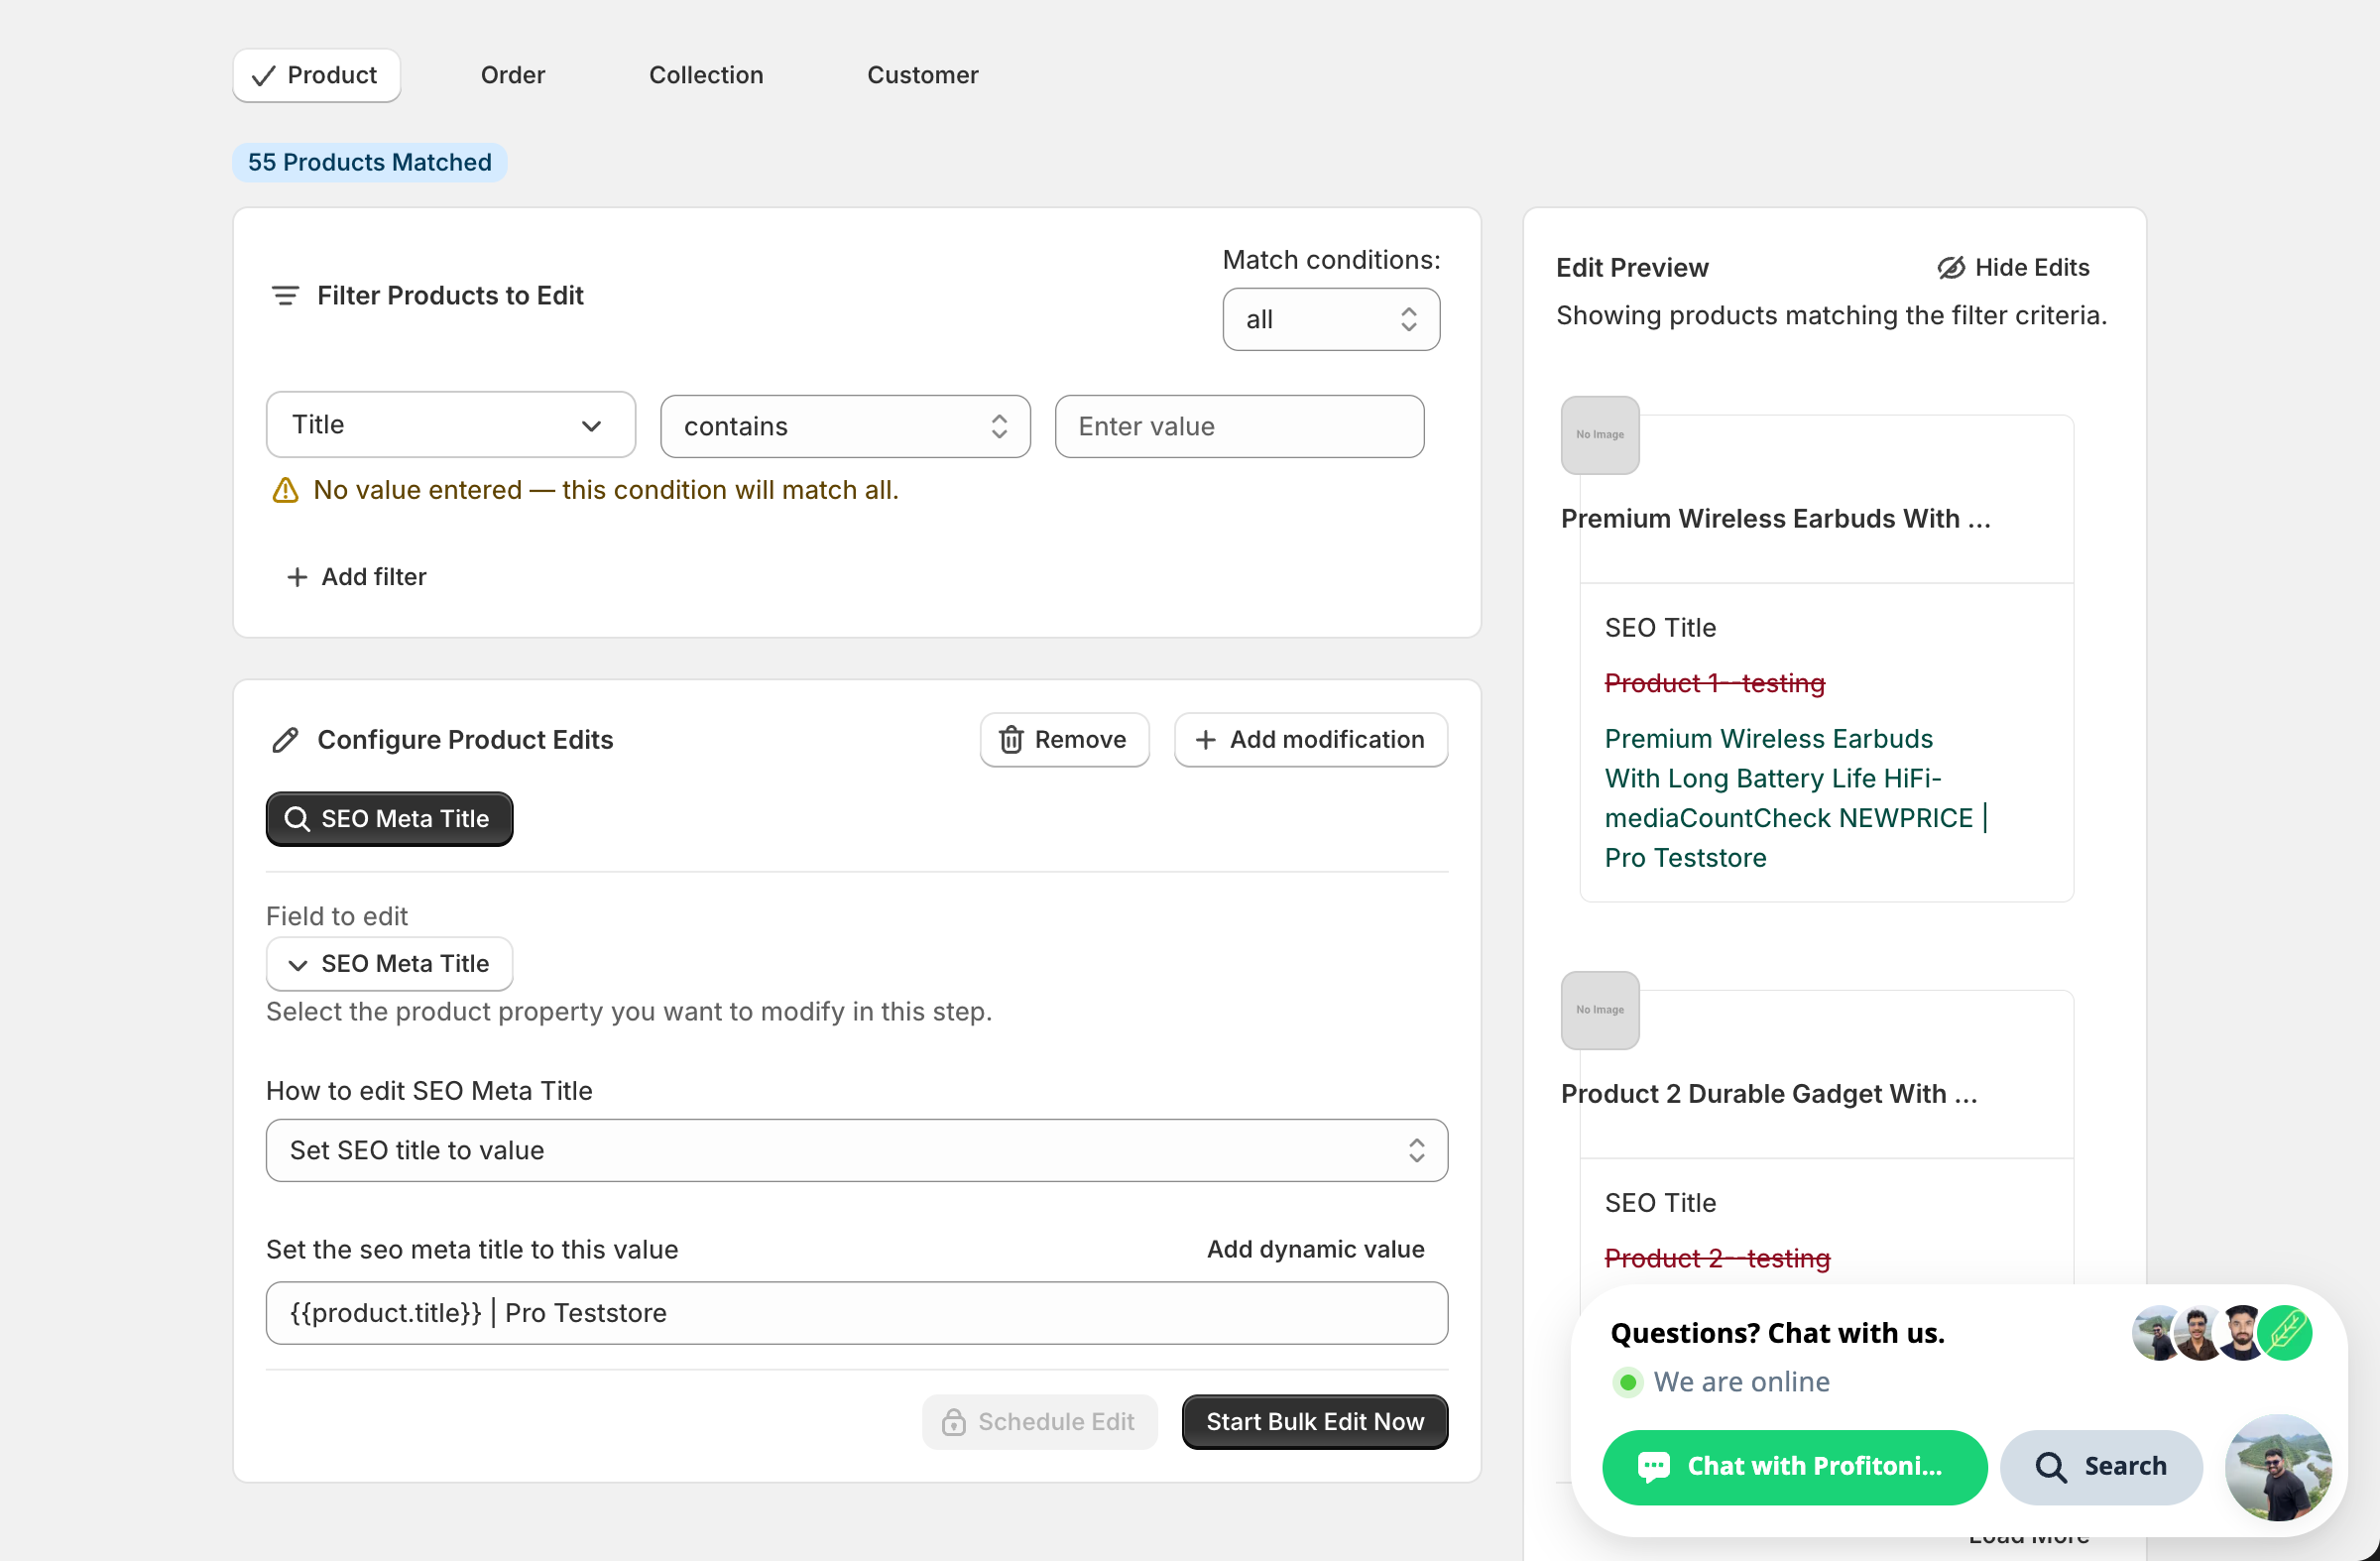
In this example, every matched SEO title becomes <product title> | Northstar Cycles. The Edit Preview resolves the token per product so you can spot-check before running.
Setting a literal value with no dynamic token across many products gives every product the same SEO title. Search engines treat that as duplicate content and may not rank any of them well — keep at least the product name dynamic.
Find text and replace
Two inputs — what to look for, and what to replace it with — plus a Case insensitive checkbox.
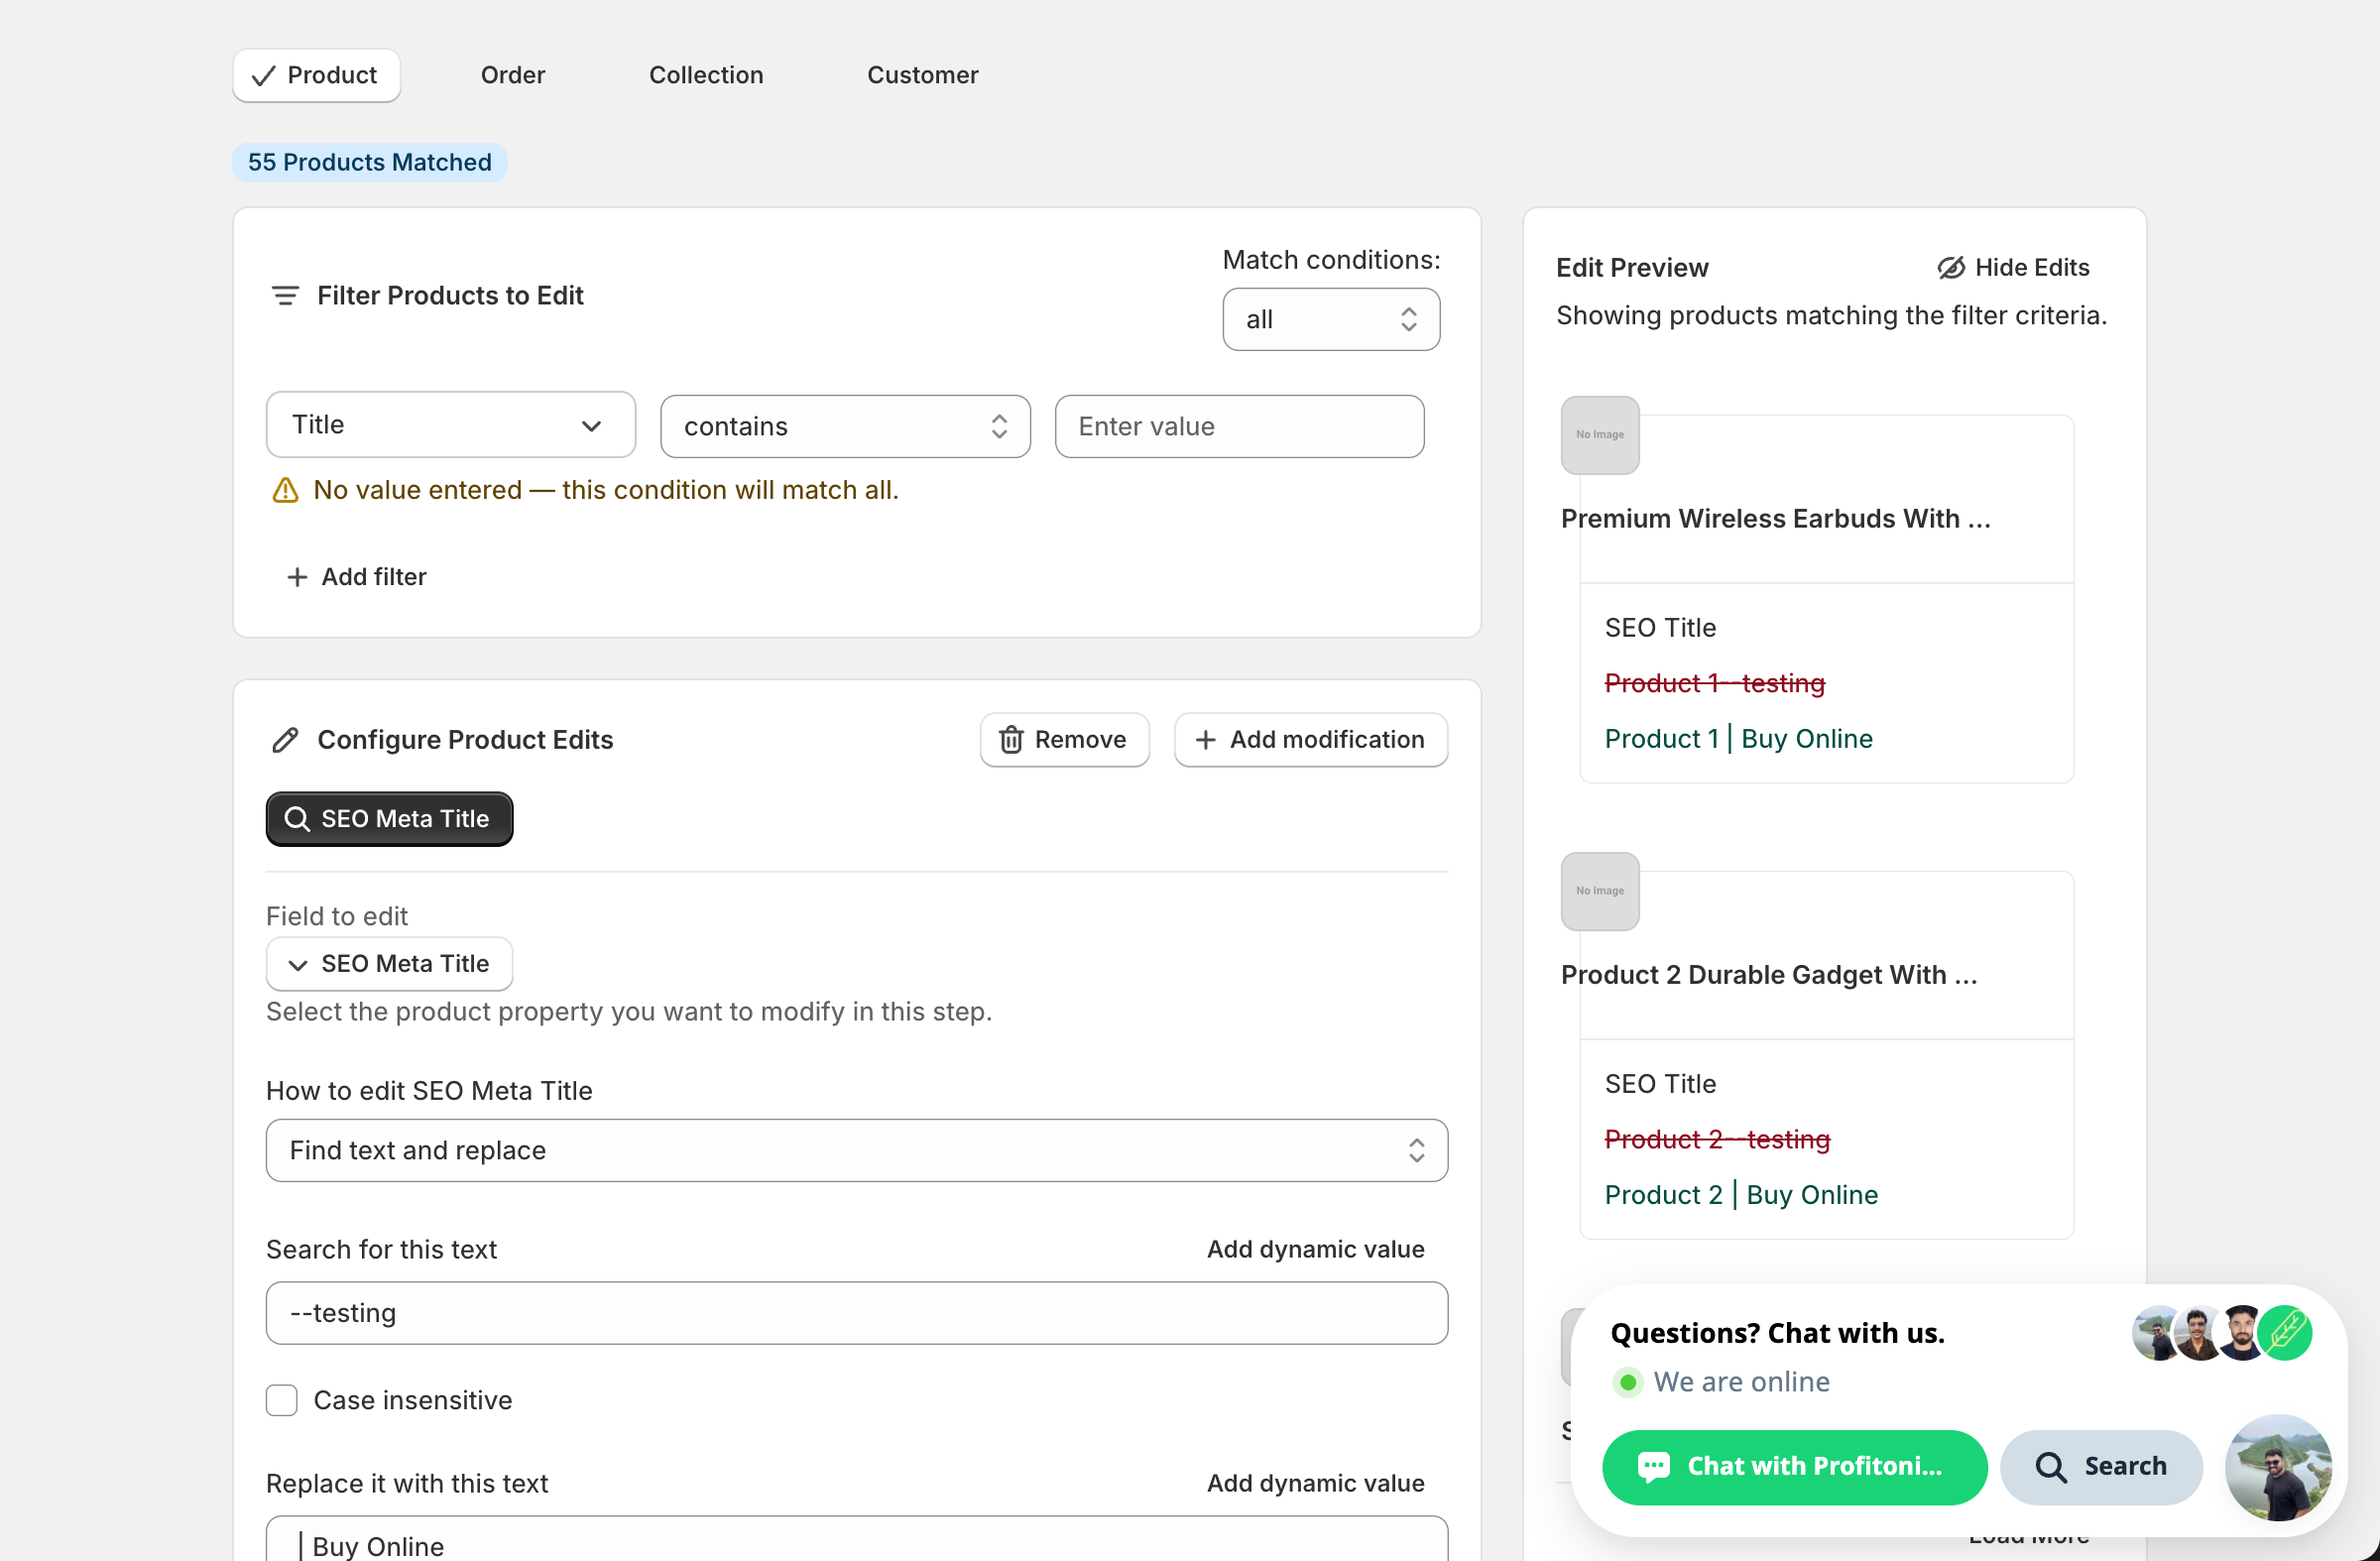
Use this to retire a placeholder, swap a brand name after a rebrand, fix a typo across the catalog, or replace a season tag (Summer 2025 → Fall 2025). Leave the replace field blank to delete the matched text outright.
Add / Remove text from end or beginning
A single input. Whatever you type gets appended, prepended, or stripped from the matching end of every SEO title. Useful for tacking on | Free Shipping, · YourBrand, or your store name.
Limit length of text
A number input prefilled with 70 plus two checkboxes:
- If the text is trimmed, include '...' at the end — adds an ellipsis when truncation actually happens.
- Don't trim the text in the middle of a word — pulls the cut back to the previous word boundary so titles don't end mid-word. On by default.
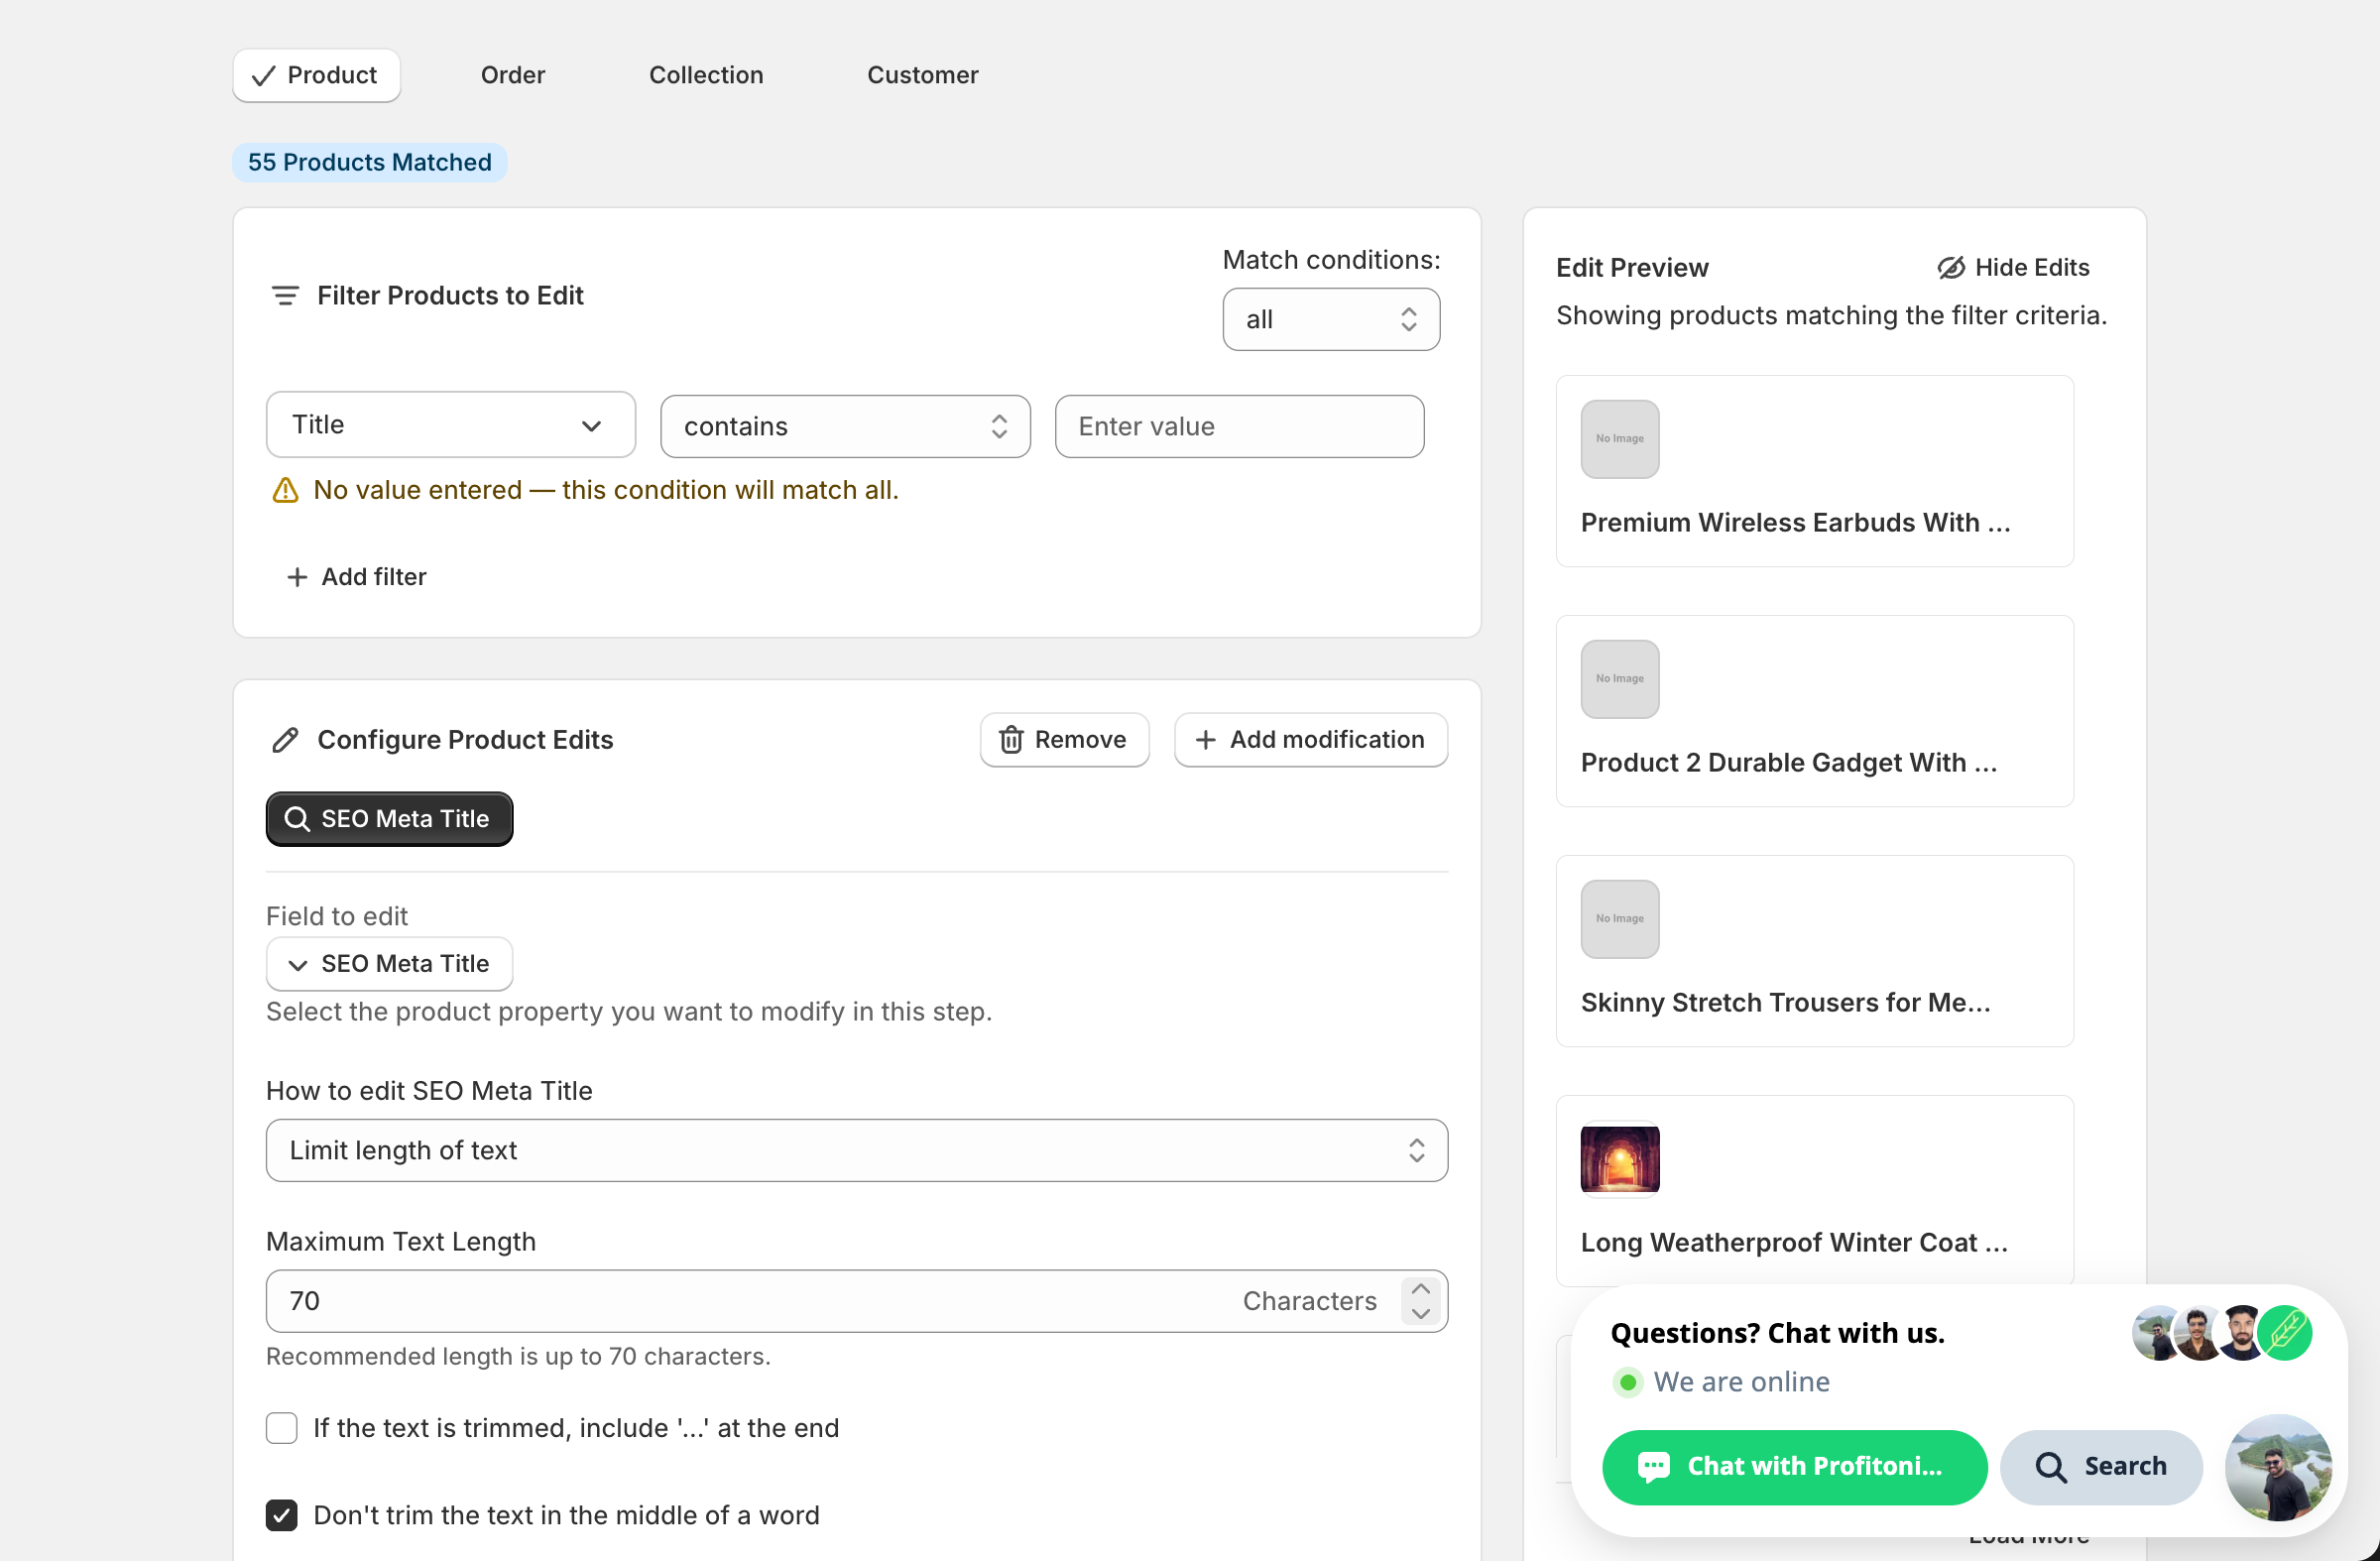
Shopify accepts up to 255 characters in this field, but Google only shows the first ~60 before cutting off. The form's recommendation of 70 is the practical sweet spot.
Remove text from a word to the end / up to and including a word
A single input — the marker word. Everything from that word onward (or up to and including it, depending on the action) is stripped. Handy when SEO titles share a trailing or leading boilerplate phrase you want cleared in one pass.
After the run
- SEO Meta Title changes are reversible from the History page using Undo.
- Search engines re-crawl on their own schedule; expect anywhere from hours to a couple of weeks before the new titles show up in results.
- The Edit Preview on the right shows the resolved new SEO title per product. Use it before clicking Start Bulk Edit Now — Find/Replace and the Add/Remove actions are not idempotent, so re-running them keeps modifying the title.
- If you'd rather queue this for a quieter time, Schedule Edit runs the same configuration at a future date instead of now.
Frequently asked questions
How do I bulk edit SEO titles in Shopify?
In EditEngine's Configure Product Edits panel, click Select Field and choose SEO Meta Title under Product Fields. Nine actions cover setting a value outright, appending or prepending text, find-and-replace, trimming length, and stripping text around a marker word. The Edit Preview shows the resolved new title per product before you click Start Bulk Edit Now.
Will every product end up with the same SEO title if I bulk edit in Shopify?
Only if you set a literal value with no dynamic token — and search engines treat that as duplicate content and may not rank any of them well. In EditEngine, click Add dynamic value to insert tokens like {{product.title}}, then combine them with literal text so each product gets a unique SEO title, such as its own name plus your brand.
Can bulk SEO title changes be undone in Shopify?
Yes — SEO Meta Title changes are reversible from the History page using Undo in EditEngine. Also note that Find/Replace and the Add/Remove actions are not idempotent, so re-running the same edit keeps modifying the title. Check the Edit Preview before each run rather than relying on a repeat run to fix things.
How long should a Shopify SEO meta title be?
Shopify accepts up to 255 characters in this field, but Google only shows roughly the first 60 before cutting off, so aim short and frontload the keywords that matter. EditEngine's Limit length of text action defaults to 70 characters — the practical sweet spot — with options to add an ellipsis and avoid trimming mid-word.
Can I schedule a bulk SEO title edit in Shopify for later?
Yes. If you'd rather queue the change for a quieter time, use Schedule Edit in EditEngine — it runs the same configuration at a future date instead of now. Keep in mind search engines re-crawl on their own schedule, so expect anywhere from hours to a couple of weeks before the new titles show up in results.