Products
How to Bulk Replace Shopify Images by URL
Last updated
Need to bulk replace Shopify images by url after a photo refresh, a new product shoot, or a CDN move? With EditEngine Bulk Product Editor, you export your products to a spreadsheet, paste the new URL into the Image Src column for each row, and import the file back. Because Shopify fetches each replacement file straight from the URL you provide, swapping photography across a catalog stops being a one-product-at-a-time chore.
What you'll learn
- Export every product with its current images
- Edit images per row in a spreadsheet
- Import the updated file back to Shopify
What you'll need
- The EditEngine Bulk Product Editor app installed in your Shopify store
- At least one product with one or more images already uploaded in Shopify
- Replacement image URLs that are publicly reachable over HTTPS (Shopify fetches the file from the URL during import)
- The Advanced import flow inside EditEngine Bulk Product Editor — image media is advanced-import only
- A spreadsheet editor (Excel, Google Sheets, Numbers — anything that opens CSV)
Every Shopify product image carries a source URL on Shopify's CDN. When you import a row with a different URL in Image Src, Shopify downloads the new file, hosts it on the CDN, and attaches it to the product in place of the old one. That's why a spreadsheet swap can replace dozens of product photos in a single pass — you're handing Shopify a new address for each image rather than re-uploading the file yourself.
Step 1 — Export your Shopify images
Open EditEngine and go to the Export page. This is where you pick the image columns that will land in your spreadsheet.

Pick the right columns
- Handle — the unique product identifier the importer uses to match each row back to the right product.
- Image Src — the column you'll edit. Each row holds one image URL; paste the new URL here to replace the photo on that row. Expand the Media group and tick Image Src.
- Image Position — the slot number the image occupies on the product (1, 2, 3 …). Keep it as exported so the new photo lands in the same position as the one it's replacing.
- Image Alt Text — the description tied to the image. Leave it alone if you only want to swap the file, or update it in the same import if the new photo needs a new caption.
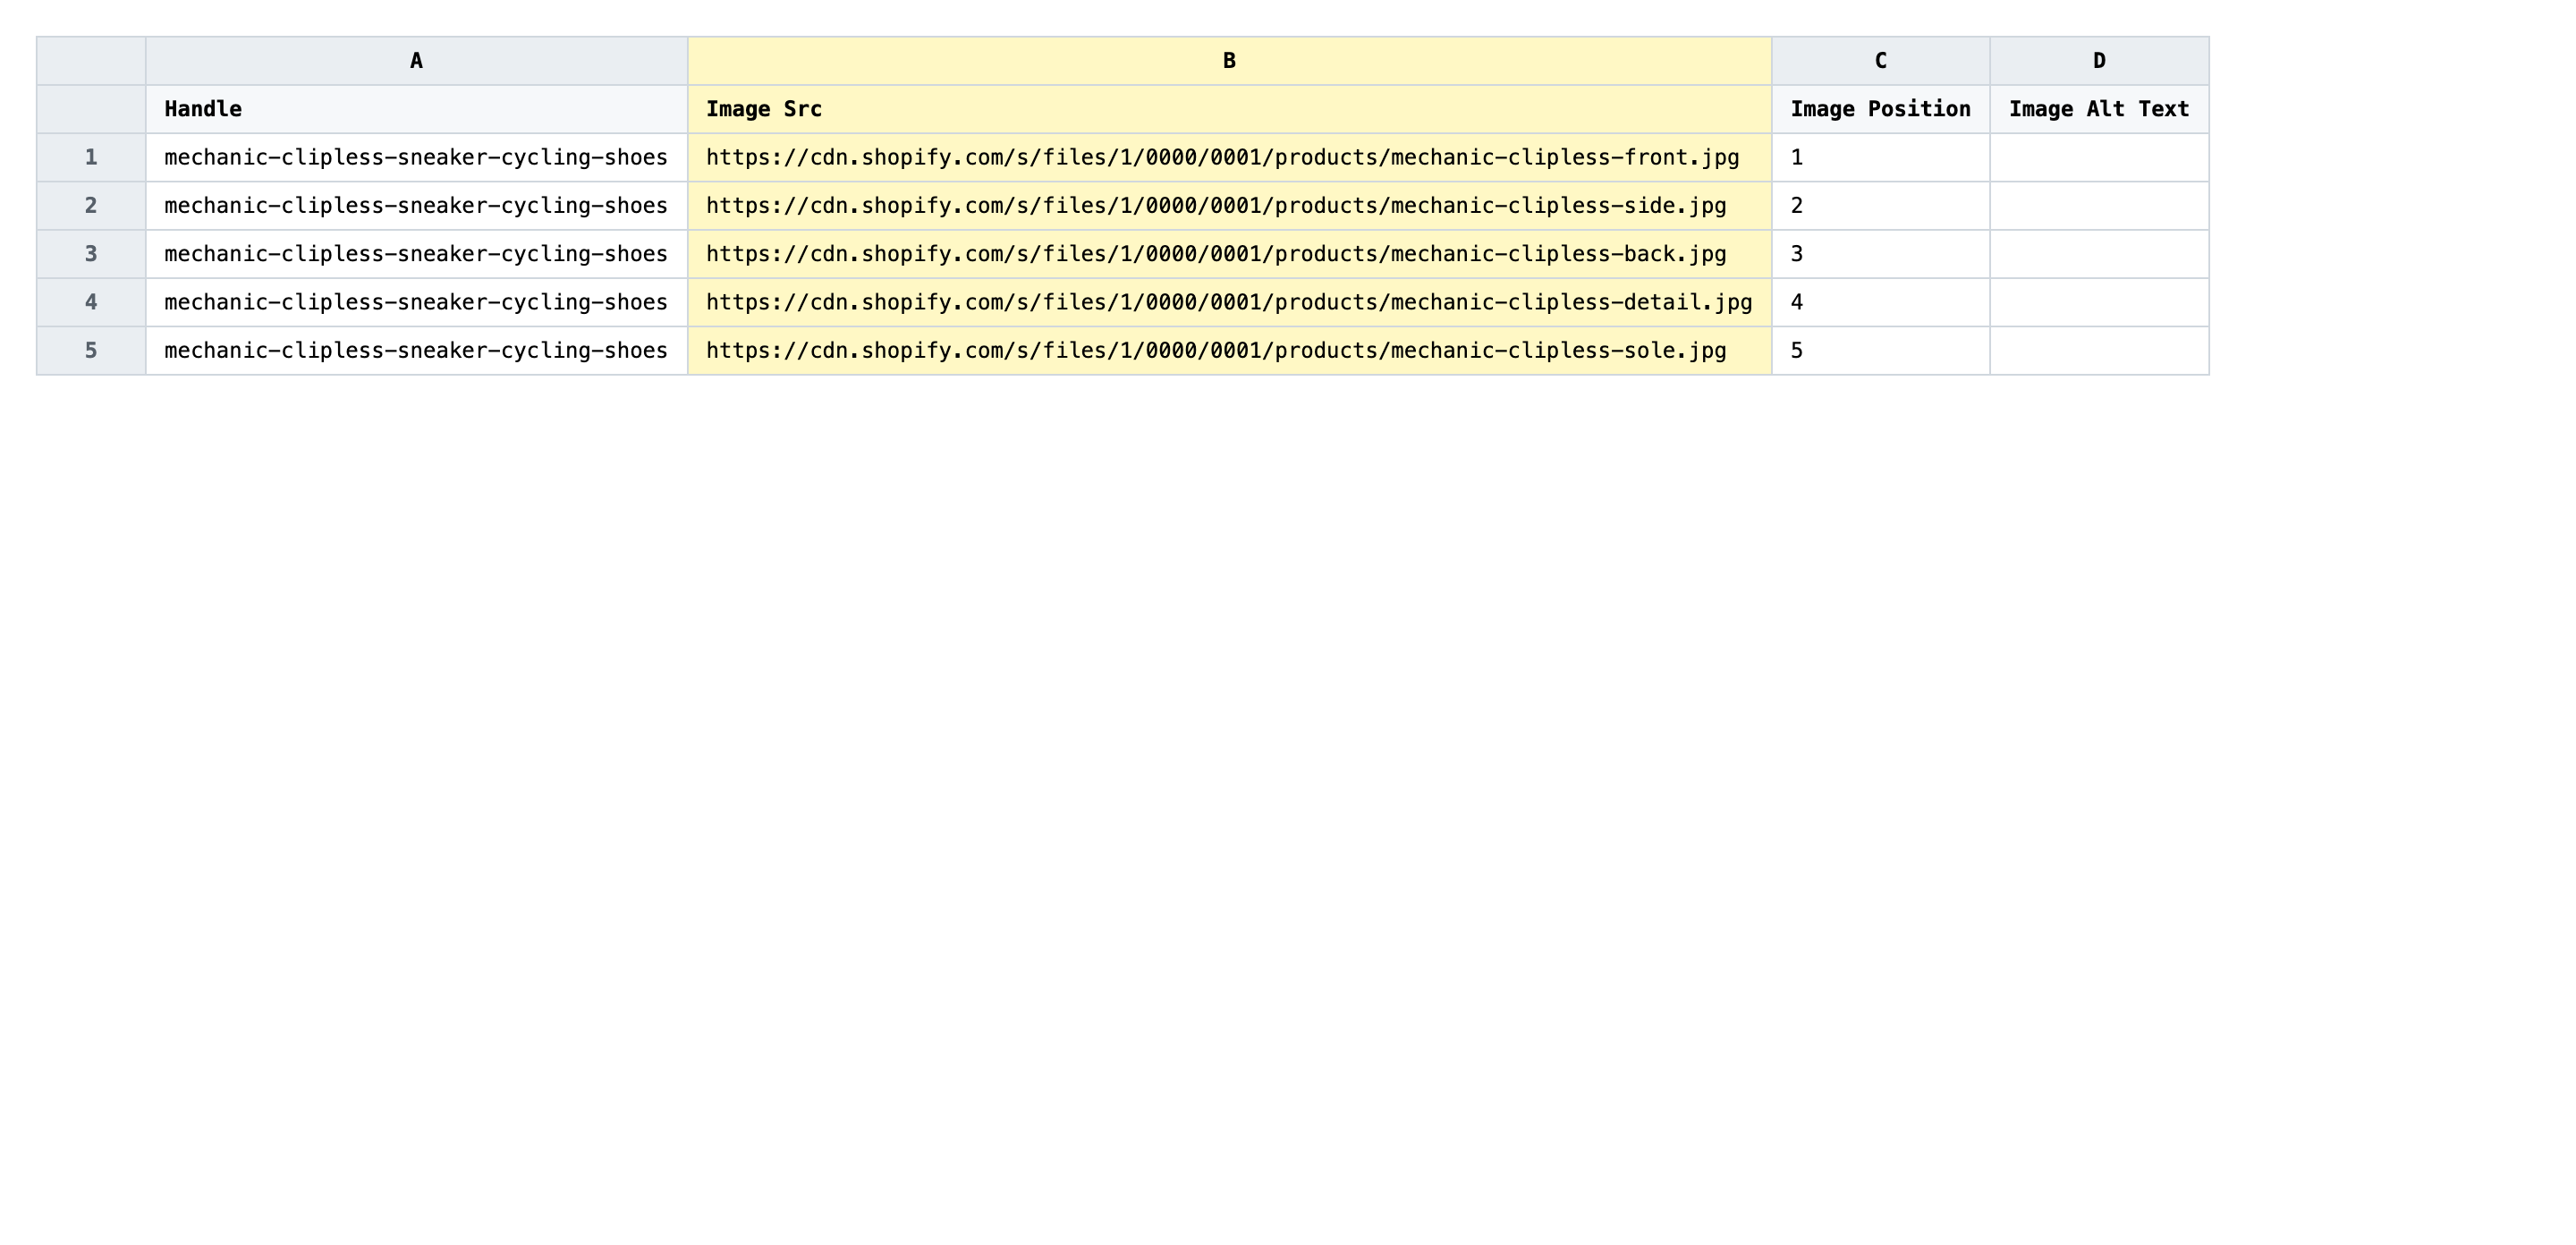
When the export completes, click Download. You'll get one row per image: products with several photos repeat across rows with Image Position incrementing 1, 2, 3 — that ordering is what tells Shopify which existing image each new URL is replacing.
New to exporting? This guide assumes you know how to run an export and focuses only on the columns and edit unique to this workflow.
Step 2 — Bulk replace Shopify images by URL in your spreadsheet
Open the downloaded CSV in Excel or Google Sheets. The Image Src column holds each image's current Shopify CDN URL — that's the value you overwrite.
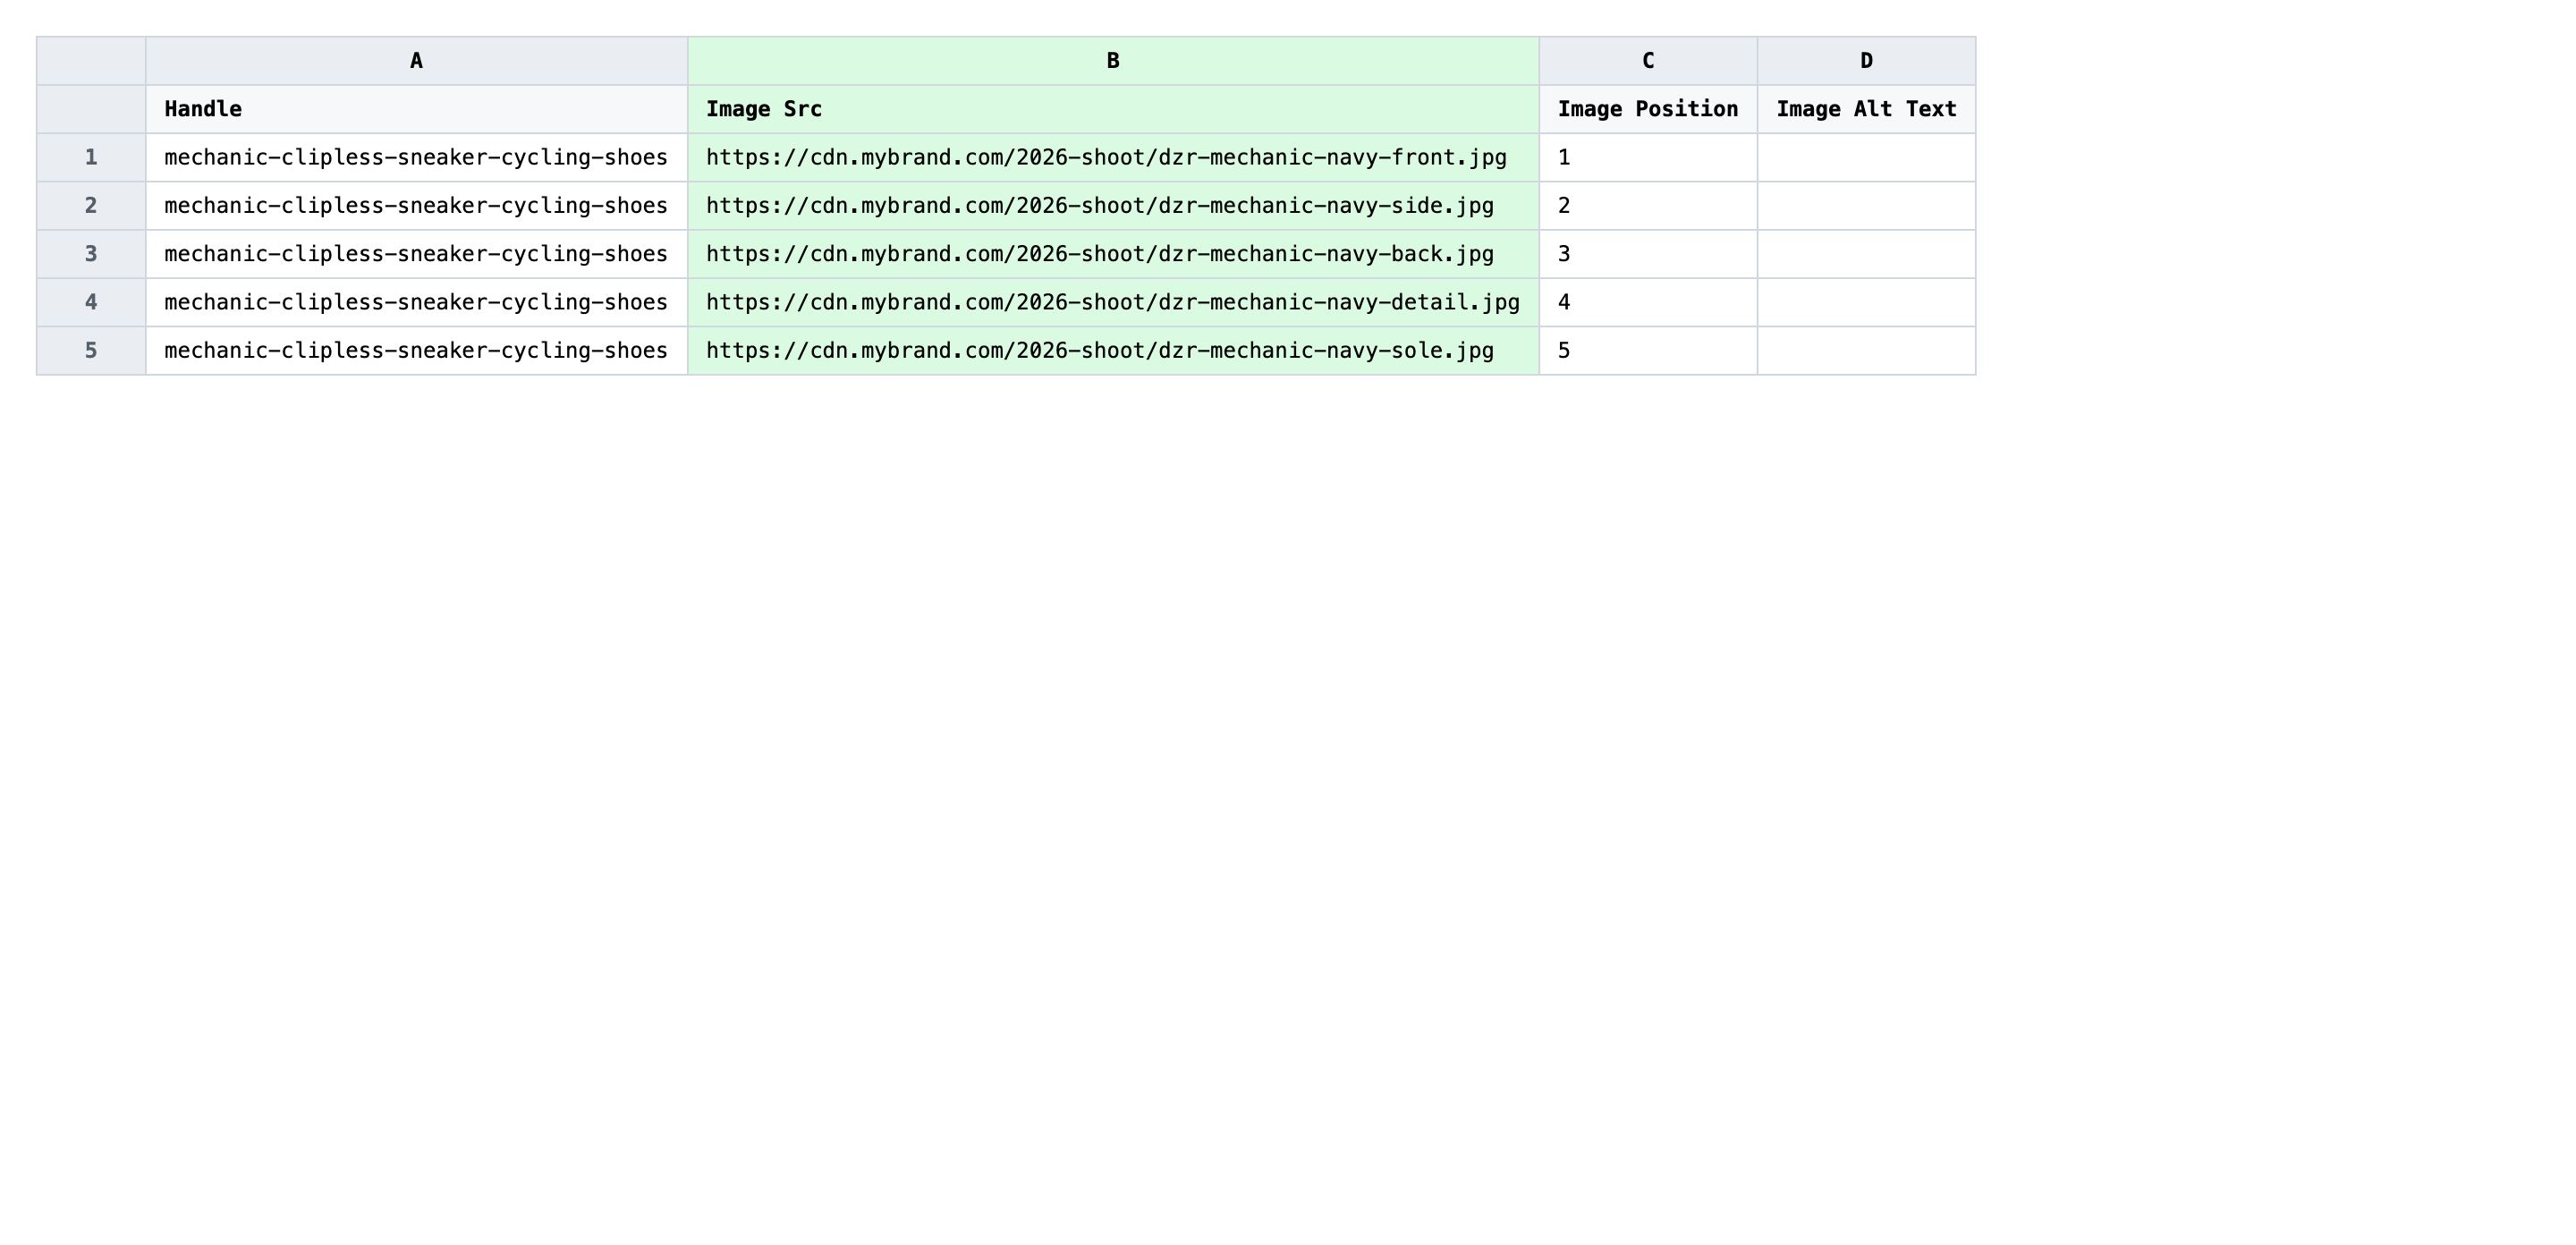
Paste the new image URL into Image Src for every row you want to replace. The URL must be a direct HTTPS link to the image file itself (ending in .jpg, .png, .webp, etc.), not a webpage that contains the image. Keep Image Position untouched so the replacement lands in the same slot, and only edit the rows whose images are actually changing — rows you leave alone keep their existing photo.
- ✅
https://cdn.mybrand.com/2026-shoot/dzr-mechanic-navy-front.jpg - ❌
https://www.mybrand.com/products/mechanic-shoe (a product page, not a direct image URL)
Leave Handle and Image Position exactly as exported — Handle is how the importer finds the product, and Image Position is how it lines up old photo with new. Don't paste the same new URL into multiple rows of the same product; that asks Shopify to attach one file to several slots and you'll lose the variety. If a row's old image is fine, leave its Image Src alone and the importer will skip it.
Save the file as CSV when you're done, and keep the original export handy in case you want to revert.
Tip: Open one or two of your new URLs in a private browser window before you import — if the file doesn't load there, Shopify can't fetch it either and that row will fail.
Step 3 — Import the edited file back to Shopify
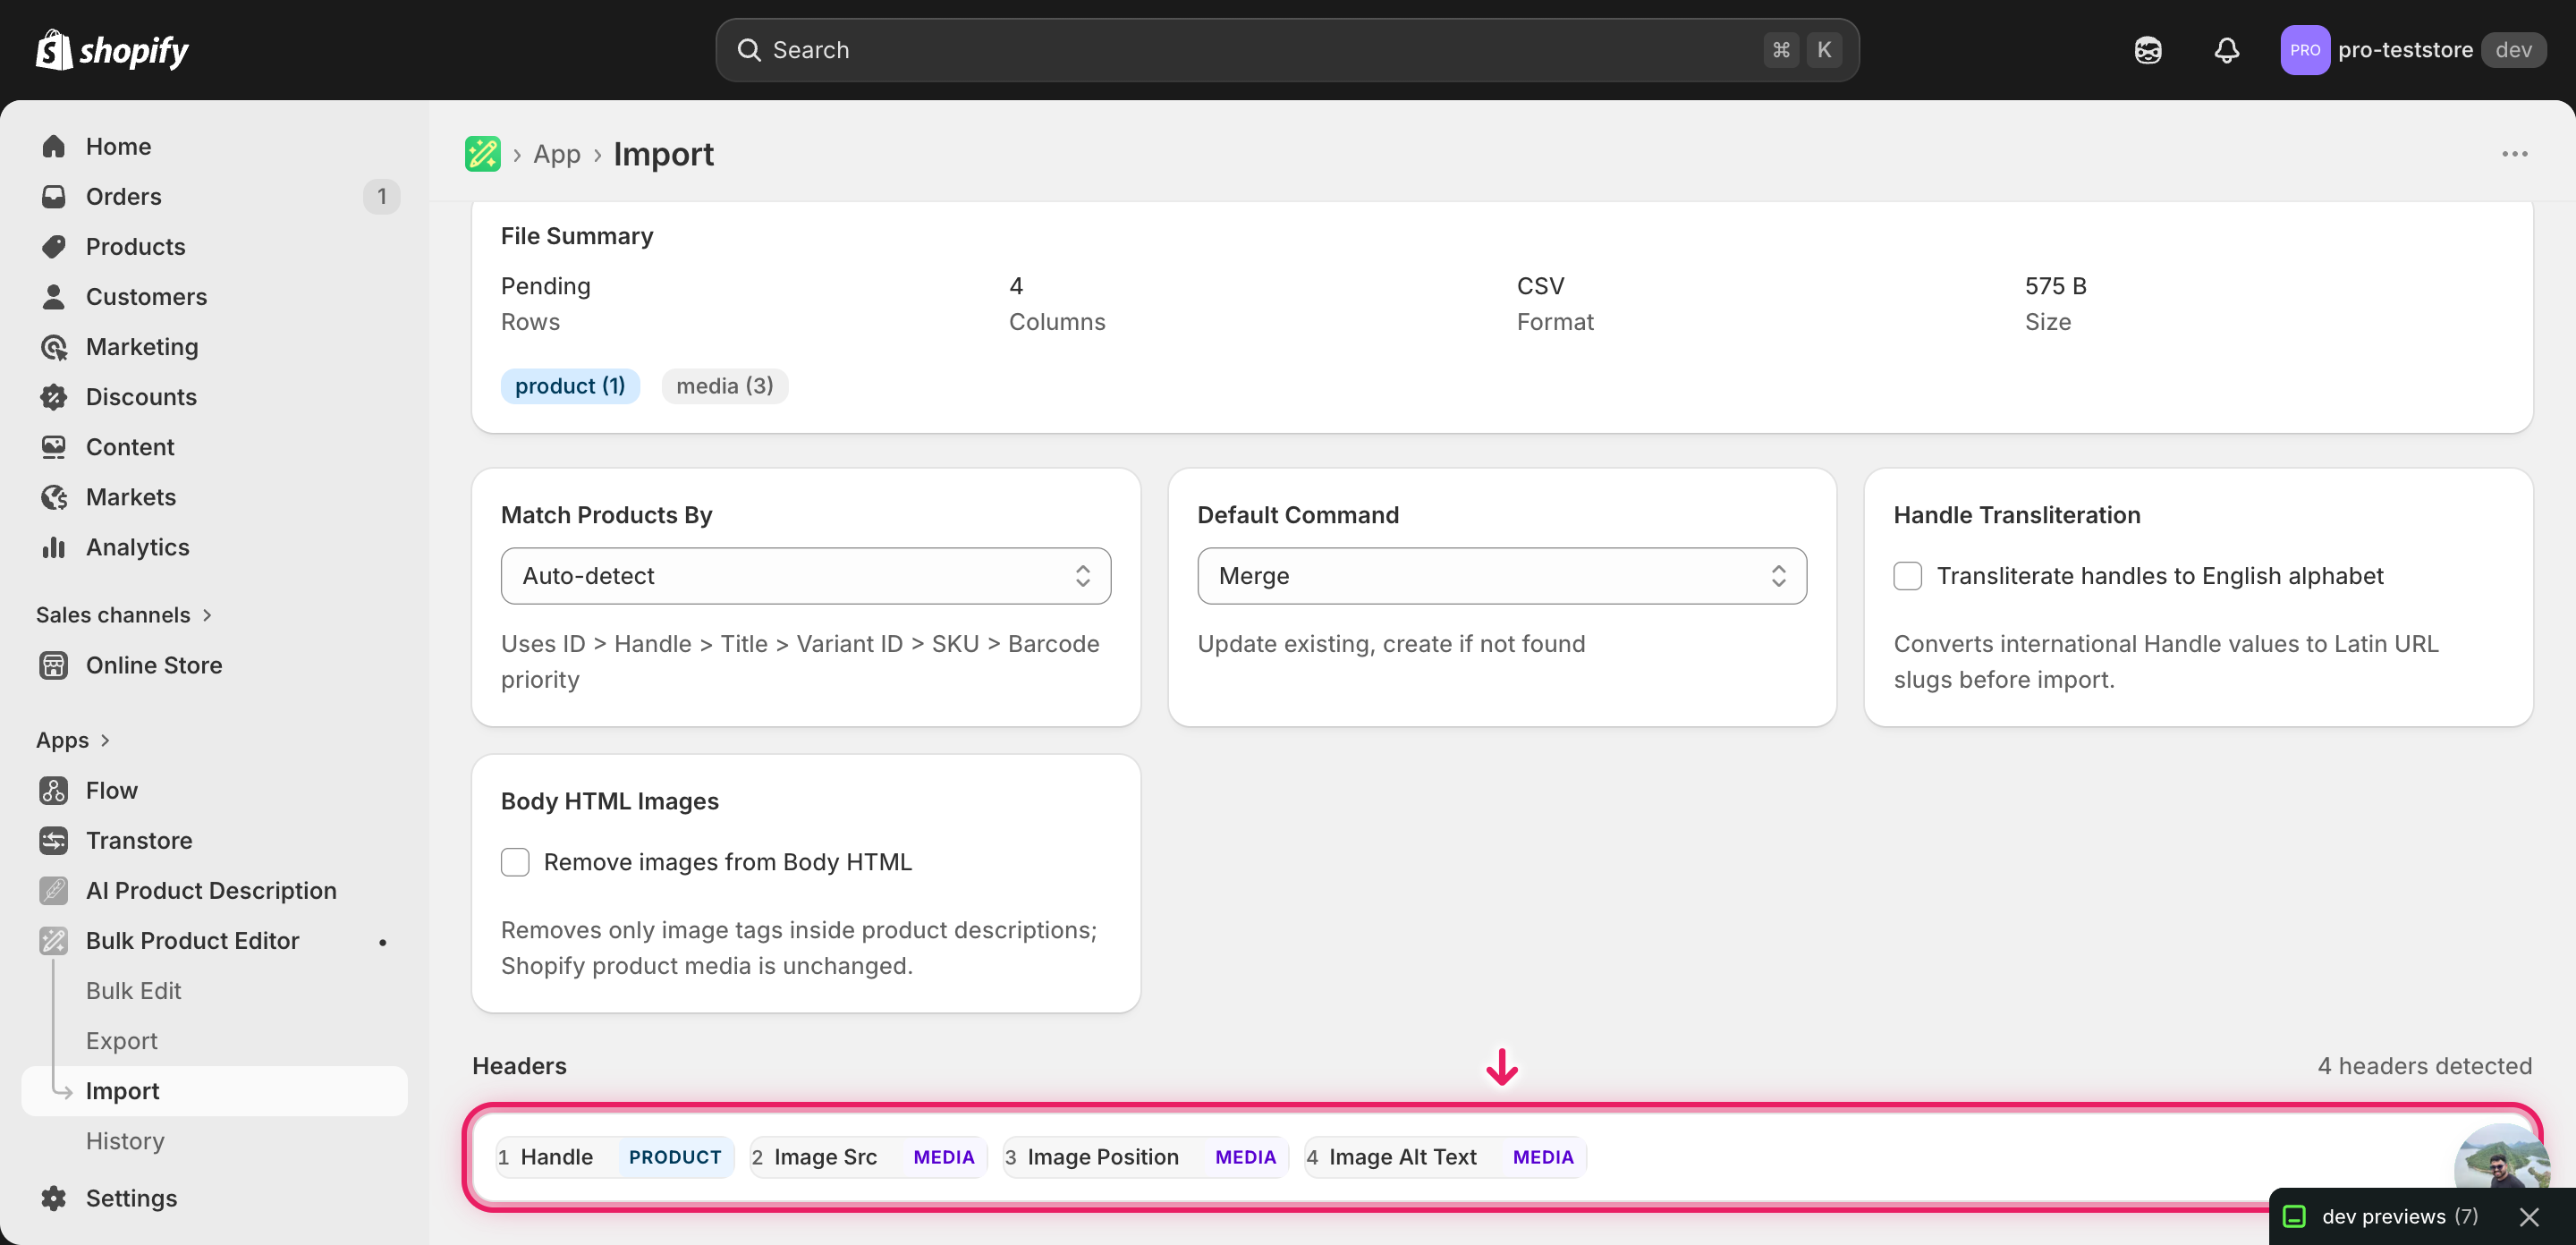
Open EditEngine → Import and select Advanced import. Then upload the file you just edited.
EditEngine reads the file and shows a summary. Check the Headers panel: Image Src should carry the MEDIA badge, which confirms the importer recognized it as an image column. Leave Match Products By on Auto-detect and Default Command on Merge — Merge is what tells Shopify to replace the matched image rather than append a new one.
Note: This is a destructive workflow — once Shopify swaps an image URL, the original photo is gone and there is no built-in undo. The advanced import does not have a dry-run toggle, so always test on a tiny batch first: cut the file down to two or three rows, import that, and check the products in the Shopify admin. Only after those replacements look right should you import the full file.
Click Start Import and wait for the job to finish — a small file takes seconds, larger catalogs a couple of minutes. When it completes, EditEngine shows a per-row summary.
Download the results CSV. It lists every row with a pass/fail status — that file is your proof the change went through, and the new values are now live in your Shopify admin.
Tips and troubleshooting
Image Src replaces, it does not append. A new URL in an existing row swaps that image for the new file at the same position. If you want an extra photo instead of a replacement, that's a different workflow — add a new row with the next Image Position number rather than overwriting an existing one. Confusing the two is the single most common mistake on this import.
Use direct HTTPS URLs to the image file. Shopify's fetcher needs to download the raw image, so the URL has to end in an image extension (.jpg, .png, .webp, .gif) and respond with a 200 OK. Dropbox share links, Google Drive viewer URLs, and product pages don't qualify — use the direct file URL or host the assets on a CDN. HTTP-only URLs are rejected outright.
Run a two-row test before the full file. Replacing images is destructive: once an old photo is overwritten, only your own backup brings it back. Cut the CSV down to two rows, import that, and look at the products in the Shopify admin. Once those two look right, import the rest with confidence.
Keep the original export as your rollback. The pre-edit CSV is the only on-hand record of what the old Image Src values were. If a replacement batch turns out wrong, re-importing that file points each row back at the original Shopify CDN URL and restores the previous photo. Don't delete it until you've signed off on the new images in production.
Frequently asked questions
How do I bulk replace images in Shopify?
Export your products from EditEngine with the Image Src column, paste the new image URL into each row in a spreadsheet, and import the file back through the advanced import flow. That round-trip is how you bulk replace Shopify images by url without uploading each photo by hand in the admin.
Can I edit Shopify images in a spreadsheet?
Yes. EditEngine exports one row per image with the existing URL in Image Src, and you swap that URL in Excel, Google Sheets, or any CSV editor. Shopify itself has no built-in spreadsheet editor for images, so the export and import round-trip is how you bulk replace Shopify images by url at scale.
How long does a bulk images import take in Shopify?
A handful of images imports in seconds. A few hundred typically finishes in a minute or two because Shopify has to fetch each new file from its URL, so larger replacement jobs run a bit slower than a plain text update. The results CSV shows the exact duration for your job.
What format does Shopify accept for images imports?
A CSV or XLSX with a Handle column to match the product and an Image Src column that holds an HTTPS URL pointing directly at the new image file. EditEngine's advanced import reads this format, and that same file is what you use to bulk replace Shopify images by url.
Can I undo a bulk Shopify images update?
There's no one-click undo, but your original export is the rollback file: re-import it and the old Image Src values move back into place. Keep the pre-edit CSV until you're certain the new photos look right in the storefront, since a replaced image is not recoverable from Shopify on its own.
Related tutorials
- How to Bulk Update Shopify Image Alt Text Per Product
- How to Bulk Reorder Shopify Product Images
- How to Bulk Add Shopify Multiple Images Per Product
About EditEngine: EditEngine Bulk Product Editor helps Shopify merchants bulk edit, bulk import, and bulk export their product catalog in minutes instead of days. Install on Shopify →