Pricing
How to Bulk Roll Out Pricing Tiers in Shopify
Last updated
Need to bulk update Shopify tier rollouts the day a new wholesale tier goes live, without editing each variant in the admin? With EditEngine Bulk Product Editor, you export your catalog to a spreadsheet, rewrite the Variant Price column to the new tier, and import the file back. Because a tier switch touches every variant of every product in the rollout, the spreadsheet round-trip is the right tool for the job.
What you'll learn
- Export every product with its current tier rollouts
- Edit tier rollouts per row in a spreadsheet
- Import the updated file back to Shopify
What you'll need
- The EditEngine Bulk Product Editor app installed in your Shopify store
- Two pricing tiers already worked out on paper — the current tier and the target tier, with a price for every SKU
- The Advanced import flow so the price columns map correctly per variant
- A rollout date locked in, so you import the file on the day the new tier should go live
- A spreadsheet editor (Excel, Google Sheets, Numbers — anything that opens CSV)
A pricing tier is a coordinated price level you apply across a group of products — wholesale tier A, retail tier B, a seasonal MSRP bump. Rolling out a new tier means rewriting Variant Price (and often Variant Compare At Price) for every SKU in scope on a specific date. Doing that in the Shopify admin means opening each variant individually, which is exactly what this spreadsheet workflow replaces.
Step 1 — Export your Shopify tier rollouts
Open EditEngine and go to the Export page to pick the price columns that drive the rollout.
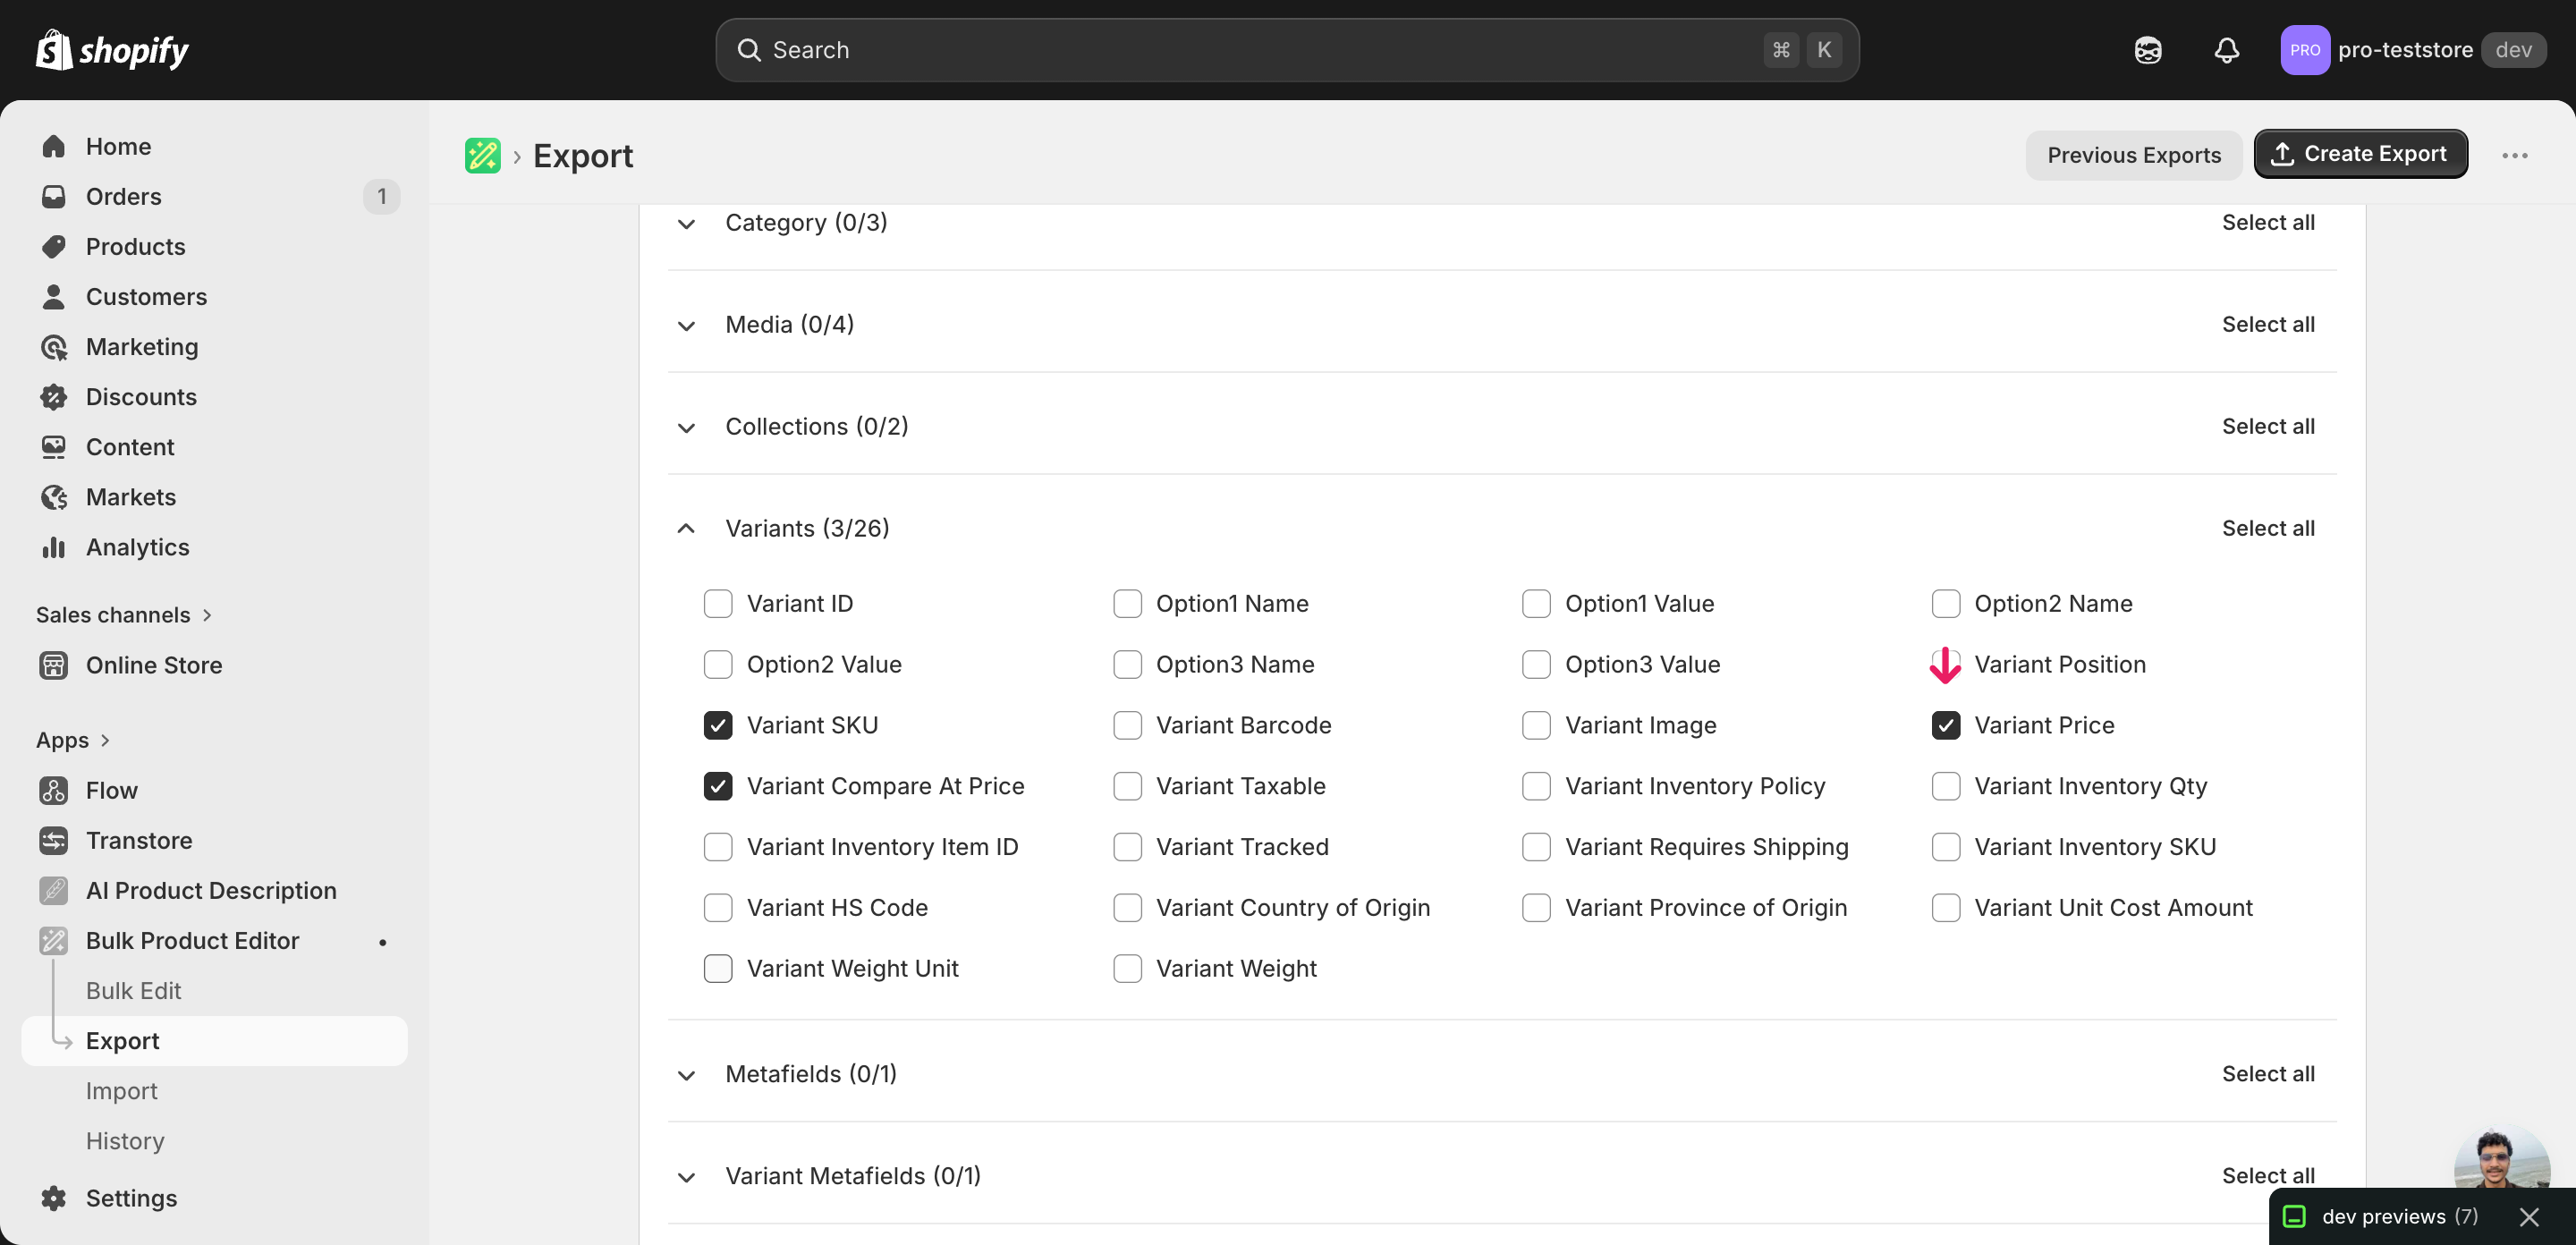
Pick the right columns
- Handle — the unique product identifier the importer uses to match each row back to the right product.
- Variant SKU — the per-variant identifier — combined with Handle, it pins each price change to exactly one variant, which matters when a product has several sizes or colors on different tiers.
- Variant Price — the column you'll edit. This is the live selling price each variant will switch to when the file imports.
- Variant Compare At Price — optional. Move the previous tier's price here if you want shoppers to see a strikethrough next to the new tier price.
When the export finishes, click Download. You'll get one row per variant, so a product with five sizes appears as five rows — that's intentional, because tier rollouts often differ across sizes.
New to exporting? This guide assumes you know how to run an export and focuses only on the columns and edit unique to this workflow.
Step 2 — Bulk update Shopify tier rollouts in your spreadsheet
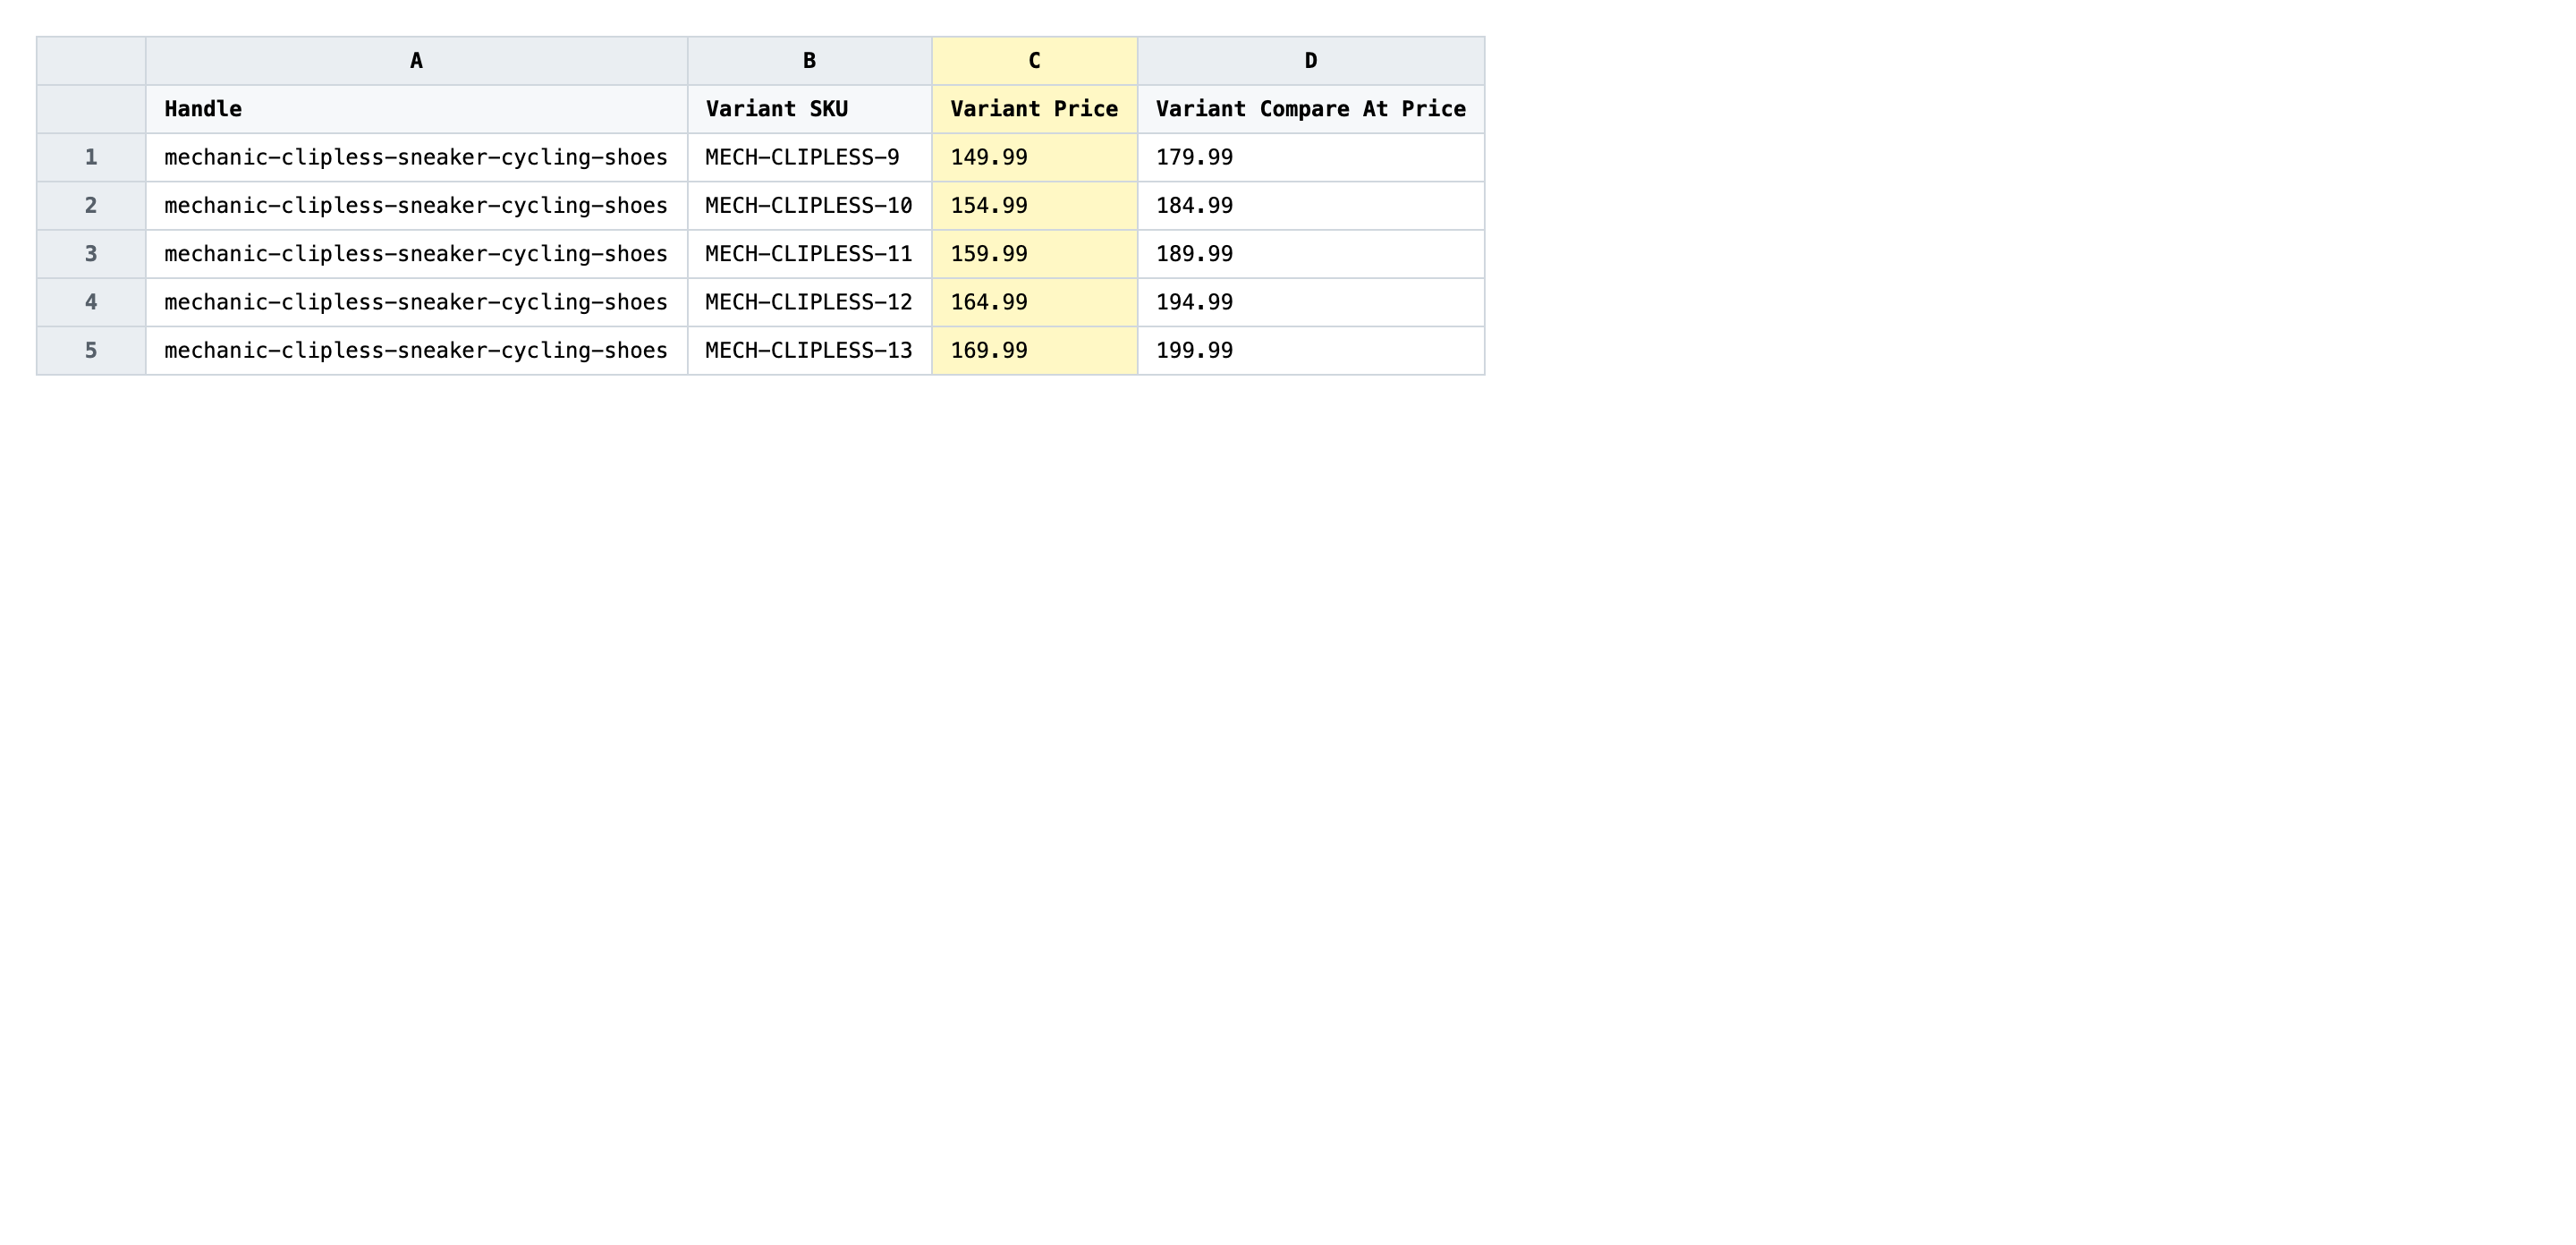
Open the downloaded CSV in Excel or Google Sheets. The Variant Price column holds today's tier, and that's the column the rollout rewrites.
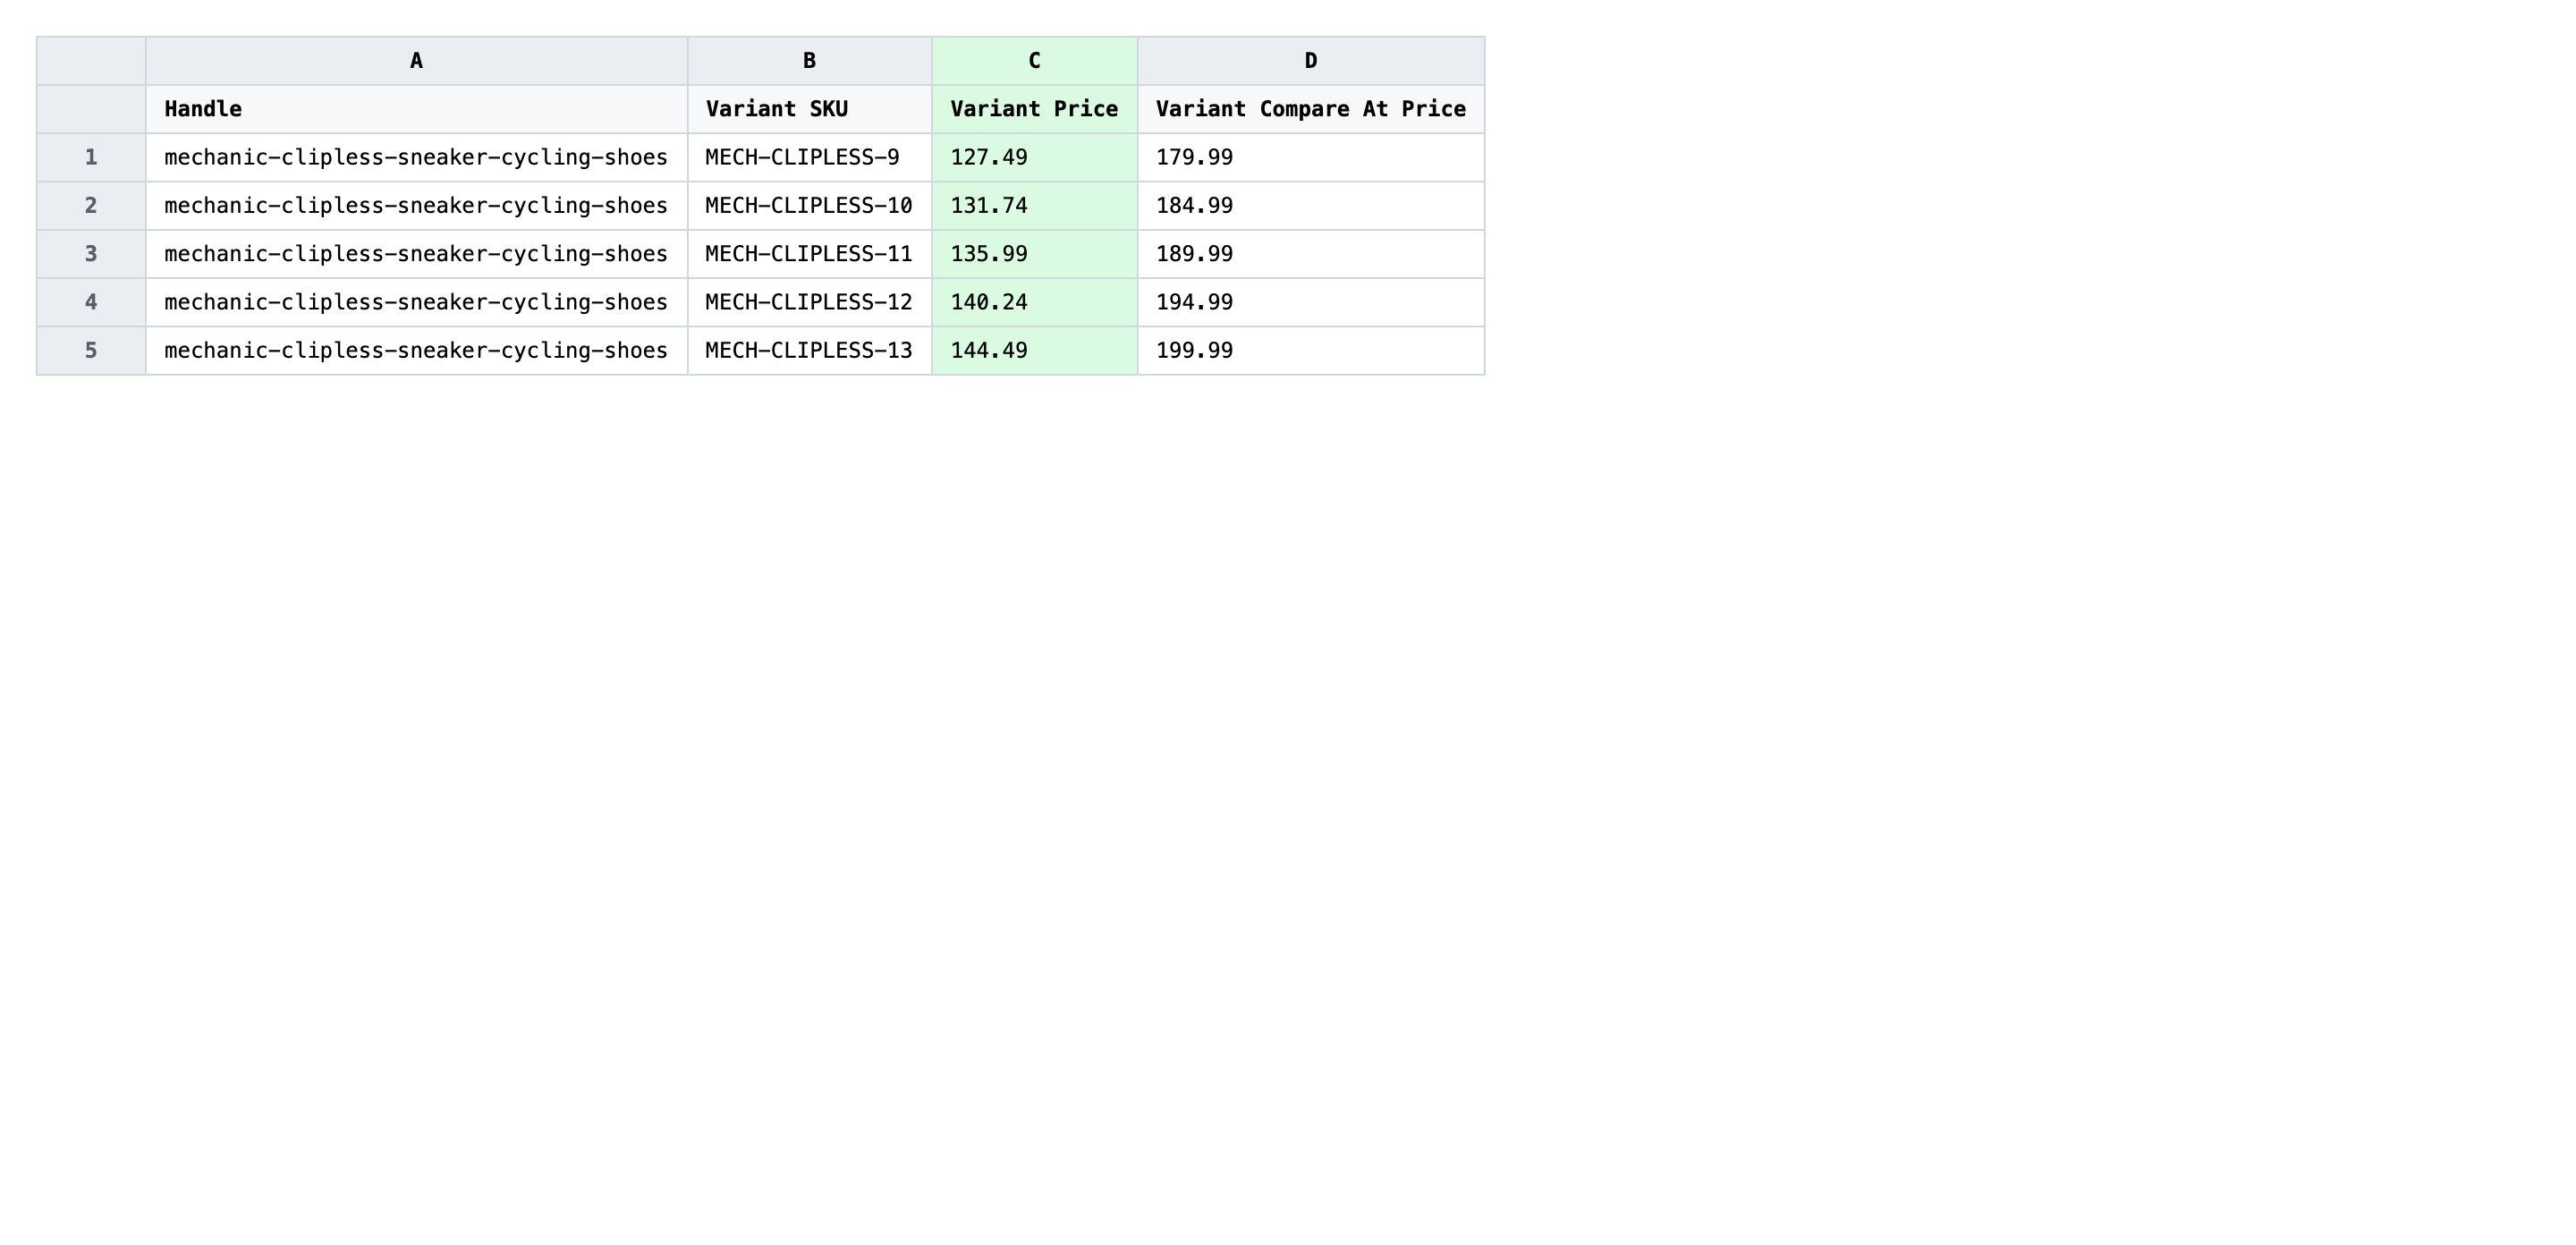
Now rewrite Variant Price on every row to the new tier value. Type the price as a plain decimal number with no currency symbol — Shopify's importer rejects $ and thousand separators. If you want shoppers to see the previous tier as a strikethrough, copy the old price from Variant Price into Variant Compare At Price before you overwrite it.
- ✅
129.95 - ❌
$1,299.95 USD
Leave Handle and Variant SKU exactly as exported — those are the matching keys, and a typo in either points the row at the wrong variant or none at all. If your file has rows where Variant SKU is blank (rare, but happens on products without distinct variants), leave the price on those rows alone or remove the rows entirely rather than guessing.
Save the file as CSV when you're done, and keep the original export handy in case you want to revert.
Tip: Sort the spreadsheet by Variant Price before editing so every variant in the same starting tier sits together — it makes spot-checking the new prices far faster than scanning a random order.
Step 3 — Import the edited file back to Shopify
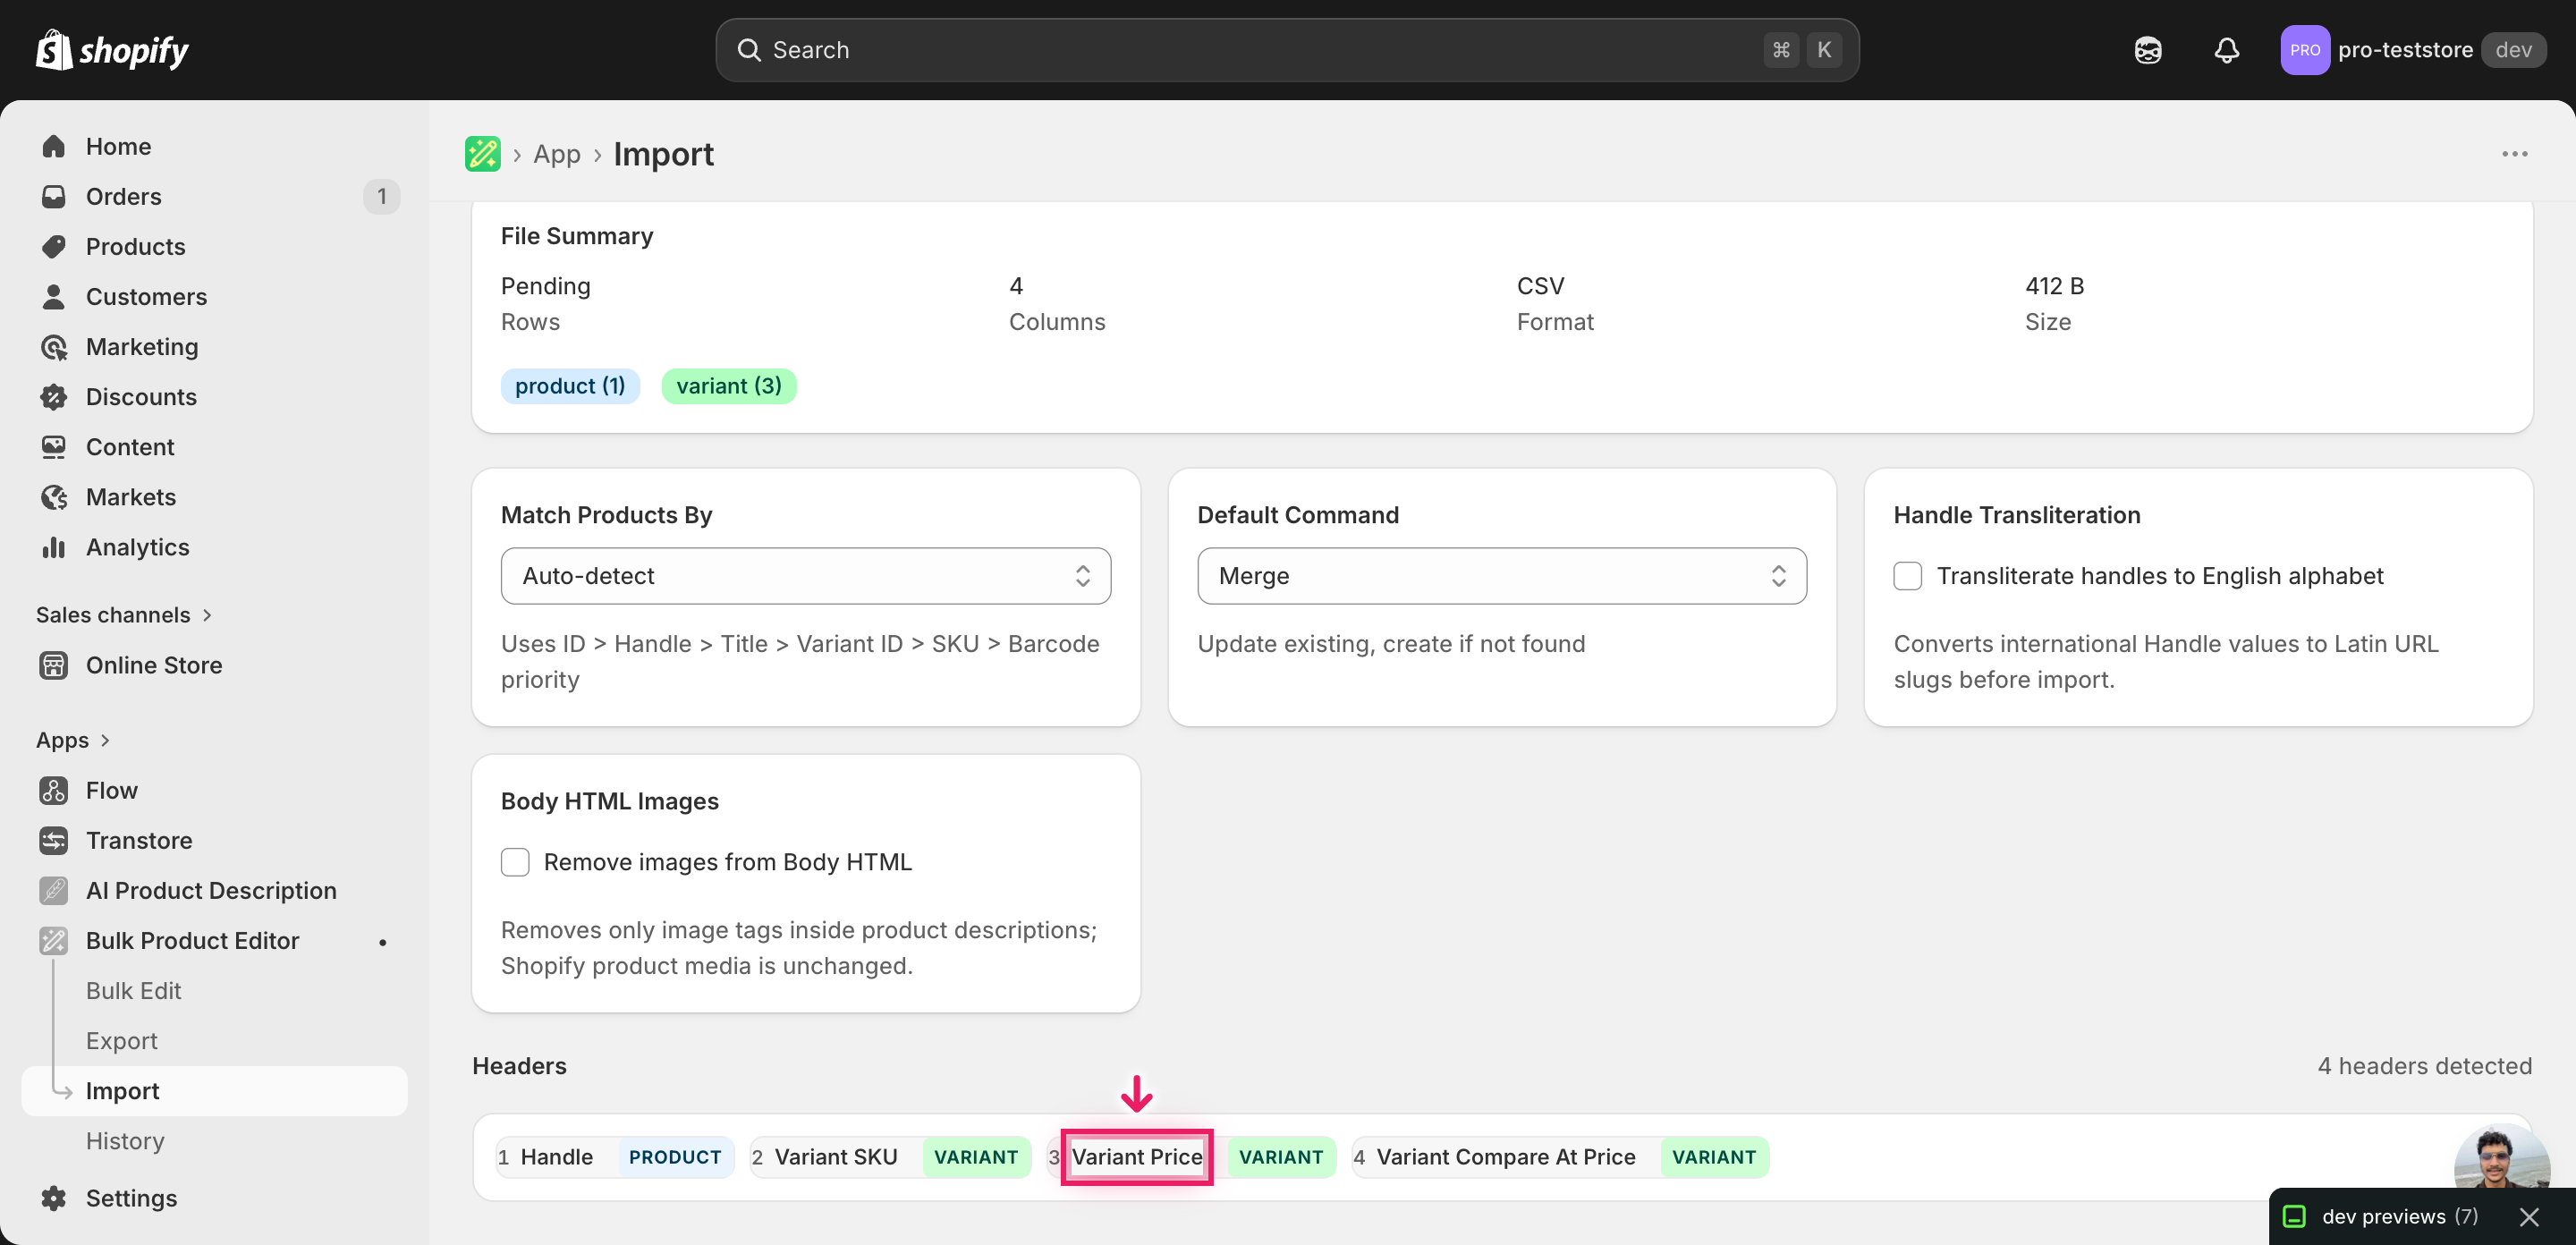
Open EditEngine → Import and select Advanced import. Then upload the file you just edited.
EditEngine reads the file and shows a summary. Check the Headers panel: Variant Price and Variant Compare At Price should be detected as variant-level columns, and Variant SKU should show as the variant matching key. Leave Match Products By on Auto-detect and Default Command on Merge so the importer updates the existing variants instead of creating new ones.
Note: This advanced import does not have a dry-run toggle, and a tier rollout overwrites live selling prices — so test on a tiny batch first. Take two or three rows from your edited file, save them as a separate CSV, import that, and verify the new prices in the Shopify admin before you upload the full rollout. That catches a misformatted price or a swapped tier column before it hits every variant in your catalog.
Click Start Import and wait for the job to finish — a small file takes seconds, larger catalogs a couple of minutes. When it completes, EditEngine shows a per-row summary.
Download the results CSV. It lists every row with a pass/fail status — that file is your proof the change went through, and the new values are now live in your Shopify admin.
Tips and troubleshooting
Don't touch Handle or Variant SKU. EditEngine matches each price update to its variant by the Handle + Variant SKU pair. If you sort by accident and then edit a SKU, or trim a trailing space, the importer either points the price at the wrong variant or fails the row outright. Lock those two columns before editing, and only unlock them if you genuinely need to.
Stage the rollout on two SKUs first. A tier rollout that goes wrong is visible to every shopper the second the import finishes. Cut two or three representative rows into a separate file, import that, refresh the storefront, confirm the new prices and any compare-at strikethroughs render correctly, then import the full file. Five extra minutes of staging saves an emergency revert.
Move the old price into Variant Compare At Price. Shoppers respond to seeing the change, not just the new number. Before you overwrite Variant Price with the new tier, paste the previous value into Variant Compare At Price in the same row — Shopify will render the old price as a strikethrough next to the new one. Skip this on rollouts where the price goes up: leaving an old, lower compare-at price looks like an error.
Run the import on the rollout date, not before. EditEngine has no scheduled-import feature, so the moment the file imports is the moment the new tier goes live. Save the edited CSV ahead of time, then open EditEngine on the rollout morning and start the import — that way the new prices and the marketing email or storefront banner land in the same window instead of leaking early.
Frequently asked questions
How do I bulk update tier rollouts in Shopify?
Export your products from EditEngine with the Handle, Variant SKU, and Variant Price columns, then rewrite each price in a spreadsheet to match the new tier. Import the file back through the advanced flow to bulk update Shopify tier rollouts in one pass instead of editing each variant by hand.
Can I edit Shopify tier rollouts in a spreadsheet?
Yes. EditEngine exports one row per variant with its current price, and you edit the Variant Price column in Excel or Google Sheets before importing the file back. A Shopify tier rollouts CSV is the only way to swap thousands of variants from tier A to tier B without clicking through the admin.
How long does a bulk tier rollouts import take in Shopify?
A few hundred variants finish in under a minute, and a catalog of several thousand typically lands in three to five. EditEngine streams the file row-by-row, so even large tier rollouts complete without timing out, and the results CSV shows the exact duration for your job.
What format does Shopify accept for tier rollouts imports?
A CSV or XLSX file with Handle, Variant SKU, and Variant Price columns is the format EditEngine's advanced import reads for a bulk update Shopify tier rollouts job. Add Variant Compare At Price if you want shoppers to see the previous tier as a strikethrough next to the new one.
Can I undo a bulk Shopify tier rollouts update?
There's no one-click undo, but the export file is your backup — keep the unedited copy and re-import it to roll prices back to the previous tier. Because the workflow only overwrites Variant Price, no products, variants, or inventory are touched.
Related tutorials
- How to Bulk Markup Shopify Pricing From Cost
- How to Bulk Markdown Shopify Sale Pricing
- How to Bulk Round Shopify All Prices To 99 95 Endings
About EditEngine: EditEngine Bulk Product Editor helps Shopify merchants bulk edit, bulk import, and bulk export their product catalog in minutes instead of days. Install on Shopify →