Variants & options
How to Bulk Reposition Shopify Variants
Last updated
Want to bulk reposition Shopify variants so the size, color, or pack option you actually sell most appears first on every product page? With EditEngine Bulk Product Editor, you export your products to a spreadsheet, renumber the Variant Position column for each variant row, and import the file back. Because each variant carries its own position, the spreadsheet round-trip is the right tool when you need to reorder dozens or hundreds of variants at once.
What you'll learn
- Export every product with its current variants and positions
- Reorder variants per row in a spreadsheet
- Import the updated file back to Shopify and confirm the new order is live
What you'll need
- The EditEngine Bulk Product Editor app installed in your Shopify store
- At least one product with two or more variants already created in Shopify
- The Advanced import flow — variant position is supported in the advanced import only
- A spreadsheet editor (Excel, Google Sheets, Numbers — anything that opens CSV)
Variant position is the integer that controls the order variants appear in on the product page, in the admin, and in the variant picker. Position 1 shows first. Shopify lets you drag variants one product at a time in the admin, but there's no UI to reorder variants across a whole catalog — which is exactly what the spreadsheet workflow below fixes.
Step 1 — Export your Shopify variants
Open EditEngine and go to the Export page. This is where you choose which variant fields land in your spreadsheet.
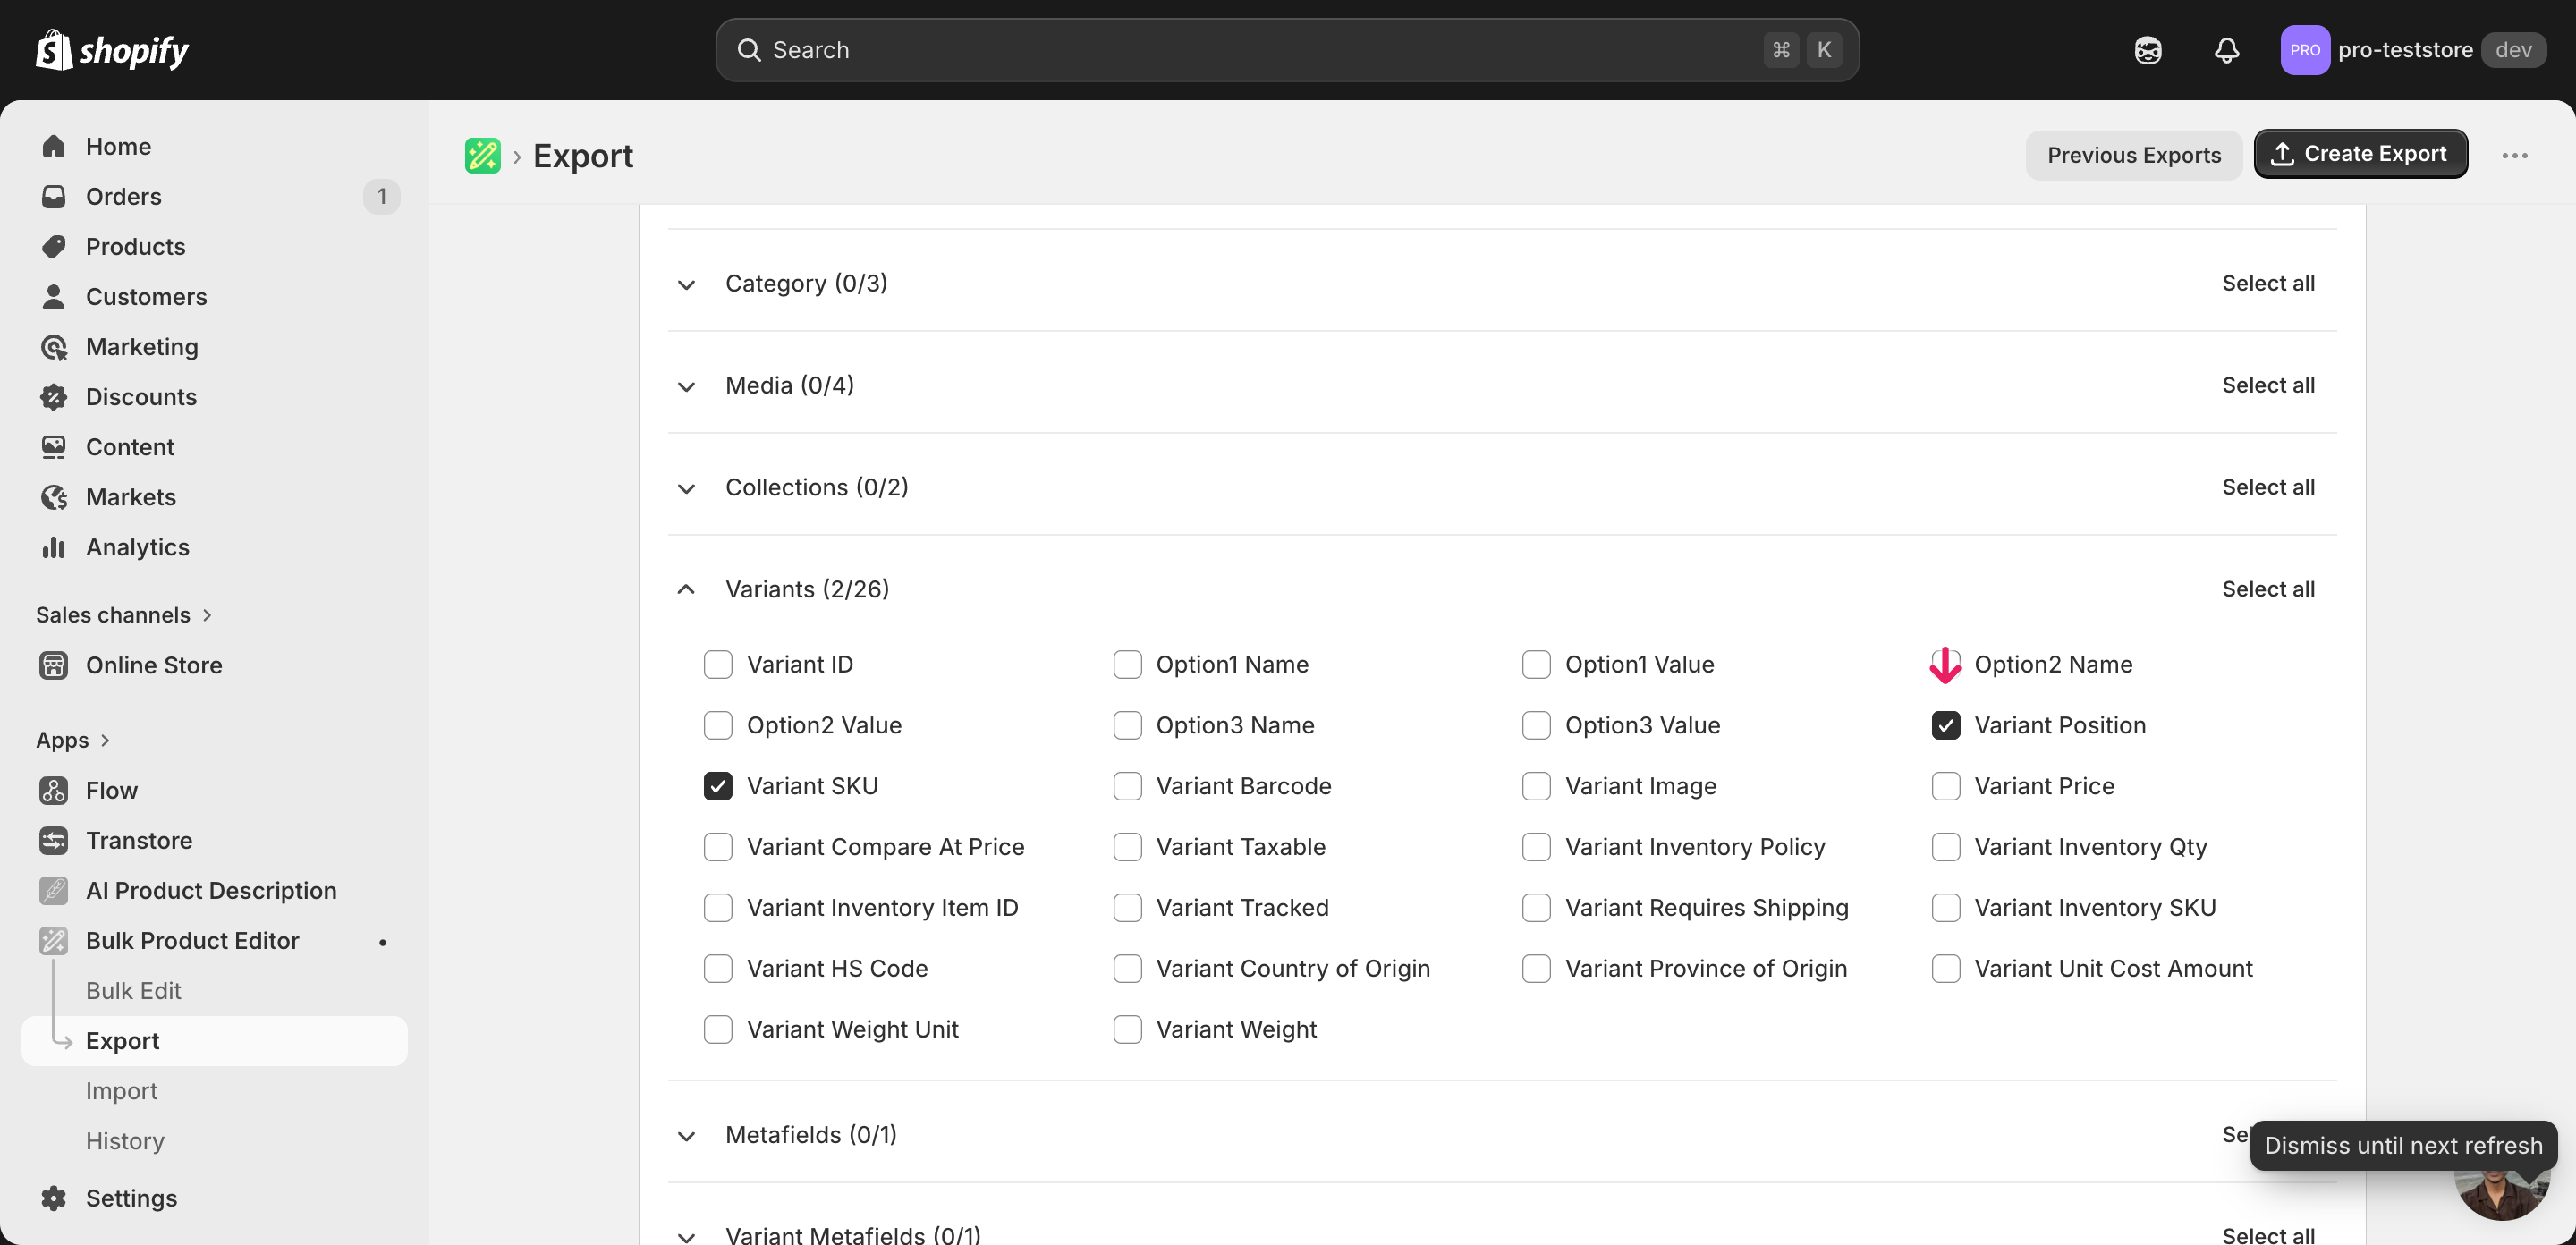
Pick the right columns
- Handle — the unique product identifier the importer uses to match each row back to the right product.
- Variant SKU — the matching key for each variant within a product. EditEngine uses this to find the specific variant to reposition, so it must stay exactly as exported.
- Variant Position — the column you'll edit. It's the integer (1, 2, 3, …) that controls the order variants appear in on the product page. Expand the Variants group and tick Variant SKU and Variant Position.
When the export completes, click Download. You'll get one row per variant: a product with five variants exports as five rows, and the second and later rows leave Title blank — that's normal.
New to exporting? This guide assumes you know how to run an export and focuses only on the columns and edit unique to this workflow.
Step 2 — Bulk reposition Shopify variants in your spreadsheet
Open the downloaded CSV in Excel or Google Sheets. The Variant Position column holds the current order — 1 is the variant that shows first today, 2 is second, and so on.
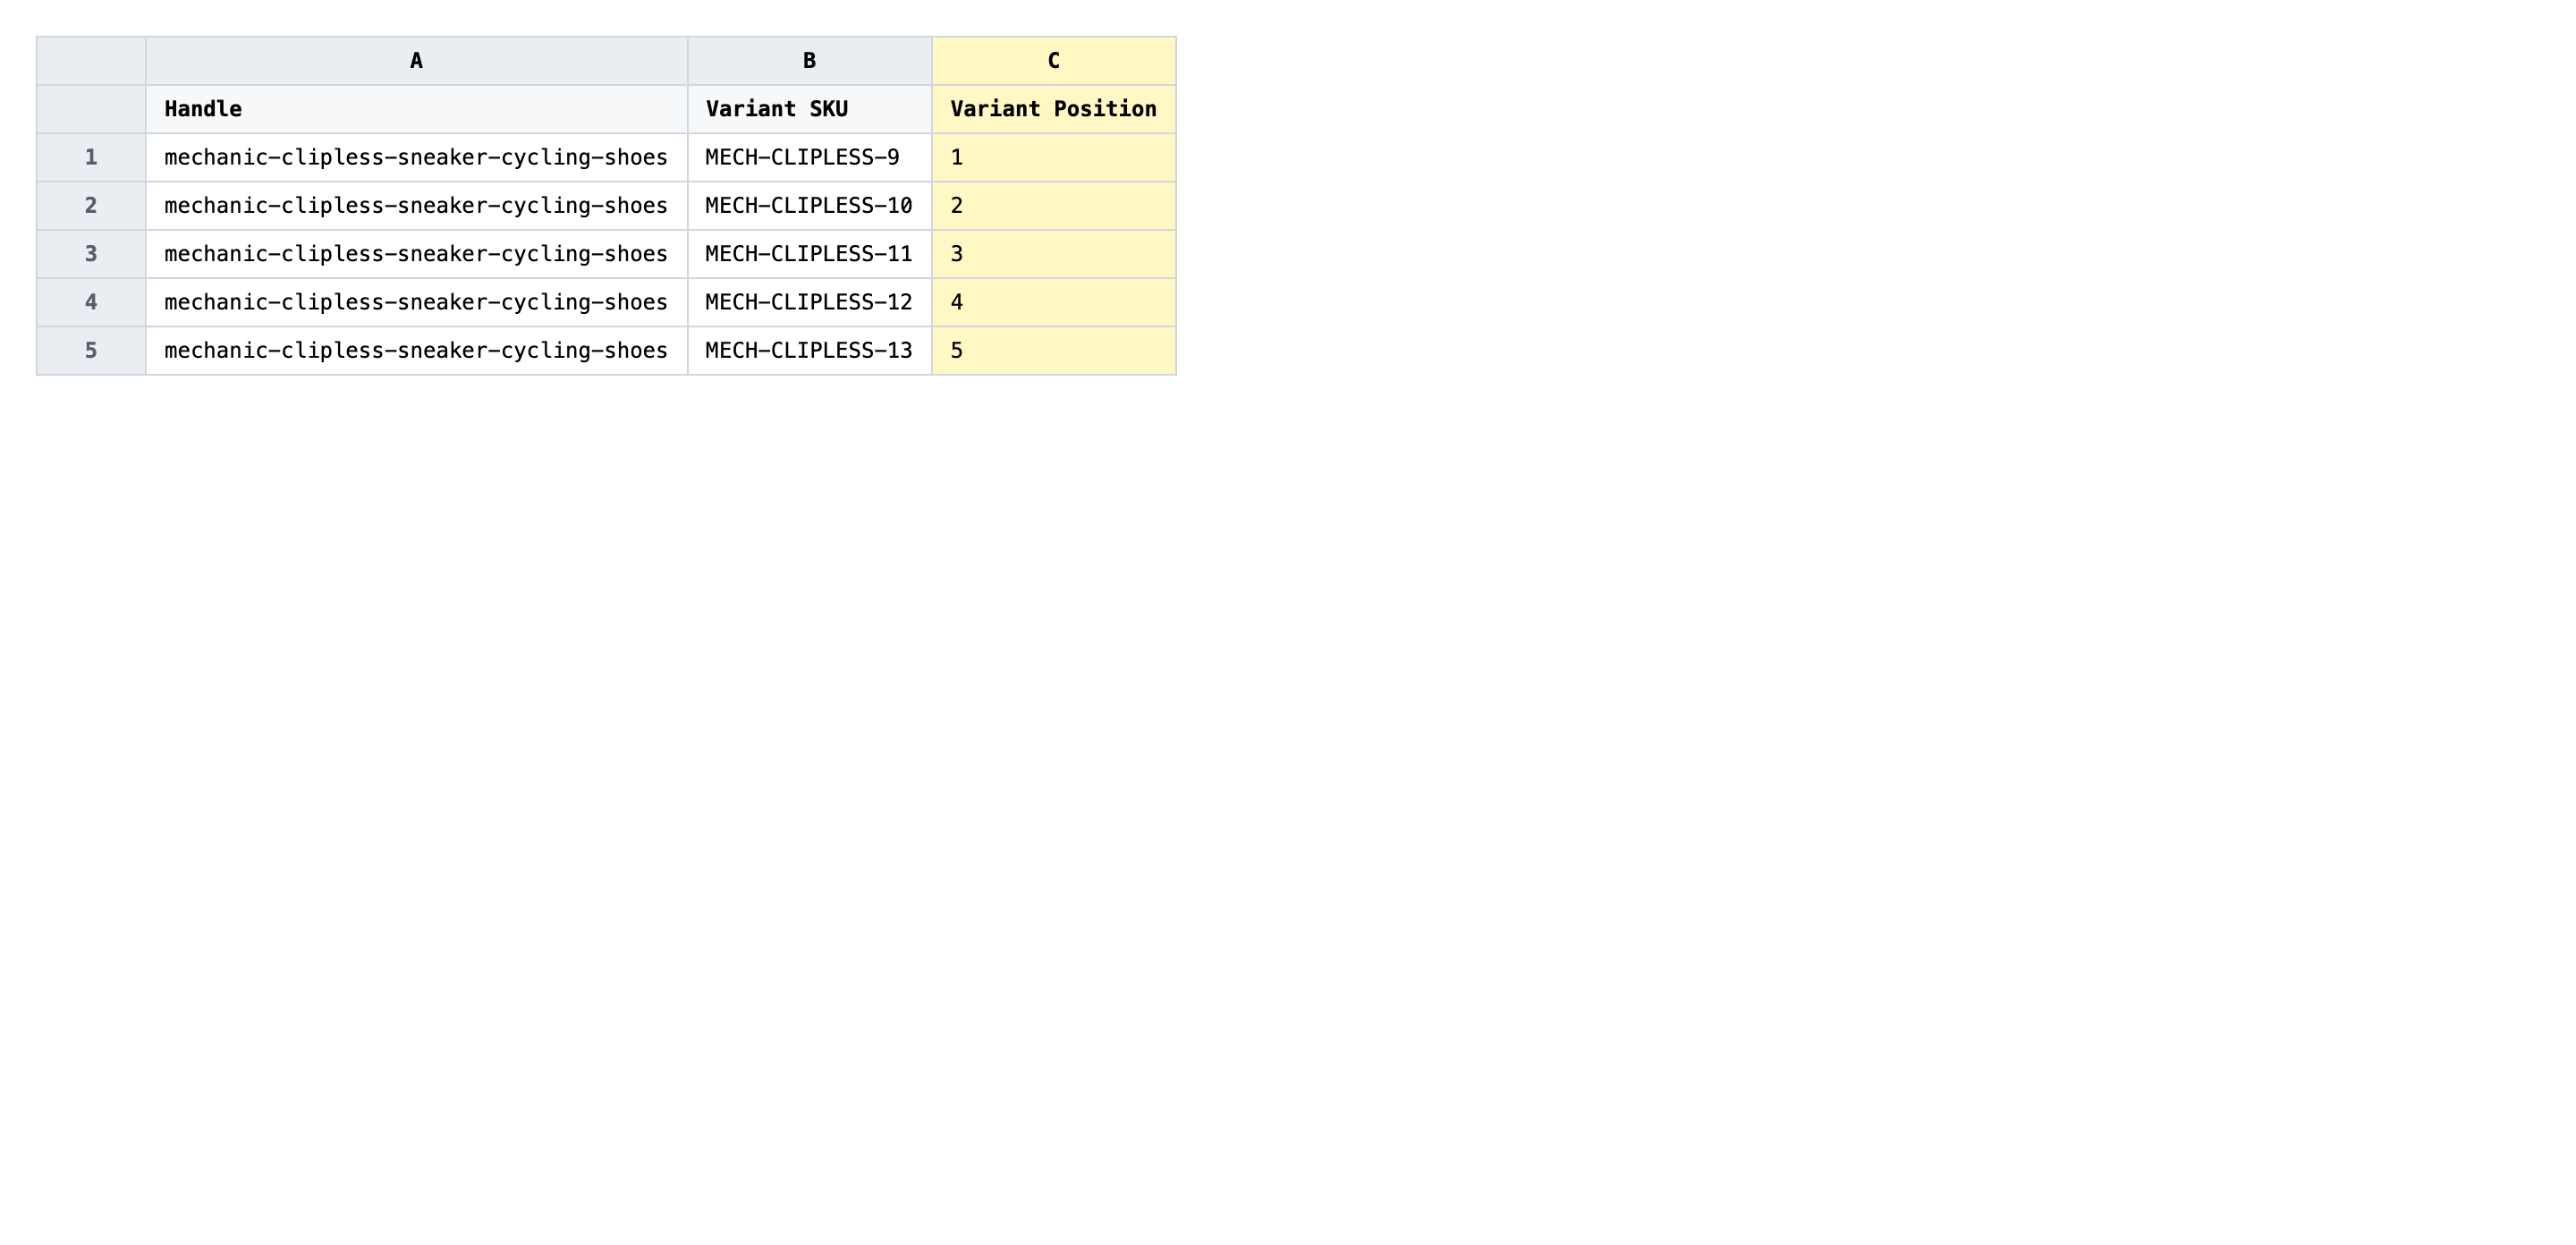
Now renumber Variant Position within each product. The positions are scoped per product — every product starts at 1 — so set the variant you want to appear first to 1, the next to 2, and so on. Use whole numbers only, and make sure each number from 1 to N is used exactly once inside a product (no gaps, no duplicates).
- ✅
1, 2, 3, 4 within the four rows that share the same Handle - ❌
1, 1, 3, 5 or 0, 1, 2, 3 — duplicates, zero, or gaps will leave variants in an unpredictable order
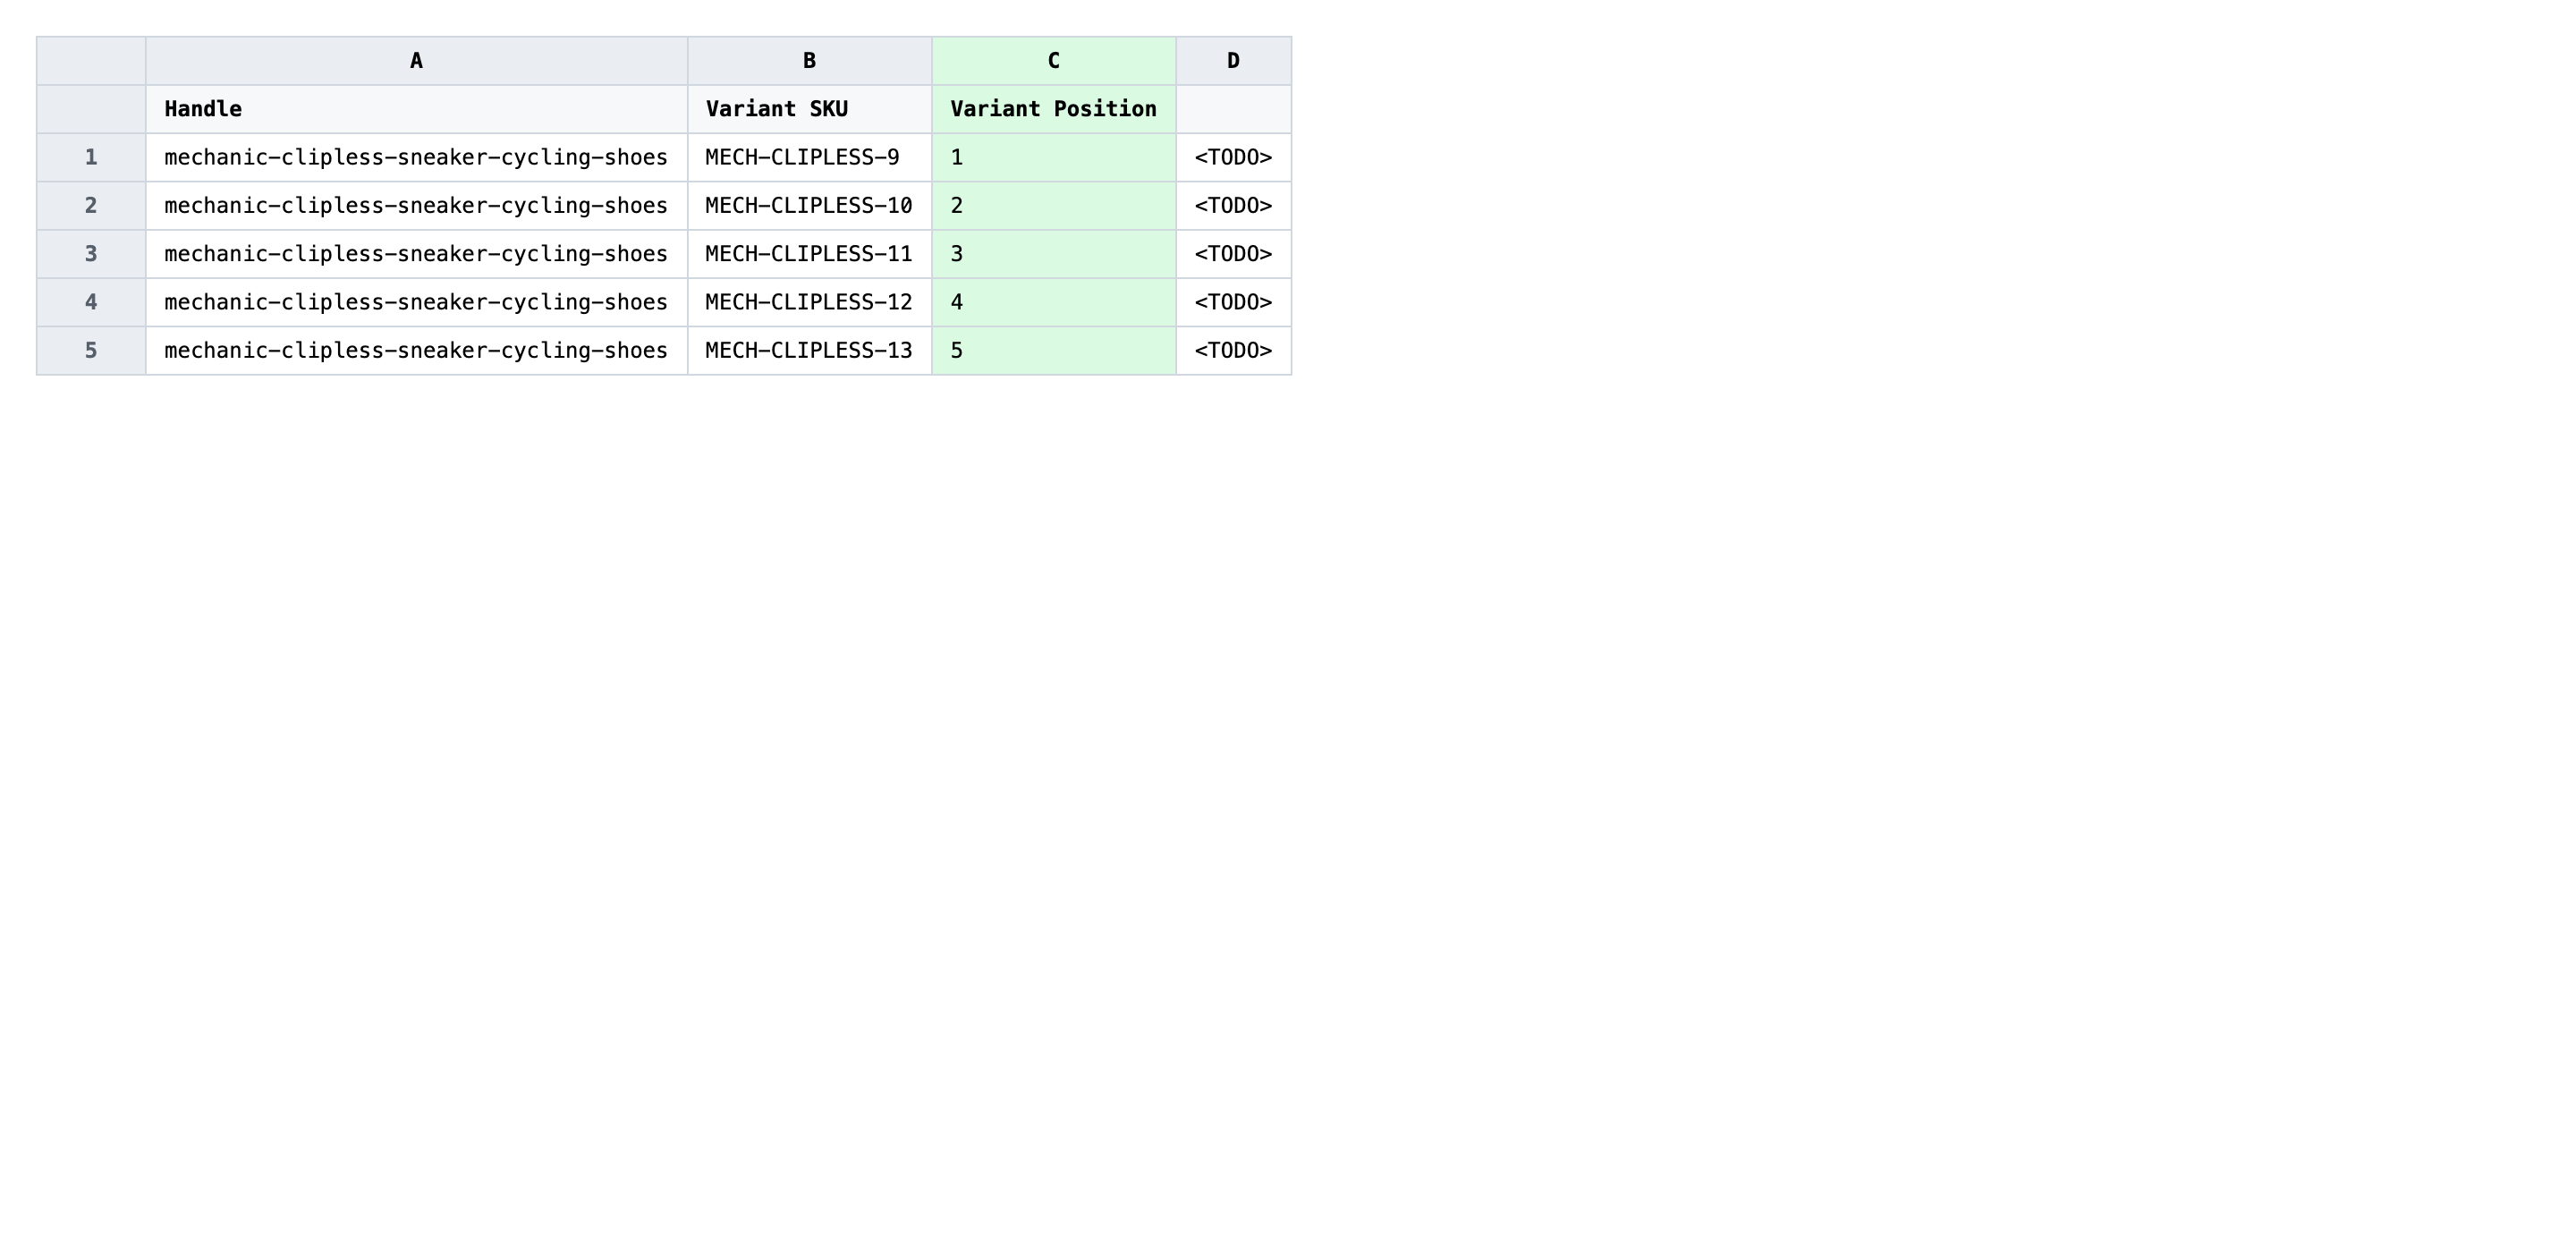
Leave every other column exactly as exported. Do not edit Handle or Variant SKU — those are the matching keys, so changing them either points the row at a different variant or unlinks it entirely. Position numbers must restart at 1 for each new Handle; don't number 1–50 straight down the file across multiple products.
Save the file as CSV when you're done, and keep the original export handy in case you want to revert.
Tip: Sort the spreadsheet by Handle first, then by the new Variant Position, before you save. That visual check makes duplicate or missing positions jump out immediately.
Step 3 — Import the edited file back to Shopify
Open EditEngine → Import and select Advanced import. Then upload the file you just edited.
EditEngine reads the file and shows a summary. Check the Headers panel: Variant SKU and Variant Position should both carry the VARIANT badge, which confirms the importer recognized them as variant-level fields. Leave Match Products By on Auto-detect and Default Command on Merge.
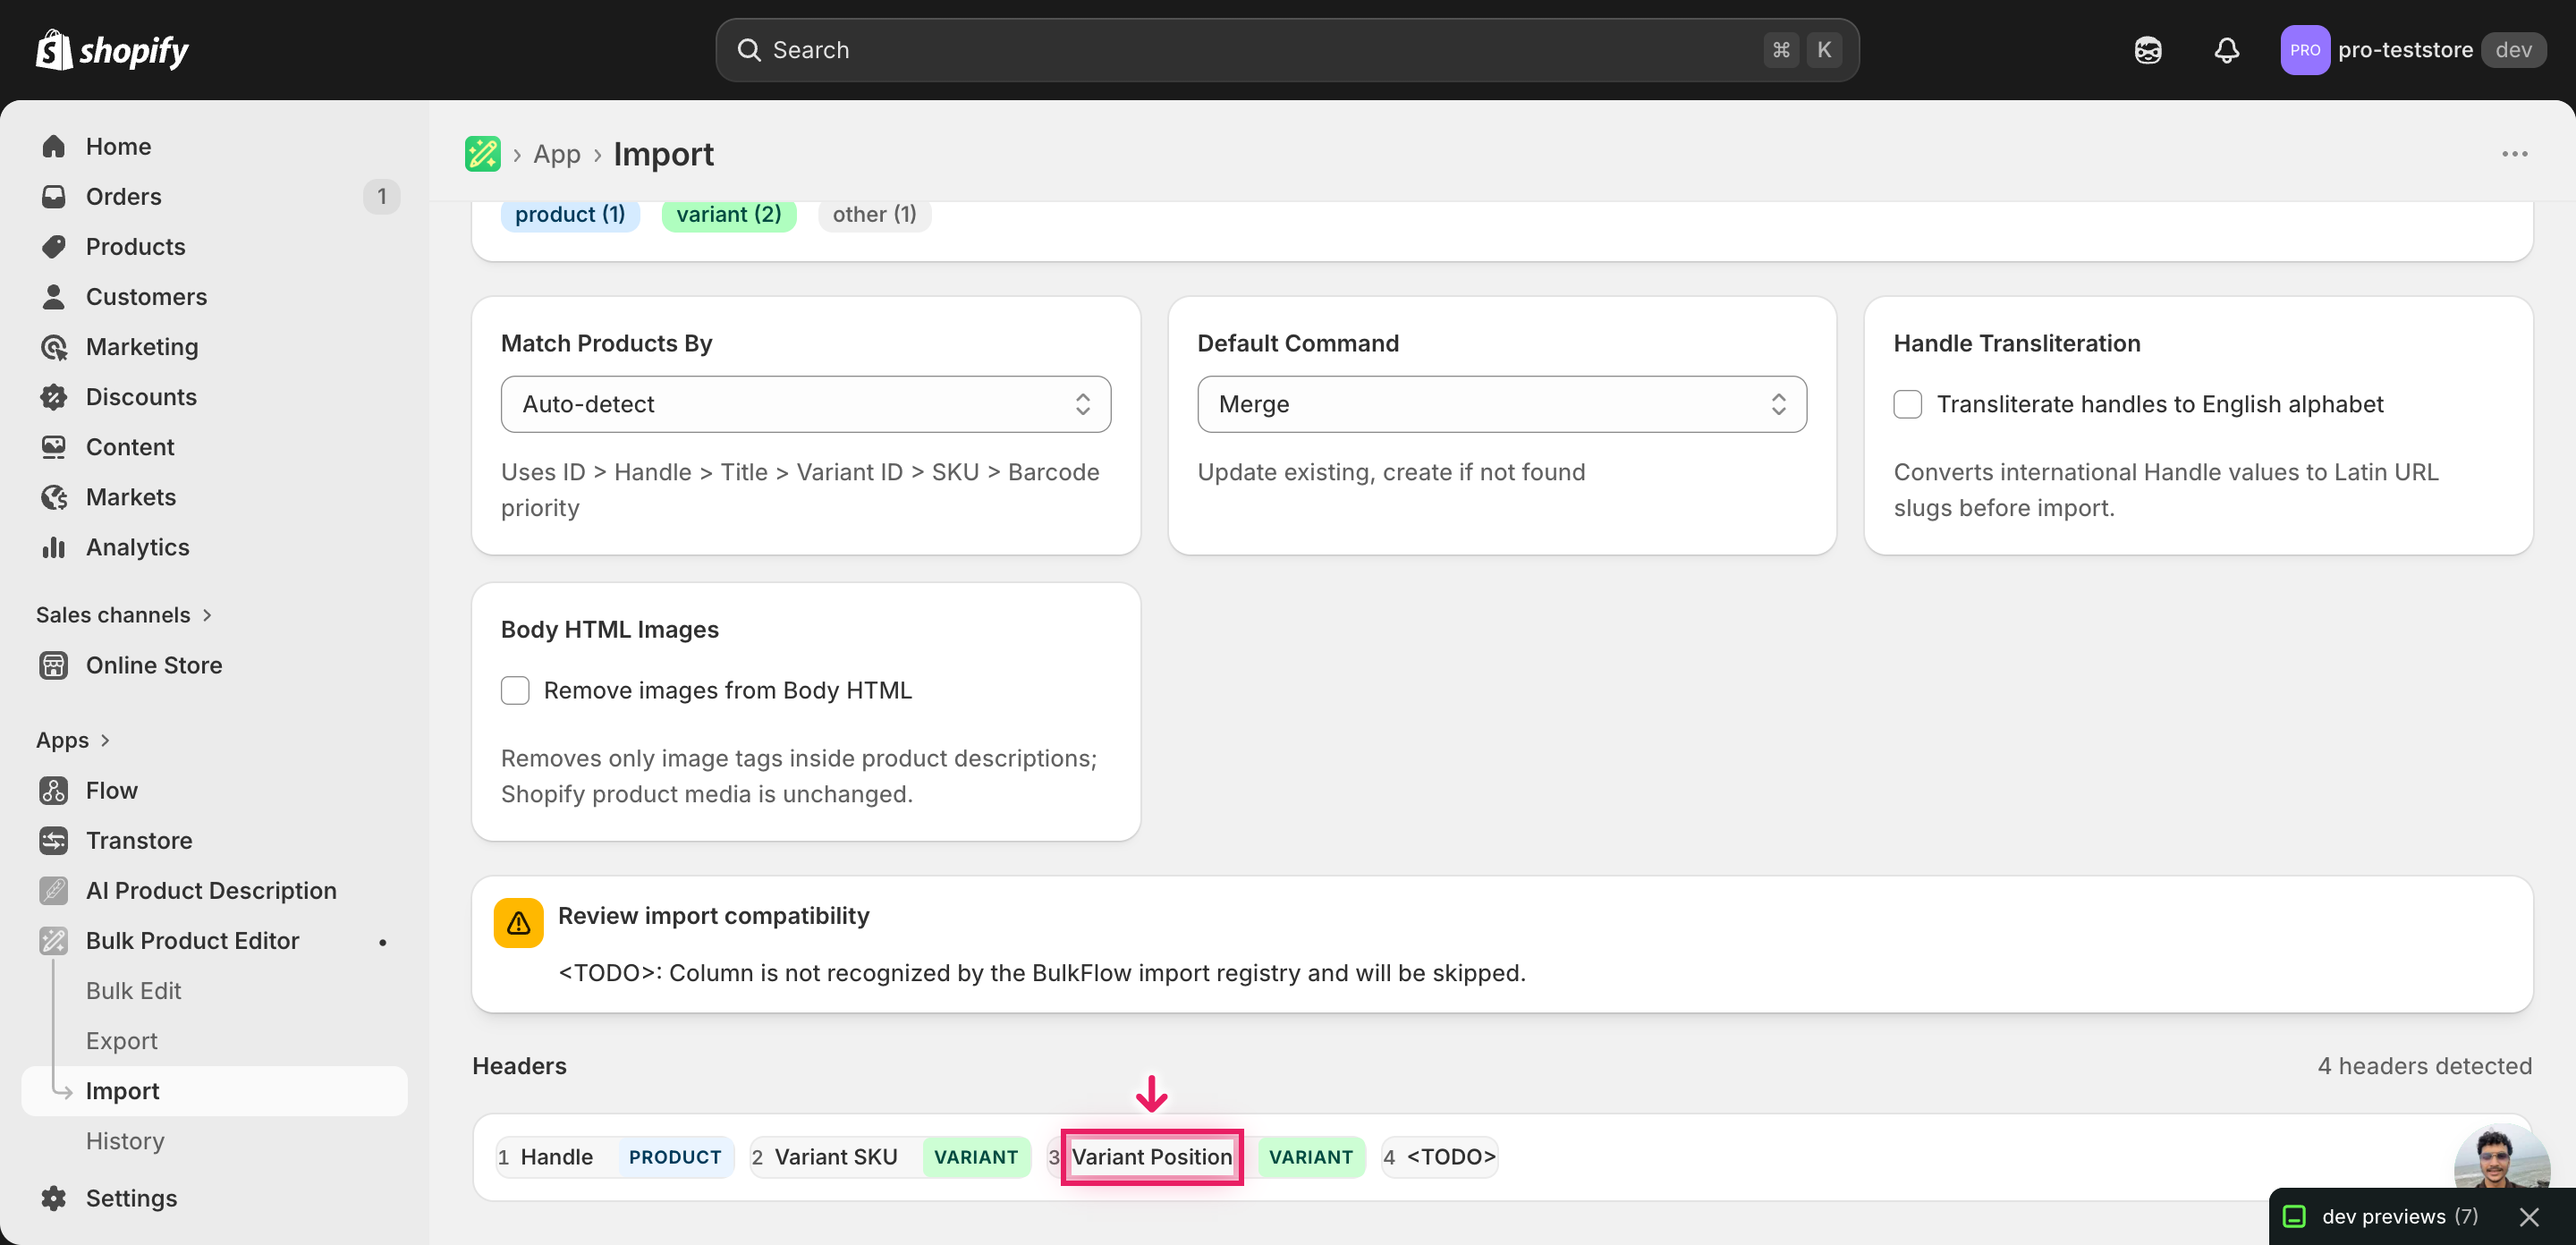
Note: This advanced import does not have a dry-run toggle. Repositioning is reversible — no variants are deleted — but a typo in Variant Position can scramble a product's order, so run a first import with one product (a few rows) before you commit the whole catalog. Open that product in the admin, confirm the order looks right, then upload the full file.
Click Start Import and wait for the job to finish — a small file takes seconds, larger catalogs a couple of minutes. When it completes, EditEngine shows a per-row summary.
Download the results CSV. It lists every row with a pass/fail status — that file is your proof the change went through, and the new values are now live in your Shopify admin.
Tips and troubleshooting
Position is per product, not per file. Every product's variants are numbered starting at 1. If you accidentally number variants 1–50 straight down the file across five products, only the last product will look right and the rest will end up in unpredictable order. Sort by Handle and reset the counter at every Handle change.
Don't touch Handle or Variant SKU. EditEngine matches each row to a variant by Handle + Variant SKU. If you edit, trim, or reformat either column, the importer either targets the wrong variant or fails the row. If your SKUs have changed since the last export, re-export to get fresh values before you renumber positions.
Use whole numbers with no gaps or duplicates. Shopify expects positions 1, 2, 3, … N for a product with N variants. Decimals, zero, negative numbers, or a 1–1–3–5 sequence will either be rejected or quietly normalized to an order you didn't intend. Renumber cleanly in the spreadsheet — don't rely on Shopify to clean it up.
Test on one product before the full catalog. There's no dry-run for advanced imports. The fastest safety net is a two-step rollout: import the rows for a single product first, open it in the Shopify admin to confirm the variant order matches what you intended, and only then upload the full file. That catches a sort error or a header rename before it touches hundreds of products.
Frequently asked questions
How do I bulk reposition variants in Shopify?
Export your products from EditEngine with the Handle, Variant SKU, and Variant Position columns, edit the Variant Position number on each row in a spreadsheet, then import the file back through the advanced import flow. This lets you bulk reposition Shopify variants in one pass instead of dragging them one by one in the admin.
Can I edit Shopify variants in a spreadsheet?
Yes. EditEngine exports one row per variant with every editable variant field as a column, so you can bulk reposition Shopify variants, rename SKUs, or update prices in Excel or Google Sheets. Shopify itself has no built-in spreadsheet editor for variant order.
How long does a bulk variants import take in Shopify?
A handful of variants imports in seconds. A few hundred typically finishes in a minute or two, and EditEngine streams larger files so even big catalogs complete without timing out. The results CSV shows the exact duration for your job.
What format does Shopify accept for variants imports?
A CSV (or XLSX) with a Handle column to match the product, a Variant SKU column to match the variant within that product, and the variant fields you want to change — for repositioning, that's the Variant Position column. EditEngine's advanced import reads this format and is the way to bulk reposition Shopify variants from a spreadsheet.
Can I undo a bulk Shopify variants update?
There's no one-click undo, but the workflow is its own backup: keep the original export, and to revert just re-import that unedited file. Because positions only overwrite a number, no variants are deleted or unlinked when you bulk reposition Shopify variants.
Related tutorials
About EditEngine: EditEngine Bulk Product Editor helps Shopify merchants bulk edit, bulk import, and bulk export their product catalog in minutes instead of days. Install on Shopify →