Inventory
How to Bulk Update Shopify Inventory Quantities Across Multiple Locations
Last updated
Need to bulk update Shopify inventory quantities across multiple locations after a stocktake, a warehouse transfer, or a quarterly reset? With the EditEngine Bulk Product Editor, you export every variant with one column per location, type the new available counts in a spreadsheet, and import the file back. EditEngine writes the absolute number you typed to each location — no per-variant clicking, no admin pagination, no math on deltas.
What you'll learn
- Export every product with its current inventory quantities at each location
- Edit per-location available quantities per row in a spreadsheet
- Import the updated file back to Shopify and confirm every location applied
What you'll need
- The EditEngine Bulk Product Editor app installed in your Shopify store
- At least two active locations in Shopify Admin → Settings → Locations, both with inventory tracking turned on for the variants you're editing
- Inventory tracking enabled on every variant you plan to update (variants set to Don't track will ignore the import)
- The Advanced import flow — multi-location inventory columns are supported in advanced import only
- A spreadsheet editor (Excel, Google Sheets, Numbers — anything that opens CSV)
Shopify tracks inventory per location, so a single variant can hold different Available counts at your warehouse, your retail store, and a pop-up. Available is what the storefront can sell — distinct from On hand (everything physically there) and Committed (already on open orders). This workflow sets Available directly, which is the column most stocktakes feed back into.
Step 1 — Export your Shopify inventory quantities
Open EditEngine and go to the Export page. This is where you choose which inventory columns land in your spreadsheet.
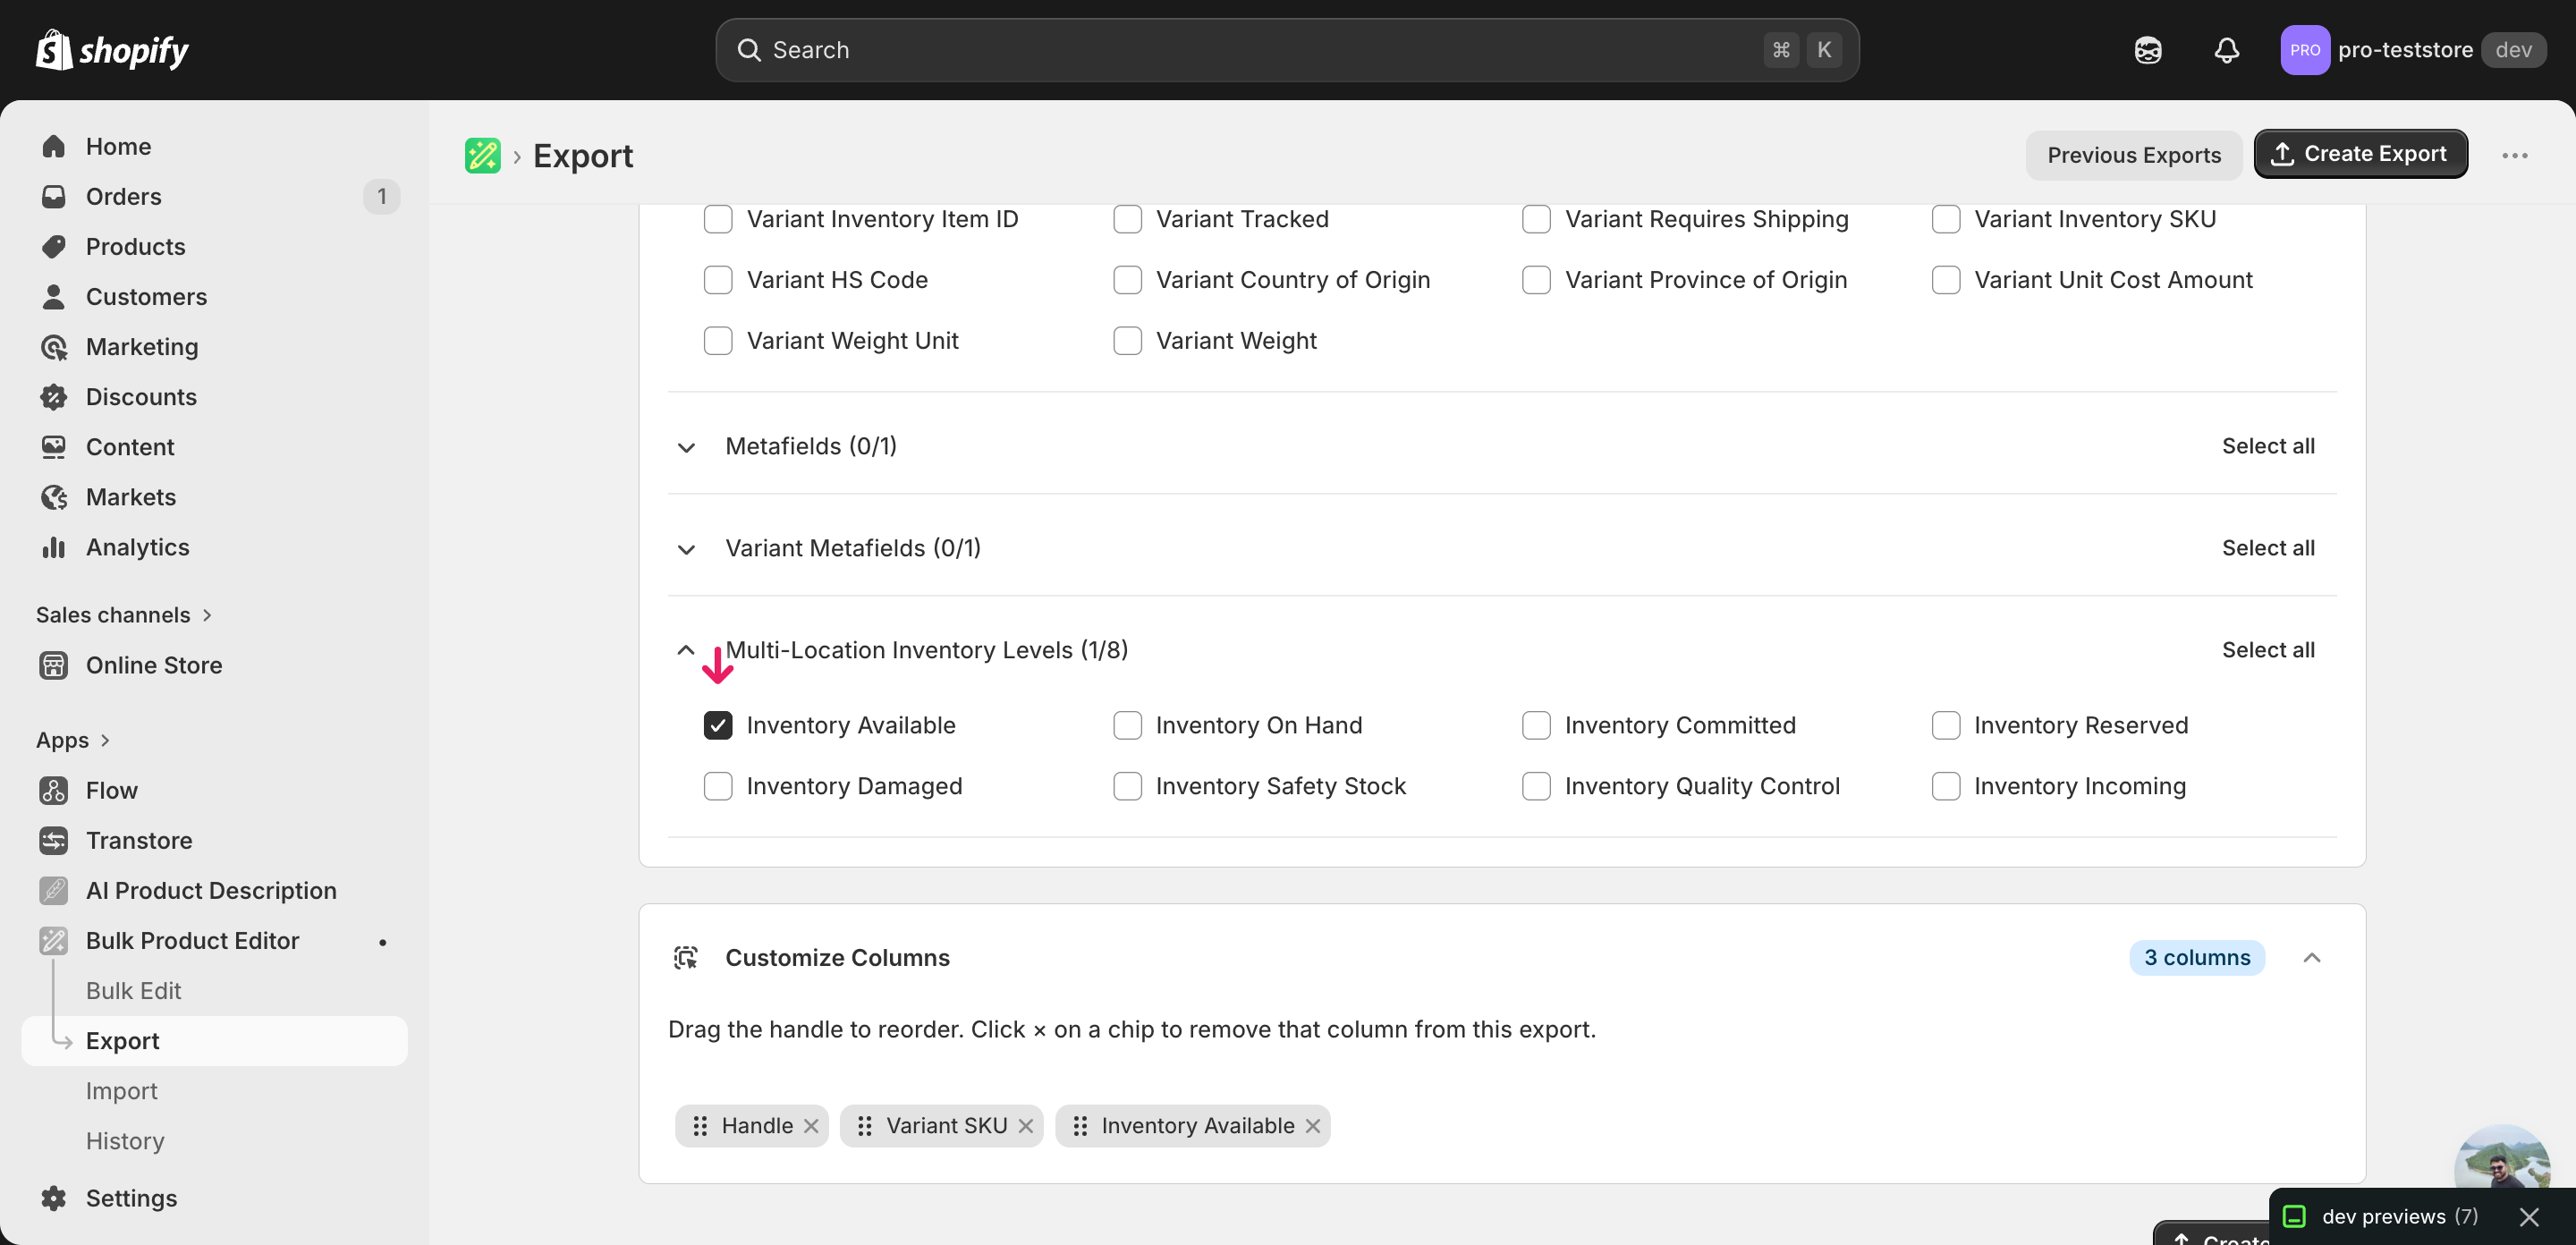
Pick the right columns
- Handle — the unique product identifier the importer uses to match each row back to the right product.
- Variant SKU — identifies the specific variant on each row. Inventory lives at the variant level, so this is the key the importer uses to write to the correct stock record.
- Inventory Available: Shop Location — the absolute available count at that location. Expand the Inventory group in the column picker and tick one
Inventory Available: <Location>column for every location you want to update — one column per location is the rule.
Click Download when the export finishes. You'll get one row per variant with a separate Inventory Available: <Location Name> column for each location you ticked — a product with five variants and three locations exports as five rows and three inventory columns.
New to exporting? This guide assumes you know how to run an export and focuses only on the columns and edit unique to this workflow.
Step 2 — Bulk update Shopify inventory quantities across multiple locations in your spreadsheet
Open the downloaded CSV in Excel or Google Sheets. Each Inventory Available: <Location> column holds the current available count at that location, and that's the only set of cells you'll edit.
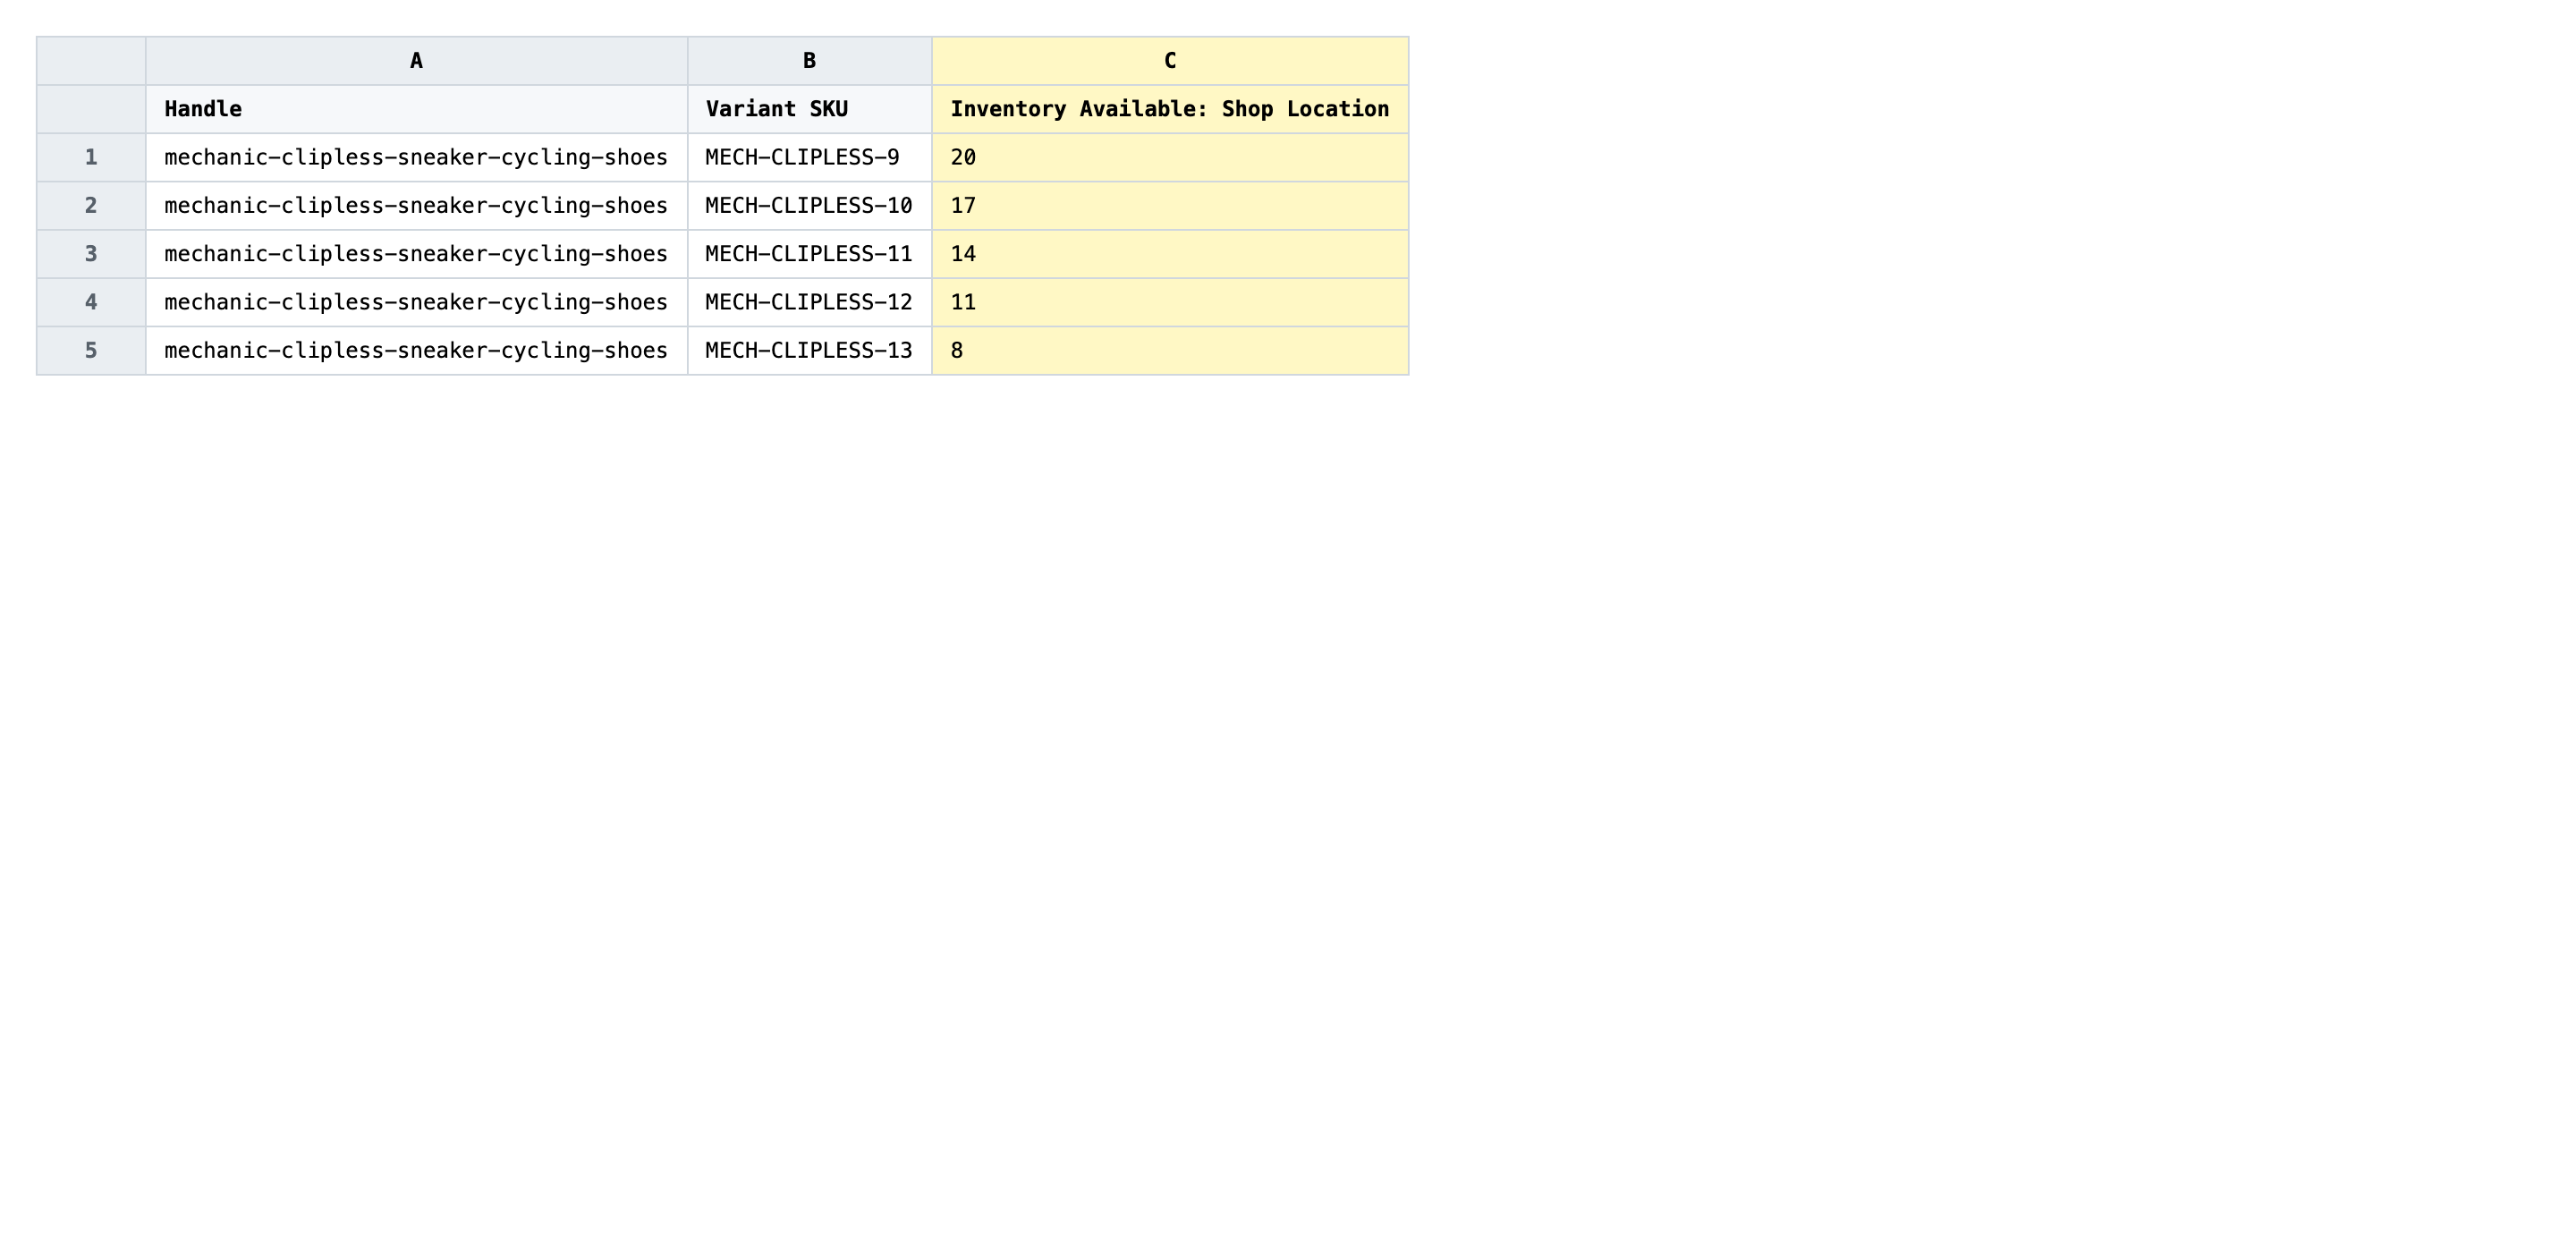
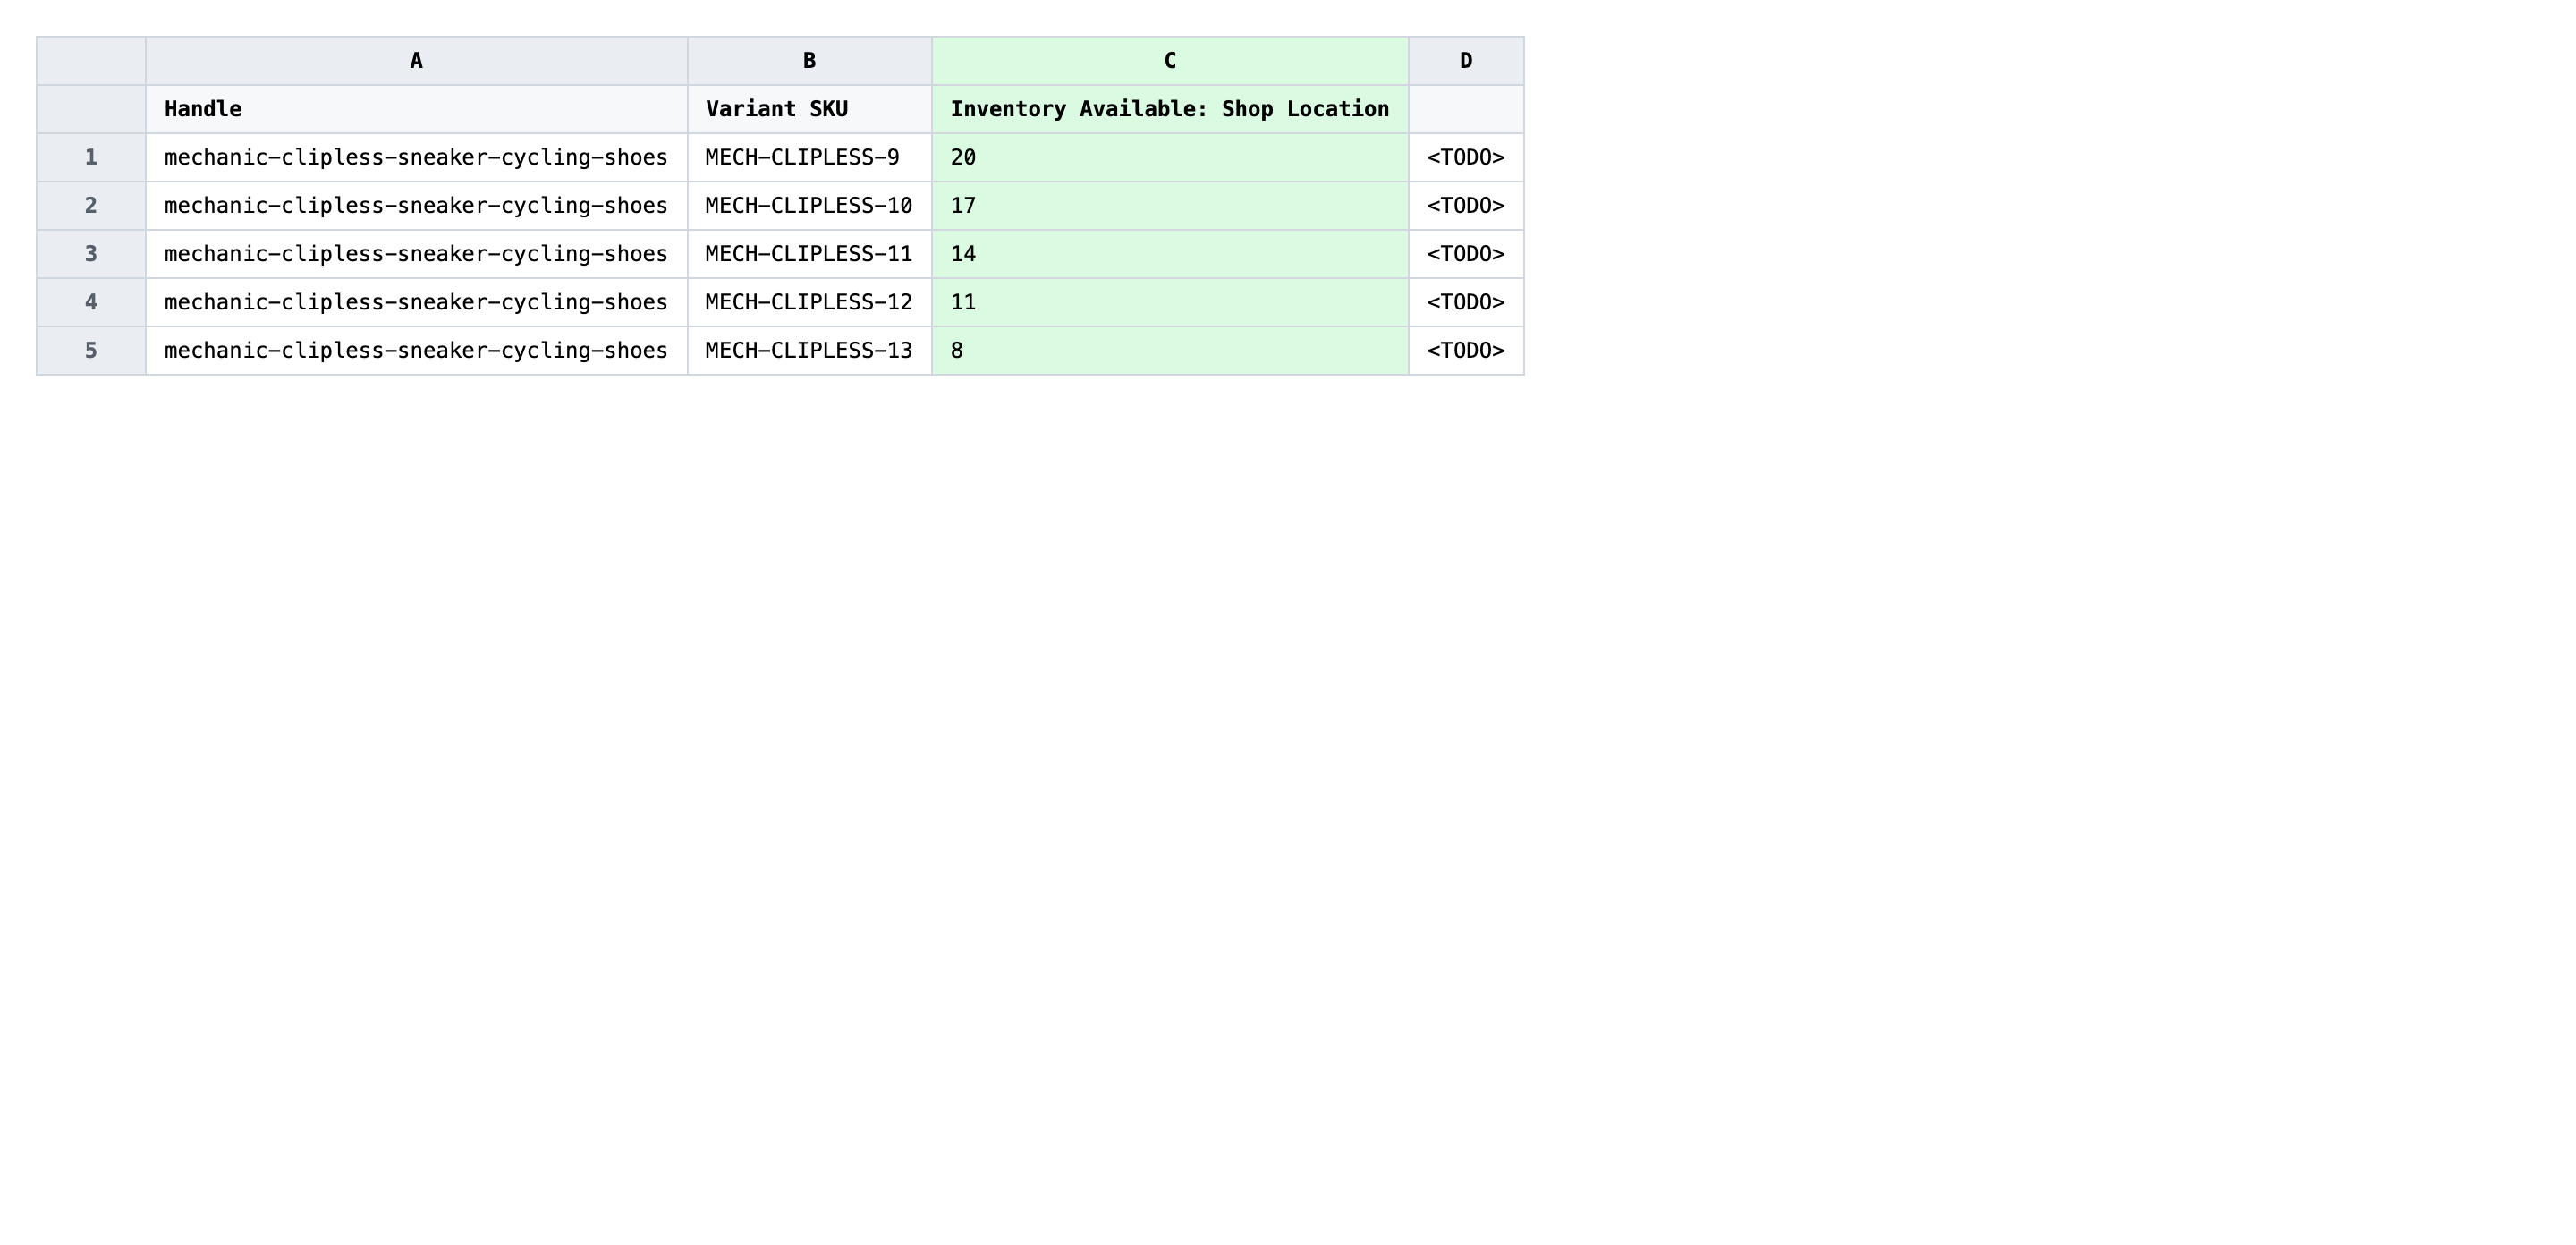
Type the new available count into each Inventory Available: <Location> cell for every variant row. Use whole numbers only — no commas, no units, no formulas left unresolved. A blank cell means "don't change this location", and 0 means "set the available count to zero" (which makes the variant unsellable at that location), so be deliberate about which one you're using.
- ✅
42 - ❌
42 units, 1,250, or +12 (deltas belong in the inventory adjust workflow, not this one)
Leave Handle and Variant SKU exactly as exported — those are the matching keys, so changing them points the row at a different variant or at nothing. Don't rename the location columns either: the header Inventory Available: Shop Location is how the importer knows which location to write to, and a typo silently drops the update for that column.
Save the file as CSV when you're done, and keep the original export handy in case you want to revert.
Tip: If a variant is set to Don't track quantity in Shopify, the importer ignores its inventory cells — turn tracking on for those variants before you import, or the row will report success but the count won't change.
Step 3 — Import the edited file back to Shopify
Open EditEngine → Import and select Advanced import. Then upload the file you just edited.
EditEngine reads the file and shows a summary. Check the Headers panel: every Inventory Available: <Location> column should carry the INVENTORY badge, which confirms the importer recognized them and matched each header to a real location in your store. Leave Match Products By on Auto-detect (it'll use Variant SKU) and Default Command on Merge.
Note: This advanced import does not have a dry-run toggle, and inventory writes are immediate — the new available counts replace the old ones the moment the job finishes, which can take products off-sale if you write a zero by mistake. Import three or four representative rows first, open those variants in the Shopify admin, confirm the per-location numbers match what you typed, then import the full file.
Click Start Import and wait for the job to finish — a small file takes seconds, larger catalogs a couple of minutes. When it completes, EditEngine shows a per-row summary.
Download the results CSV. It lists every row with a pass/fail status — that file is your proof the change went through, and the new values are now live in your Shopify admin.
Tips and troubleshooting
Available is not On-hand. Shopify exposes several inventory states per location — Available, On hand, Committed, Incoming, Damaged, Safety stock, Quality control. This workflow writes to Available, the count the storefront can sell against. If your stocktake actually measured physical stock on the floor, use the Inventory On Hand: <Location> columns in the on-hand tutorial instead — writing physical counts into Available will undercount whatever's already committed to open orders.
One column per location, named exactly. The importer pairs each header to a Shopify location by its name. If your store has locations called Main Warehouse and Pop-up Shop, the headers must be Inventory Available: Main Warehouse and Inventory Available: Pop-up Shop — capitals, punctuation, spaces and all. A renamed or shortened header is silently ignored, and the row will report success even though that location didn't update. Check the INVENTORY badge on the mapping screen for every column before you start.
Pilot on a handful of SKUs first. Inventory changes hit the storefront the second the import finishes, so a typo in a popular SKU can take a bestseller off-sale across every location at once. Filter your export to five or ten representative variants, run the full export → edit → import once, spot-check the result in the admin, then re-export the full catalog and edit at scale. This catches column-name drift, location renames, and Excel auto-formatting (those leading-zero SKUs becoming numbers) before they hit production.
Frequently asked questions
How do I bulk update inventory quantities in Shopify?
Export your products with the Inventory Available: <Location> columns ticked for each location, edit the numbers per row in a spreadsheet, then import the file back through EditEngine's advanced import. That is the fastest way to bulk update Shopify inventory quantities across multiple locations without clicking through each variant in the admin.
Can I edit Shopify inventory quantities in a spreadsheet?
Yes. EditEngine exports one row per variant with a separate column for every location, so you can edit Shopify inventory quantities CSV-style in Excel or Google Sheets. Save the file as CSV and import it back — Shopify has no built-in spreadsheet editor for per-location stock.
How long does a bulk inventory quantities import take in Shopify?
A few dozen variants finish in seconds. Several thousand rows across two or three locations usually complete in a couple of minutes, and EditEngine streams larger jobs so you can bulk update Shopify inventory quantities across multiple locations without timeouts. The results CSV reports the exact duration.
What format does Shopify accept for inventory quantities imports?
A CSV or XLSX with a Handle column, a Variant SKU column to identify the variant, and one Inventory Available: <Location Name> column per location you're updating. EditEngine's advanced import reads this format directly when you bulk update Shopify inventory quantities across multiple locations.
Can I undo a bulk Shopify inventory quantities update?
There's no one-click undo, but the workflow is its own backup: keep the original export, and to revert just re-import that file. Because the importer overwrites the available number with whatever's in the cell, the previous export restores the previous state exactly.
Related tutorials
- How to Bulk Adjust Shopify Inventory Deltas Across Locations
- How to Bulk Update Shopify On Hand Stock Per Location
About EditEngine: EditEngine Bulk Product Editor helps Shopify merchants bulk edit, bulk import, and bulk export their product catalog in minutes instead of days. Install on Shopify →