Products
How to Bulk Create Shopify New Products From a Spreadsheet
Last updated
Want to bulk create Shopify new products from a spreadsheet instead of clicking through the Shopify admin product form for each one? With the EditEngine Bulk Product Editor, you build a CSV using EditEngine's column structure, set Default Command to NEW on the advanced import, and Shopify creates every product in a single job. It's how merchants seed a catalog of dozens or hundreds of products without losing an afternoon.
What you'll learn
- Build a CSV of new products from scratch using EditEngine's column structure
- Import the file with Command = NEW so Shopify creates each row as a brand-new product
- Confirm every product landed in your Shopify admin with the right Handle, Title, and Variant SKU
What you'll need
- The EditEngine Bulk Product Editor app installed in your Shopify store
- A short export of one or two existing products so you can copy the exact column headers EditEngine expects
- Decisions made up front on Handle, Title, Vendor, Product Type, Status, Variant SKU, and Variant Price for each new product
- The Advanced import flow — creating products with Command = NEW is advanced-import only
- A spreadsheet editor (Excel, Google Sheets, Numbers — anything that opens CSV)
Shopify's product CSV format was originally designed for migrations: each row is a product (or a variant of a product), keyed by Handle. EditEngine's advanced import reads that same format, plus a Command column that tells the importer what to do with each row. Set Command to NEW and any Handle that doesn't already exist in your store is created from scratch — that's the lever this tutorial pulls.
Step 1 — Export your Shopify new products
Open EditEngine and go to the Export page. The goal here isn't to export your whole catalog — it's to grab one or two existing products so you have an exact column-header template to fill in.
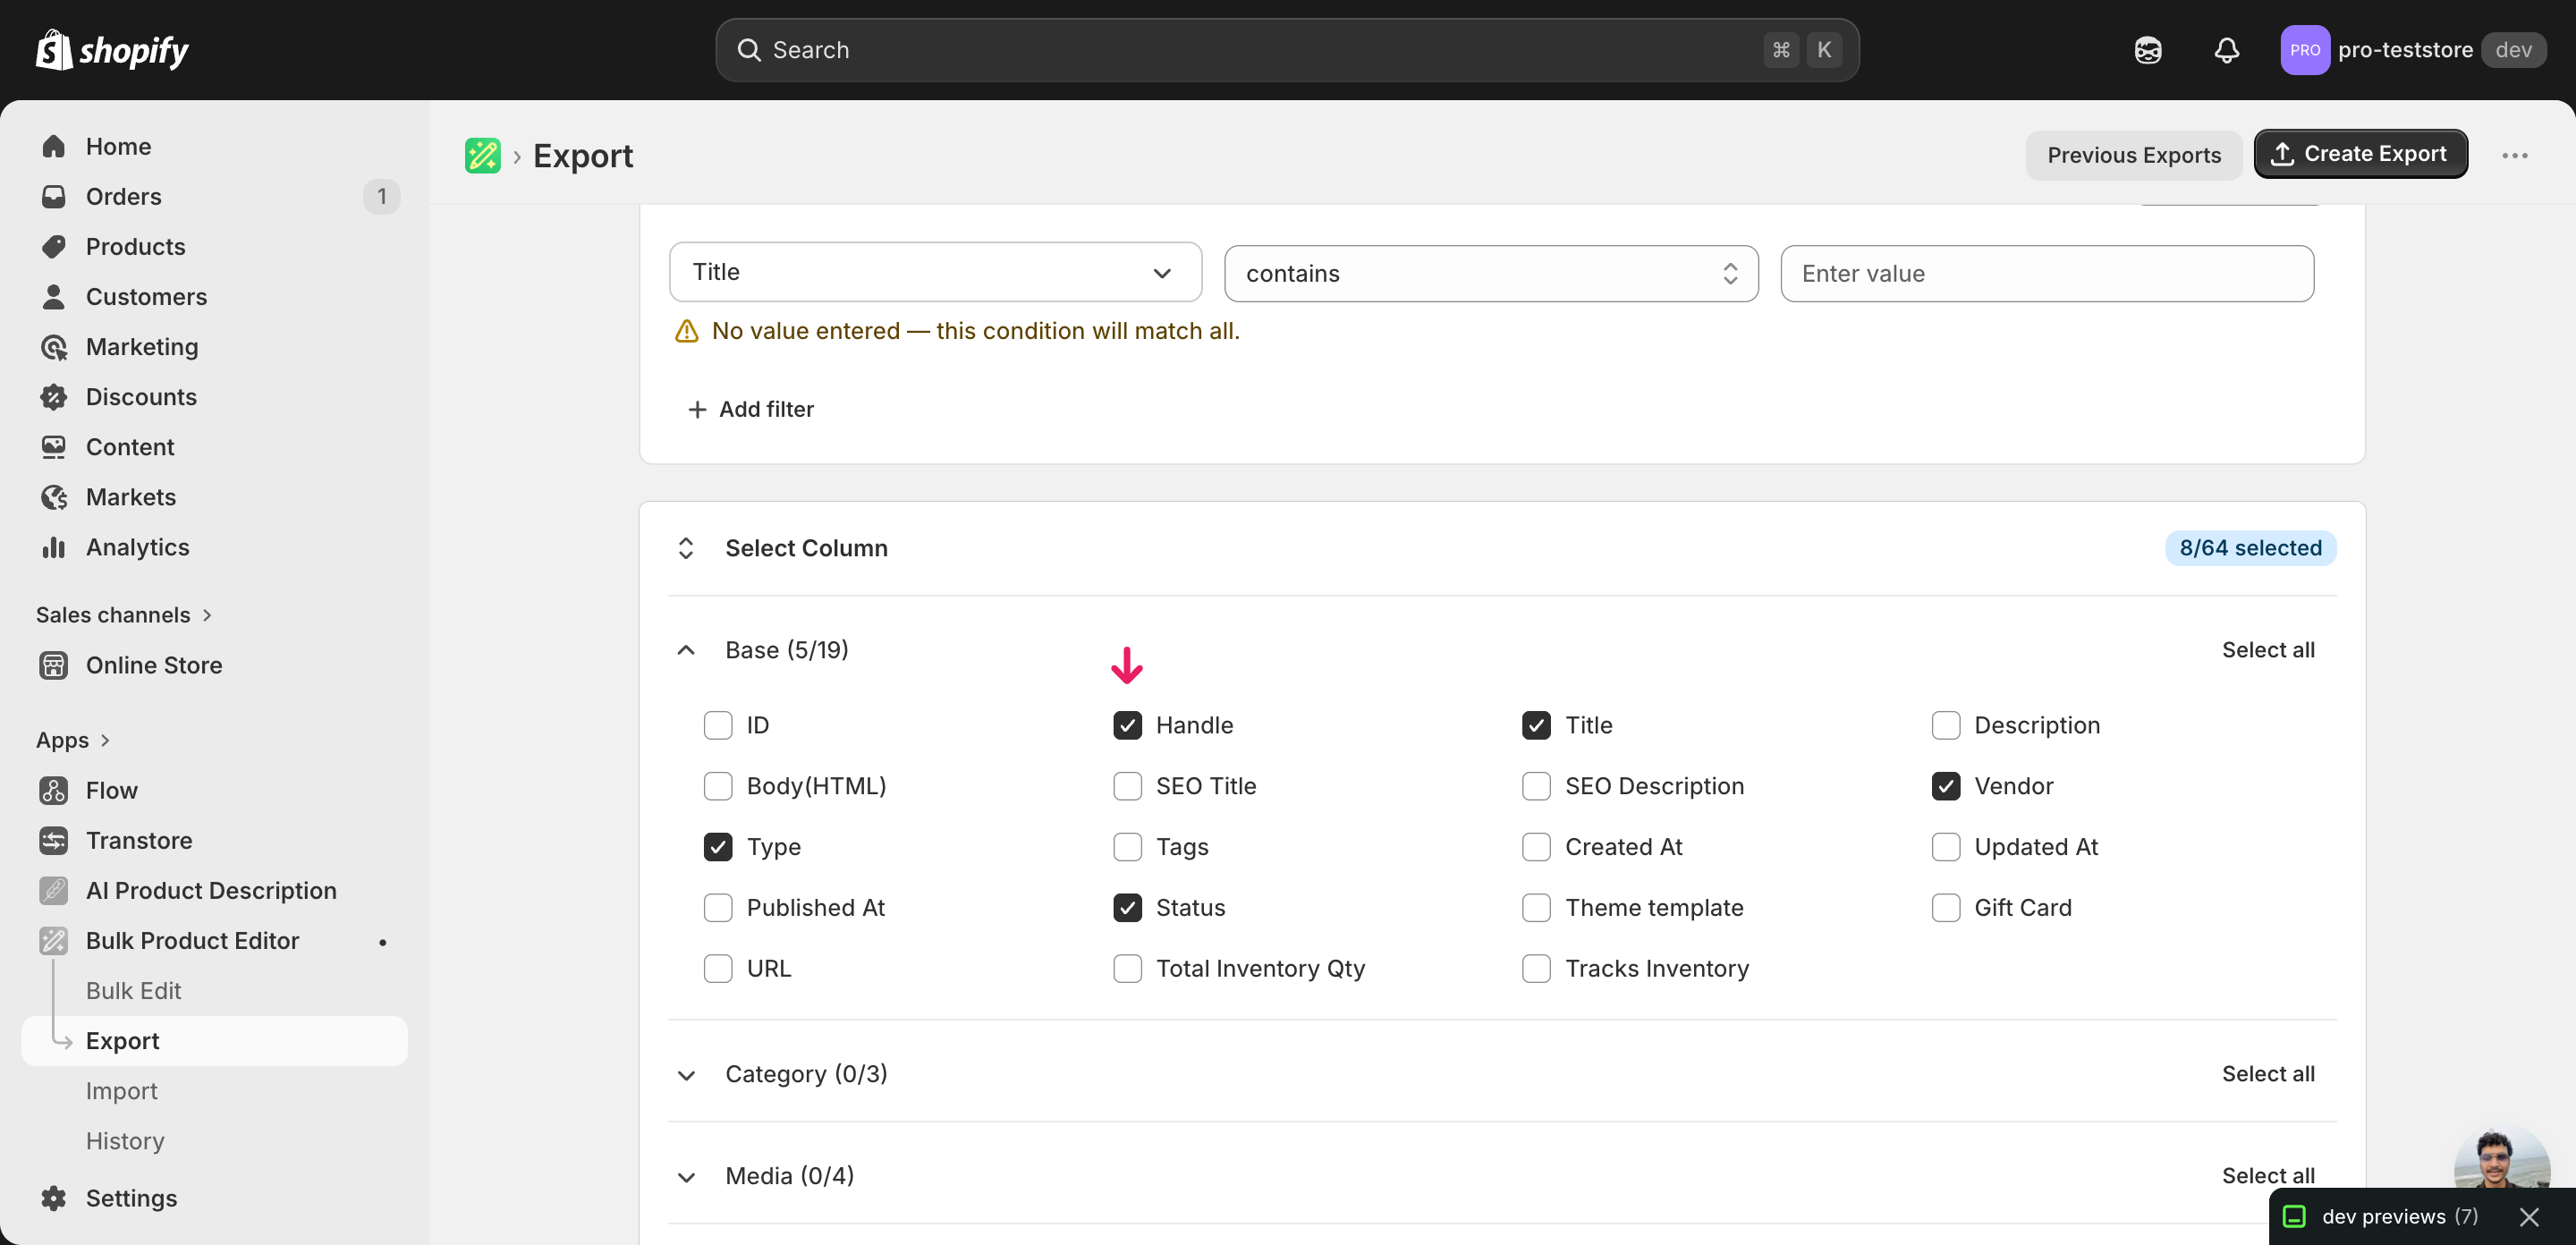
Pick the right columns
- Handle — the unique product identifier. For new products this is the row's key — EditEngine creates one product per unique Handle.
- Title — the product name shown in your storefront and admin.
- Vendor — the brand or supplier behind the product. Shopify also uses this for the default Vendor filter on collections.
- Product Type — the merchant-defined category (e.g. "Cycling Shoes"). Drives automated collections that filter by type.
- Status — draft, active, or archived. Set to draft while you're still loading media and copy, then flip to active later.
- Variant SKU — the stock-keeping unit. For single-variant products this is one value per row; multi-variant products use one row per variant with the same Handle.
- Variant Price — the variant's selling price in your store's default currency.
- Variant Inventory Qty — starting inventory count at your default location. Leave blank or set to 0 if you'll seed inventory in a follow-up import.
When the export completes, click Download. You won't actually import this file — you'll open it, delete the sample rows, and use the column headers and shape as the template for your new-product rows.
New to exporting? This guide assumes you know how to run an export and focuses only on the columns and edit unique to this workflow.
Step 2 — Bulk create Shopify new products from a spreadsheet in your spreadsheet
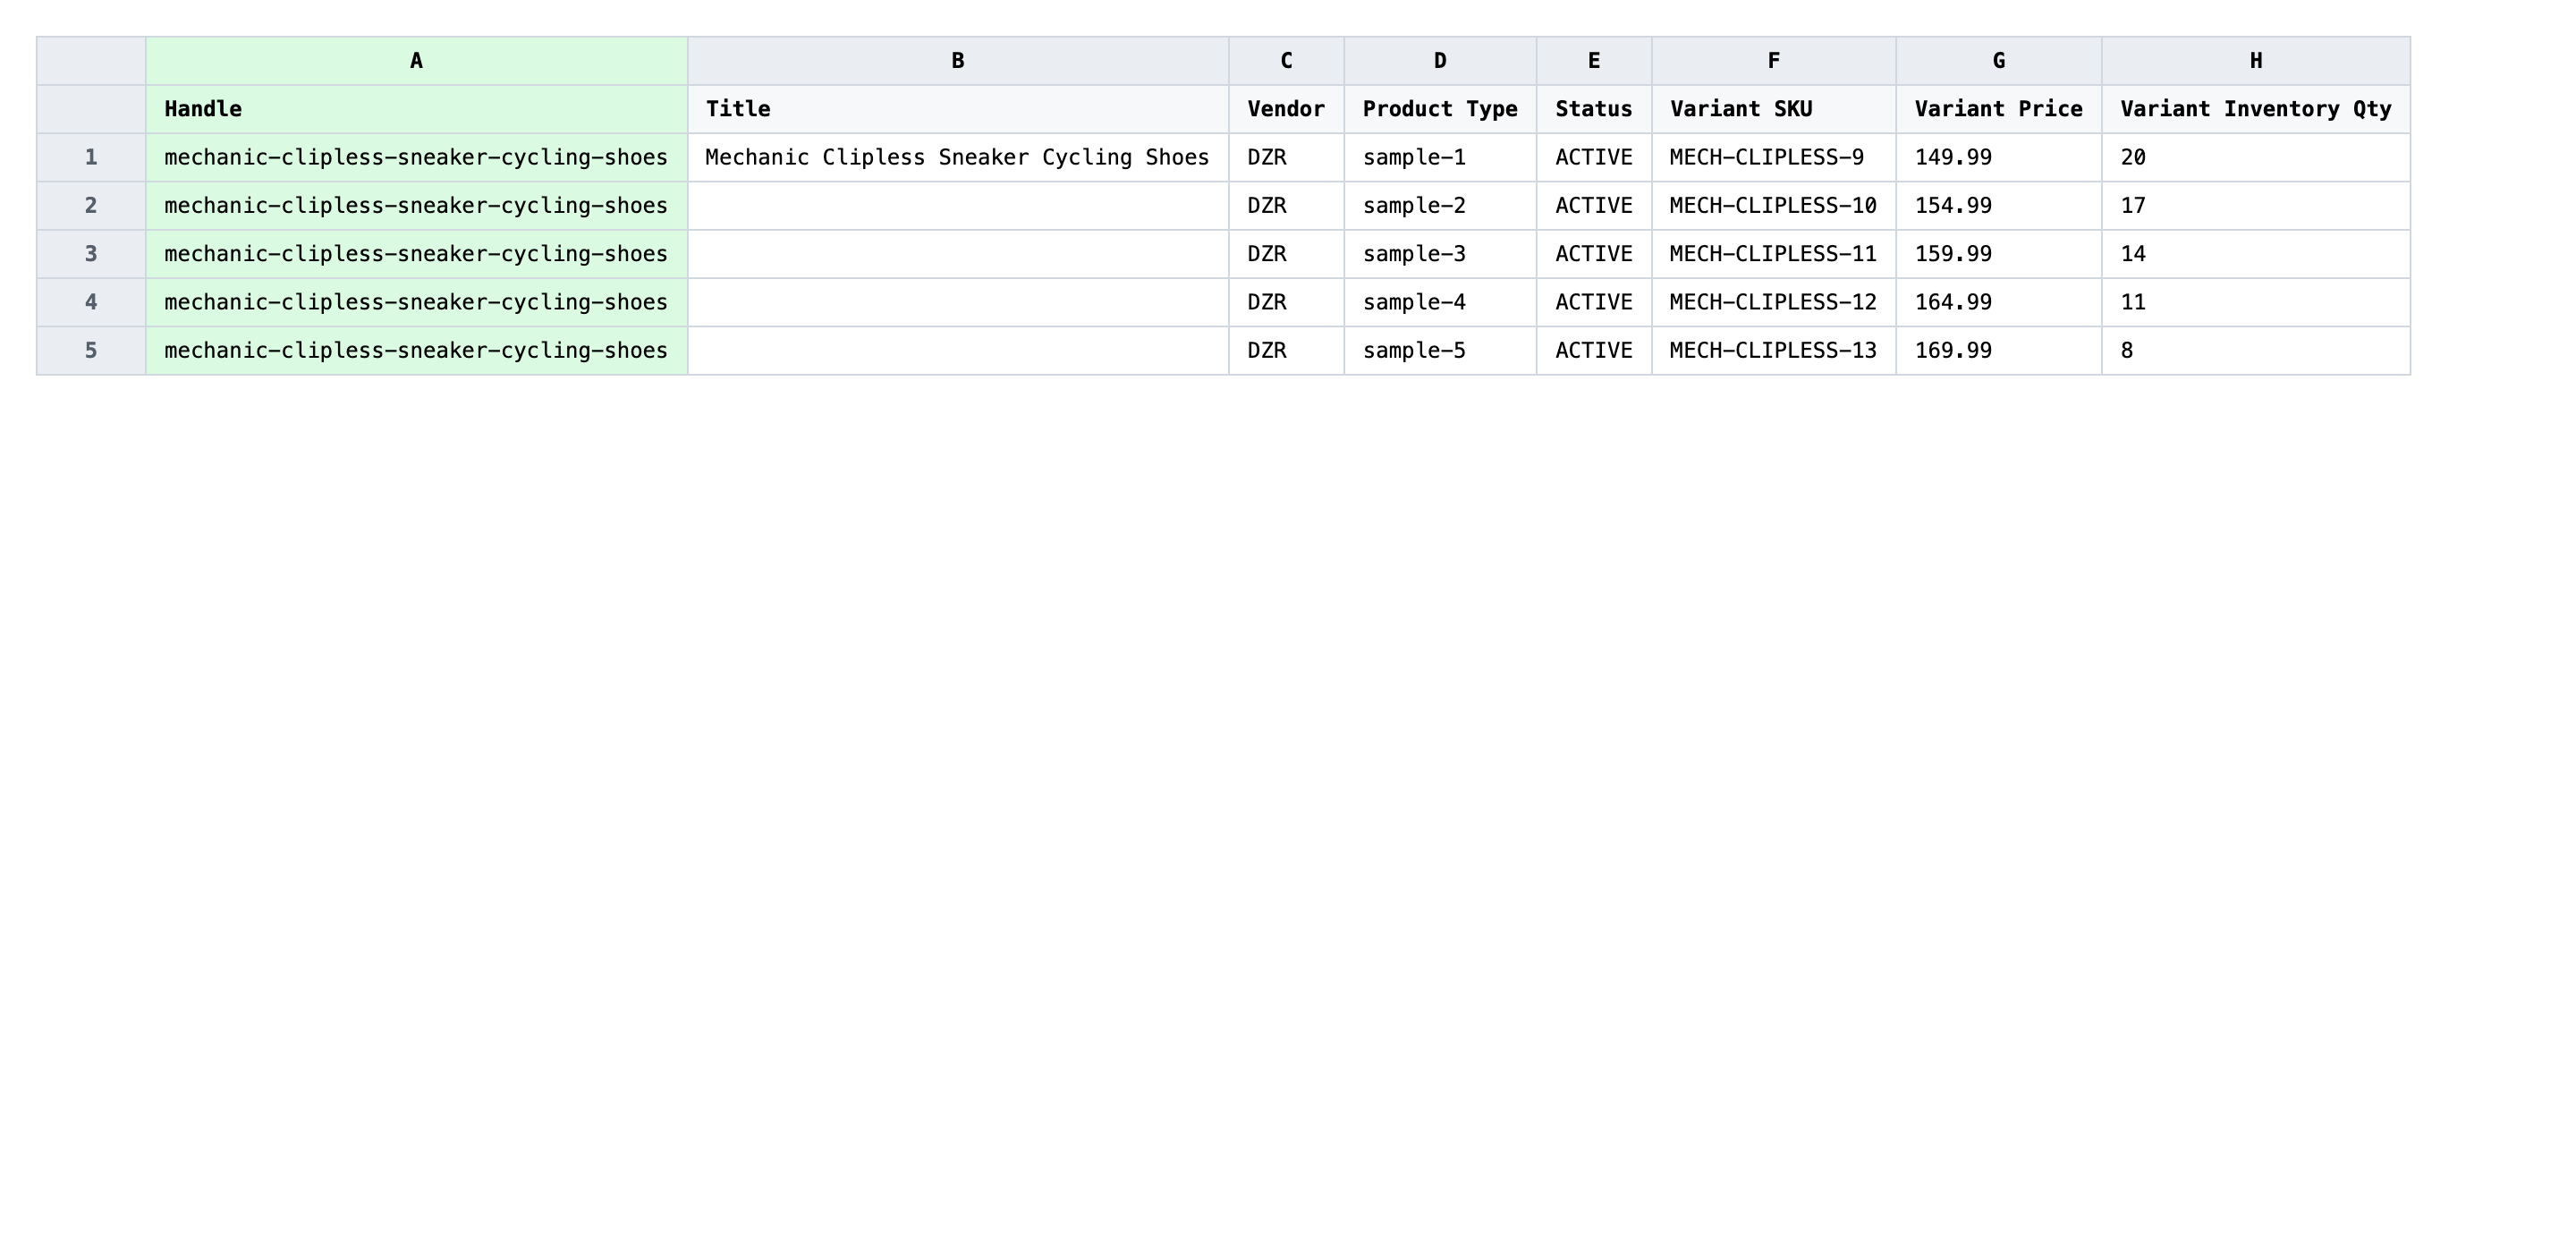
Open the downloaded CSV in Excel or Google Sheets. Keep the header row exactly as exported and delete every data row underneath — you'll add one row per new product (or one row per variant for multi-variant products) in their place.
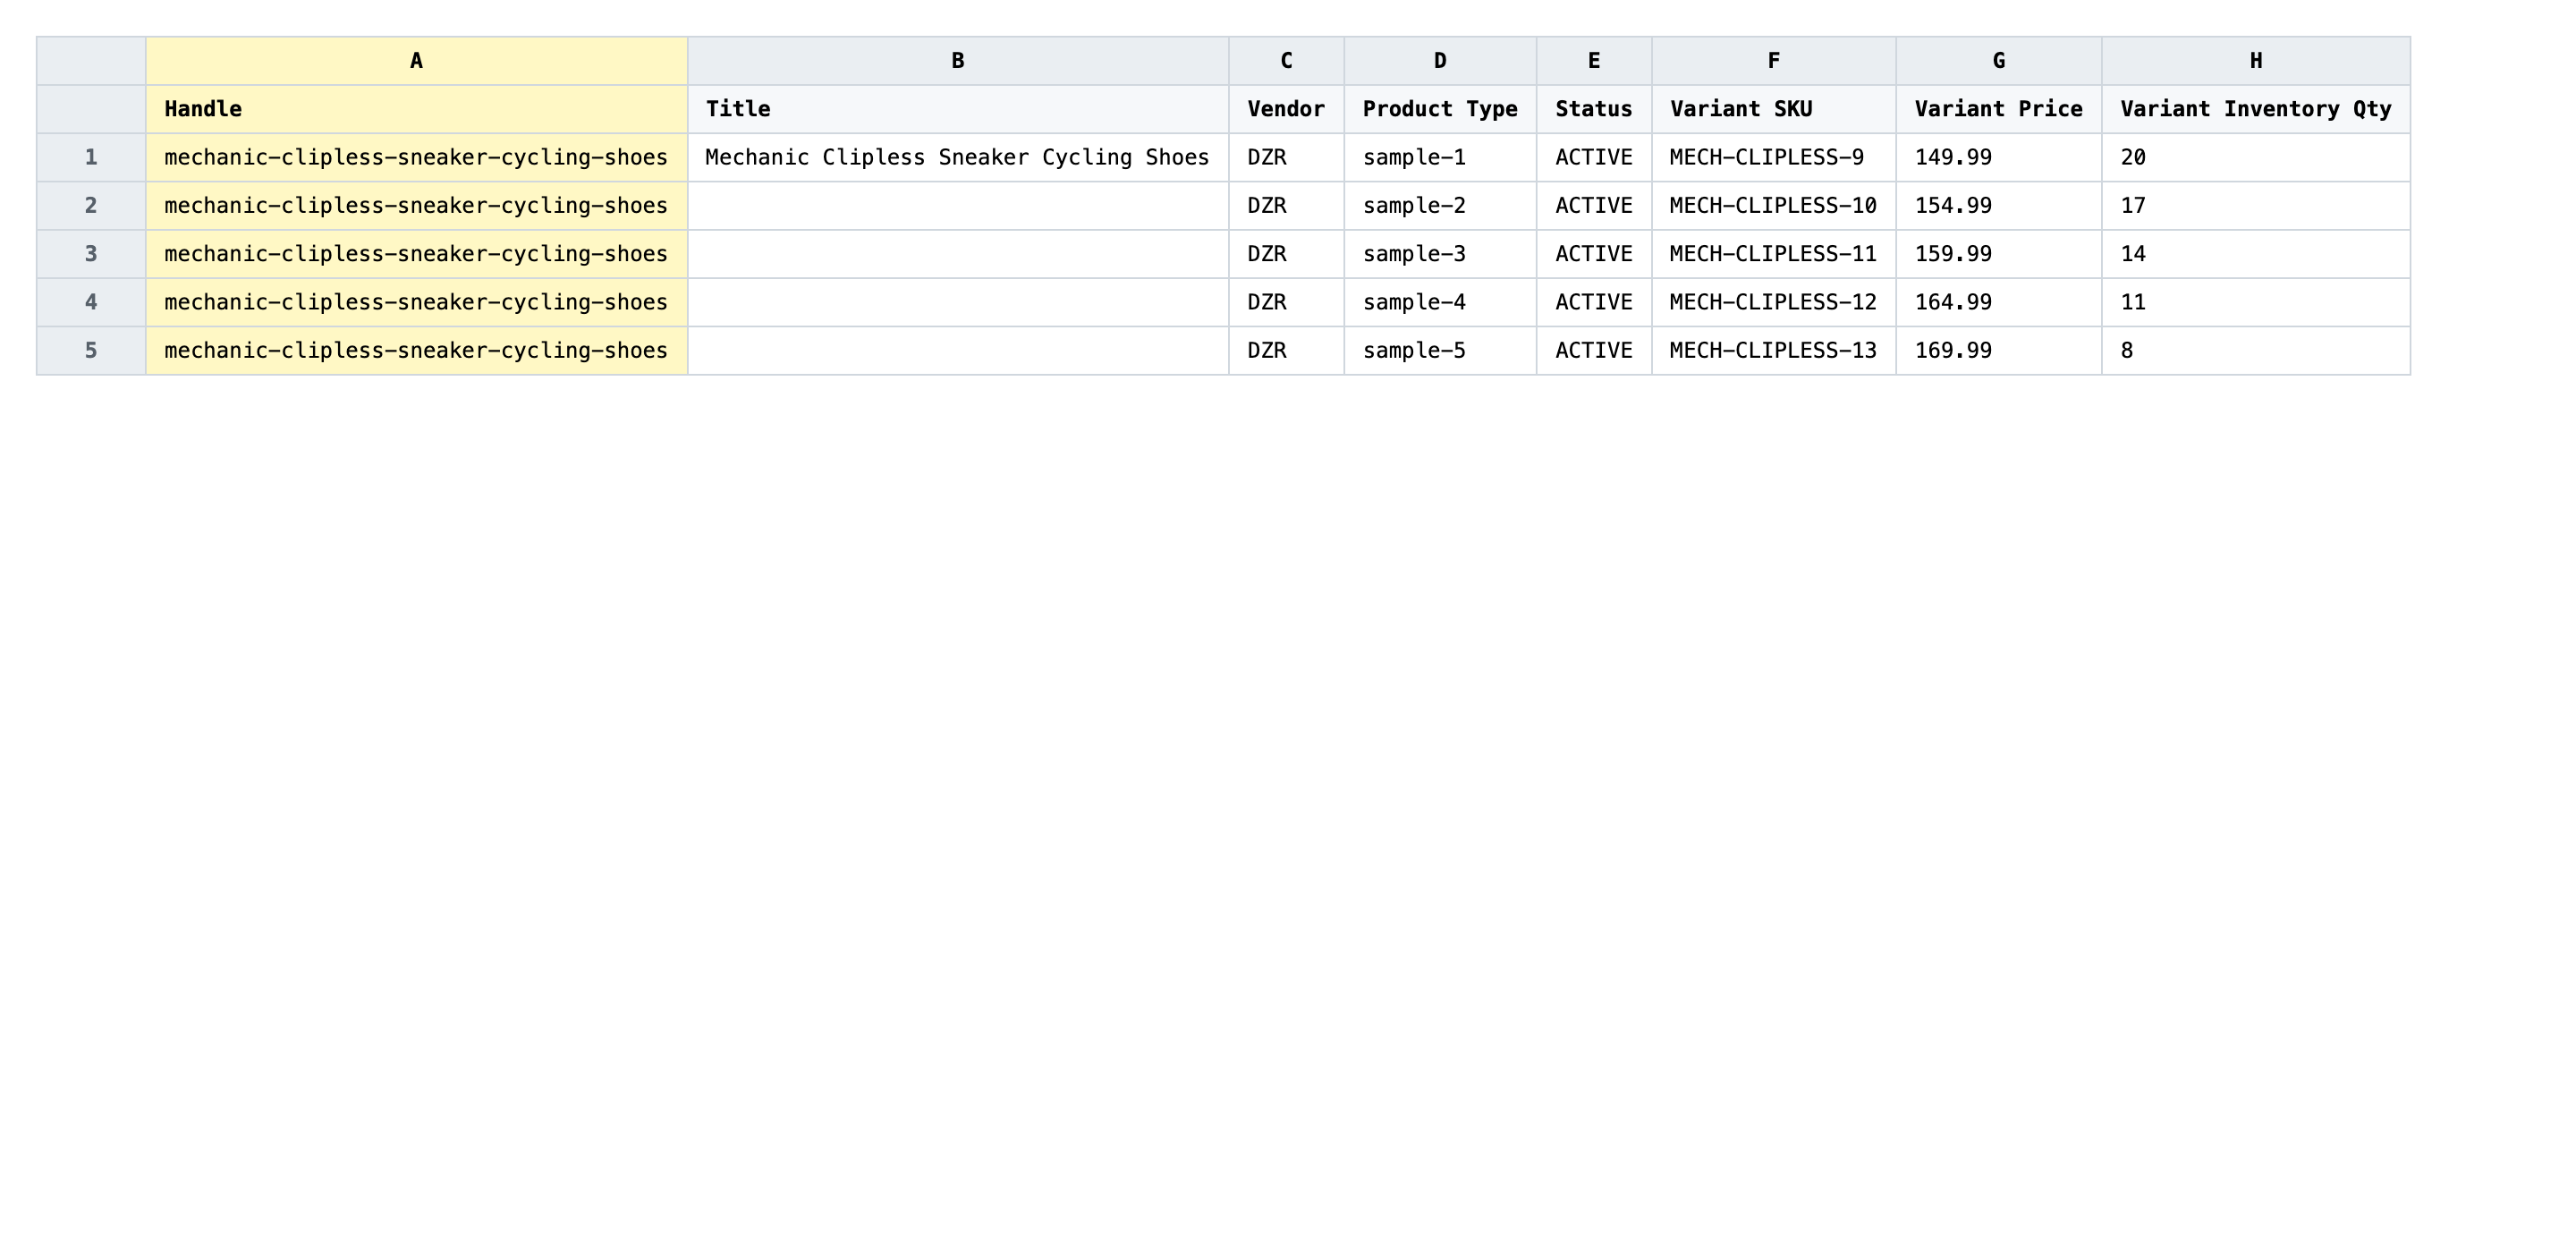
Type one row per new product. Give every product a unique Handle (lowercase, hyphenated, no spaces — Shopify will reject My Product but accept my-product), a real Title, a Vendor, a Variant SKU, and a Variant Price. Set Status to draft if you want to QA the products before they go live. For a product with several variants, write one row per variant — repeat the same Handle on every row, but vary the Variant SKU, Variant Price, and Option columns.
- ✅
dzr-mechanic-clipless-navy, DZR Mechanic Clipless Cycling Shoes, DZR, Cycling Shoes, draft, DZR-MECH-NAVY-42, 159.00, 12 - ❌
DZR Mechanic!, , , , , , , (a blank Handle, missing Title, missing Variant SKU — Shopify rejects the row)
Never reuse a Handle that already exists in your store. With Command = NEW, the importer rejects any row whose Handle is already taken — that's deliberate, and it's how NEW differs from MERGE. If you accidentally include an existing Handle, the row fails but every other row still imports, so you can clean up the failures from the results CSV and re-run them. Leave columns you don't need entirely blank rather than typing placeholder values like N/A — Shopify treats N/A as a real value and writes it to the field.
Save the file as CSV when you're done, and keep the original export handy in case you want to revert.
Tip: Generate Handles from Titles in a formula instead of typing them —
=LOWER(SUBSTITUTE(B2," ","-"))in Sheets gives you a clean, hyphenated Handle in one column and saves you typos across hundreds of rows.
Step 3 — Import the edited file back to Shopify
Open EditEngine → Import and select Advanced import. Then upload the file you just edited.
EditEngine reads the file and shows a summary. Set Default Command to NEW — this is the switch that tells the importer to create every row instead of merging into existing products. Leave Match Products By on Handle, since Handle is your row key for new products. Scan the Headers panel to confirm Title, Vendor, Variant SKU, and Variant Price are all recognized.
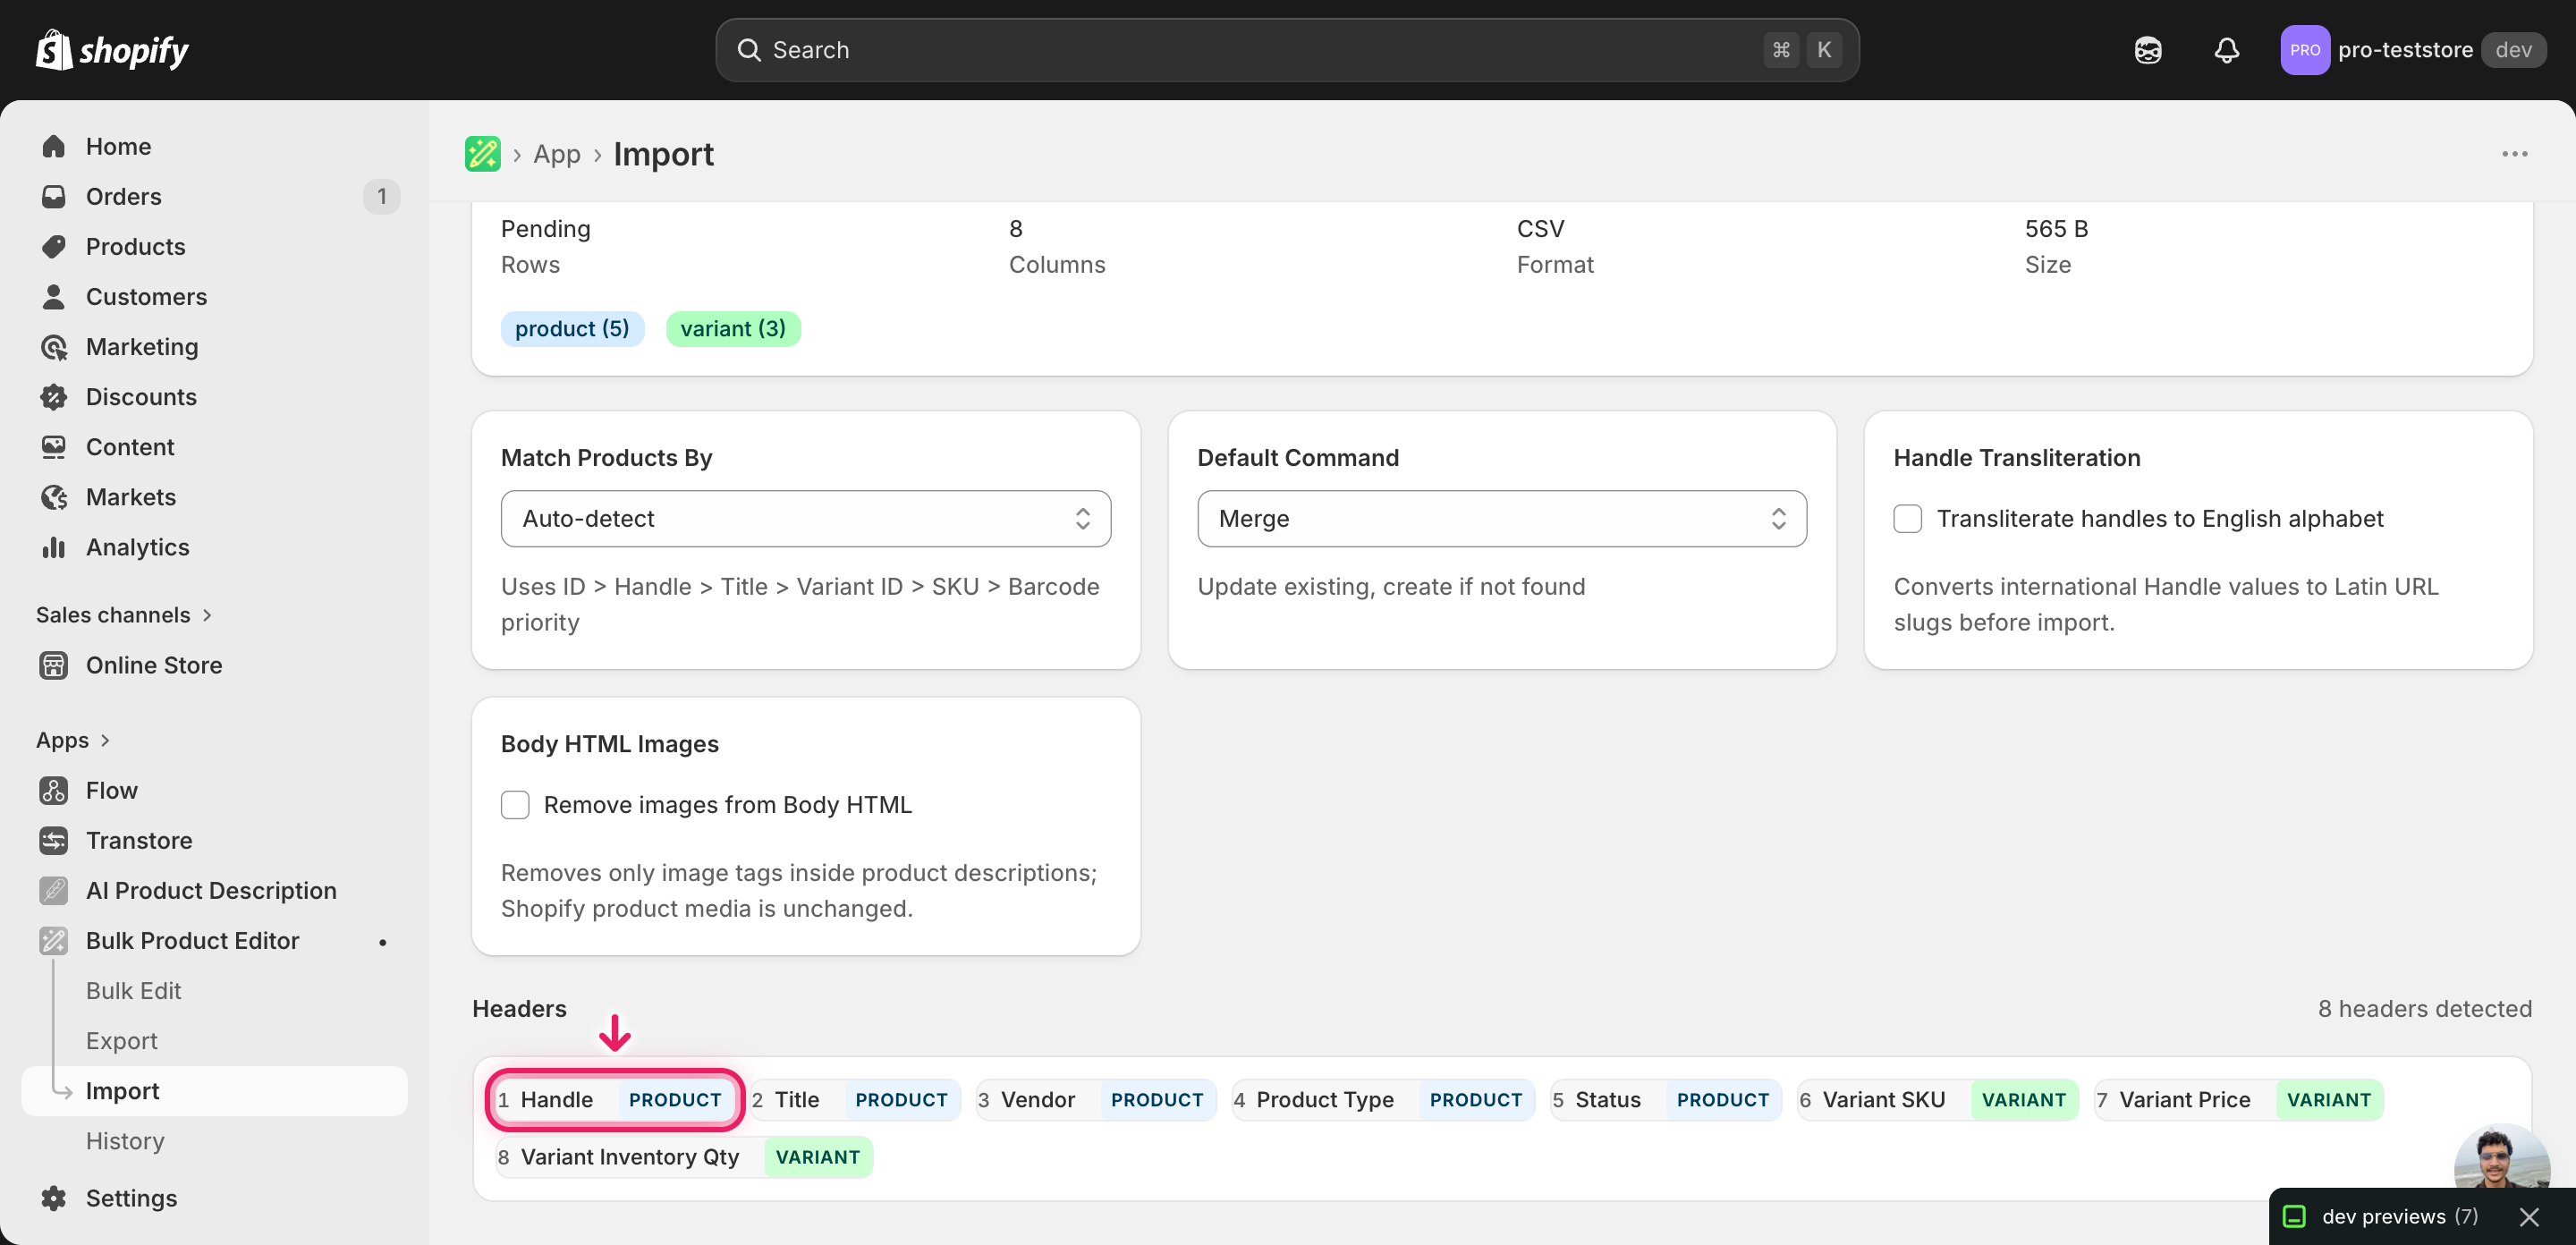
Note: Creating products is destructive in the sense that it writes new rows to your catalog — once imported, you have to delete them to roll back. Run a first import with just two or three rows, open Shopify admin → Products to spot-check that the Handle, Title, Variant SKU, and Variant Price all look right, and only then import the full file. Catching a malformed Handle or a wrong Vendor on three test products is faster than cleaning up three hundred.
Click Start Import and wait for the job to finish — a small file takes seconds, larger catalogs a couple of minutes. When it completes, EditEngine shows a per-row summary.
Download the results CSV. It lists every row with a pass/fail status — that file is your proof the change went through, and the new values are now live in your Shopify admin.
Tips and troubleshooting
Don't reuse an existing Handle. With Command = NEW, a Handle that already exists in your store is a hard fail for that row. Before importing a large batch, do a quick check: re-export your catalog with just the Handle column and use a spreadsheet MATCH or VLOOKUP against your new file to flag collisions. Renaming dzr-mechanic to dzr-mechanic-2024 on the new row gets it past the importer without touching the original product.
Export first, then strip the rows. Don't invent column headers from memory or from a Shopify Help Center example. Export one or two real products from your store first, then delete the data rows and keep the header row — that guarantees every header is spelled exactly the way EditEngine expects, including the difference between Variant SKU and Variant Sku. A renamed header is the single most common reason new-product imports fail on otherwise valid data.
Multi-variant products use multiple rows with the same Handle. A shoe in three sizes is three rows that share a Handle, a Title, a Vendor, and a Product Type. Only the variant-level columns change — Variant SKU, Variant Price, Option1 Value, Option1 Name. Leave Title blank on the second and later rows; the importer reads them as additional variants of the same product, not as separate products.
Start with Status = draft, not active. Importing 200 products straight to active exposes any data mistake to your storefront the moment the job finishes. Set Status to draft in your file, run the import, scan a sample of products in the Shopify admin, then bulk-flip them to active with a second tiny EditEngine import. The extra step costs a minute and catches typos before customers see them.
Frequently asked questions
How do I bulk create new products in Shopify?
Build a spreadsheet with one row per product (or one row per variant for multi-variant products) using EditEngine's standard column headers, then import the file with Command set to NEW. This is how you bulk create Shopify new products from a spreadsheet without using the Shopify admin product form one product at a time.
Can I edit Shopify new products in a spreadsheet?
Yes. To bulk create Shopify new products from a spreadsheet, you write each product's Handle, Title, Vendor, Variant SKU, and Variant Price as a row in Excel or Google Sheets. Once the products exist, you can re-export them and edit any field the same way.
How long does a bulk new products import take in Shopify?
Creating a few dozen new products usually finishes in under a minute. A catalog of several hundred takes a couple of minutes because Shopify has to create each product, its variants, and any media — the results CSV shows the exact duration for your job.
What format does Shopify accept for new products imports?
A CSV or XLSX with a Handle column to identify each product plus whichever fields you want populated (Title, Vendor, Product Type, Status, Variant SKU, Variant Price, and so on). EditEngine's advanced import reads this format directly when you bulk create Shopify new products from a spreadsheet.
Can I undo a bulk Shopify new products update?
There's no one-click undo, but the import results CSV lists every Handle that was created. To roll back, run a second import against those Handles with Command = DELETE — that removes the products you just created without touching the rest of your catalog.
Related tutorials
- How to Bulk Delete Shopify Products By SKU Handle Barcode
- How to Bulk Replace Shopify Entire Product Records
About EditEngine: EditEngine Bulk Product Editor helps Shopify merchants bulk edit, bulk import, and bulk export their product catalog in minutes instead of days. Install on Shopify →