Products
How to Bulk Update Shopify Image Alt Text Per Product
Last updated
Want to bulk update Shopify image alt text per product so every photo describes itself for shoppers and search engines? With EditEngine Bulk Product Editor, you export your products to a spreadsheet, write a unique alt text for each image row, and import the file back. Because every image needs its own description, the spreadsheet round-trip is the right tool for this job.
What you'll learn
- Export every product with its current image alt text
- Edit image alt text per row in a spreadsheet
- Import the updated file back to Shopify and confirm every row applied
What you'll need
- The EditEngine Bulk Product Editor app installed in your Shopify store
- At least one product with one or more images already uploaded in Shopify
- The Advanced import flow — image media is advanced-import only
- A spreadsheet editor (Excel, Google Sheets, Numbers — anything that opens CSV)
Alt text is the short written description attached to each product image. Screen readers read it aloud, and Google uses it to understand and rank your photos in image search. Setting it well across a catalog is tedious in the Shopify admin because you edit one image at a time — which is exactly what the spreadsheet workflow below fixes.
Step 1 — Export your Shopify product images
Open EditEngine and go to the Export page. This is where you choose which product fields land in your spreadsheet.

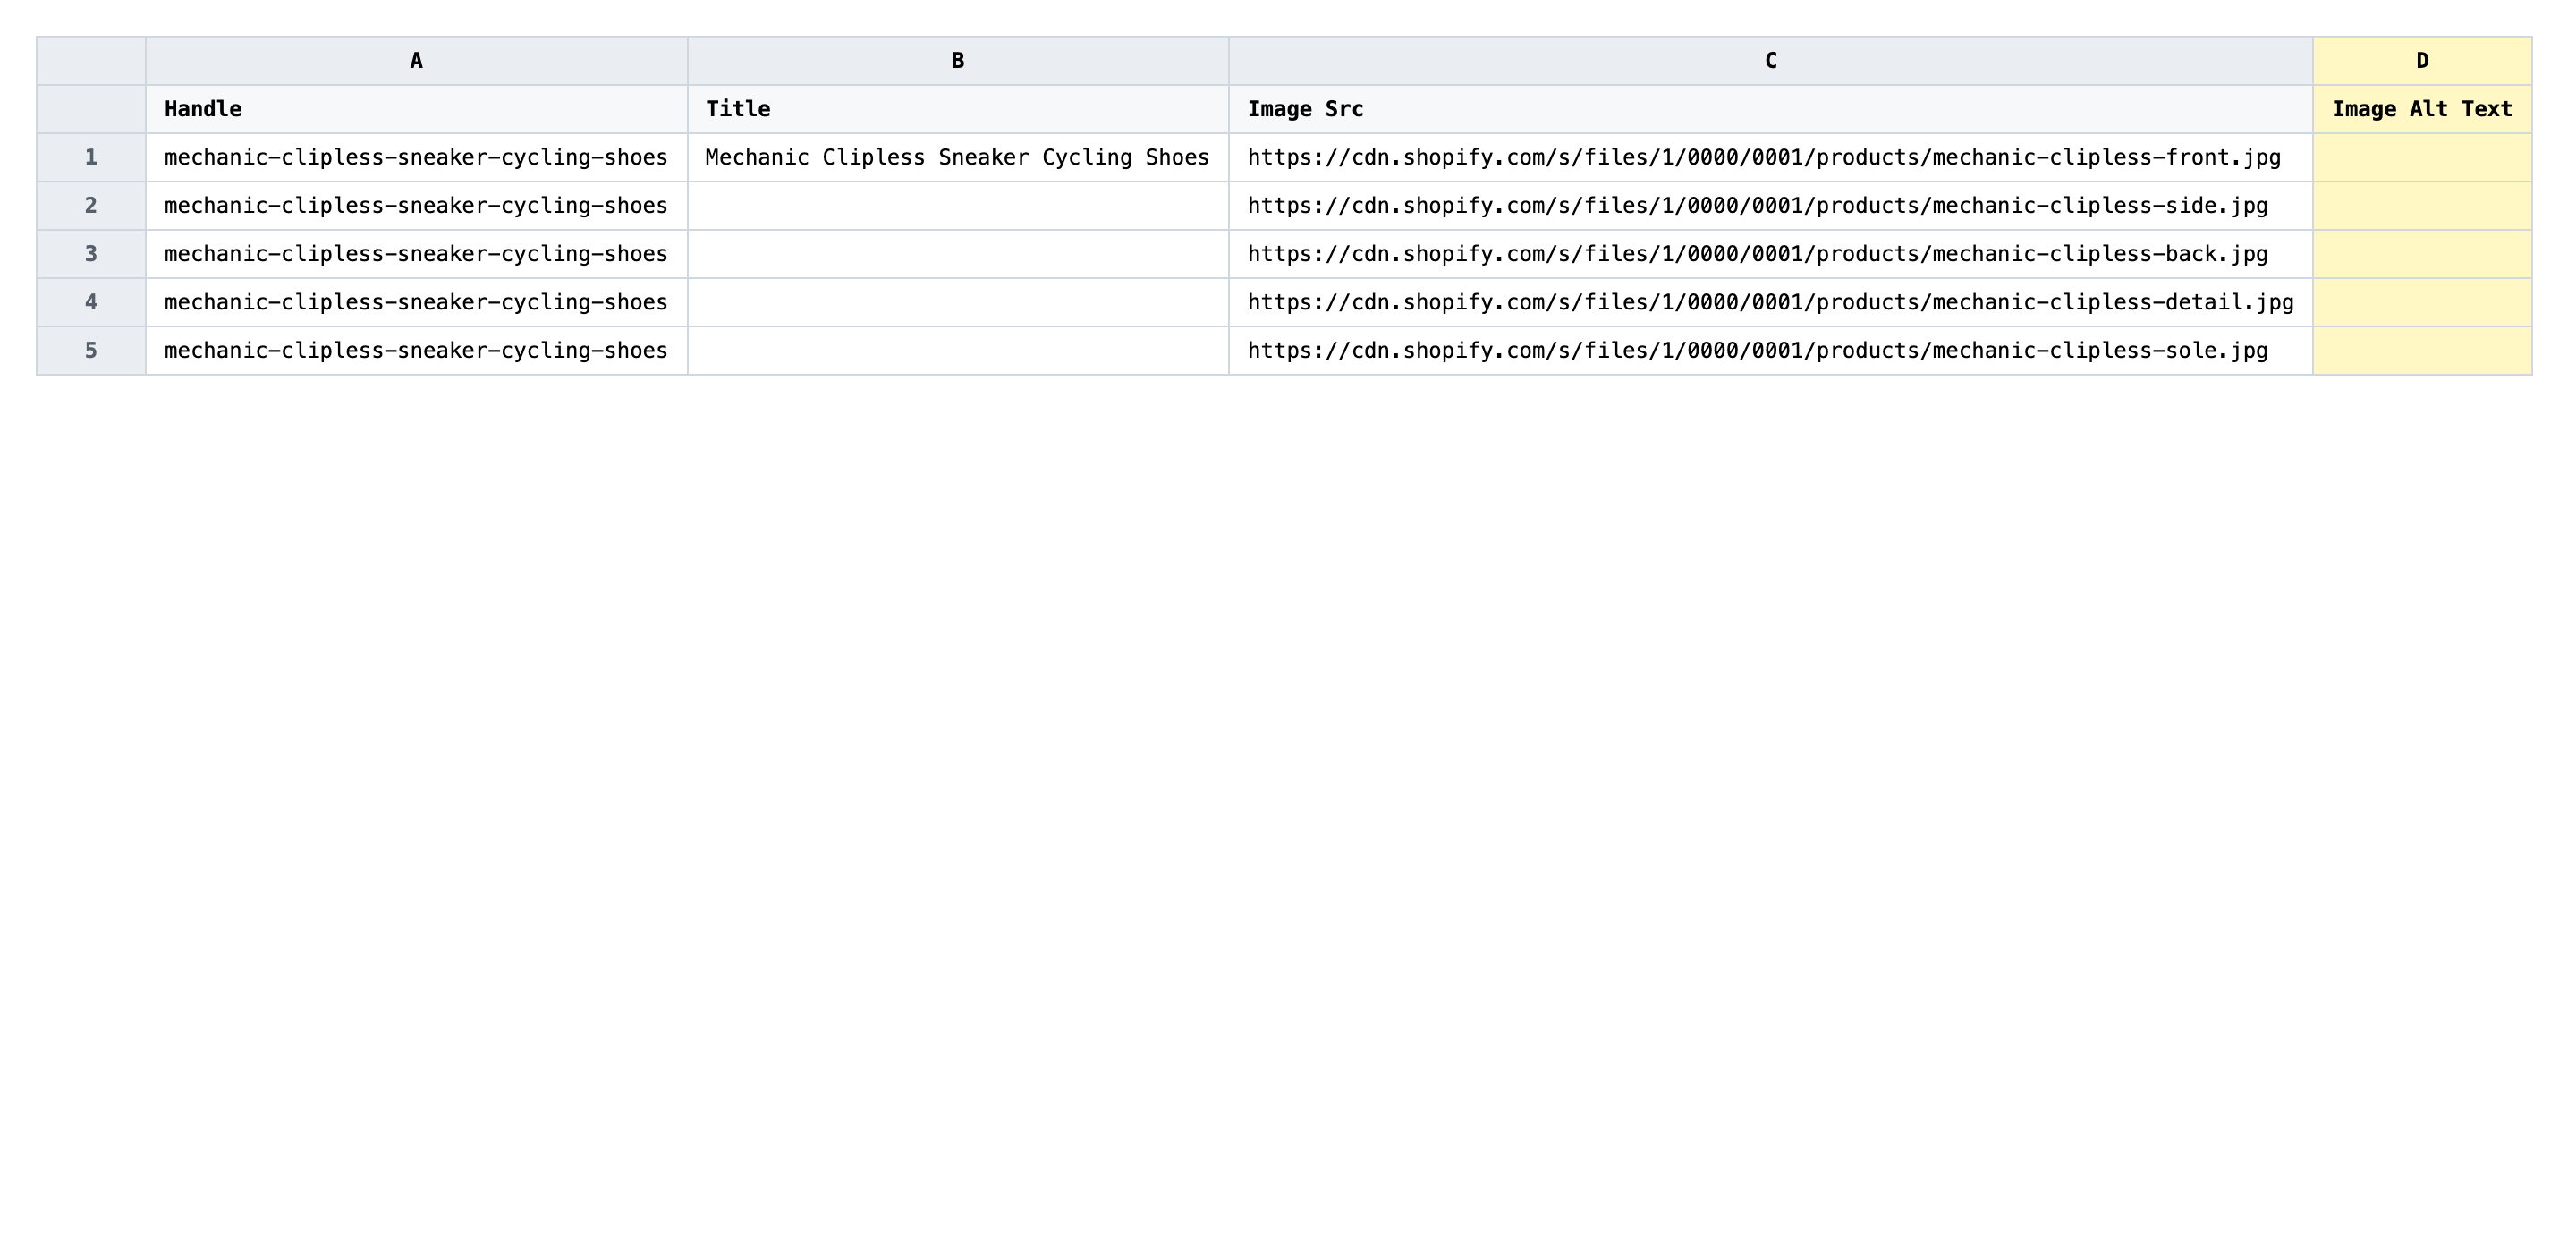
Pick the right columns
- Handle — the unique product identifier the importer uses to match each row back to the right product.
- Title — context only, so you can see which product a row belongs to while editing.
- Image Src — the image URL. EditEngine matches each row to an existing image by this URL, so it is the key that ties your new alt text to the correct photo.
- Image Alt Text — the column you'll edit. Expand the Media group and tick Image Src and Image Alt Text.
When the export completes, click Download. You'll get one row per image: products with several photos repeat across rows, and the second and later rows leave Title blank — that's normal.
New to exporting? This guide assumes you know how to run an export and focuses only on the columns and edit unique to this workflow.
Step 2 — Bulk update Shopify image alt text per product in your spreadsheet
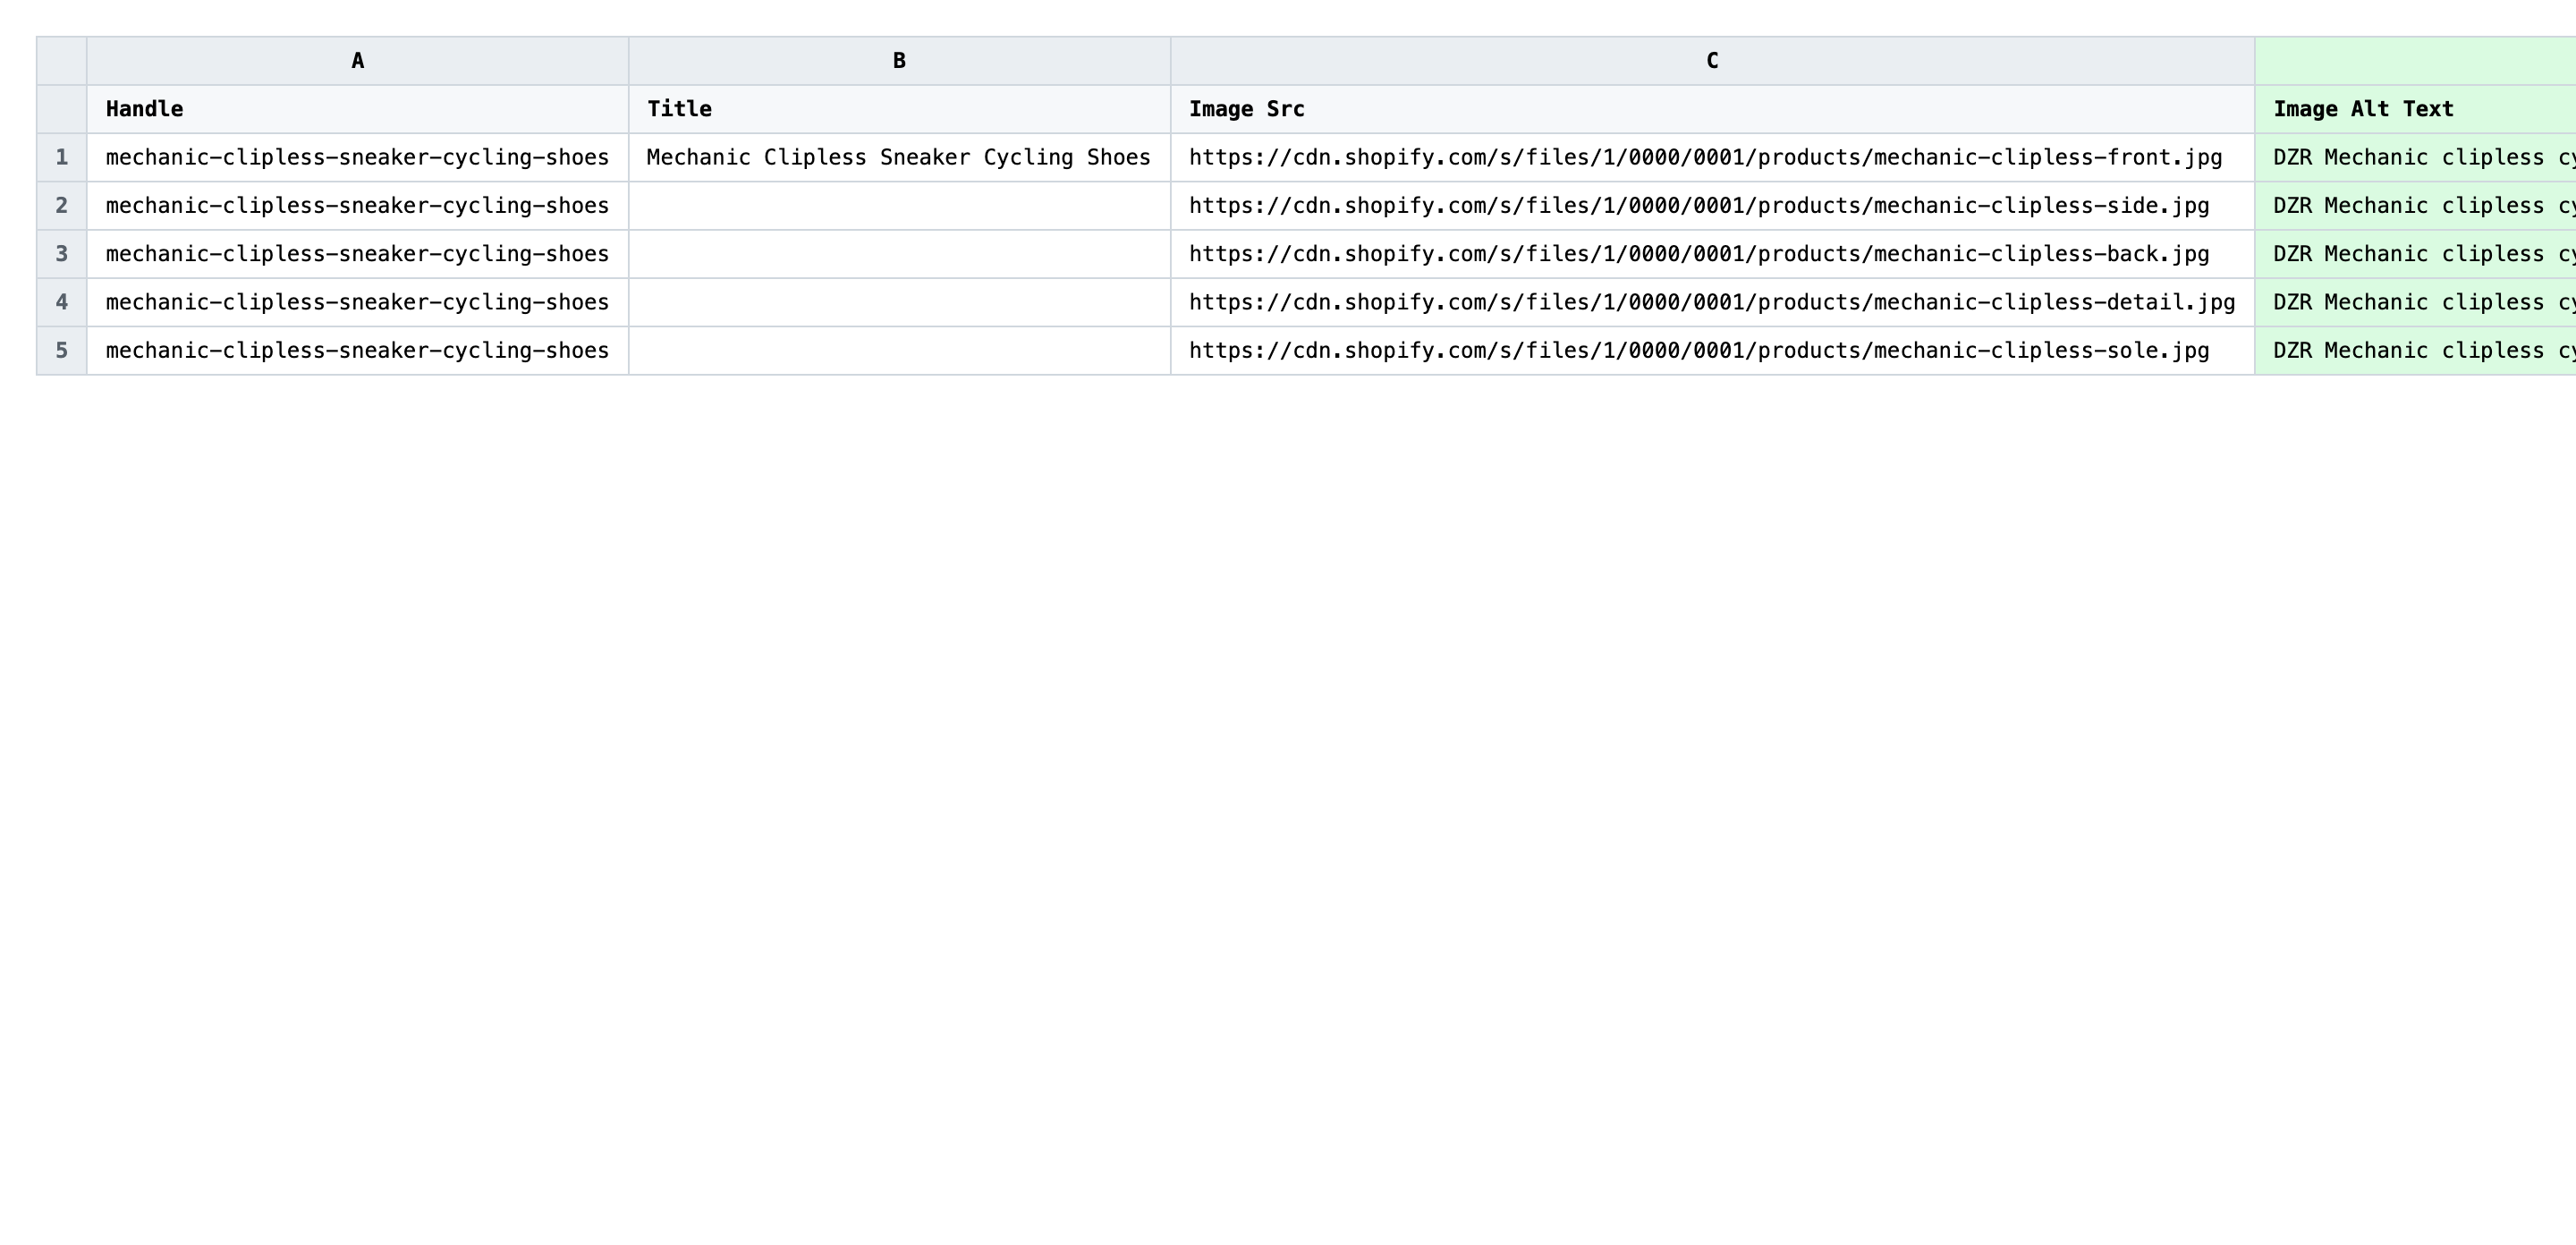
Open the downloaded CSV in Excel or Google Sheets. The Image Alt Text column (column D) holds whatever alt text each image has today.
Now write a fresh value in Image Alt Text for every image row. Good alt text describes what the photo shows in plain language, with the product name where it fits naturally. Keep each description under about 125 characters, and write something different for each angle — a front view and a back view are not the same image.
- ✅
DZR Mechanic clipless cycling sneakers in navy, front view with black laces and perforated toe - ❌
shoe.jpg,product image 2, or the same product title pasted onto every row`
Leave every other column exactly as exported. Do not edit Image Src — that URL is the matching key, so changing it points the row at a different image (or none at all). Rows that have a Handle but no Image Src are extra variant rows; you can leave their alt text blank because there is no image to attach.
Save the file as CSV when you're done, and keep the original export handy in case you want to revert.
Tip: Alt text is a Shopify image attribute, not a variant one. Even a product with dozens of variants has just one row per image, so you only write each description once.
Step 3 — Import the edited file back to Shopify
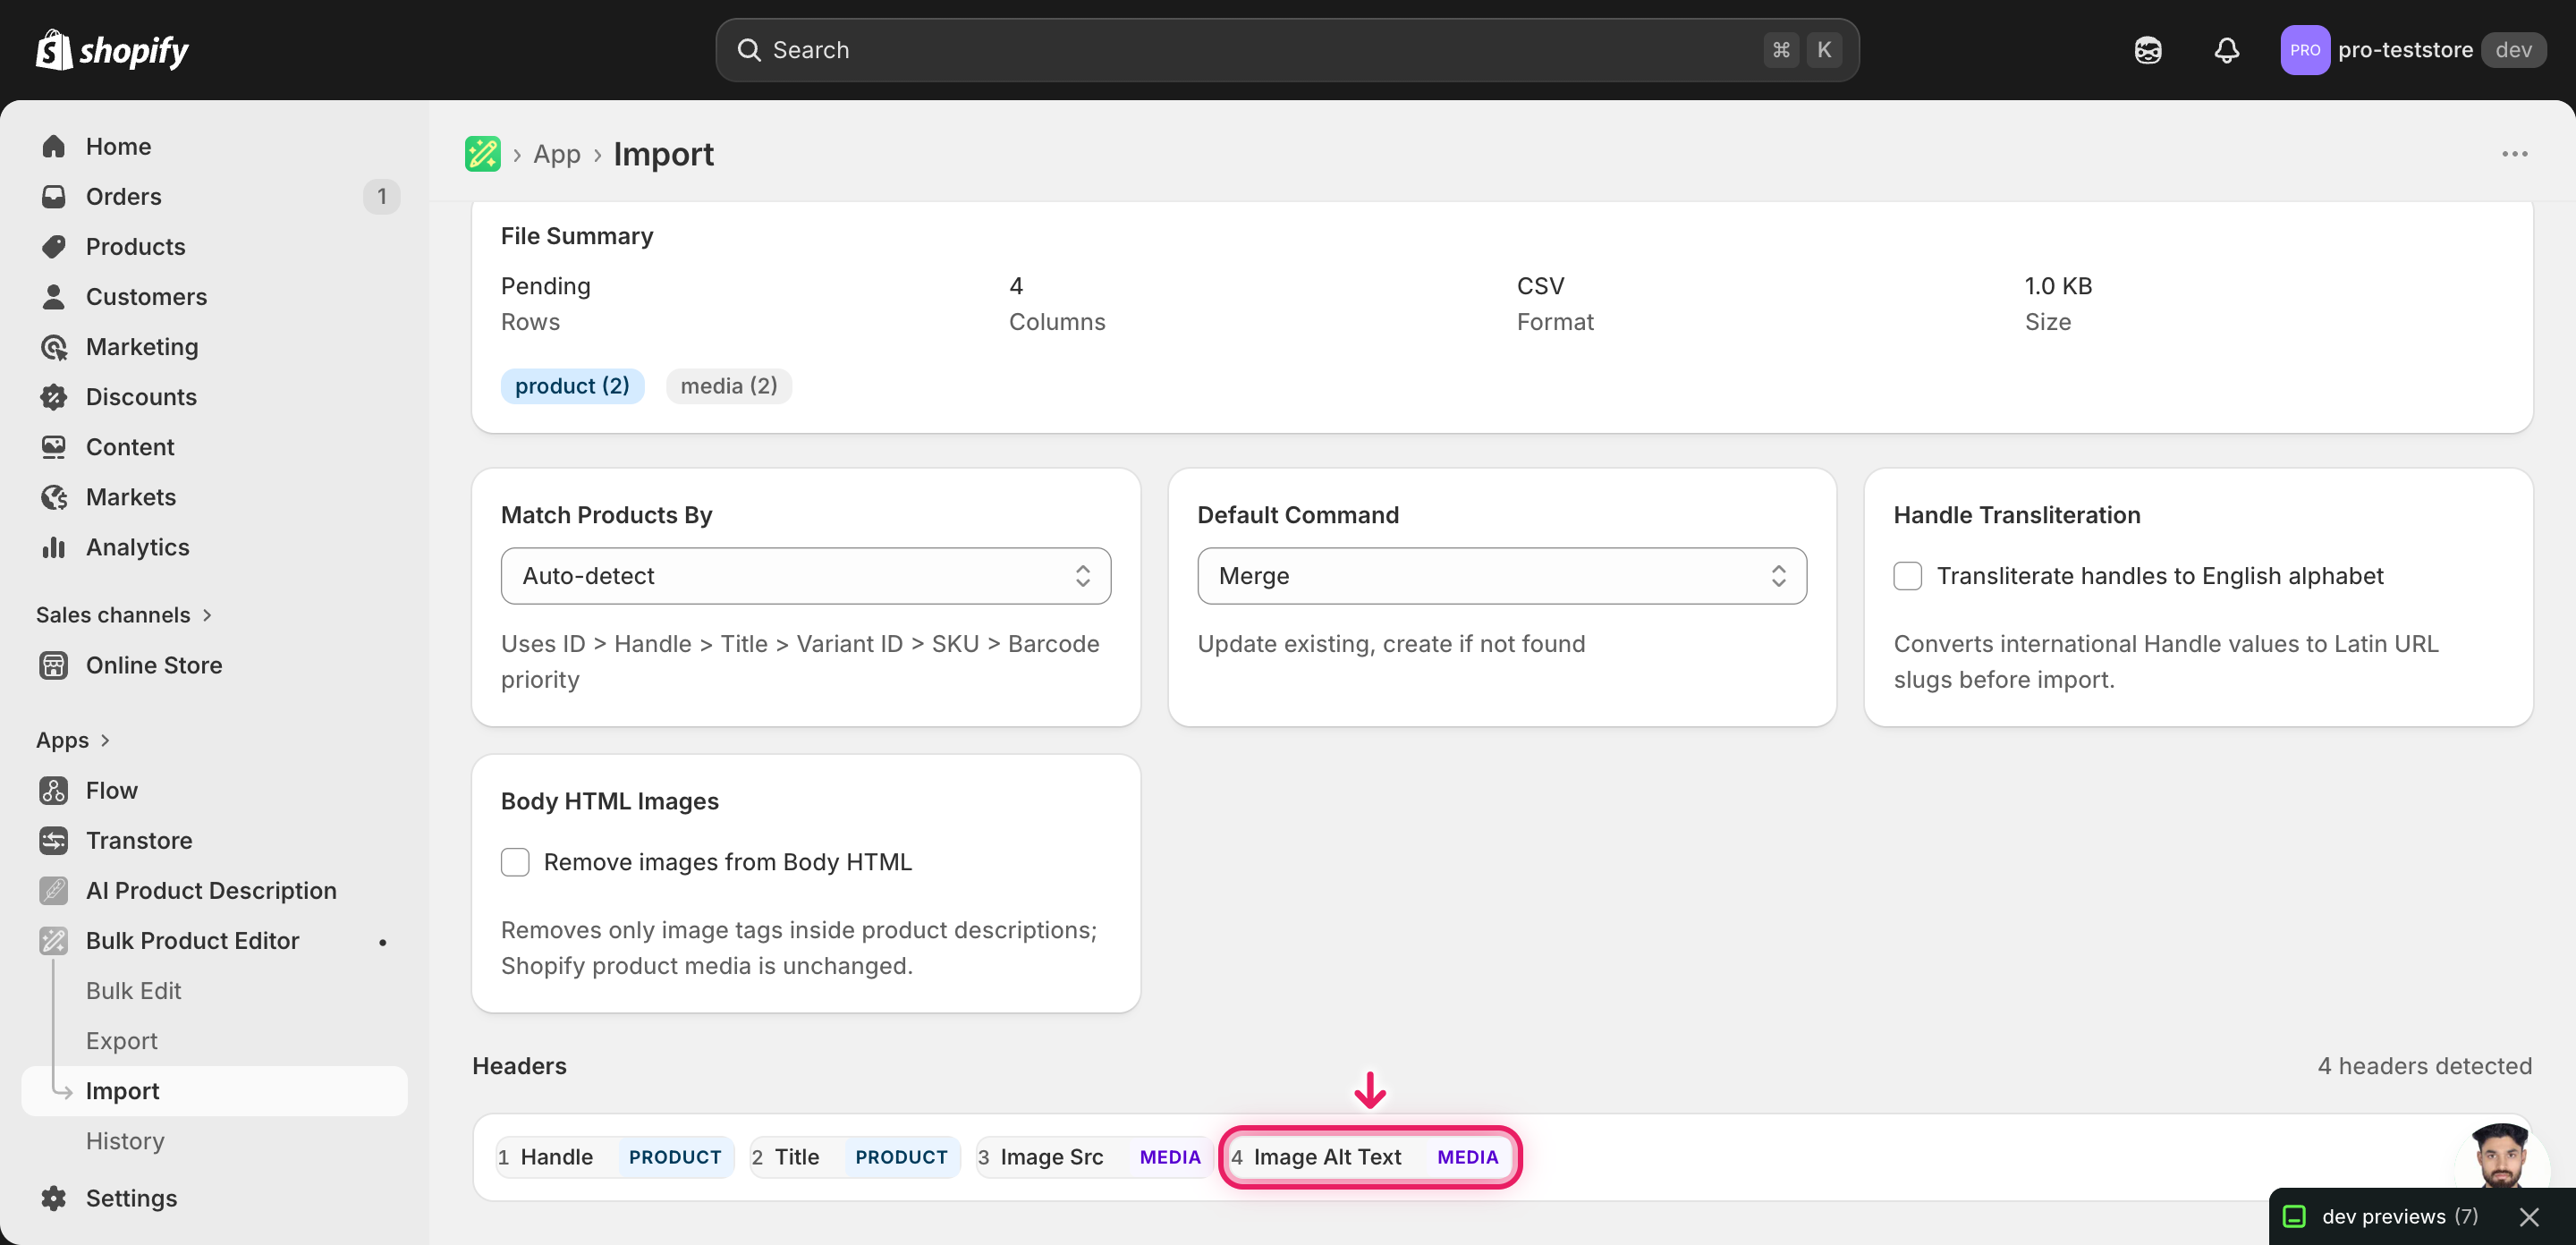
Open EditEngine → Import and select Advanced import — image media columns are only supported in the advanced flow. Then upload the file you just edited.
EditEngine reads the file and shows a summary. Check the Headers panel: both Image Src and Image Alt Text should carry the MEDIA badge, which confirms the importer recognized them as image fields. Leave Match Products By on Auto-detect and Default Command on Merge.
Note: This advanced import does not have a dry-run toggle. Alt text updates are low-risk — they never move, replace, or delete an image — but if you're updating hundreds of photos, run a first import with just two or three rows, confirm the result, then import the full file. That catches a renamed header or a broken Image Src before you commit the whole catalog.
Click Start Import and wait for the job to finish — a small file takes seconds, larger catalogs a couple of minutes. When it completes, EditEngine shows a per-row summary.
Download the results CSV. It lists every row with a pass/fail status and a comment such as "Product updated" — that file is your proof the change went through, and the new alt text is now live on your images in the Shopify admin.
Tips and troubleshooting
Don't touch the Image Src column. EditEngine matches each alt text to its image by the image URL in Image Src. If you edit, shorten, or reorder those URLs, the importer can't find the image that row belongs to and the alt text won't apply. If a product's images changed since your last export, re-export to get fresh URLs before editing.
Header names are exact. The importer accepts Image Alt Text (or the alias Image Alt). A renamed header like Alt Text won't be recognized as a media column — check for the MEDIA badge on the mapping screen before you start the import. The same goes for Image Src, which also accepts Image URL.
Products with several images mean several rows. A product with four photos exports as four rows. Edit the Image Alt Text on each one. A blank Title on a row just means "same product as the row above" — it is not an error and you don't need to fill it in.
Write for a person, not a keyword. Describe the photo the way you'd describe it to someone who can't see it. Stuffing the product title or a list of keywords into every image hurts both accessibility and SEO. One clear sentence per image is the goal.
Frequently asked questions
How do I bulk update image alt text in Shopify?
Export your products from EditEngine with the Image Src and Image Alt Text columns, write a description for each image row in a spreadsheet, then import the file back through the advanced import flow. This lets you bulk update Shopify image alt text per product instead of editing one image at a time in the admin.
Can I edit Shopify image alt text in a spreadsheet?
Yes. EditEngine exports one row per image with its current alt text in the Image Alt Text column. Edit that column in Excel, Google Sheets, or any CSV editor and import the file back — Shopify itself has no built-in spreadsheet editor for alt text.
How long does a bulk image alt text import take in Shopify?
A handful of images imports in seconds. A few hundred typically finishes in a minute or two, and EditEngine streams larger files so even big catalogs complete without timing out. The results CSV shows the exact duration for your job.
What format does Shopify accept for image alt text imports?
A CSV (or XLSX) with a Handle column to match the product, an Image Src column with the image URL, and an Image Alt Text column with your new descriptions. EditEngine's advanced import reads this format directly.
Can I undo a bulk Shopify image alt text update?
There's no one-click undo, but the workflow is its own backup: keep the original export, and to revert just re-import that unedited file. Because alt text only overwrites text, no images are moved or deleted.
Related tutorials
- How to Bulk Reorder Shopify Product Images
- How to Bulk Replace Shopify Images by URL
- How to Bulk Add Shopify Multiple Images Per Product
About EditEngine: EditEngine Bulk Product Editor helps Shopify merchants bulk edit, bulk import, and bulk export their product catalog in minutes instead of days. Install on Shopify →