Pricing
How to Bulk Markdown Shopify Prices for a Sale
Last updated
Need to mark down Shopify prices in bulk for a seasonal sale, a clearance push, or a Black Friday weekend? With the EditEngine Bulk Product Editor, you export every variant's current price, copy it into the compare-at column as the struck-through original, write the discounted price next to it, and import the file back. EditEngine handles thousands of variants in one round trip — no per-product clicking in the Shopify admin.
What you'll learn
- Export every product with its current Variant Price and Variant Compare At Price
- Set a markdown sale price per variant row in a spreadsheet
- Import the updated file back to Shopify and confirm every row applied
What you'll need
- The EditEngine Bulk Product Editor app installed in your Shopify store
- A live Shopify store with the products you want to put on sale
- Variant prices already populated for every product going on sale
- The Advanced import flow — pricing columns import cleanly through both flows, but Advanced shows the per-row results CSV you'll want as proof
- A spreadsheet editor (Excel, Google Sheets, Numbers — anything that opens CSV)
Shopify shows a sale price by pairing two fields on the variant: the active price (what the customer pays) and the compare-at price (the higher, struck-through original). To run a sale you move the current price into compare-at, then lower the price — the discount badge and strikethrough render automatically. Doing that variant by variant in the admin is slow; the spreadsheet round-trip turns it into one paste.
Step 1 — Export your current Shopify prices
Open EditEngine and go to the Export page. This is where you pick which product fields land in your spreadsheet.
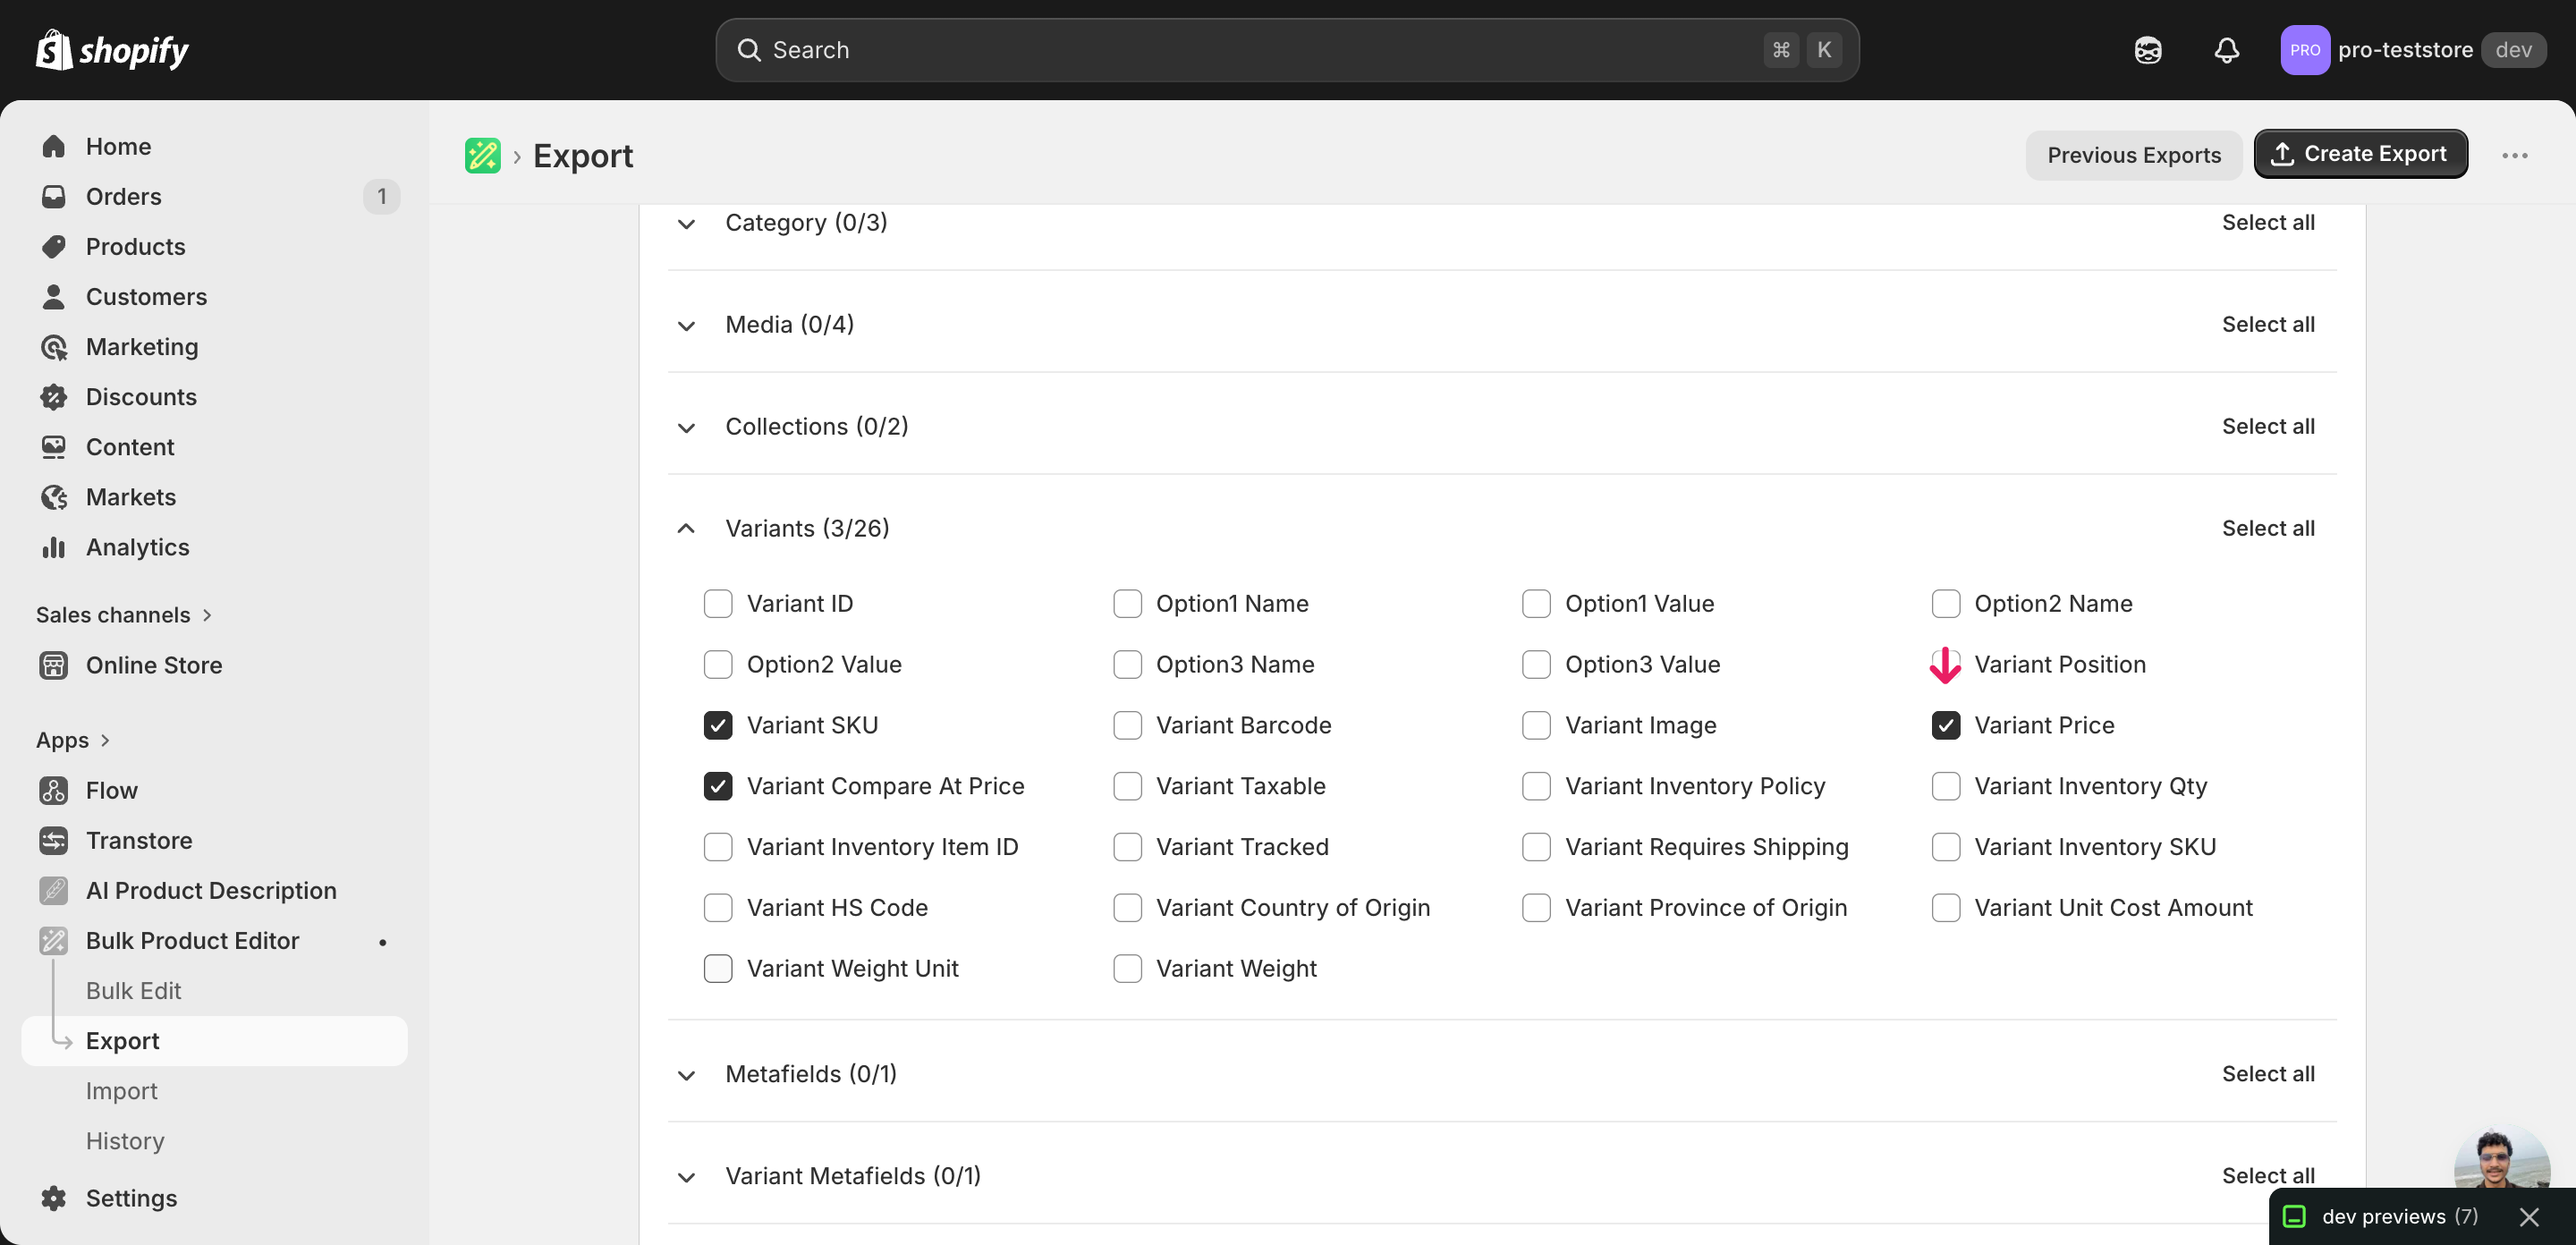
Pick the right columns
- Handle — the unique product identifier the importer uses to match each row back to the right product.
- Variant SKU — the variant-level identifier. Pricing is set per variant, so SKU is the key that pins each new price to the correct row.
- Variant Price — the column the customer pays. This is where the discounted markdown price goes after you edit.
- Variant Compare At Price — the struck-through original. Move the current Variant Price into this column so the storefront shows the discount.
When the export completes, click Download. You'll get one row per variant: a product with five sizes exports as five rows, each with its own price. Keep this file untouched as your rollback copy before opening a working copy to edit.
New to exporting? This guide assumes you know how to run an export and focuses only on the columns and edit unique to this workflow.
Step 2 — Mark down the prices in your spreadsheet
Open the downloaded CSV in Excel or Google Sheets. The Variant Price column holds the active price each variant charges today; Variant Compare At Price is the strikethrough field, usually blank until you run a sale.
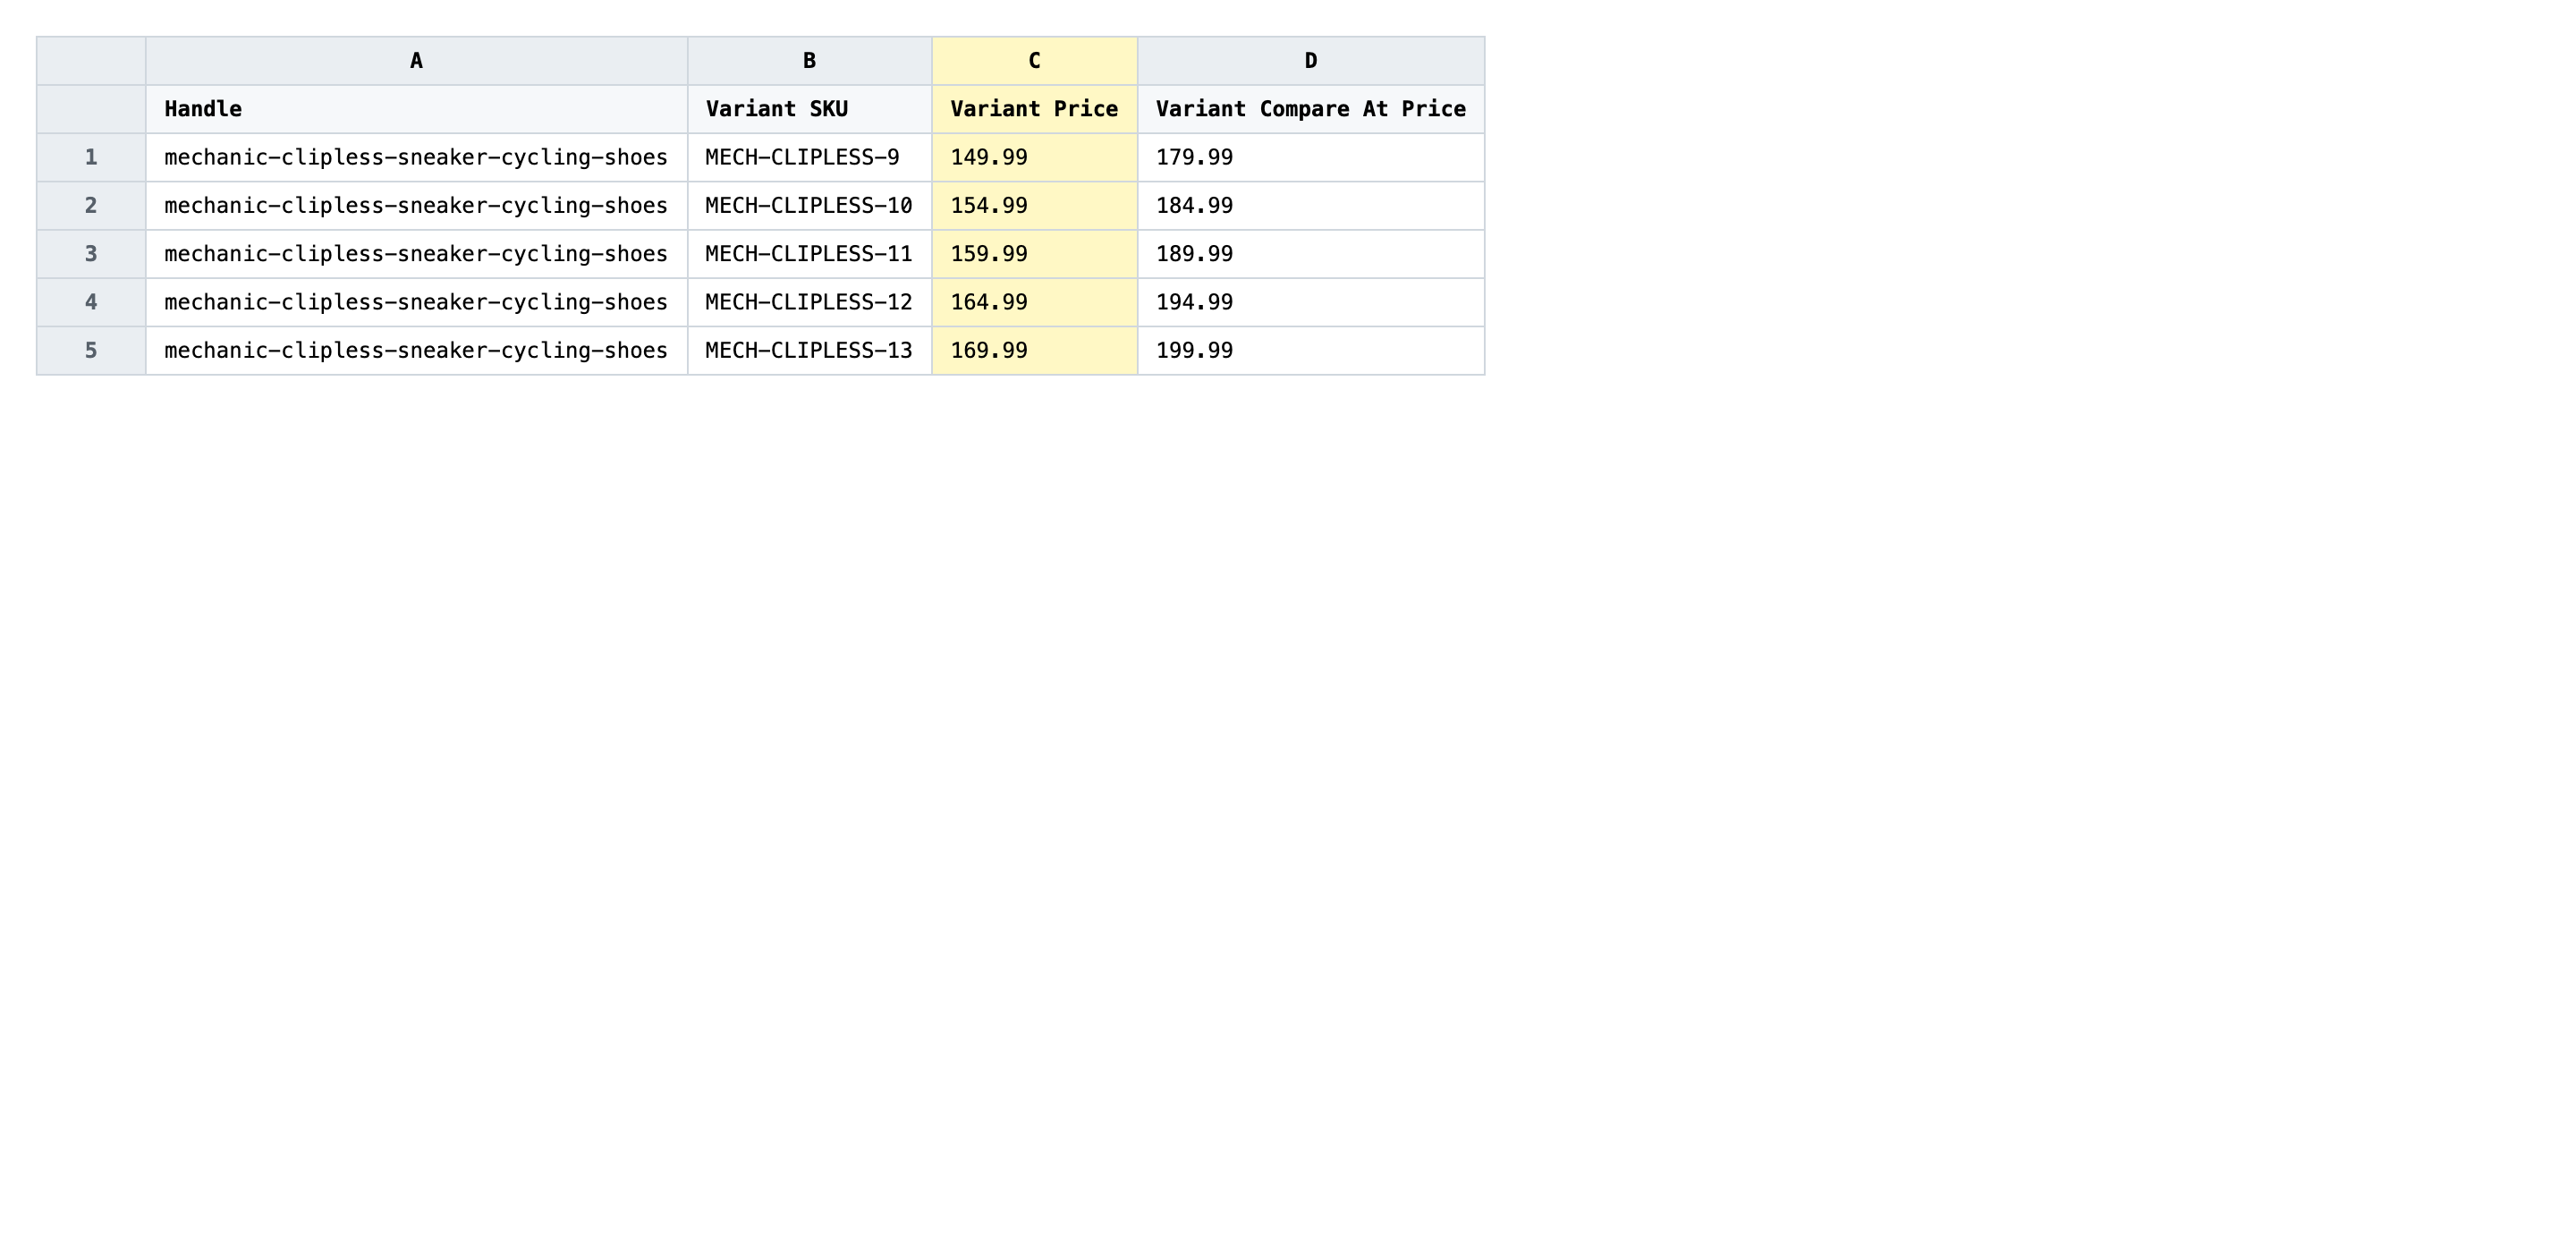
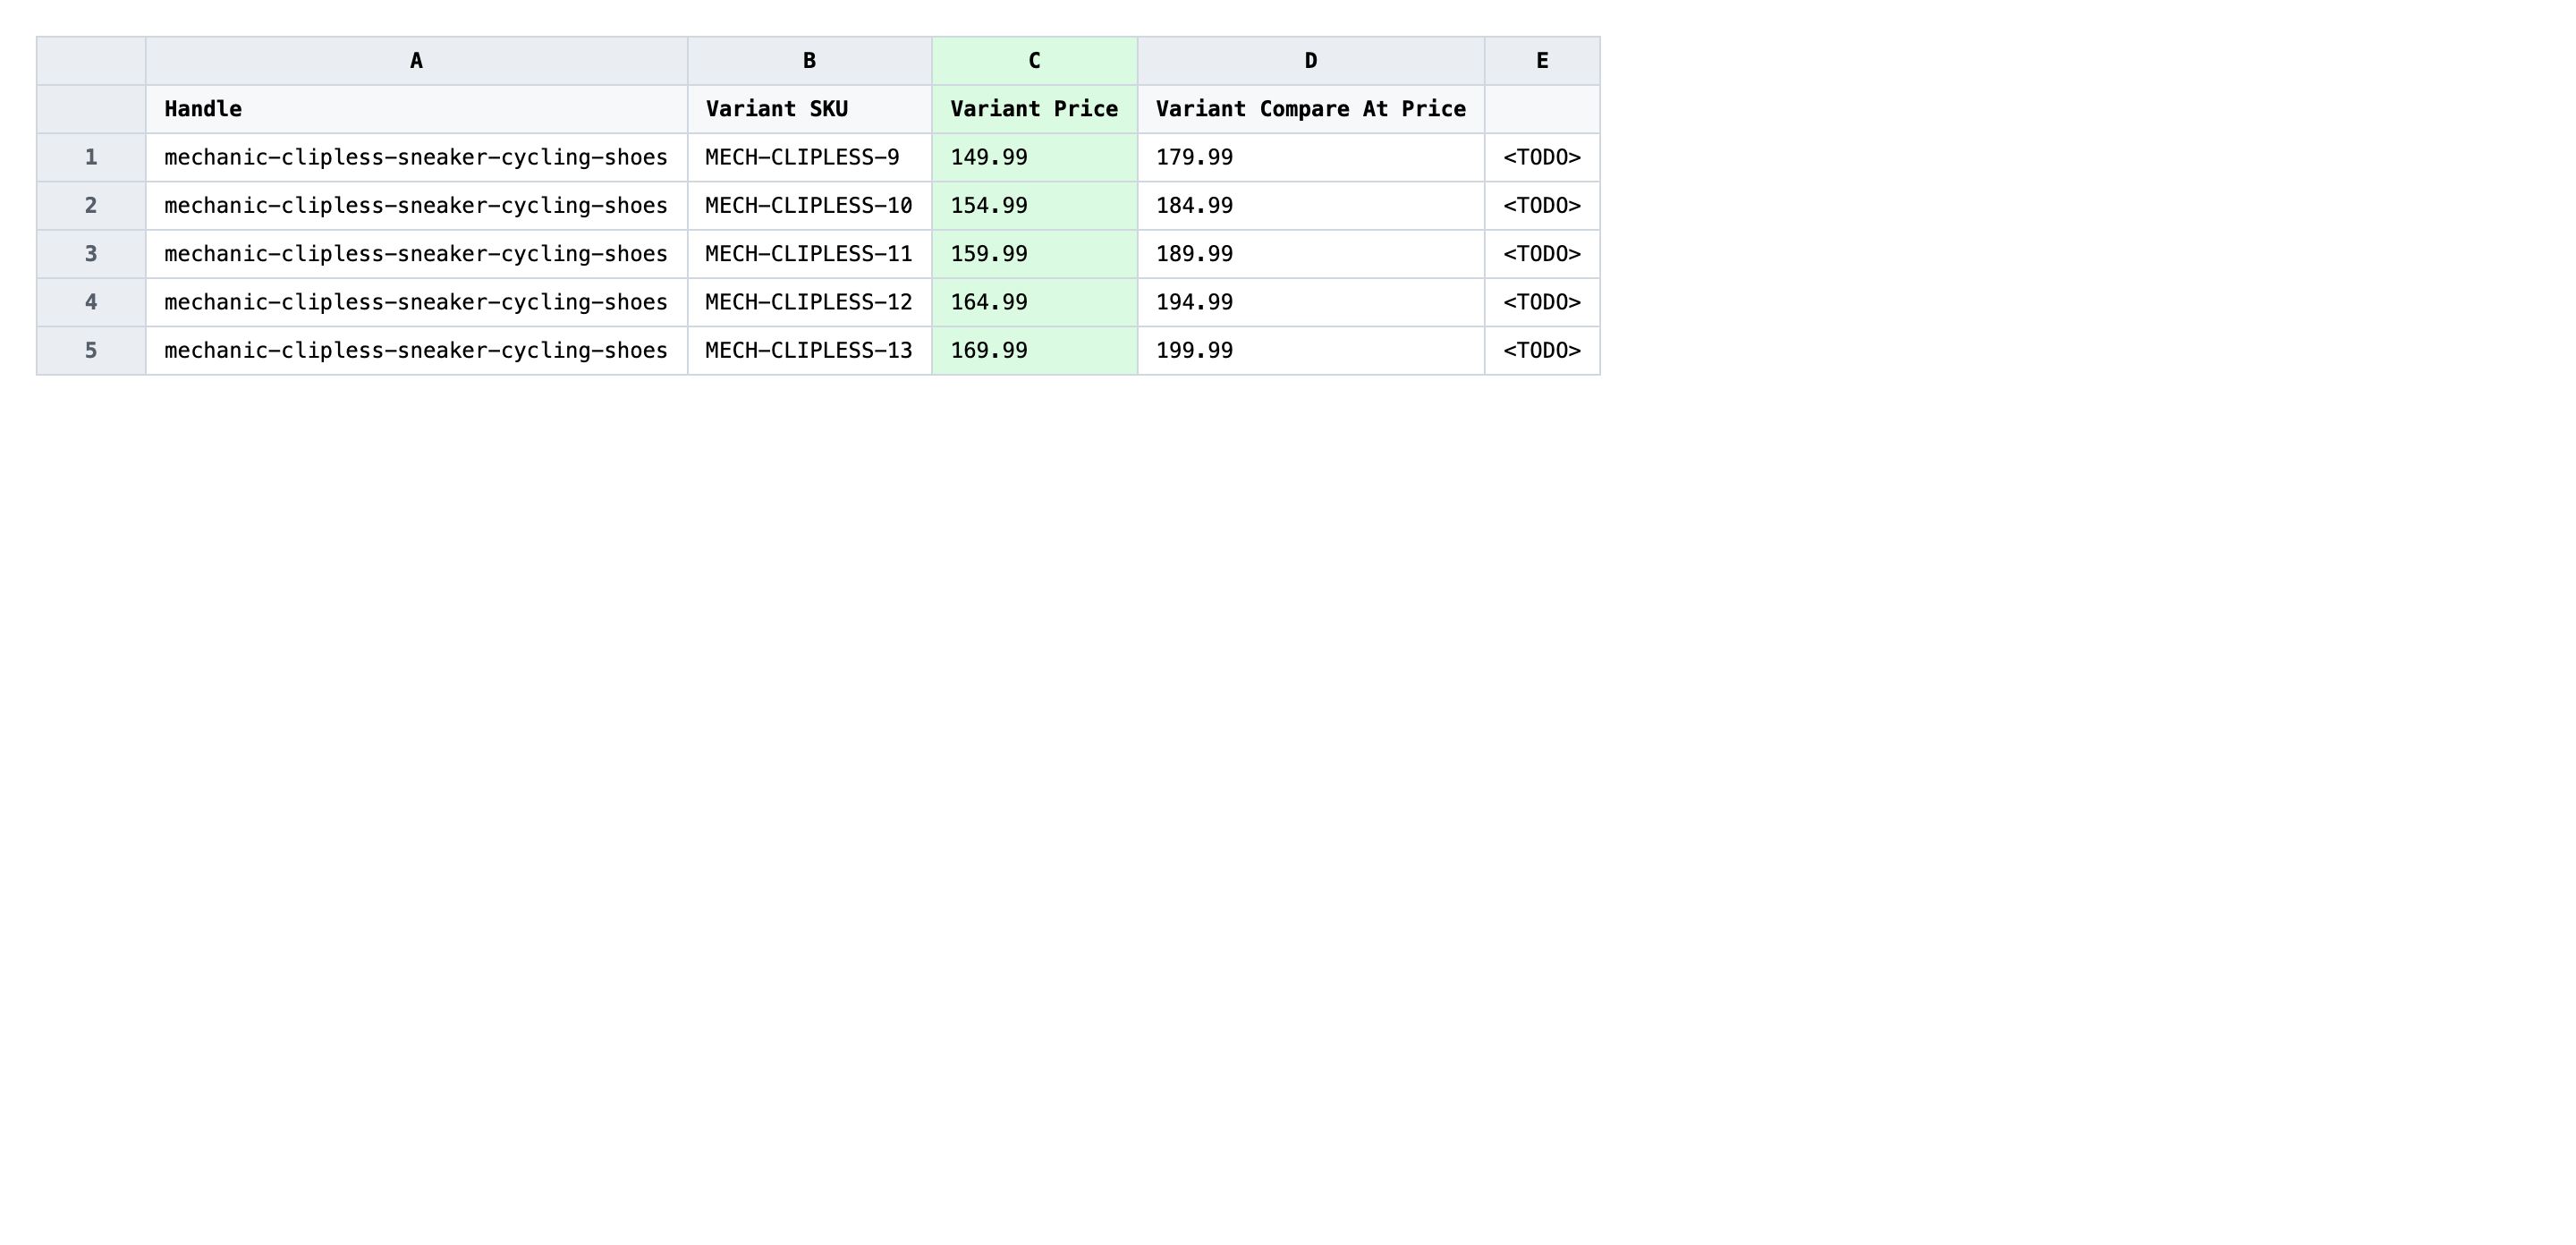
For every row going on sale, copy the current Variant Price value into Variant Compare At Price, then overwrite Variant Price with the markdown. A spreadsheet formula like =ROUND(C2*0.8,2) applies a 20% markdown in one drag. Use the same currency precision as the original (two decimals for USD, EUR, GBP — no currency symbol, no thousands separator).
- ✅
Variant Compare At Price: 149.00, Variant Price: 119.20 - ❌
Variant Price: $119.20 (20% off)
Leave Handle and Variant SKU exactly as exported — those are the matching keys, and changing them retargets the row to a different variant or drops it on the floor. If a variant should stay full-price, blank both price columns on that row so the importer skips it instead of writing zeros. Don't add currency symbols, percentages, or thousands separators to the price cells; Shopify expects a plain number like 119.20.
Save the file as CSV when you're done, and keep the original export handy in case you want to revert.
Tip: If your storefront already uses charm endings (
.99,.95), round the discounted price to that ending instead of letting the spreadsheet land on119.20—119.00or118.95reads cleaner on the product page.
Step 3 — Import the edited file back to Shopify
Open EditEngine → Import and select Advanced import. Then upload the file you just edited.
EditEngine reads the file and shows a summary. Check the Headers panel: Variant Price and Variant Compare At Price should both be detected as variant pricing columns. Leave Match Products By on Auto-detect (it pairs Handle + Variant SKU) and Default Command on Merge so untouched columns aren't disturbed.
Note: Pricing changes touch revenue immediately, so don't run the full sheet on your first import. Trim the file to two or three test variants, import that, and check the storefront — confirm the strikethrough renders and the discount math is right. Once the small batch looks correct, import the rest. EditEngine's results CSV is your audit trail if anything looks off.
Click Start Import and wait for the job to finish — a small file takes seconds, larger catalogs a couple of minutes. When it completes, EditEngine shows a per-row summary.
Download the results CSV. It lists every row with a pass/fail status — that file is your proof the change went through, and the new values are now live in your Shopify admin.
Tips and troubleshooting
Move the original price into Compare At Price first. Shopify only renders the strikethrough and the discount badge when Variant Compare At Price is higher than Variant Price. Skip the copy step and you'll just lower the price silently with no visual cue that it's on sale. The order matters: write the compare-at value before you overwrite the price cell so a half-saved file doesn't lose the original.
Round to a charm ending after the markdown math. A flat 20% off a $149 product lands at $119.20, which feels arbitrary on a product page. Wrap the formula in ROUND and nudge to .99 or .95 so the prices stay on-brand. A second column with the formula =FLOOR(C2*0.8,1)-0.01 gives you 118.99 automatically — copy the values back over Variant Price before saving.
Test a tiny batch before discounting the whole catalog. Pricing is the one field where a bad import shows up in real revenue within minutes. Import three or four rows first, walk the storefront, and confirm both the new price and the strikethrough render. Then run the full file. EditEngine's results CSV gives you the rollback list if a row goes wrong.
Blank rows skip; zero rows charge zero. Leaving Variant Price and Variant Compare At Price blank on a row tells the importer to leave that variant alone. Typing 0 does the opposite — it sets the variant's price to zero, which is a real money problem. Use blanks for skips, never zero.
Frequently asked questions
How do I bulk markdown prices for a sale in Shopify?
Export your products from EditEngine with the Variant Price and Variant Compare At Price columns, copy the current price into Compare At Price, and write the discounted price into Variant Price. Import the file back through Advanced import to apply the markdown across every variant at once.
Can I edit Shopify sale pricing in a spreadsheet?
Yes. EditEngine exports one row per variant with its current price, and a sale-pricing CSV is the fastest way to discount hundreds of variants together. Edit Variant Price and Variant Compare At Price in Excel or Google Sheets, then import the file back.
How long does a bulk sale-pricing import take in Shopify?
A handful of variants imports in seconds. A few hundred typically finishes in a minute or two, and EditEngine streams larger files so a full sale-pricing CSV completes without timing out. The results CSV shows the exact duration.
What format does Shopify accept for sale-pricing imports?
A CSV (or XLSX) with a Handle column, a Variant SKU column to match the right variant, plus Variant Price and Variant Compare At Price. EditEngine's Advanced import reads this sale-pricing CSV directly and applies each row to the matching variant.
Can I undo a bulk Shopify sale-pricing update?
There's no one-click undo, but the workflow is its own backup. Keep the original export — to revert the bulk markdown, re-import that unedited file and the prices snap back to where they started.
Related tutorials
- How to Bulk Markup Shopify Pricing From Cost
- How to Bulk Round Shopify All Prices To 99 95 Endings
- How to Bulk Convert Shopify Prices For A New Currency Market
About EditEngine: EditEngine Bulk Product Editor helps Shopify merchants bulk edit, bulk import, and bulk export their product catalog in minutes instead of days. Install on Shopify →