Inventory
How to Bulk Update Shopify Quality Control Inventory Per Location
Last updated
Need to bulk update Shopify quality-control inventory per location across dozens of variants and several warehouses at once? With EditEngine Bulk Product Editor, you export every variant with its current QC stock per location into a spreadsheet, set the right number on each row, and import the file back. Because Shopify stores inventory state separately at every location, editing per-location columns in a CSV is the right tool — clicking through each variant in the admin is not.
What you'll learn
- Export every product with its current quality-control inventory
- Edit quality-control inventory per row in a spreadsheet
- Import the updated file back to Shopify
What you'll need
- The EditEngine Bulk Product Editor app installed in your Shopify store
- At least one active Shopify location with inventory tracked at the variant level
- Variants whose inventory is managed by Shopify (the Track quantity toggle is on)
- The Advanced import flow — per-location inventory state columns are advanced-import only
- The EditEngine Bulk Product Editor installed on your store
- A spreadsheet editor (Excel, Google Sheets, Numbers — anything that opens CSV)
Shopify tracks inventory states — including on hand, available, committed, and quality-control — separately at every location you operate. Quality-control is the count of units physically present but held back from sale pending inspection. EditEngine exposes one CSV column per location for each state, so you can reconcile and update QC stock across your full multi-location catalog in a single import.
Step 1 — Export your Shopify quality-control inventory
Open EditEngine and go to the Export page. This is where you pick the per-location inventory columns that land in your spreadsheet.
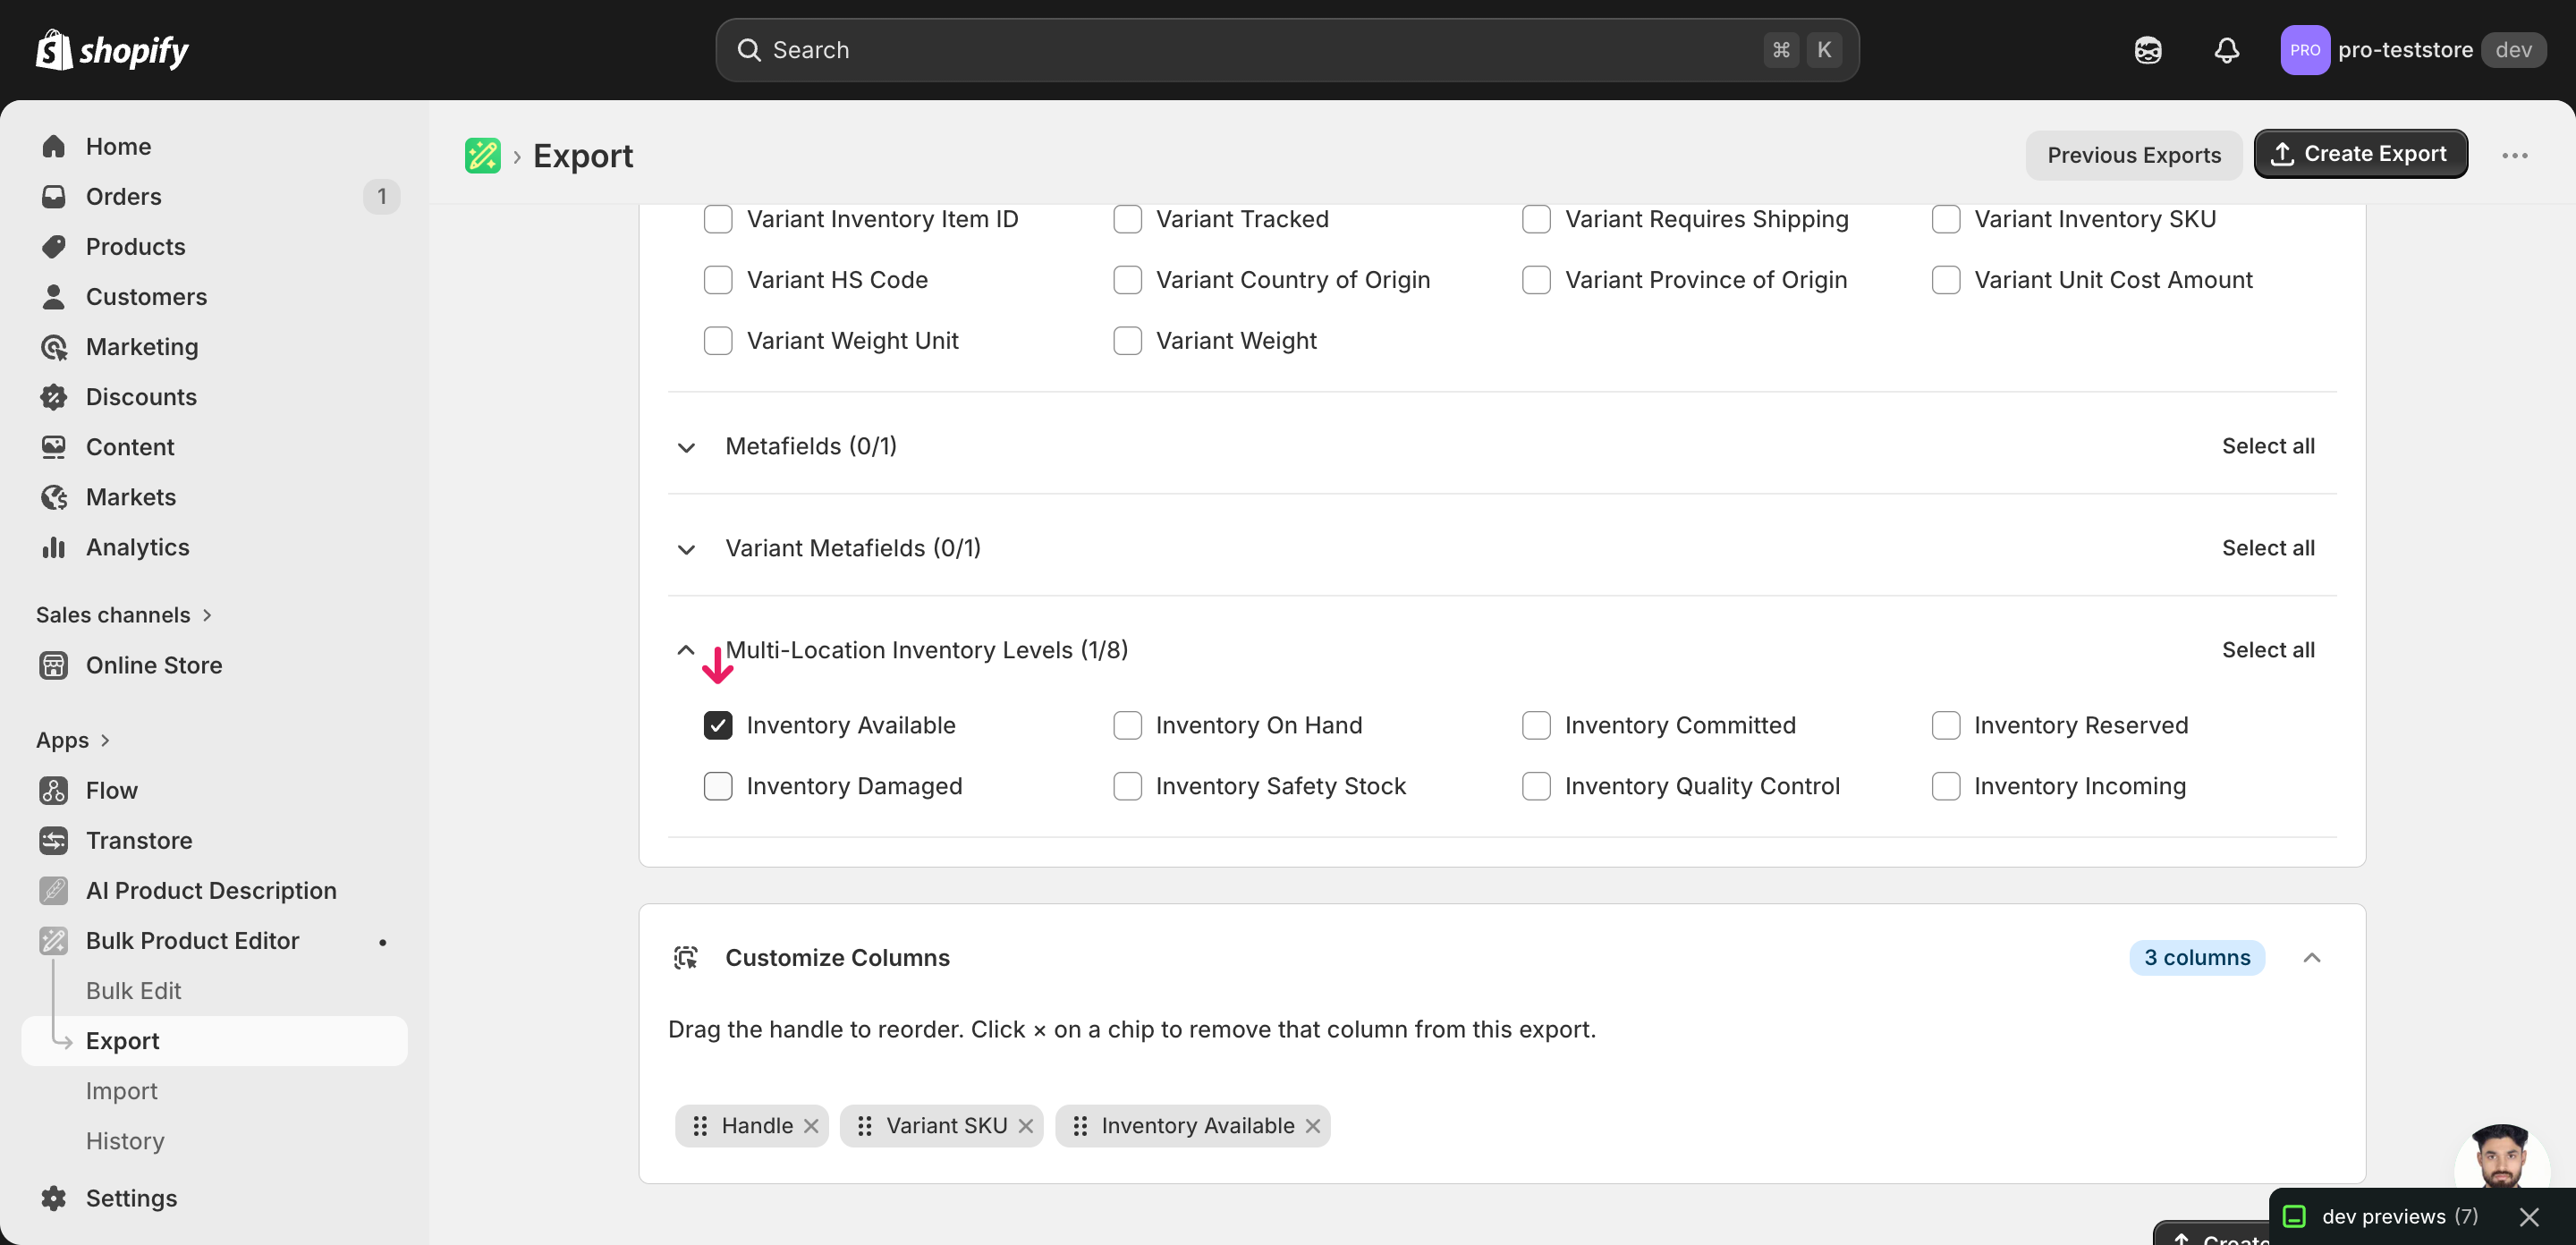
Pick the right columns
- Handle — the unique product identifier the importer uses to match each row back to the right product.
- Variant SKU — disambiguates rows when a product has several variants — the importer pairs Handle plus SKU to land the QC number on the correct variant.
- Inventory Available: Shop Location — the column you'll edit. Expand the Inventory group and tick the Available (or quality-control) state for each location whose stock you manage. EditEngine emits one column per location using the
Inventory Available: <Location Name>format.
When the export completes, click Download. You'll get one row per variant, with a separate inventory column for every active location — variants stocked at three locations show three per-location columns side by side.
New to exporting? This guide assumes you know how to run an export and focuses only on the columns and edit unique to this workflow.
Step 2 — Bulk update Shopify quality-control inventory per location in your spreadsheet
Open the downloaded CSV in Excel or Google Sheets. Each Inventory Available: <Location> column holds the current QC stock at that location for the variant on that row.
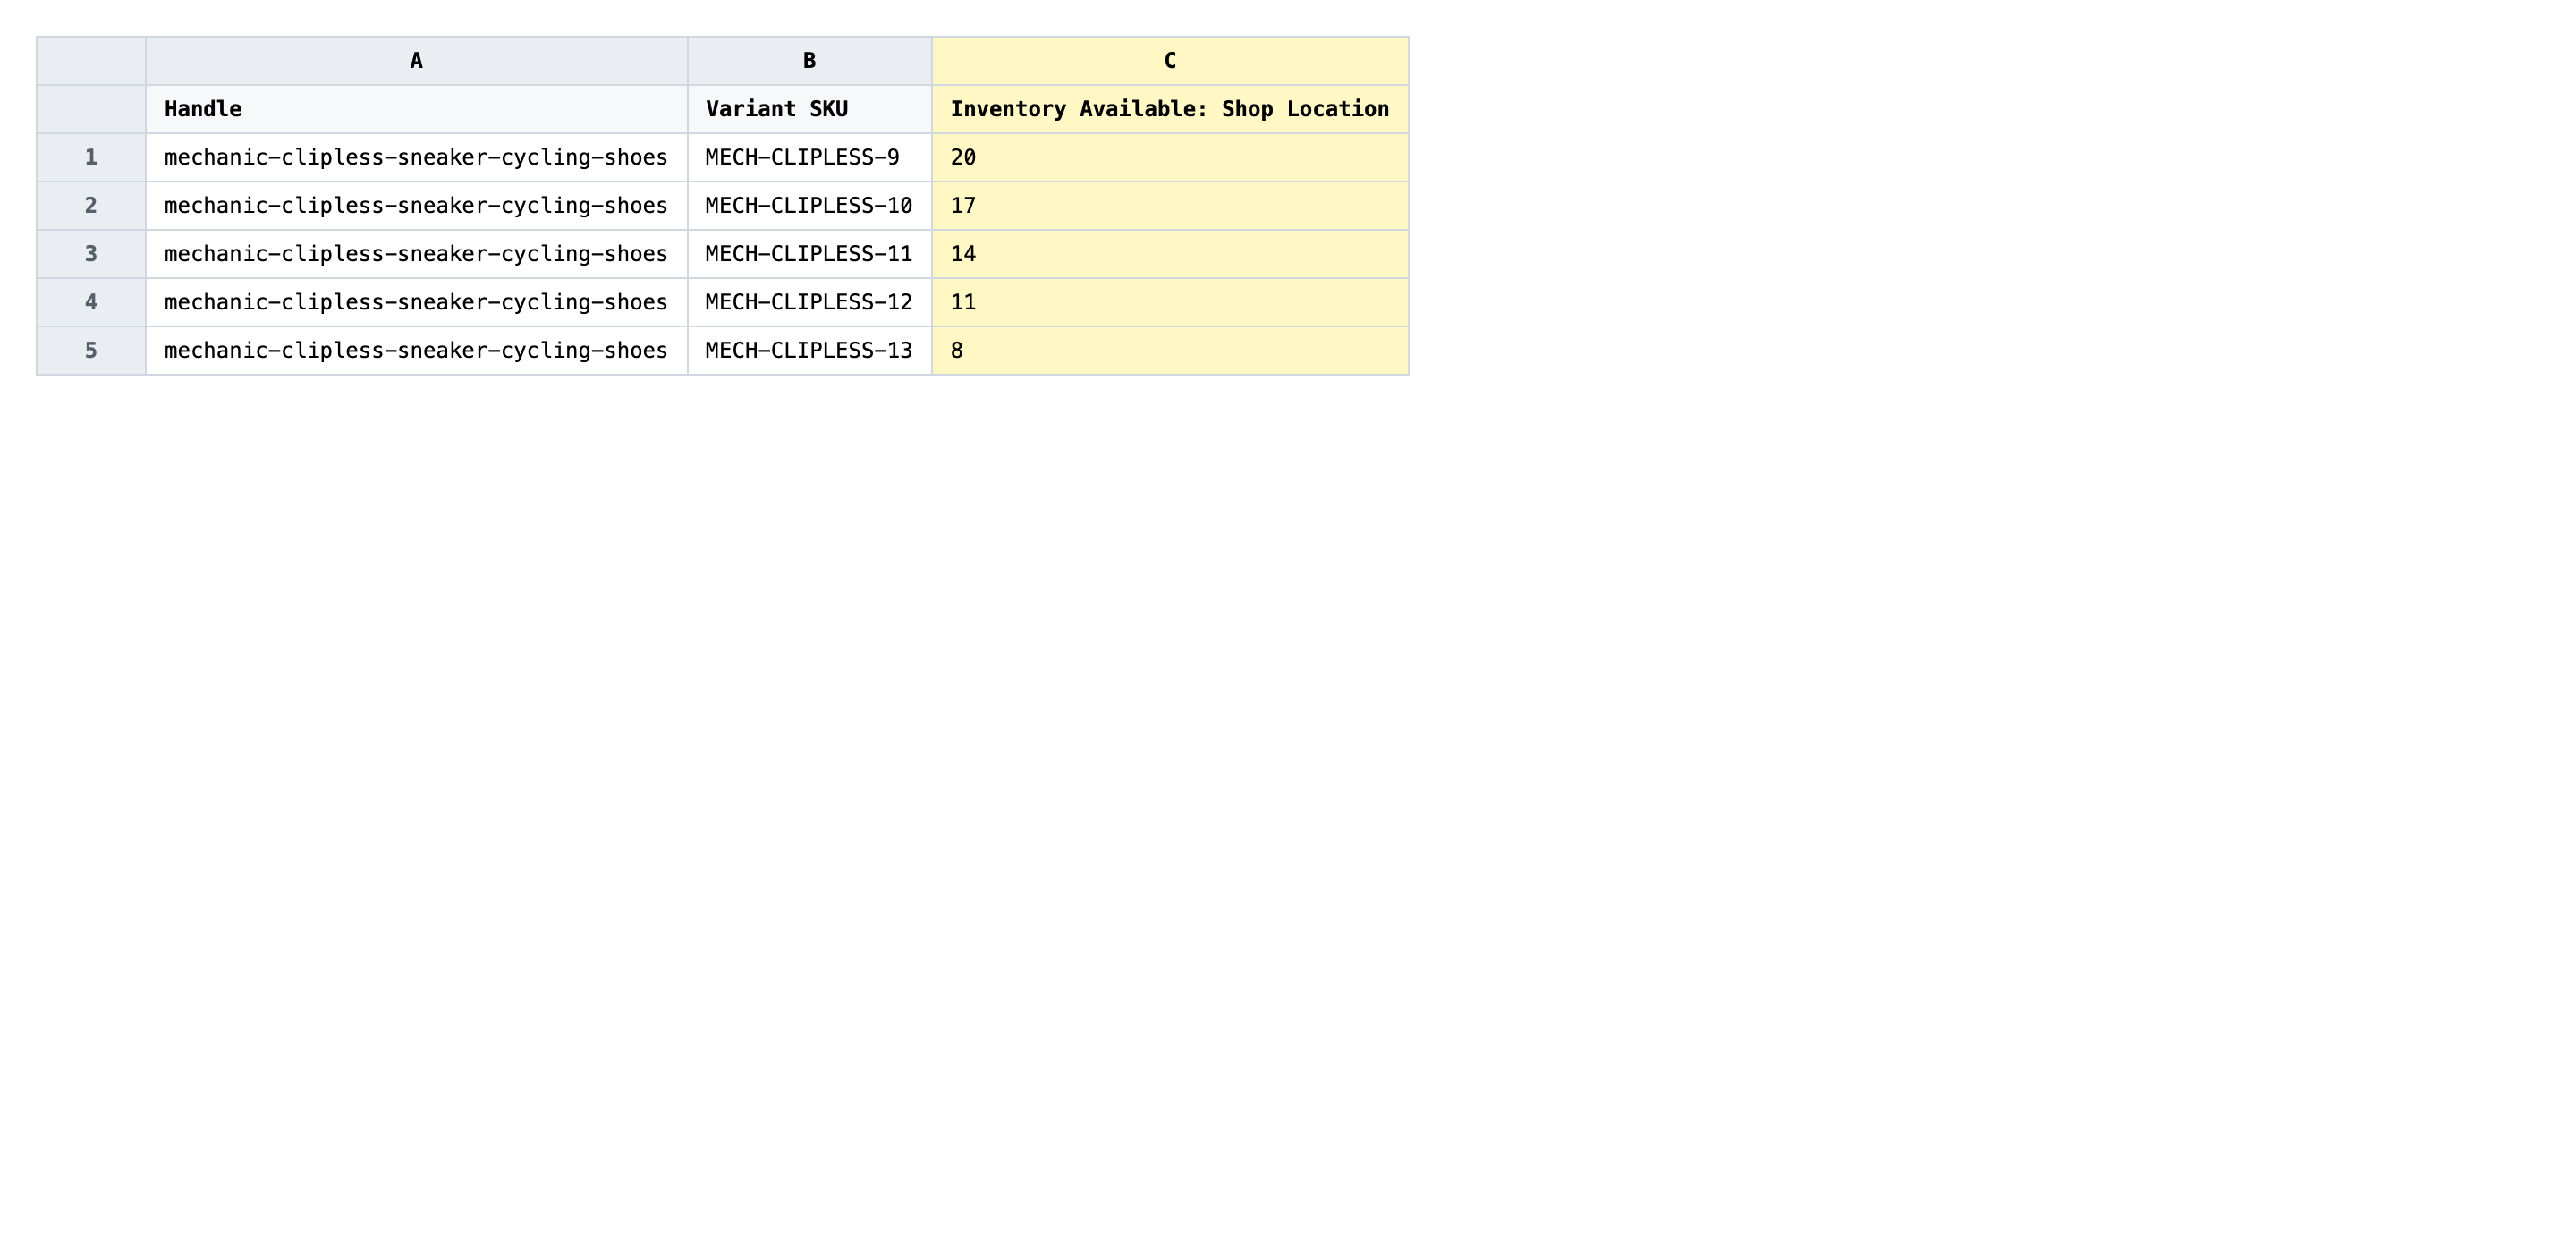
Set a whole non-negative integer in the per-location inventory column for every variant whose QC stock has changed. Leave a cell blank only if the variant isn't stocked at that location — a blank means "don't touch", while 0 means "set QC stock to zero here". Edit only the location columns you actually need to change; rows you don't edit are still re-sent untouched, but fewer edits means a smaller diff to verify.
- ✅
12 - ❌
12 units (in QC bin A)
Leave Handle, Variant SKU, and the column headers exactly as exported. The header Inventory Available: Shop Location is the matching key for that specific location — renaming Shop Location to anything else points the row at a different (or non-existent) location and the row will fail. Don't add new location columns by hand either; create the location in Shopify first, re-export, and the column appears.
Save the file as CSV when you're done, and keep the original export handy in case you want to revert.
Tip: QC inventory is part of a balance: on hand minus committed minus quality-control equals available. If you raise QC without lowering on hand, your available count drops, which can hide stock from the storefront — reconcile the whole row, not just the QC column.
Step 3 — Import the edited file back to Shopify
Open EditEngine → Import and select Advanced import. Then upload the file you just edited.
EditEngine reads the file and shows a summary. In the Headers panel, every Inventory Available: <Location> column should carry the INVENTORY badge, and the location name in the header must match a location that exists in your Shopify admin. Leave Match Products By on Auto-detect and Default Command on Merge.
Note: This advanced import does not have a dry-run toggle, and inventory writes go straight to live stock at every location — a wrong number changes what's available to sell. Always import a tiny test batch first: two or three variants you can spot-check in the Shopify admin. Confirm the QC numbers landed at the right locations, then import the full file.
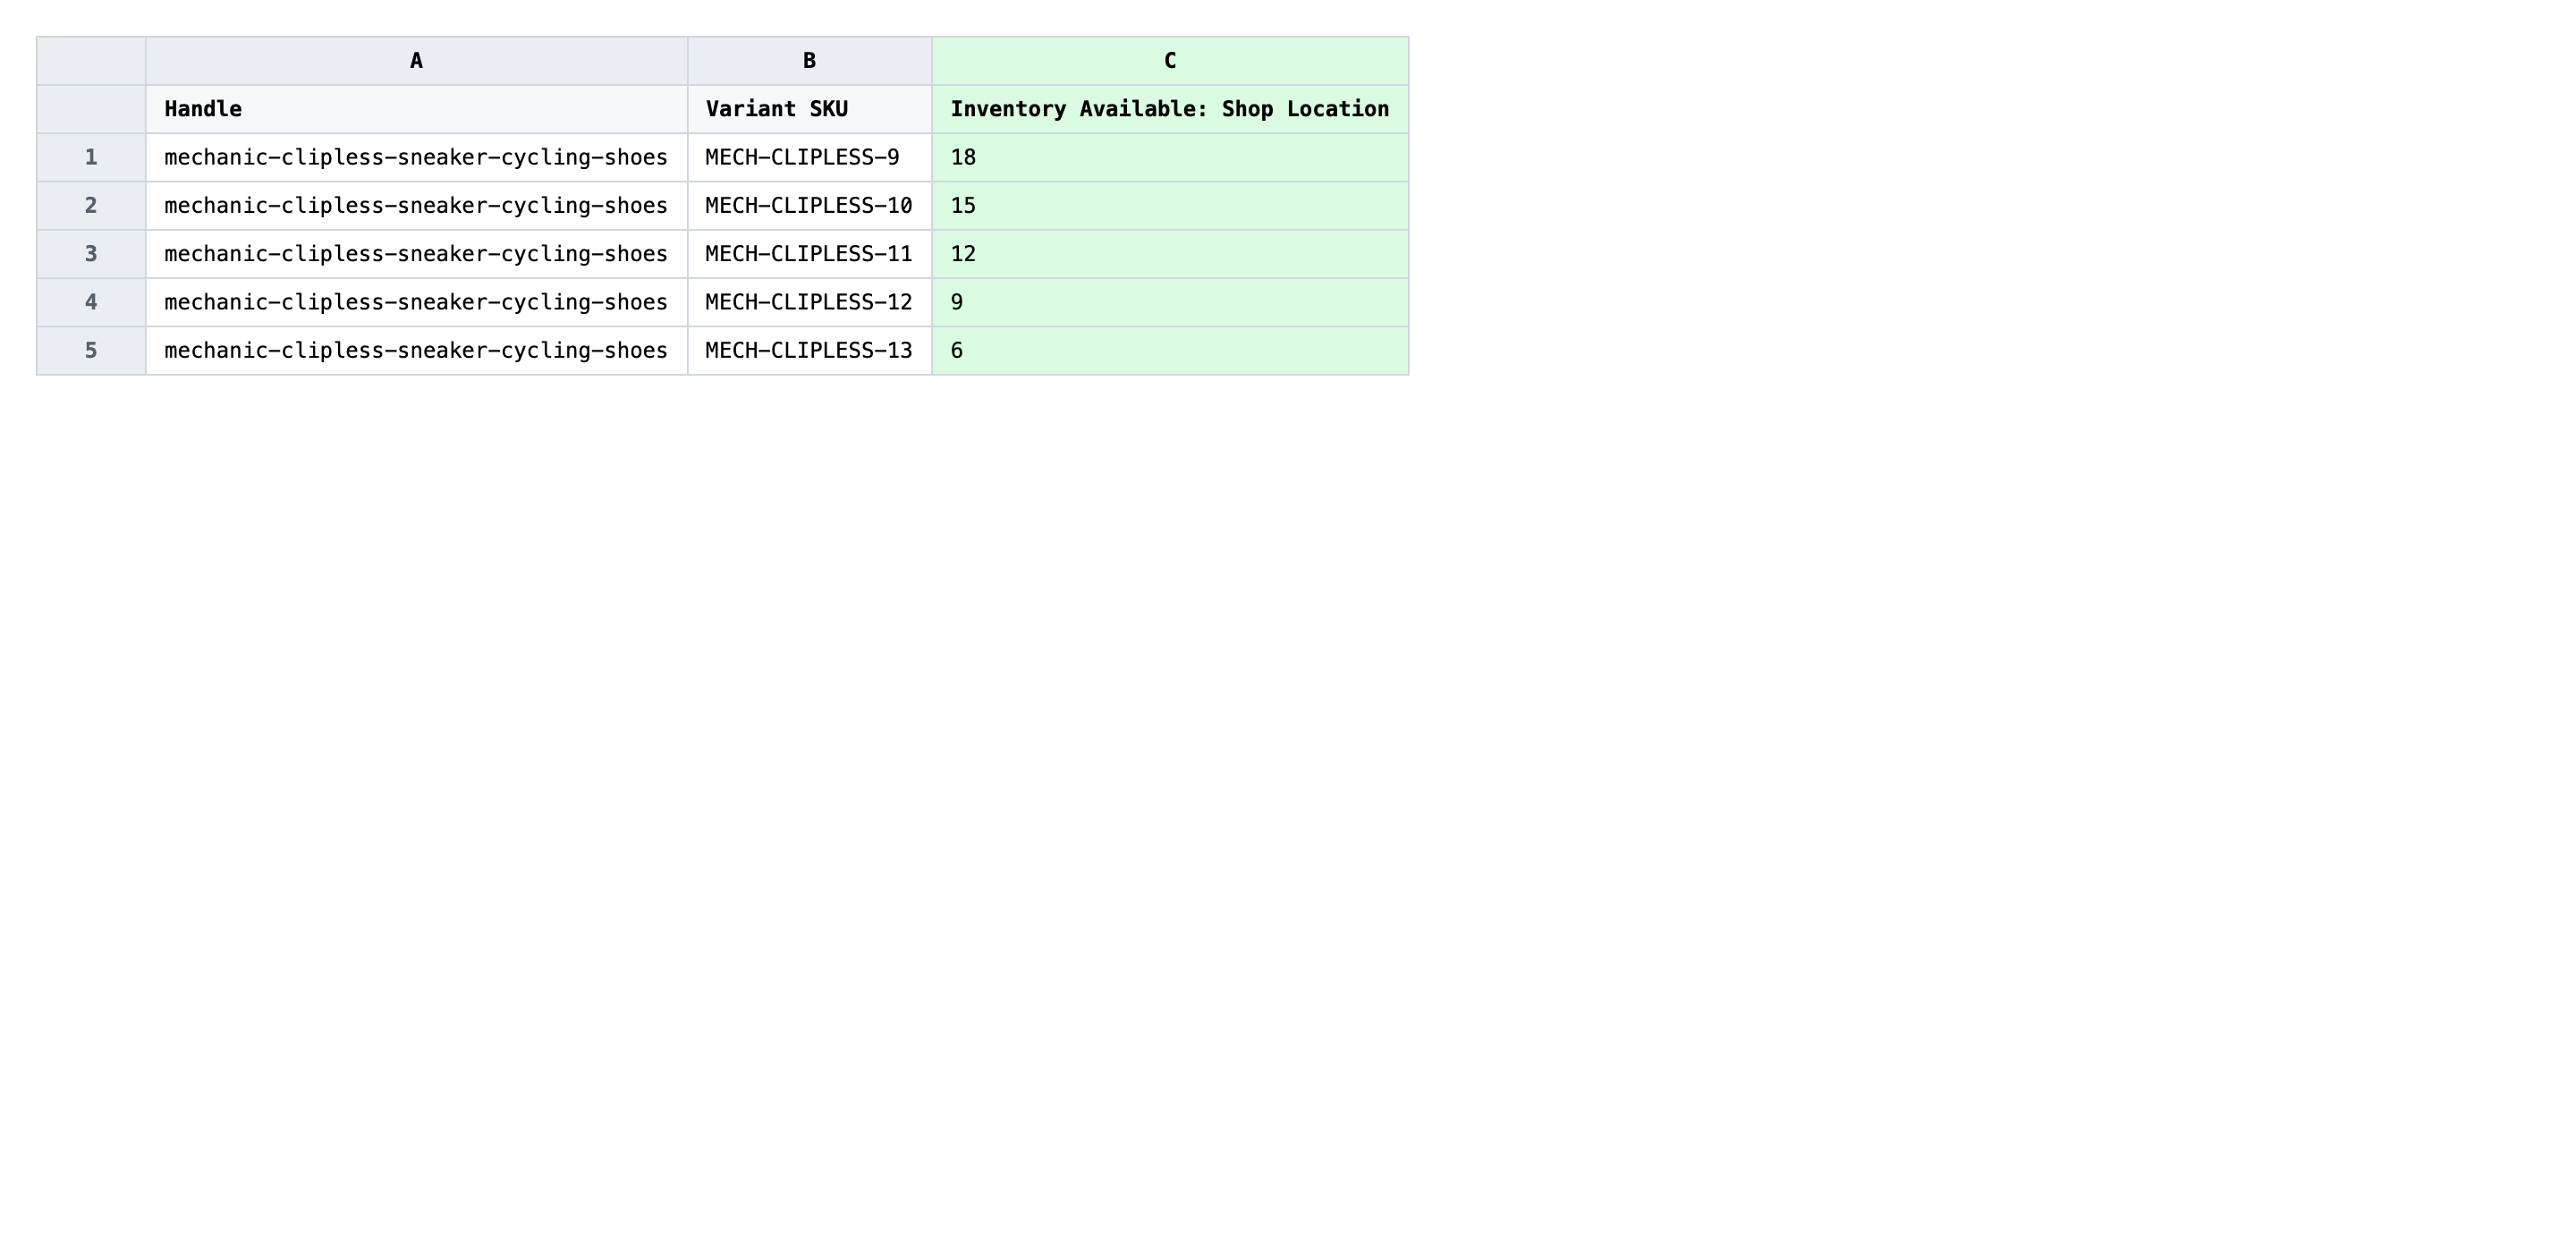
Click Start Import and wait for the job to finish — a small file takes seconds, larger catalogs a couple of minutes. When it completes, EditEngine shows a per-row summary.
Download the results CSV. It lists every row with a pass/fail status — that file is your proof the change went through, and the new values are now live in your Shopify admin.
Tips and troubleshooting
Don't rename the location in the column header. EditEngine matches each per-location inventory column to a Shopify location by the exact text after the colon — Inventory Available: Shop Location targets the location named Shop Location. Trimming whitespace, changing capitalization, or shortening the name breaks the match and the importer skips the row. If you renamed a location in Shopify, re-export to pick up the new header.
Reconcile QC against on hand, committed, and available. Quality-control stock isn't a free-floating number — it's a slice of on hand that isn't sellable. Before importing, sanity-check each row: on hand - committed - quality-control = available. If you set QC higher than on hand at a location, Shopify will accept it but available drops below zero and the variant disappears from the storefront. Export the On hand, Committed, and Available columns alongside QC so the spreadsheet shows the whole picture.
Test on a handful of variants before the full file. There's no dry-run, and inventory edits are live the instant the import completes. Cut a copy of the CSV down to two or three rows, import that first, and check the variants in the Shopify admin (Inventory → the location → the variant). Once the numbers match what you expect, run the full file. A five-minute test catches a wrong header or an off-by-one quantity before it touches the whole catalog.
Frequently asked questions
How do I bulk update quality-control inventory in Shopify?
Export your products from EditEngine with the Handle, Variant SKU, and Inventory Available: <Location> columns, set the quality-control number on each row in a spreadsheet, then import the file back through the advanced import flow. That round-trip is how you bulk update Shopify quality-control inventory per location instead of clicking through each variant in the admin.
Can I edit Shopify quality-control inventory in a spreadsheet?
Yes. EditEngine exports one row per variant with a dedicated column for each location's QC state, so you can edit Shopify quality-control inventory per location in Excel, Google Sheets, or any CSV editor. Shopify's native admin has no spreadsheet view for per-location inventory states.
How long does a bulk quality-control inventory import take in Shopify?
A few dozen variants finish in seconds. A few thousand rows of bulk Shopify quality-control inventory updates per location typically take a couple of minutes because the importer writes one inventory adjustment per row per location. The results CSV records the exact runtime.
What format does Shopify accept for quality-control inventory imports?
A CSV or XLSX with a Handle column, a Variant SKU column to disambiguate variants, and one Inventory Available: <Location Name> column per location whose QC stock you want to set. EditEngine's advanced import reads this layout directly for bulk Shopify quality-control inventory updates per location.
Can I undo a bulk Shopify quality-control inventory update?
There is no one-click undo, but the original export is your backup — re-import the unedited file and the previous quality-control inventory values per location are restored. Keep the pre-edit CSV until you've confirmed the new numbers in the Shopify admin.
Related tutorials
- How to Bulk Update Shopify Inventory Quantities Across Multiple Locations
- How to Bulk Adjust Shopify Inventory Deltas Across Locations
- How to Bulk Update Shopify On Hand Stock Per Location
About EditEngine: EditEngine Bulk Product Editor helps Shopify merchants bulk edit, bulk import, and bulk export their product catalog in minutes instead of days. Install on Shopify →