Products
How to Bulk Change Shopify Status (Active / Draft / Archived) Per Product
Last updated
Need to bulk change Shopify status (active / draft / archived) per product without opening each product card one by one? EditEngine Bulk Product Editor lets you export your catalog to a spreadsheet, set the Status column on each row, and import the file back to Shopify in one job. That's how you stage a coordinated launch, retire seasonal items, or unarchive a range of products at scale.
What you'll learn
- Export every product with its current status (active / draft / archived)
- Edit status (active / draft / archived) per row in a spreadsheet
- Import the updated file back to Shopify
What you'll need
- The EditEngine Bulk Product Editor app installed in your Shopify store
- A Shopify store with the products whose status you want to change already created
- The Advanced import flow — status changes write to the core product record and apply per row
- A clear list of which handles should end up
active, whichdraft, and whicharchivedbefore you start - A spreadsheet editor (Excel, Google Sheets, Numbers — anything that opens CSV)
Product status in Shopify is a single field with three values. active makes the product available on connected sales channels, draft keeps it hidden while you finish setting it up, and archived removes it from the storefront and from most admin lists without deleting it. Changing status per product across hundreds of items in the admin is slow — the spreadsheet round-trip flips them in one pass.
Step 1 — Export your Shopify status (active / draft / archived)
Open EditEngine and go to the Export page. This is where you pick which product fields land in your spreadsheet.
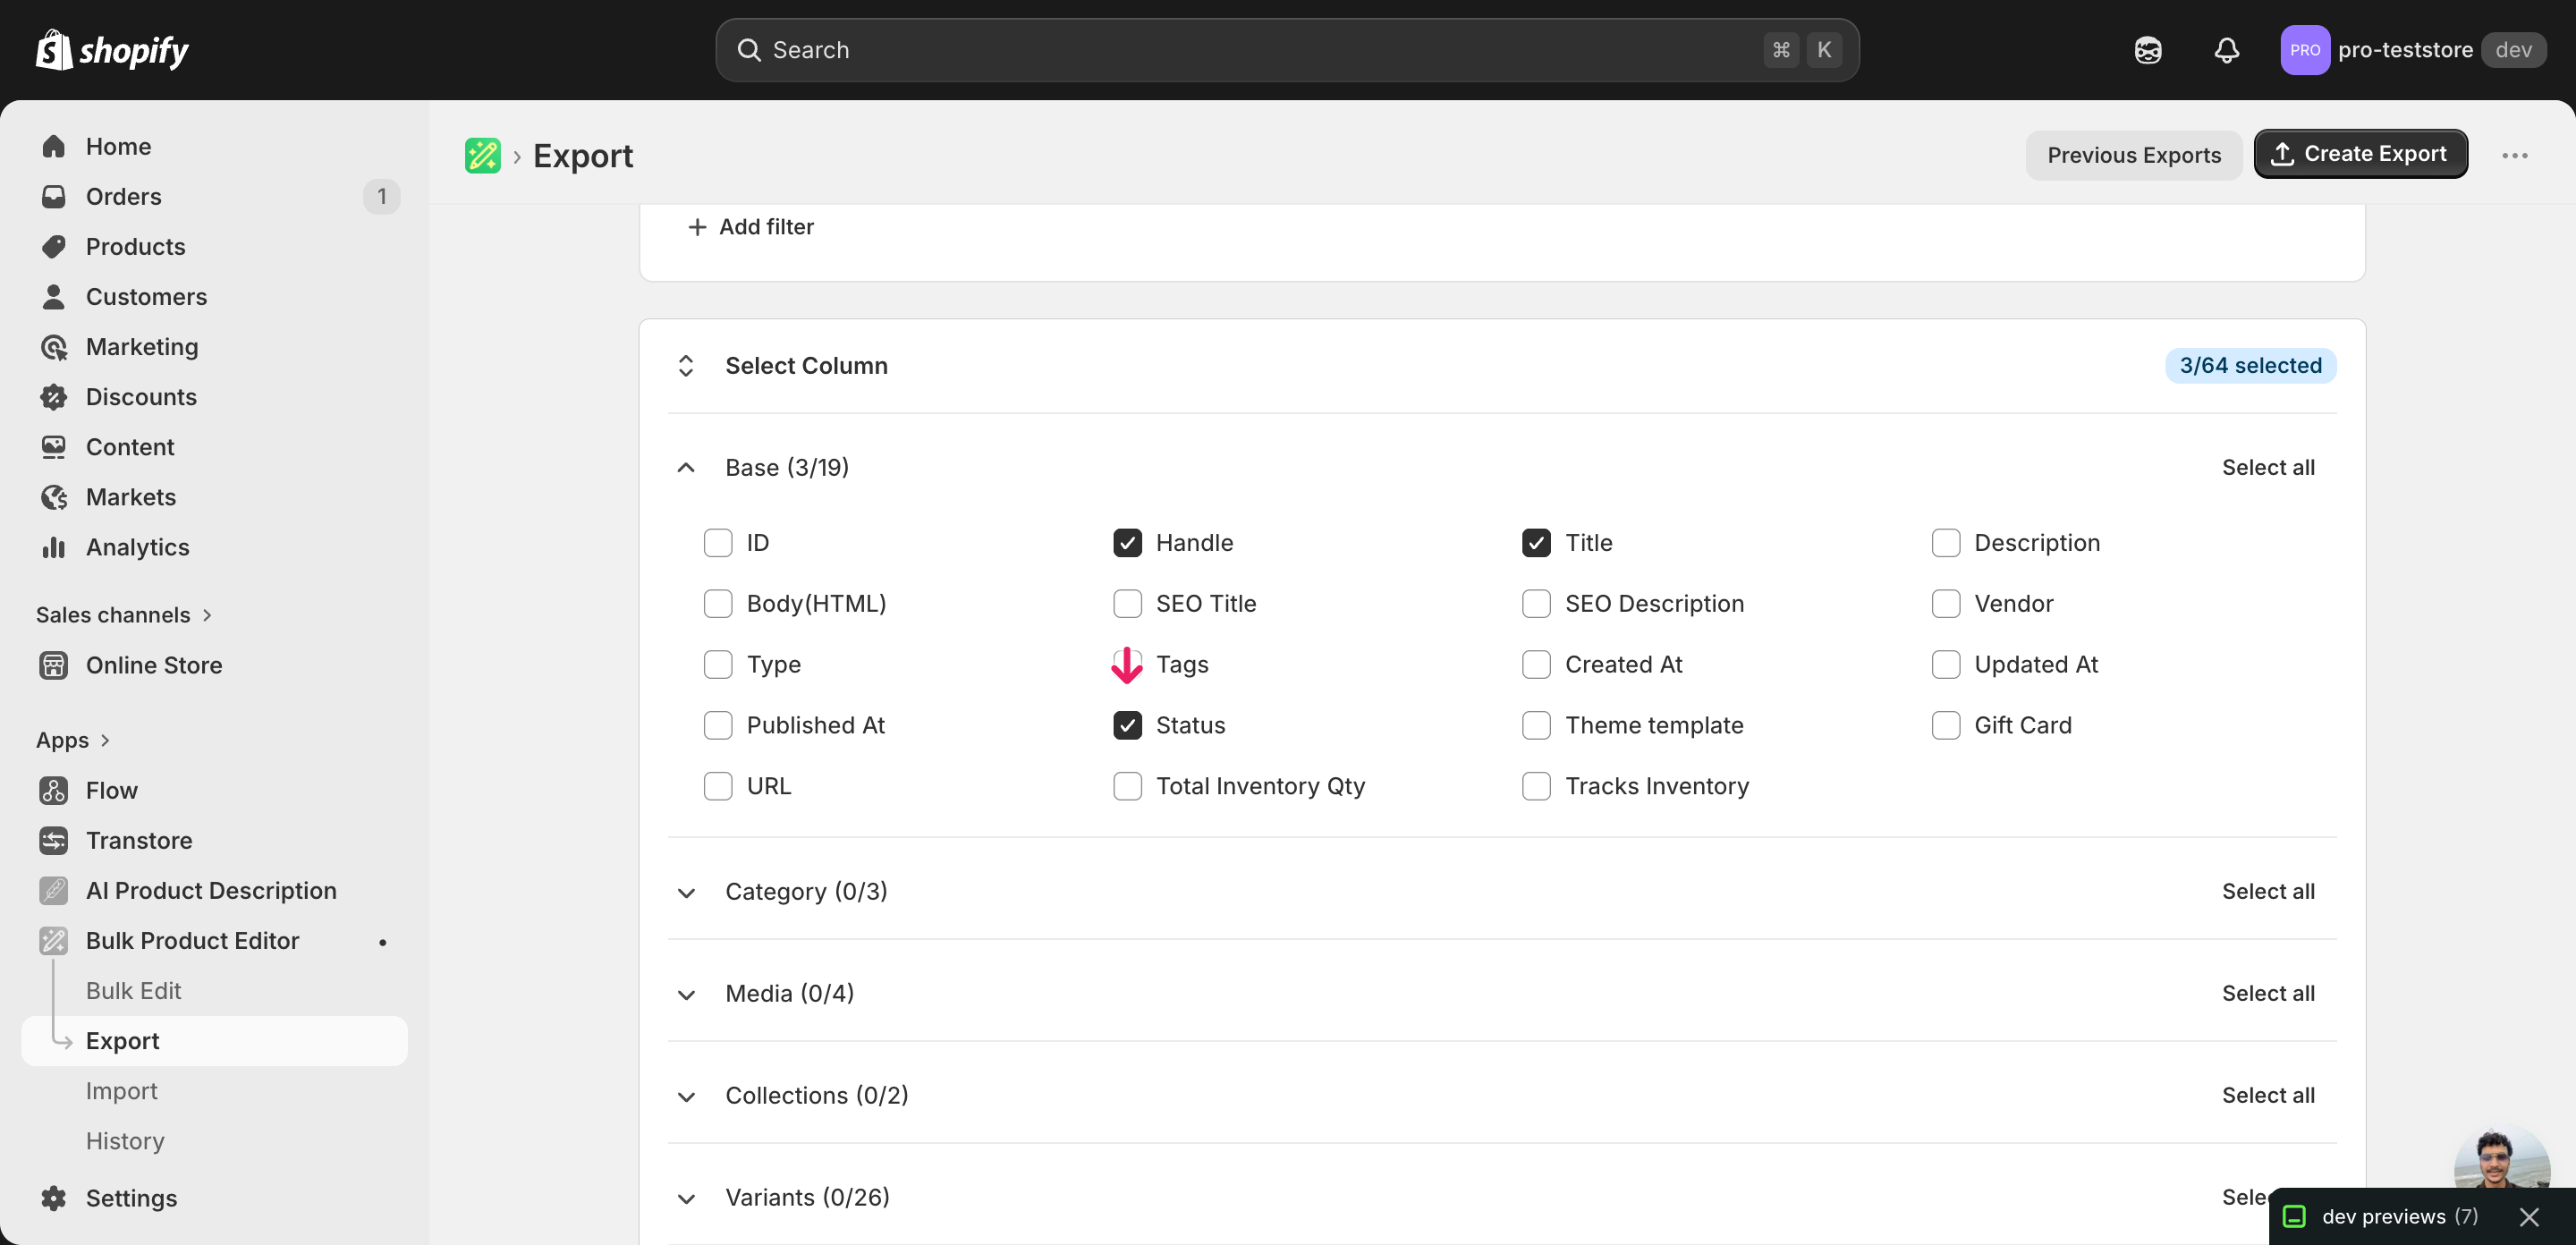
Pick the right columns
- Handle — the unique product identifier the importer uses to match each row back to the right product. Never edit this column.
- Title — context only, so you can see which product a row belongs to while you set its status.
- Status — the column you'll edit. Expand the Product group and tick Status — its current value will be one of
active,draft, orarchived.
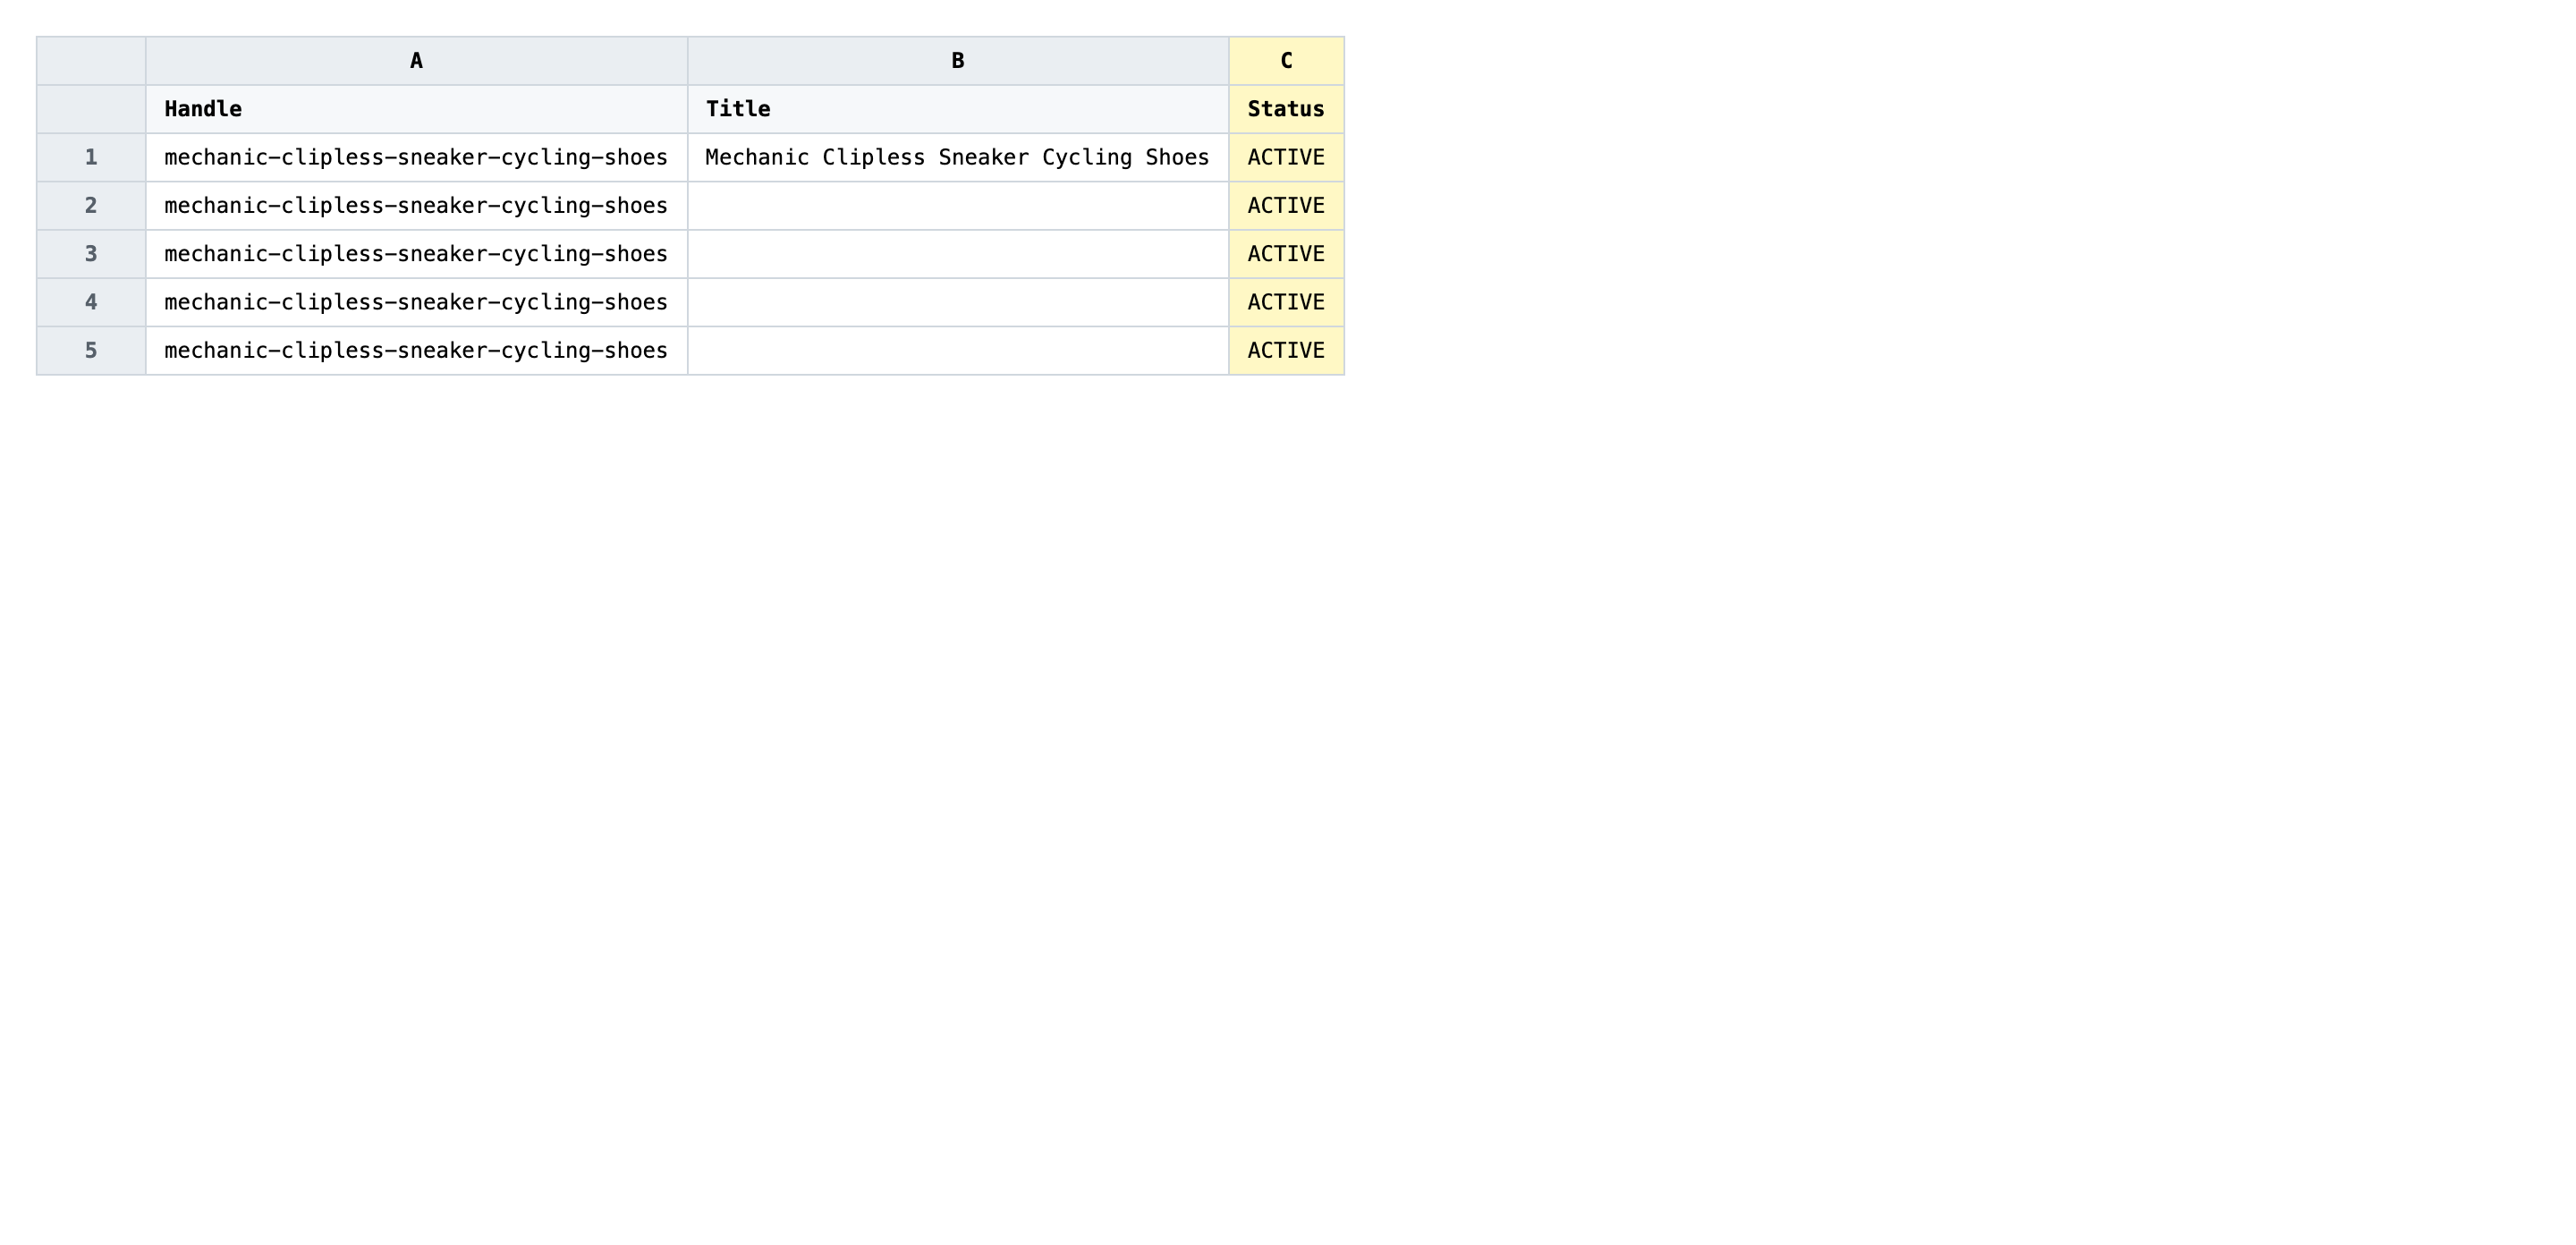
When the export completes, click Download. You'll get one row per product with the current Status value already filled in, which makes it obvious where each product stands today before you change anything.
New to exporting? This guide assumes you know how to run an export and focuses only on the columns and edit unique to this workflow.
Step 2 — Bulk change Shopify status (active / draft / archived) per product in your spreadsheet
Open the downloaded CSV in Excel or Google Sheets. The Status column holds each product's current value — active, draft, or archived — and that's the only column you'll change.
Set the Status value on each row to exactly one of active, draft, or archived. The importer is case-insensitive, but spelling has to match — archive (without the d) or published won't be accepted. Use a sort or filter on Status to flip a whole group of products at once, then double-check before saving.
- ✅
archived - ❌
Archive (misspelled) orinactive(not a Shopify status value)
Leave Handle untouched — that column is the matching key, so changing it points the row at a different product (or none at all). Leave Title alone too unless you want to rewrite product names in the same import. Empty Status cells are treated as "no change", so blanking a row out won't archive anything by mistake.

Save the file as CSV when you're done, and keep the original export handy in case you want to revert.
Tip: Sort the spreadsheet by Status before editing. Grouping every product you want to archive together lets you fill the column with a single drag instead of typing the value into each cell.
Step 3 — Import the edited file back to Shopify
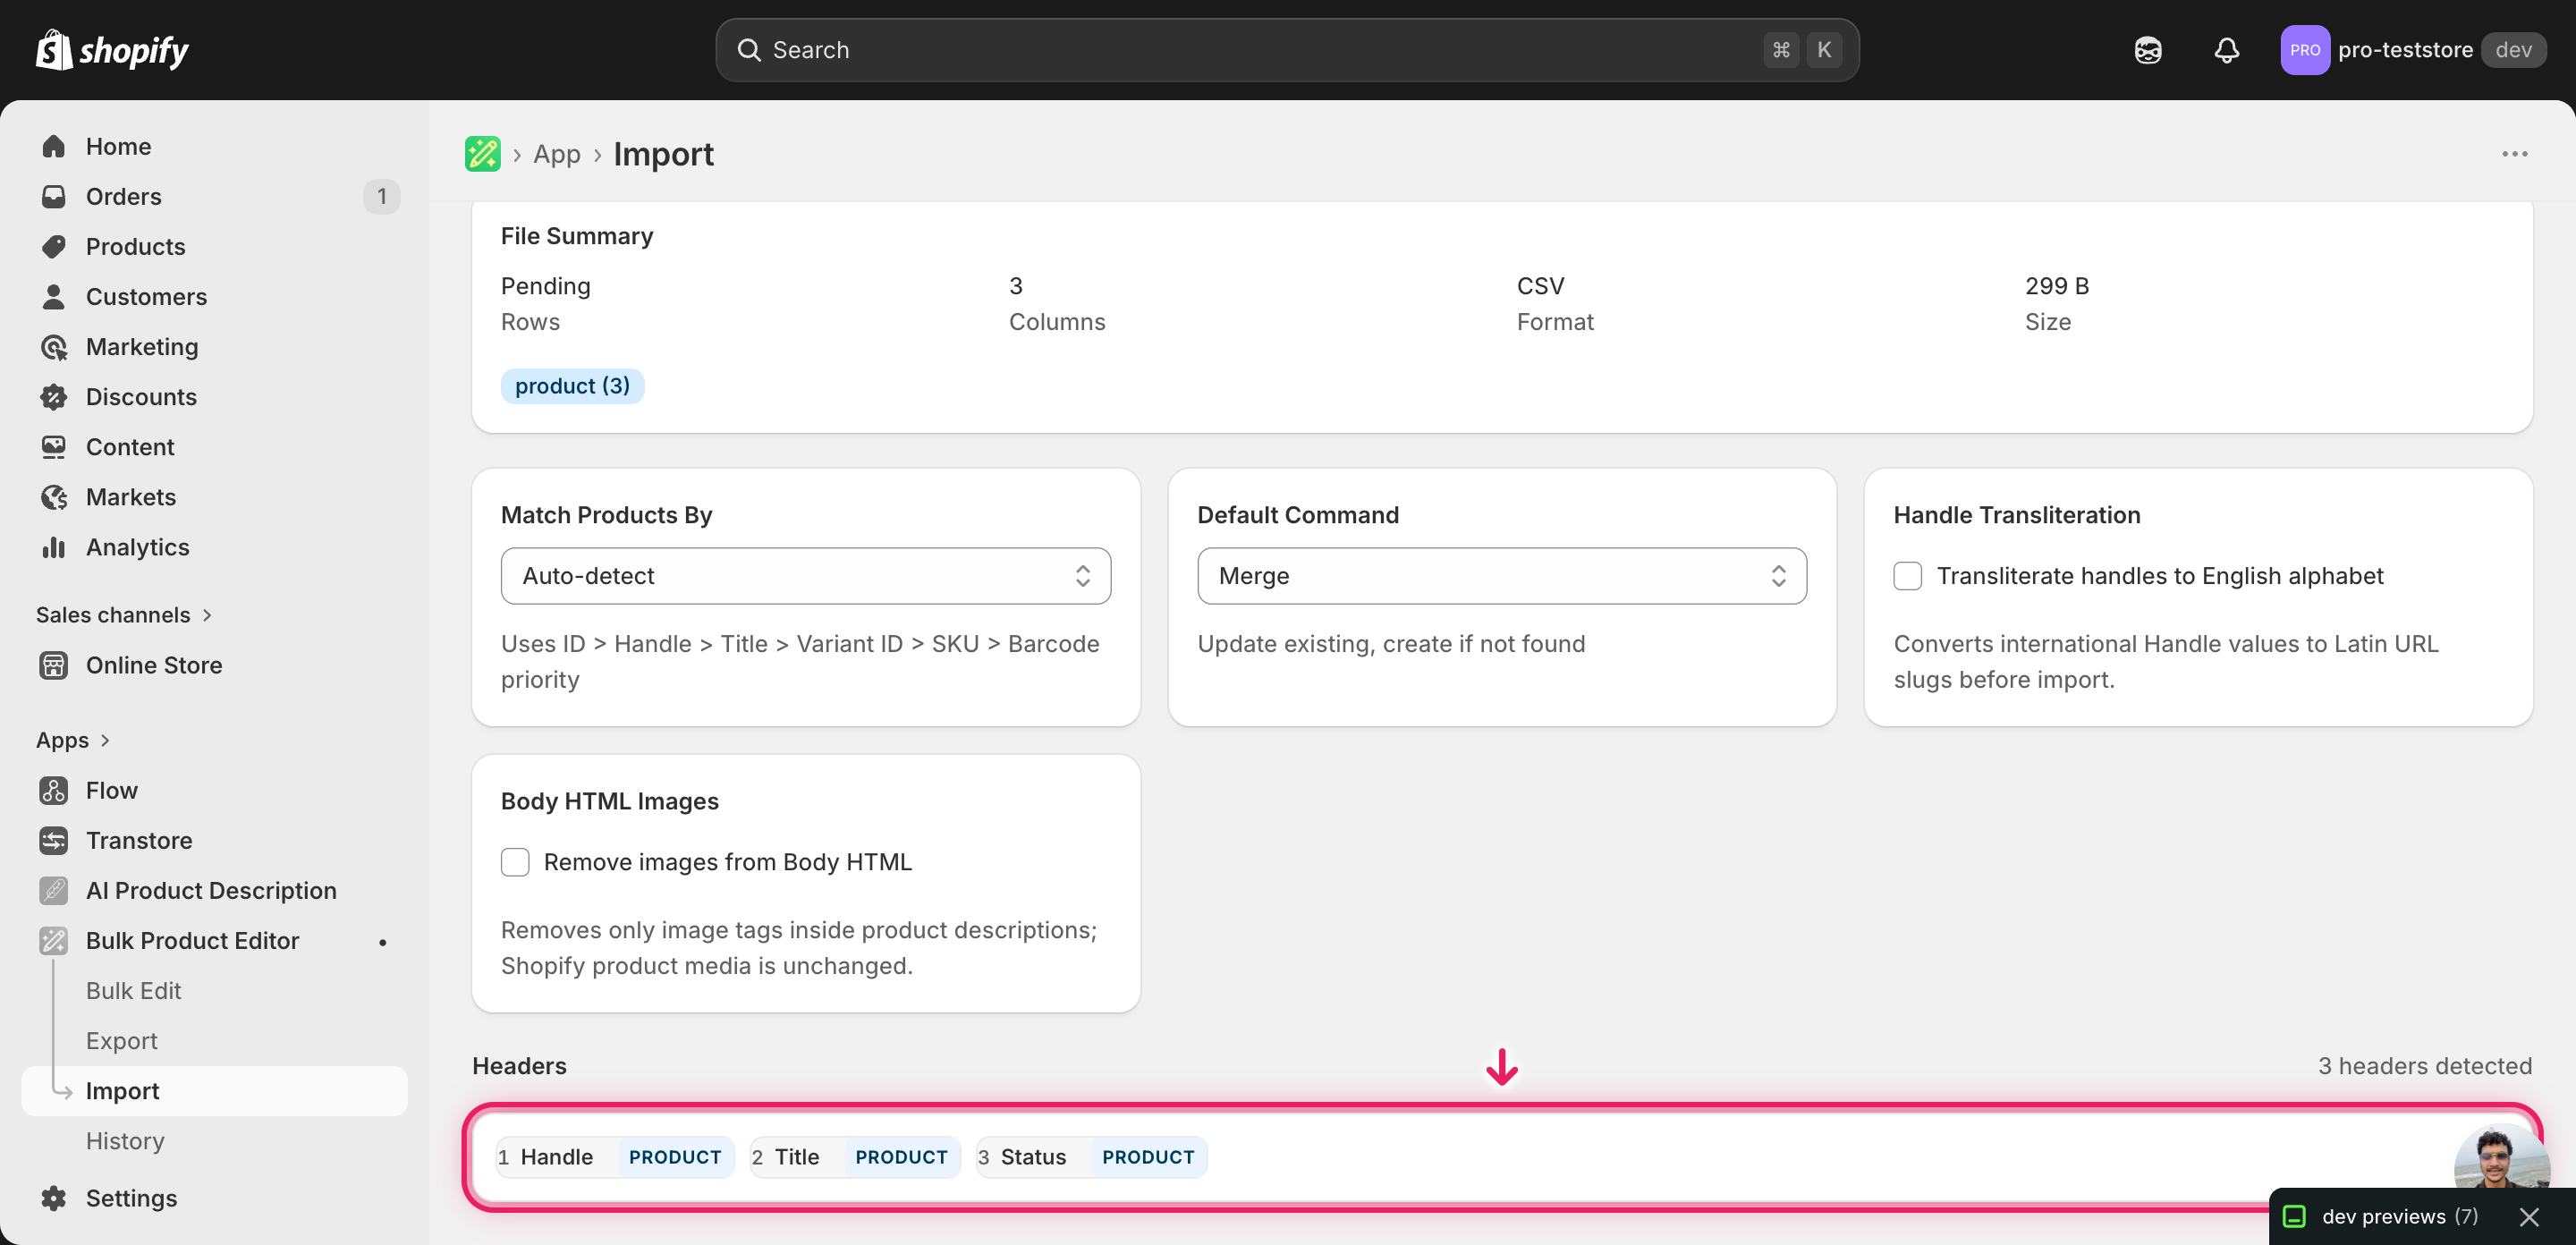
Open EditEngine → Import and select Advanced import. Then upload the file you just edited.
EditEngine reads the file and shows a summary. Check the Headers panel: Status should map cleanly to the product Status field, and the row count should match what you exported. Leave Match Products By on Auto-detect (it will pick Handle) and Default Command on Merge so other product data stays intact.
Note: Archiving in bulk is reversible but disruptive — archived products vanish from your storefront and from default admin filters the moment the import lands. Before flipping a whole catalog, import a file with just two or three rows first, check those products in the Shopify admin, then run the full import. That catches a typo in the Status column before it hides hundreds of products.
Click Start Import and wait for the job to finish — a small file takes seconds, larger catalogs a couple of minutes. When it completes, EditEngine shows a per-row summary.
Download the results CSV. It lists every row with a pass/fail status — that file is your proof the change went through, and the new values are now live in your Shopify admin.
Tips and troubleshooting
Status values are case-insensitive but spelling is exact. EditEngine accepts active, Active, or ACTIVE — they all resolve to the same Shopify state. But archive, inactive, hidden, or published are not valid product status values and the row will fail with a clear error in the results CSV. If you're pasting values from another system, run a find-and-replace pass before importing to normalize them to the three accepted strings.
Archived isn't deleted. Archiving a product hides it from the storefront and from the default product list, but the record, its variants, images, and history all stay in Shopify. You can unarchive at any time by importing the same Handle with Status set back to active or draft. If you actually want products gone, that's a separate bulk-delete workflow, not a status change.
Draft is not the same as unpublished. A draft product is incomplete by definition — it doesn't appear on any sales channel regardless of its publication settings. Active products, by contrast, can still be unpublished from specific channels. If your goal is just to hide a product from the Online Store without touching its other channels, you want a sales-channel update, not a Status change.
Pilot the import before flipping the whole catalog. This advanced import has no dry-run toggle, and a bad Status column applies the moment the job runs. For any change touching more than a few dozen products, save a copy of the file with just three or four rows, import that first, open those products in the Shopify admin to confirm, then run the full file. The extra two minutes is cheap insurance against an unintended archive.
Frequently asked questions
How do I bulk change status (active / draft / archived) in Shopify?
Export your products from EditEngine with the Handle and Status columns, change the Status value on each row in a spreadsheet, then import the file back through the advanced import flow. That's how you bulk change Shopify status (active / draft / archived) per product without opening each product card in the admin.
Can I edit Shopify status (active / draft / archived) in a spreadsheet?
Yes. EditEngine exports one row per product with its current value in the Status column, so you can bulk edit Shopify status (active / draft / archived) directly in Excel, Google Sheets, or any CSV editor. The Shopify admin has no built-in spreadsheet editor for product status.
How long does a bulk status (active / draft / archived) import take in Shopify?
A few dozen rows import in seconds. A few thousand products typically finishes in a couple of minutes, and EditEngine streams the file so even large catalogs complete without timing out. The results CSV shows the exact duration for your bulk Shopify status (active / draft / archived) job.
What format does Shopify accept for status (active / draft / archived) imports?
A CSV or XLSX with a Handle column to match the product and a Status column containing one of active, draft, or archived. EditEngine's advanced import reads this Shopify status (active / draft / archived) CSV format directly and rejects any other value.
Can I undo a bulk Shopify status (active / draft / archived) update?
There's no one-click undo, but the workflow doubles as its own backup: keep the original export, and to revert just re-import that unedited file. Because the import only rewrites the Status field, no product data, images, or variants are touched.
Related tutorials
About EditEngine: EditEngine Bulk Product Editor helps Shopify merchants bulk edit, bulk import, and bulk export their product catalog in minutes instead of days. Install on Shopify →