Inventory
How to Bulk Update Shopify On-Hand Stock Per Location
Last updated
Need to bulk update Shopify on-hand stock per location after a cycle count or warehouse transfer? With EditEngine Bulk Product Editor, you export every variant with one column per location, type the corrected on-hand number against each SKU in a spreadsheet, and import the file back. Because on-hand is a per-location value, the per-row, per-location grid is the right shape for fixing it at scale.
What you'll learn
- Export every product with its current on-hand stock
- Edit on-hand stock per row in a spreadsheet
- Import the updated file back to Shopify
What you'll need
- The EditEngine Bulk Product Editor app installed in your Shopify store
- At least one active Shopify location stocking the products you want to recount (the column header uses the exact location name, e.g.
Inventory On Hand: Shop Location) - Variants with a tracked SKU — untracked or service variants don't carry an on-hand count
- The Advanced import flow — per-location inventory columns are advanced-import only
- A spreadsheet editor (Excel, Google Sheets, Numbers — anything that opens CSV)
On-hand stock is the raw count of units physically sitting at a location, before Shopify subtracts what's committed to open orders or held in reserve. Available is the derived number shoppers see; on-hand is the truth you set after a stock take. EditEngine exposes one Inventory On Hand: <Location> column per Shopify location, so a single import can correct counts across every warehouse at once.
Step 1 — Export your Shopify on-hand stock
Open EditEngine and go to the Export page — this is where you choose which inventory columns land in your spreadsheet.
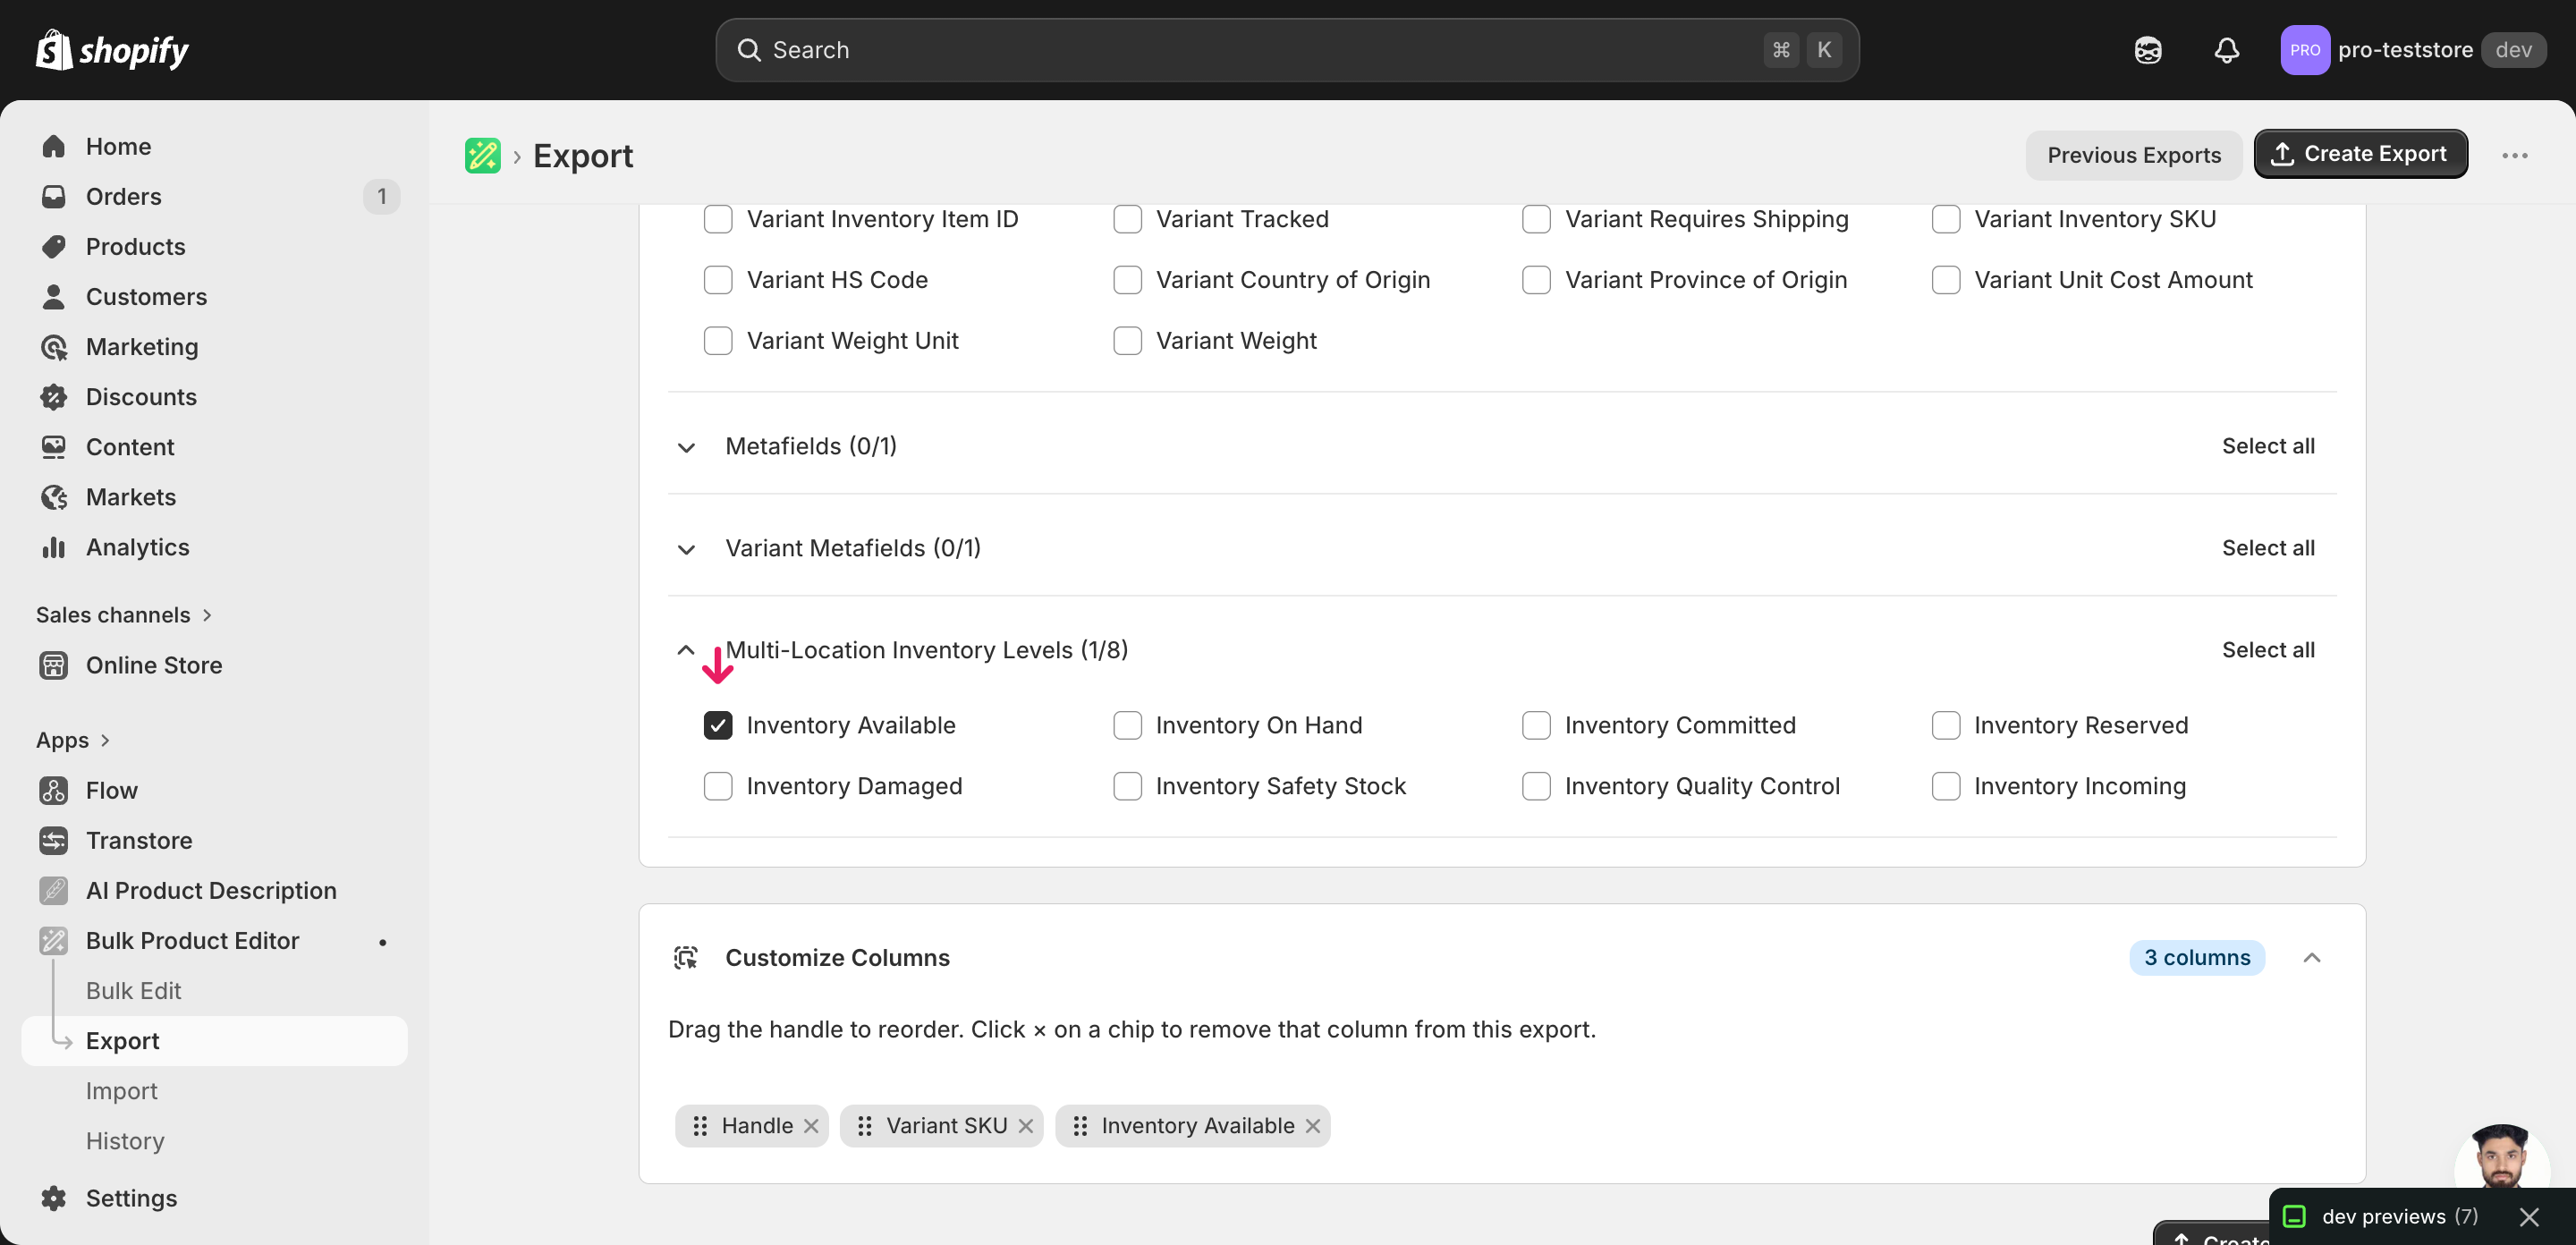
Pick the right columns
- Handle — the unique product identifier the importer uses to match each row back to the right product.
- Variant SKU — the per-variant identifier. On-hand stock is tracked at the variant level, so the SKU is what ties a row to a specific size, color, or style.
- Inventory On Hand: Shop Location — the column you'll edit. Expand the Inventory group and tick Inventory On Hand for every location you want to recount — each location becomes its own column.
When the export completes, click Download. You'll get one row per variant with a separate Inventory On Hand: <Location> column for each Shopify location — blank cells mean that variant isn't stocked at that location, and that's fine.
New to exporting? This guide assumes you know how to run an export and focuses only on the columns and edit unique to this workflow.
Step 2 — Bulk update Shopify on-hand stock per location in your spreadsheet
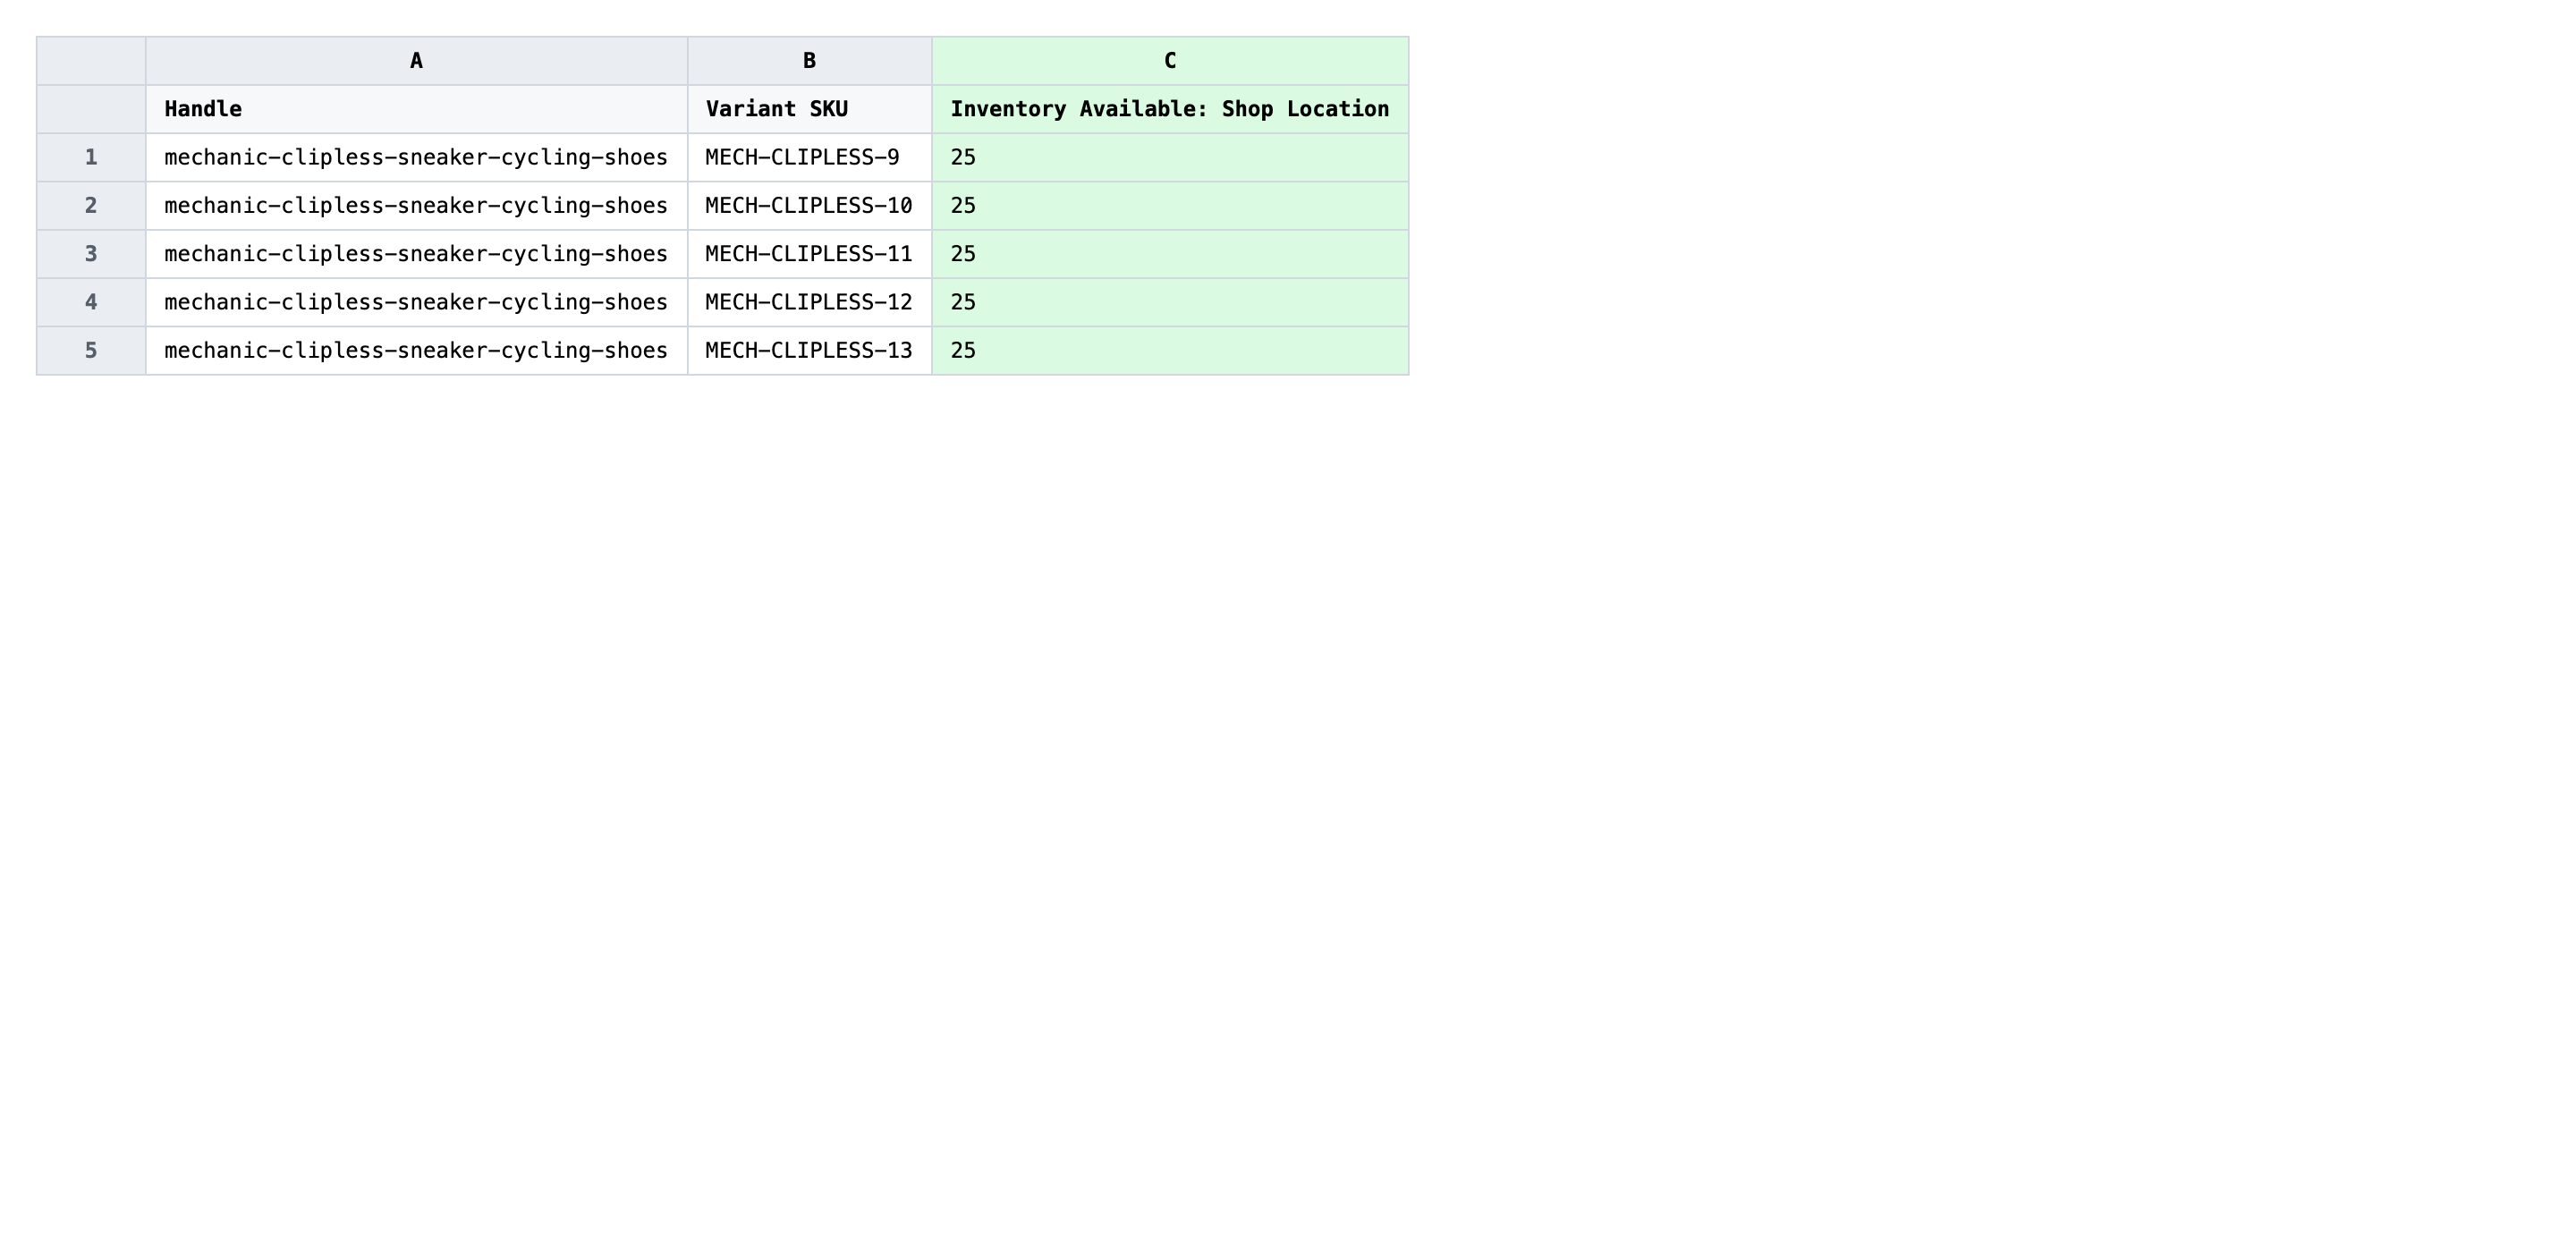
Open the downloaded CSV in Excel or Google Sheets. The Inventory On Hand: Shop Location column holds the current physical count for each SKU at that location.

Type the corrected on-hand count next to each SKU in the per-location column. Values are whole non-negative integers — 0 means out of stock at that location, an empty cell means "don't touch this location for this variant". If you stock the same SKU in three locations, you can update all three columns in the same row in one import.
- ✅
42 - ❌
42 pairs in stock
Leave Handle and Variant SKU exactly as exported — they're the matching keys, and changing them retargets the row at a different variant (or none at all). Don't put text, decimals, or negative numbers in the on-hand columns; the importer rejects anything that isn't a whole non-negative integer. If you only want to change one location, blank the other location columns rather than copying their old values, so EditEngine knows to skip them.
Save the file as CSV when you're done, and keep the original export handy in case you want to revert.
Tip: On-hand is per variant per location — not per product. A product with five variants stocked in two locations is five rows, each with two location columns. Edit only the cells you mean to change and leave the rest blank.
Step 3 — Import the edited file back to Shopify
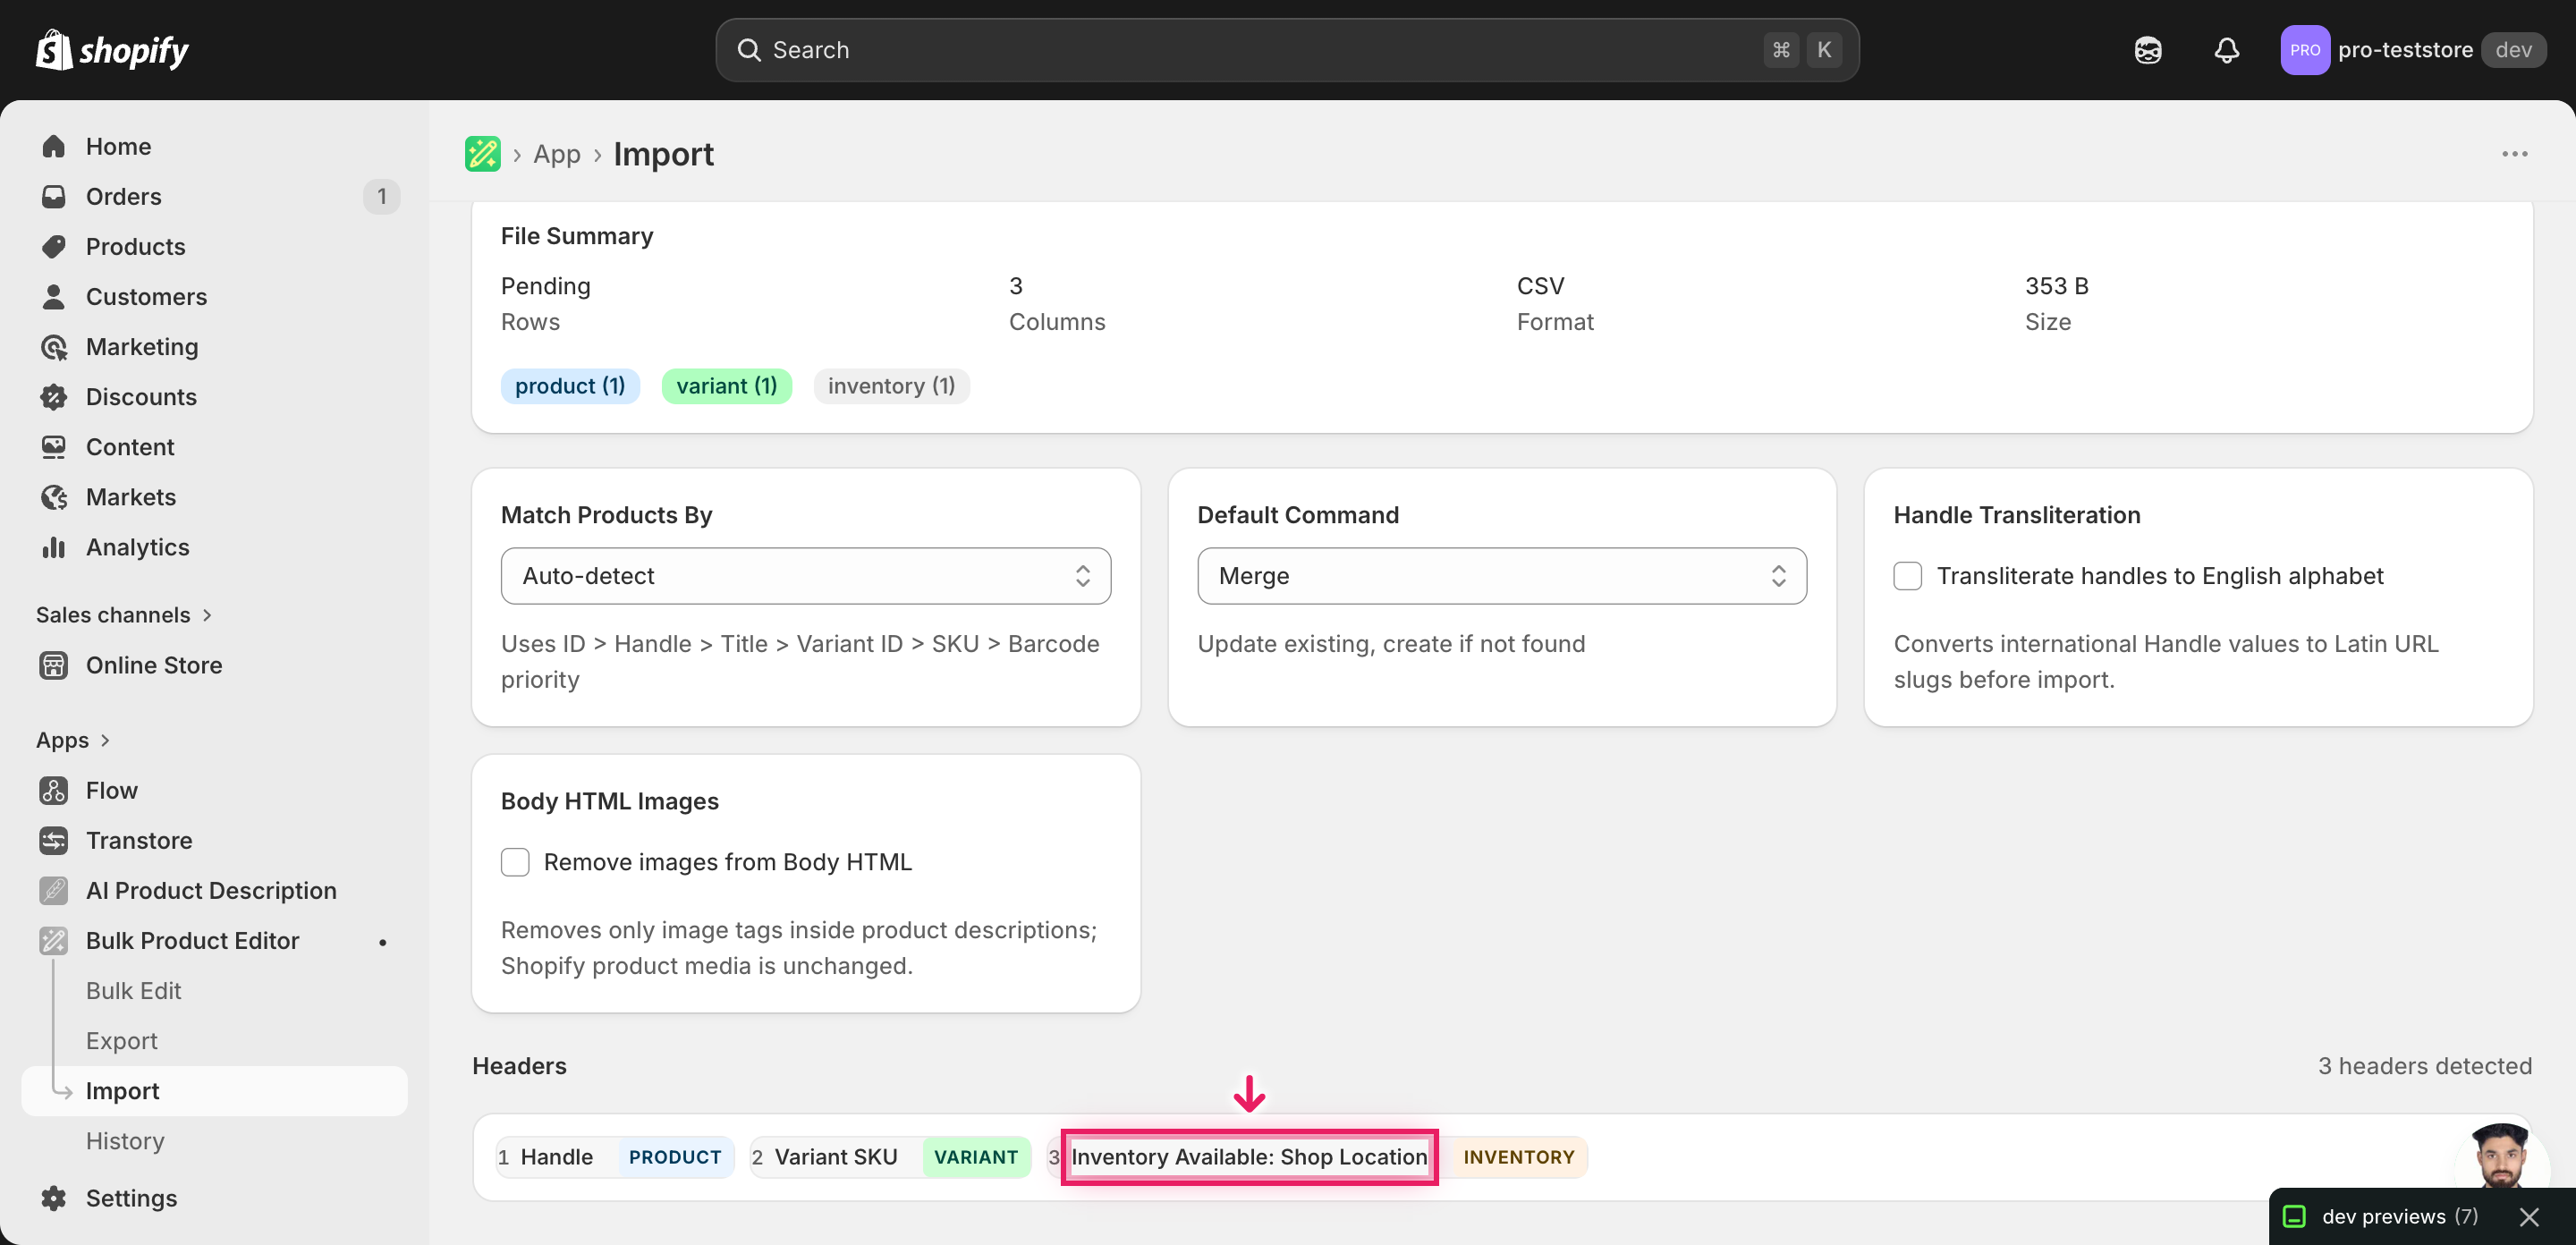
Open EditEngine → Import and select Advanced import. Then upload the file you just edited.
EditEngine reads the file and shows a summary. In the Headers panel, every Inventory On Hand: <Location> column should carry the INVENTORY badge — that confirms the importer matched the location name to a real Shopify location. Leave Match Products By on Auto-detect and Default Command on Merge so the importer only writes the cells you filled in.
Note: This is a destructive write — every populated cell overwrites the live on-hand count at that location. The advanced import doesn't have a dry-run toggle, so test on a tiny batch first. Duplicate your file, keep only two or three rows for SKUs you can eyeball in the Shopify admin, import that, confirm the new counts land at the right locations, then import the full file. A wrong header or a typo'd location name caught on three rows is a five-minute fix; caught on three thousand it's a re-export-and-revert.
Click Start Import and wait for the job to finish — a small file takes seconds, larger catalogs a couple of minutes. When it completes, EditEngine shows a per-row summary.
Download the results CSV. It lists every row with a pass/fail status — that file is your proof the change went through, and the new values are now live in your Shopify admin.
Tips and troubleshooting
On-hand isn't the same number shoppers see. Shopify derives available from on-hand minus committed minus reserved. If you set on-hand to 50 but six units are committed to unfulfilled orders, the storefront shows 44. That's correct behavior — fix on-hand to match the shelf and let Shopify recompute available. If the available number looks wrong after import, check the variant's committed and reserved counts before assuming the import failed.
One column per location — don't merge them. Every Shopify location gets its own Inventory On Hand: <Location> column, named after the exact location string in your admin. Renaming, abbreviating, or combining columns (On Hand: All, Inventory) won't carry the INVENTORY badge on the mapping screen and the importer will skip them. Re-export rather than rename — the export always emits the canonical headers.
Test on a single SKU before the whole catalog. On-hand writes are destructive — there's no dry-run for this flow. Duplicate the file, cut it to one variant you can spot-check in the admin, import that, confirm the per-location numbers land correctly, then import the rest. A bad value in a single cell becomes a bad value across thousands of variants if you skip the smoke test.
Blank cells mean skip, zero means out of stock. A blank Inventory On Hand: <Location> cell tells EditEngine to leave that variant-location pair alone. A 0 actively writes zero, marking it out of stock at that location. The two are very different — use blank when you only want to touch some locations on a row, and use 0 only when the shelf is genuinely empty.
Frequently asked questions
How do I bulk update on-hand stock in Shopify?
Export your products from EditEngine with the Inventory On Hand: <Location> column, type the new count next to each SKU in a spreadsheet, and import the file back through the advanced import flow. This is how you bulk update Shopify on-hand stock per location without touching one variant at a time in the admin.
Can I edit Shopify on-hand stock in a spreadsheet?
Yes. EditEngine exports one row per variant with a separate column for every location, so you can bulk edit Shopify on-hand stock in Excel, Google Sheets, or any CSV editor. Shopify's own admin only edits one variant-location cell at a time, which is why the spreadsheet round-trip exists.
How long does a bulk on-hand stock import take in Shopify?
A few dozen SKUs finish in seconds. A catalog of several thousand variants typically completes inside a couple of minutes, and EditEngine streams the file so the bulk update Shopify on-hand stock per location job won't time out on larger imports. The results CSV reports the exact duration.
What format does Shopify accept for on-hand stock imports?
A CSV or XLSX with a Handle column, a Variant SKU column, and one Inventory On Hand: <Location> column per location you want to update. EditEngine's advanced import recognizes that header pattern and writes the on-hand stock per location straight to Shopify's inventory API.
Can I undo a bulk Shopify on-hand stock update?
There's no one-click undo, but your original export is the backup. To revert a bulk update Shopify on-hand stock per location job, re-import the unedited file you downloaded in Step 1 and the previous counts overwrite the new ones.
Related tutorials
- How to Bulk Update Shopify Inventory Quantities Across Multiple Locations
- How to Bulk Adjust Shopify Inventory Deltas Across Locations
About EditEngine: EditEngine Bulk Product Editor helps Shopify merchants bulk edit, bulk import, and bulk export their product catalog in minutes instead of days. Install on Shopify →