Products
How to Bulk Publish or Unpublish Shopify Products to Multiple Sales Channels
Last updated
Need to bulk publish/unpublish Shopify to multiple sales channels per row without clicking through hundreds of product pages? With EditEngine Bulk Product Editor, you export your catalog to a spreadsheet, set the exact channel list for each product, and import the file back. The whole flow runs through Shopify's CSV format, so you can stage TikTok launches, retire products from Point of Sale, and roll out to Google Shopping in one batch — and EditEngine handles every row in order.
What you'll learn
- Export every product with its current to multiple sales channels
- Edit to multiple sales channels per row in a spreadsheet
- Import the updated file back to Shopify
What you'll need
- The EditEngine Bulk Product Editor app installed in your Shopify store
- The Advanced import flow — sales channel publishing is advanced-import only
- The sales channel apps you want to target (Online Store, Point of Sale, TikTok, Google, Facebook & Instagram, etc.) already installed in your Shopify admin
- The exact channel handles or names as Shopify spells them — a typo means the row is skipped
- A spreadsheet editor (Excel, Google Sheets, Numbers — anything that opens CSV)
Each Shopify product carries a publication for every sales channel it appears on — Online Store, Point of Sale, TikTok, Google, Facebook & Instagram, and any custom channels you've installed. The admin lets you toggle channels one product at a time on the product page, which is fine for ten products and painful for ten thousand. The spreadsheet workflow below collapses that work into a single import.
Step 1 — Export your Shopify to multiple sales channels
Open EditEngine and go to the Export page. This is where you pick the columns that land in your spreadsheet.
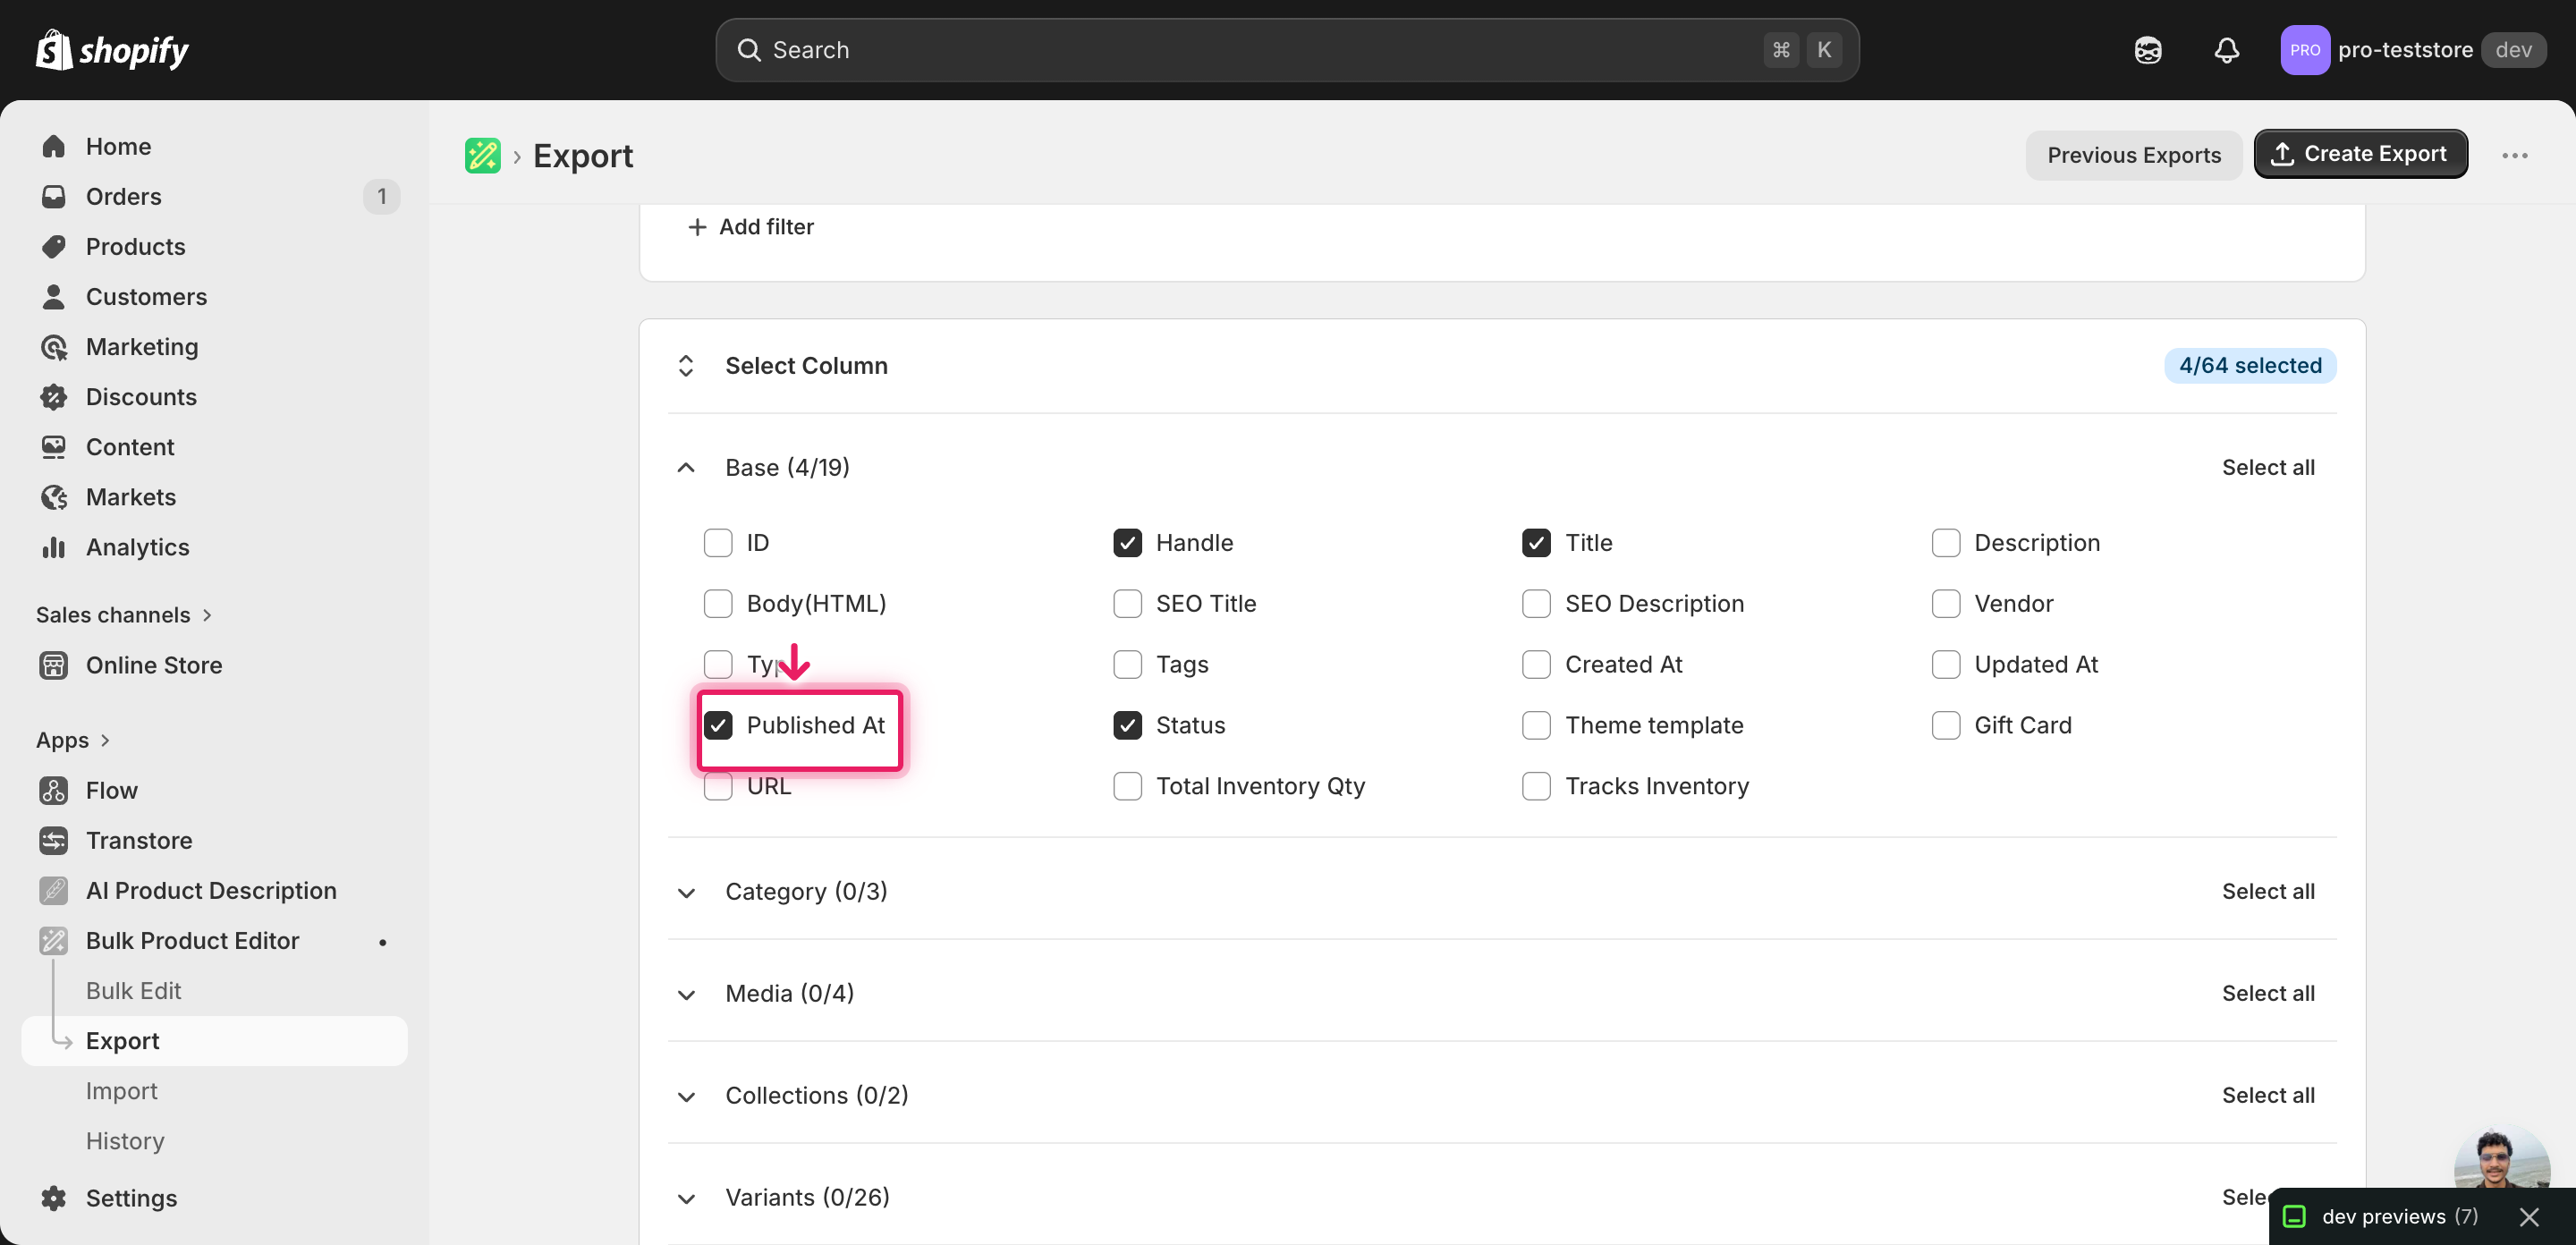
Pick the right columns
- Handle — the unique product identifier the importer uses to match each row back to the right product.
- Title — context only, so you can see which product a row belongs to while editing.
- Published Scope — the column that controls which channels the product is on. You'll rewrite this value per row to publish or unpublish across channels.
- Published — the legacy TRUE/FALSE flag for the Online Store channel. Leave it aligned with whatever you set in Published Scope to avoid mixed signals.
When the export completes, click Download. Heads up: EditEngine's export does not yet emit a dedicated column for every sales channel installed in your store — you may need to add a Published Scope column (or per-channel columns named exactly as Shopify shows them) to the file by hand before editing. One row per product is correct for this workflow.
New to exporting? This guide assumes you know how to run an export and focuses only on the columns and edit unique to this workflow.
Step 2 — Bulk publish/unpublish Shopify to multiple sales channels per row in your spreadsheet
Open the downloaded CSV in Excel or Google Sheets. The Published Scope column is where you tell Shopify which channels each product belongs on.
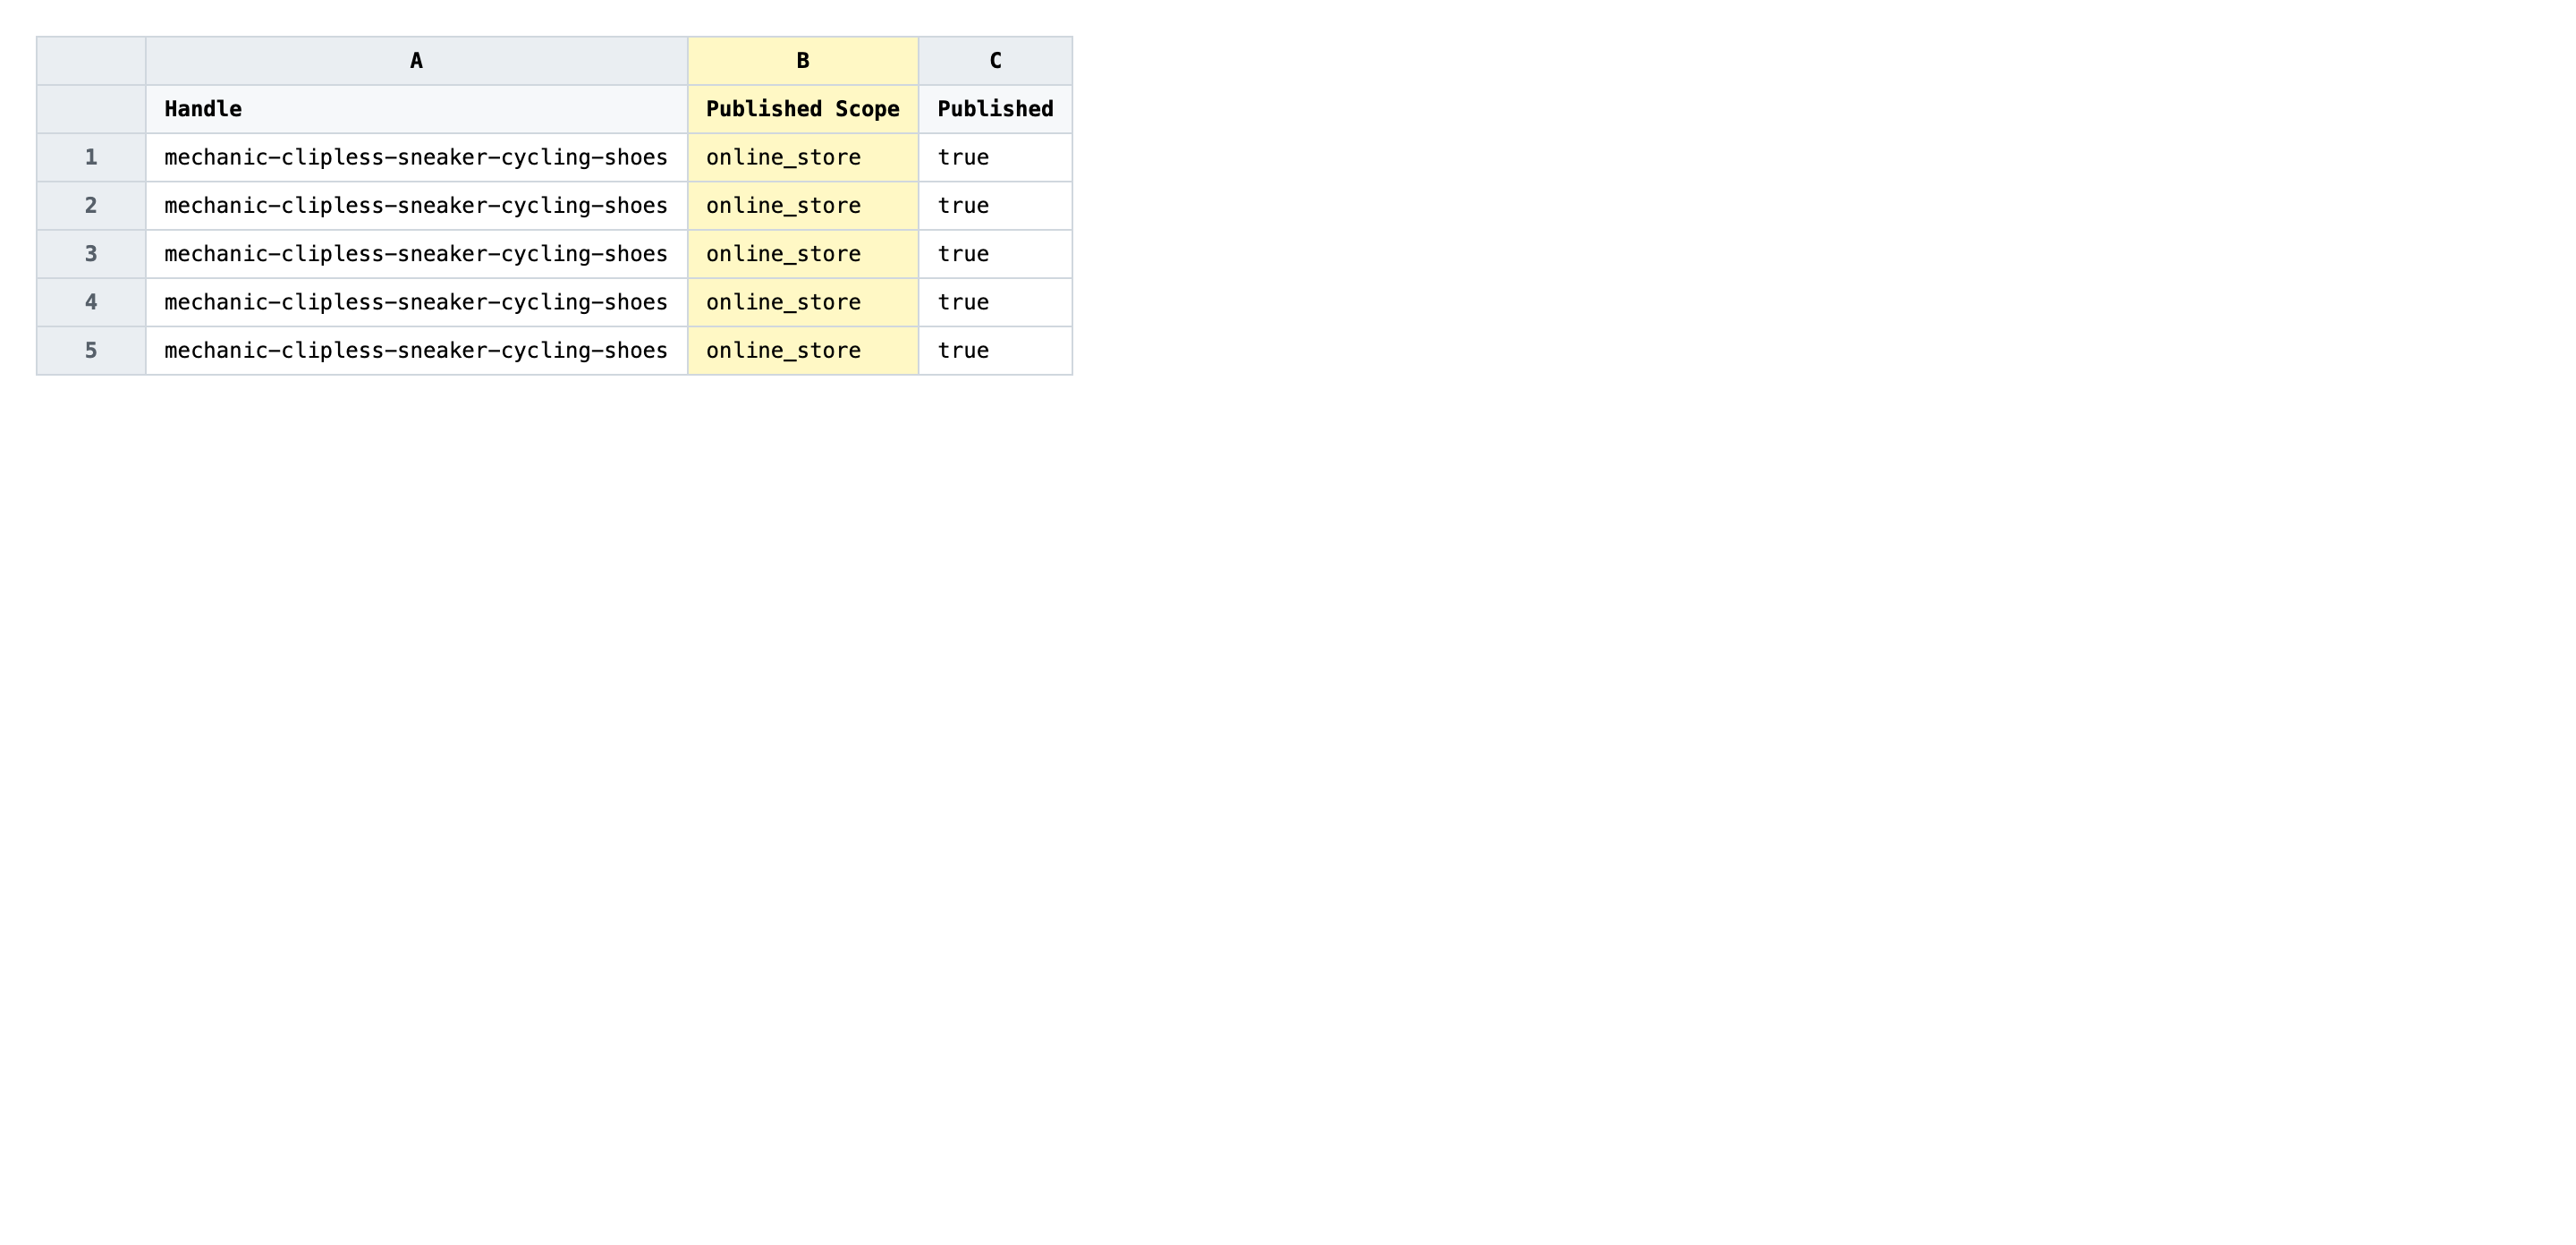
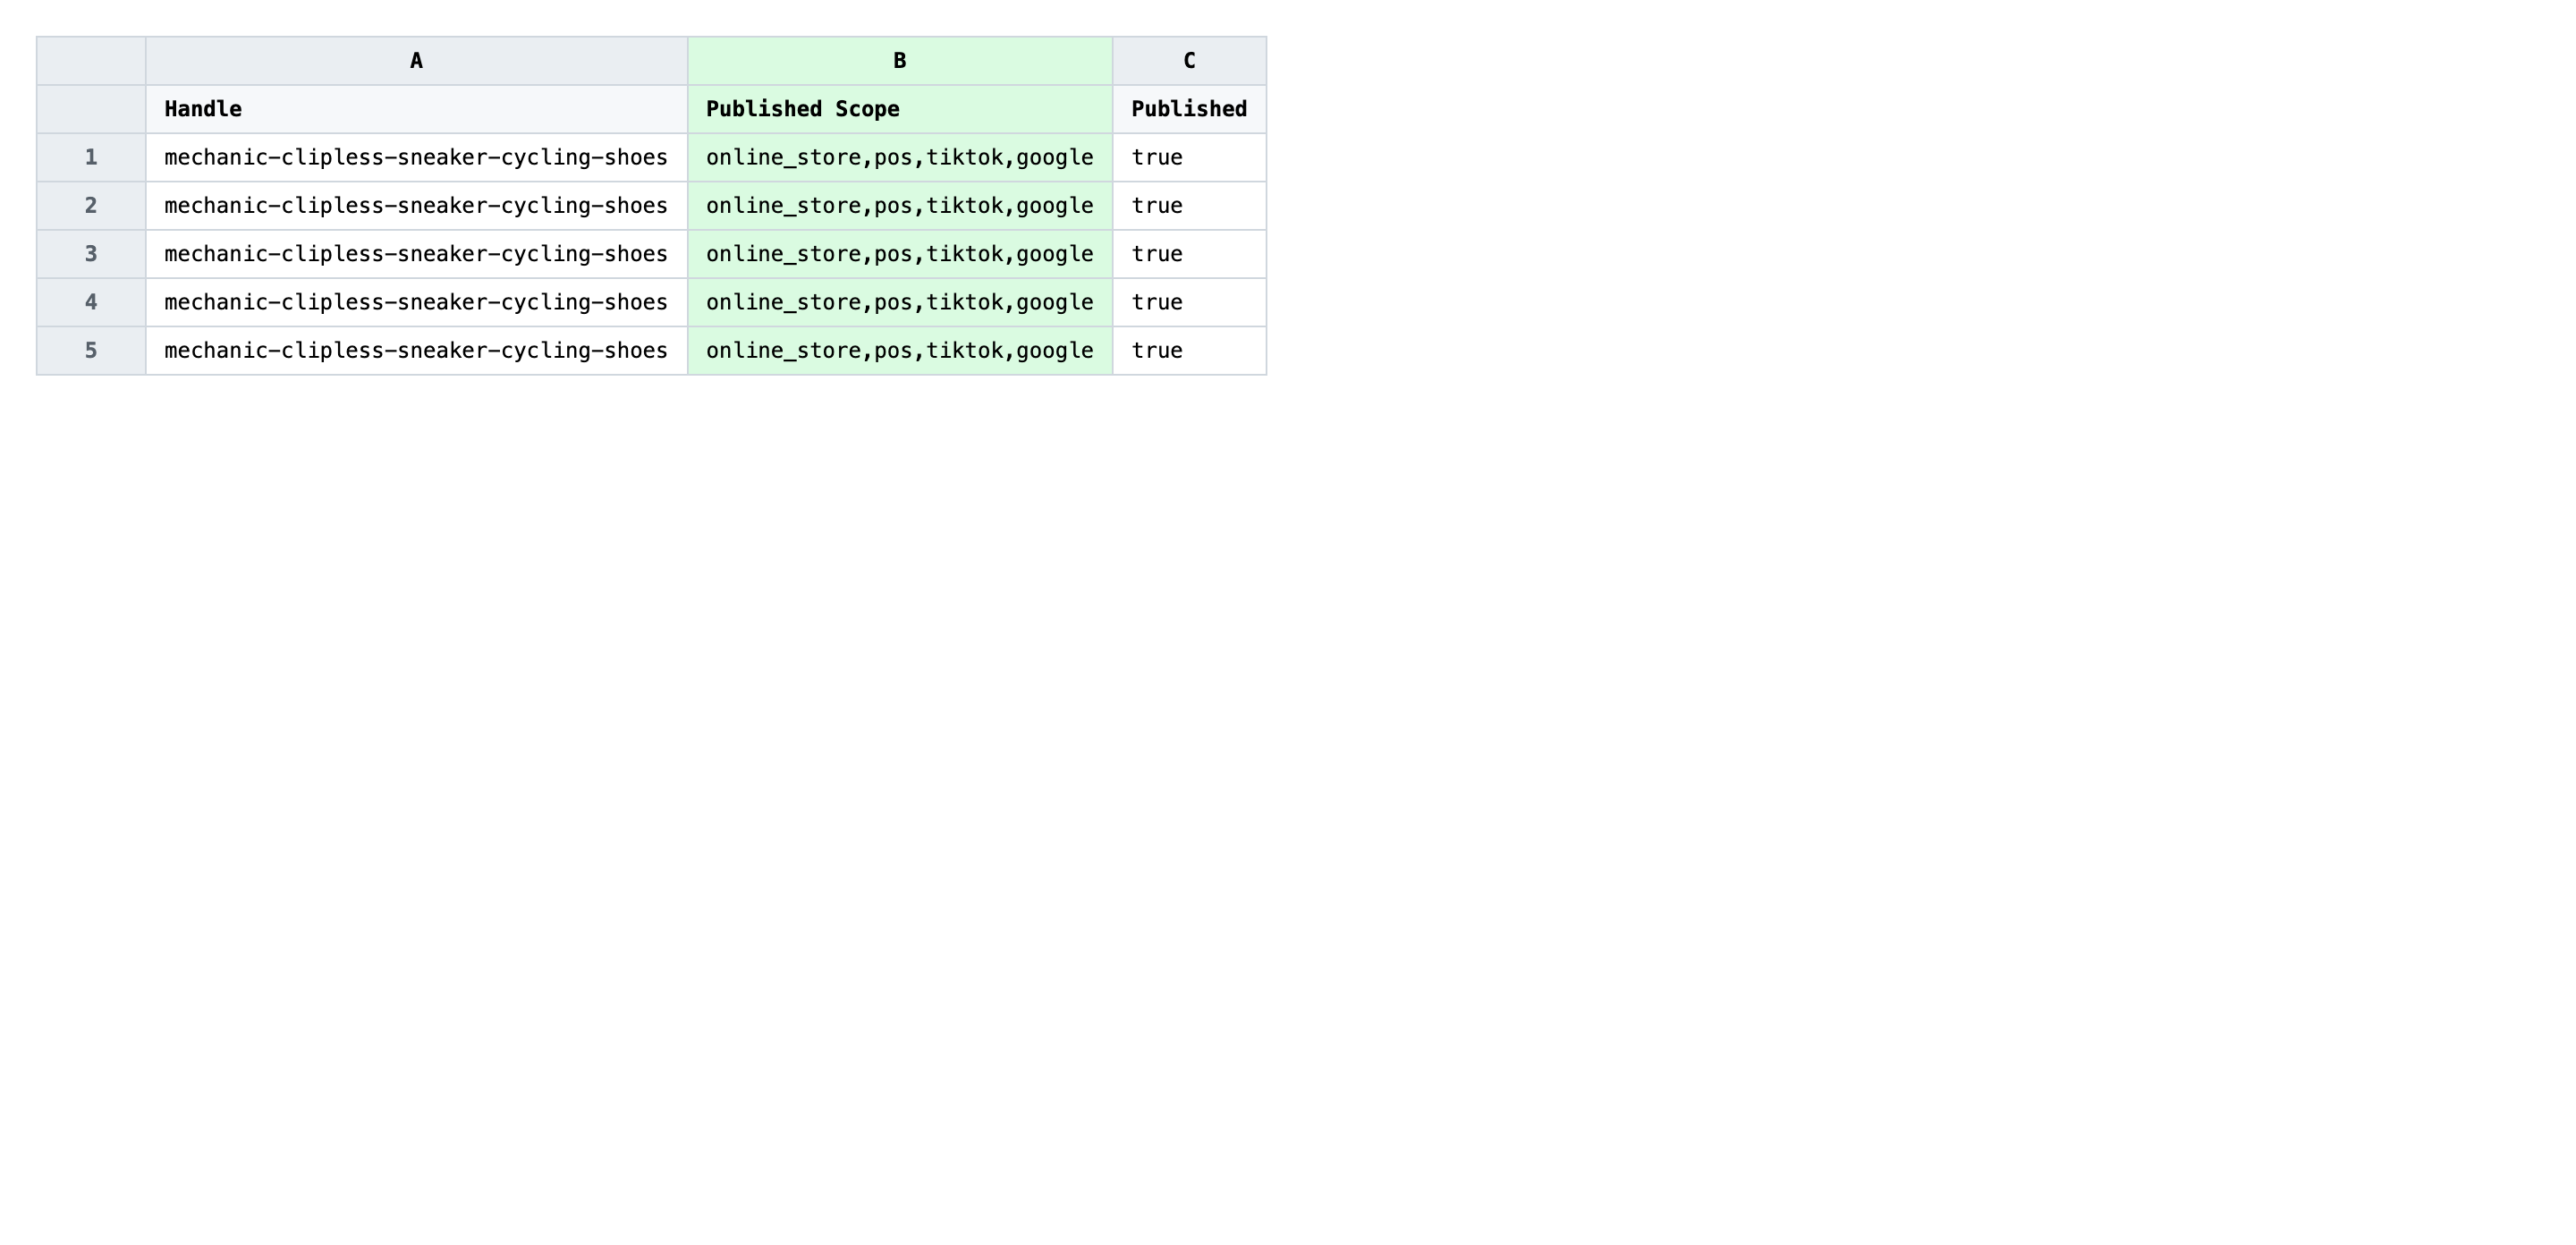
For each product row, write a comma-separated list of channel handles in Published Scope — exactly as Shopify spells them, lowercase, no spaces around the commas. To unpublish from a channel, leave that handle out of the list. To unpublish from everywhere, set the value to none (or whatever your store uses for an empty publication set). One value per row, no blank rows between products.
- ✅
online_store,pos,tiktok,google - ❌
Online Store, POS, TikTok (Channel)
Leave Handle untouched — that's the matching key, and any change there points the row at the wrong product or none at all. Don't reorder columns or rename headers; the importer matches headers by exact text. If a product should keep its current channels, you can delete that row entirely rather than re-stating the same value.
Save the file as CSV when you're done, and keep the original export handy in case you want to revert.
Tip: Channel handles are case-sensitive and must match Shopify exactly.
online_storeworks;Online Store,online-store, andOnlineStoredo not — copy them from a known-good product if you're unsure.
Step 3 — Import the edited file back to Shopify
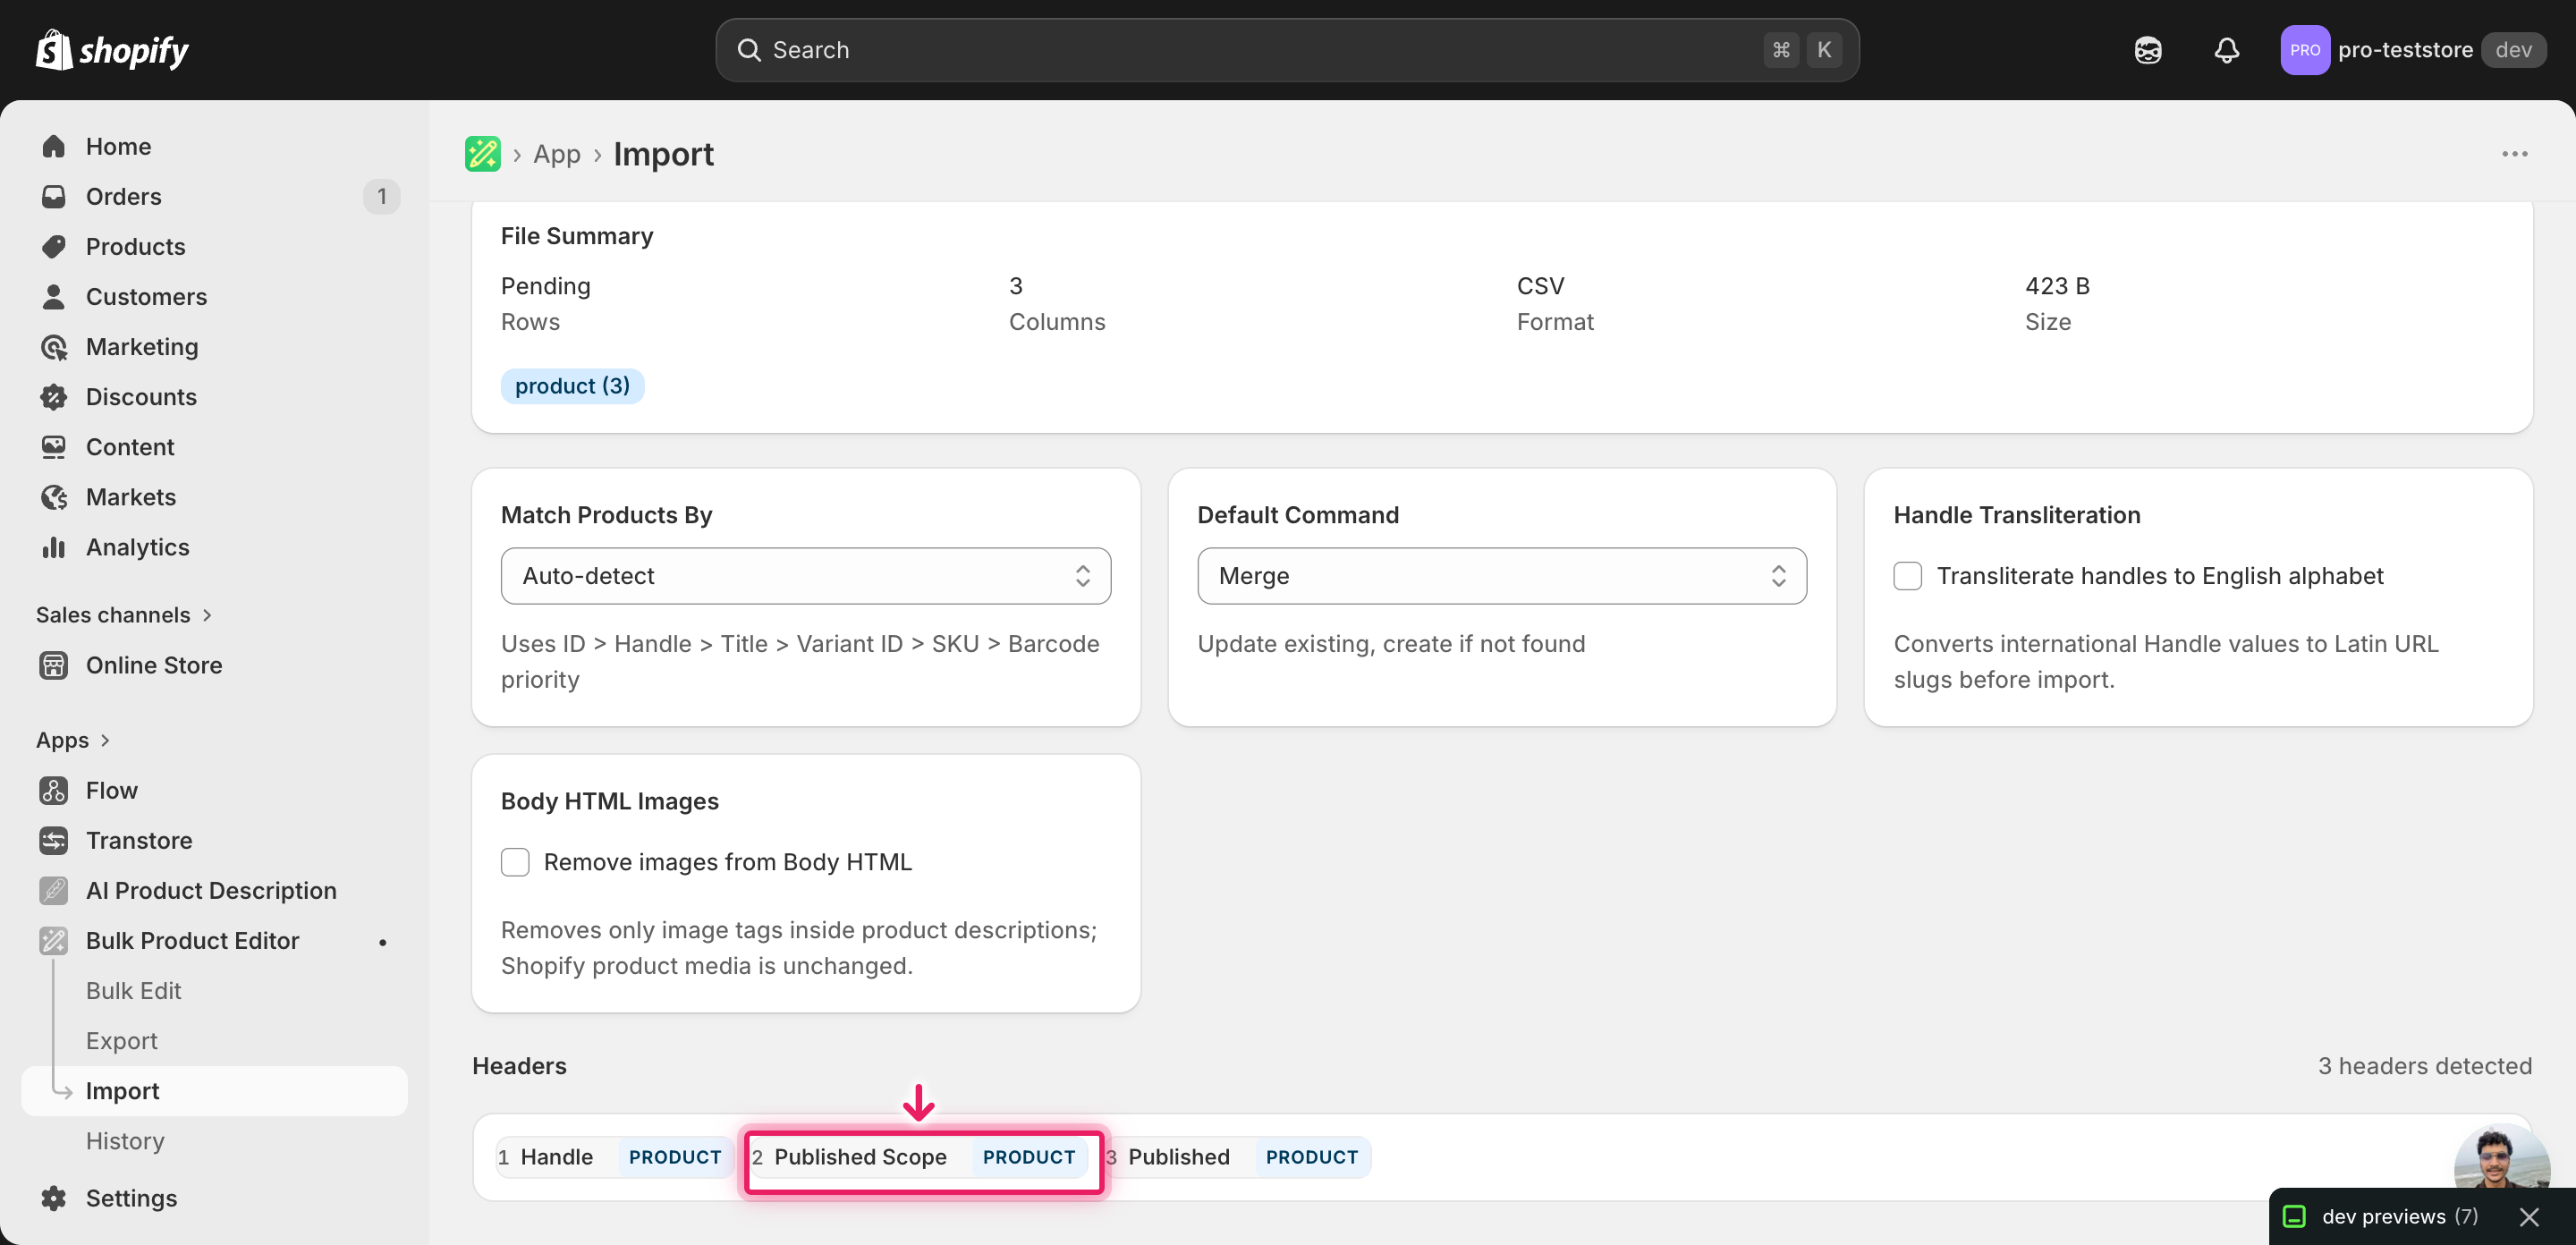
Open EditEngine → Import and select Advanced import. Then upload the file you just edited.
EditEngine reads the file and shows a header summary. Confirm Handle is detected as the matching key and Published Scope appears as a recognized publication column. Leave Match Products By on Auto-detect and Default Command on Merge so existing fields you didn't touch stay intact.
Note: This flow changes which channels customers see your products on, so test small first. Run a five-row import, open one of those products in the Shopify admin, confirm the channel toggles look right, then import the full file. If the dry-run toggle is available on your import, turn it on for the first pass — otherwise the small-batch test is your dry run.
Click Start Import and wait for the job to finish — a small file takes seconds, larger catalogs a couple of minutes. When it completes, EditEngine shows a per-row summary.
Download the results CSV. It lists every row with a pass/fail status — that file is your proof the change went through, and the new values are now live in your Shopify admin.
Tips and troubleshooting
Match channel handles to what Shopify uses, not what the channel calls itself. TikTok's app shows up as tiktok in publication data, not TikTok or TikTok Shop. Google's channel is google, not Google Shopping. Pull the exact handle from an existing product's export row before editing — if even one character is off, the importer skips that channel for that row and the product stays where it was.
Treat Published Scope as the full set, not a delta. The value you write replaces the product's entire channel list. If you want a product on Online Store and TikTok, write both — writing only tiktok removes it from Online Store. That's the trap merchants hit most often when they bulk publish/unpublish Shopify to multiple sales channels per row, and it can pull live products off your storefront.
Run a five-row import before the full catalog. Sales channel changes affect what shoppers see, so the safe pattern is: import five rows, open each product in the admin, verify the channel chips match what you wrote, then import the rest. Catching a misspelled handle on five rows costs nothing; catching it on five thousand means a second import to undo the first.
Keep the original export as your rollback file. There's no one-click undo for publication changes. The export you ran in Step 1 is the snapshot of every product's channel set at that moment — re-importing it (unedited) is how you revert. Save it next to the edited file with a clear name like channels-2026-06-05-original.csv so future-you can find it.
Frequently asked questions
How do I bulk publish/unpublish to multiple sales channels in Shopify?
Export your products from EditEngine, set the desired channel list in the publication column for each row, then import the file back through the advanced import flow. That spreadsheet round-trip is how you bulk publish/unpublish Shopify to multiple sales channels per row without opening each product card.
Can I edit Shopify to multiple sales channels in a spreadsheet?
Yes. EditEngine writes one row per product with a column listing the channels that product is published to, and you edit that list in Excel or Google Sheets. The advanced import then applies the new channel set when you bulk edit Shopify to multiple sales channels per row.
How long does a bulk to multiple sales channels import take in Shopify?
A few dozen products finish in seconds. A few thousand rows usually complete in two to five minutes because each row makes one publication call per channel, and the bulk publish/unpublish to multiple sales channels job streams progress in the results panel.
What format does Shopify accept for to multiple sales channels imports?
A CSV or XLSX with a Handle column and a publication column whose value is the comma-separated list of channel handles (for example online_store,pos,tiktok). EditEngine's advanced import reads that shape when you bulk publish/unpublish Shopify to multiple sales channels per row.
Can I undo a bulk Shopify to multiple sales channels update?
There's no one-click undo, but the export you started with is the rollback file. Re-import the original to restore the previous channel set per product — that's the safety net for any bulk publish/unpublish Shopify to multiple sales channels per row run.
Related tutorials
About EditEngine: EditEngine Bulk Product Editor helps Shopify merchants bulk edit, bulk import, and bulk export their product catalog in minutes instead of days. Install on Shopify →