Products
How to Bulk Replace Shopify Tags Per Product
Last updated
Need to bulk replace Shopify tags per product when every product has its own tag list? With EditEngine Bulk Product Editor, you export your catalog to a spreadsheet, rewrite the Tags cell for each product, and import the file back. Because the tag set differs from product to product, a per-row spreadsheet edit is faster and far less error-prone than clicking through the Shopify admin one product at a time.
What you'll learn
- Export every product with its current tags
- Edit tags per row in a spreadsheet
- Import the updated file back to Shopify
What you'll need
- The EditEngine Bulk Product Editor app installed in your Shopify store
- At least one product in the test store with existing tags so you can see the before/after difference
- The Advanced import flow if you want full control over how the Tags column is applied (Merge vs Replace)
- A spreadsheet editor (Excel, Google Sheets, Numbers — anything that opens CSV)
Tags are short labels attached to each product. They drive automated collections, storefront filters, and merchant search inside the Shopify admin. Shopify stores all of a product's tags as a single comma-separated string, so when you replace tags in this workflow you are rewriting that entire string — the new list wins and any tag you leave out is removed.
Step 1 — Export your Shopify tags
Open EditEngine and go to the Export page. This is where you choose which product fields land in your spreadsheet.
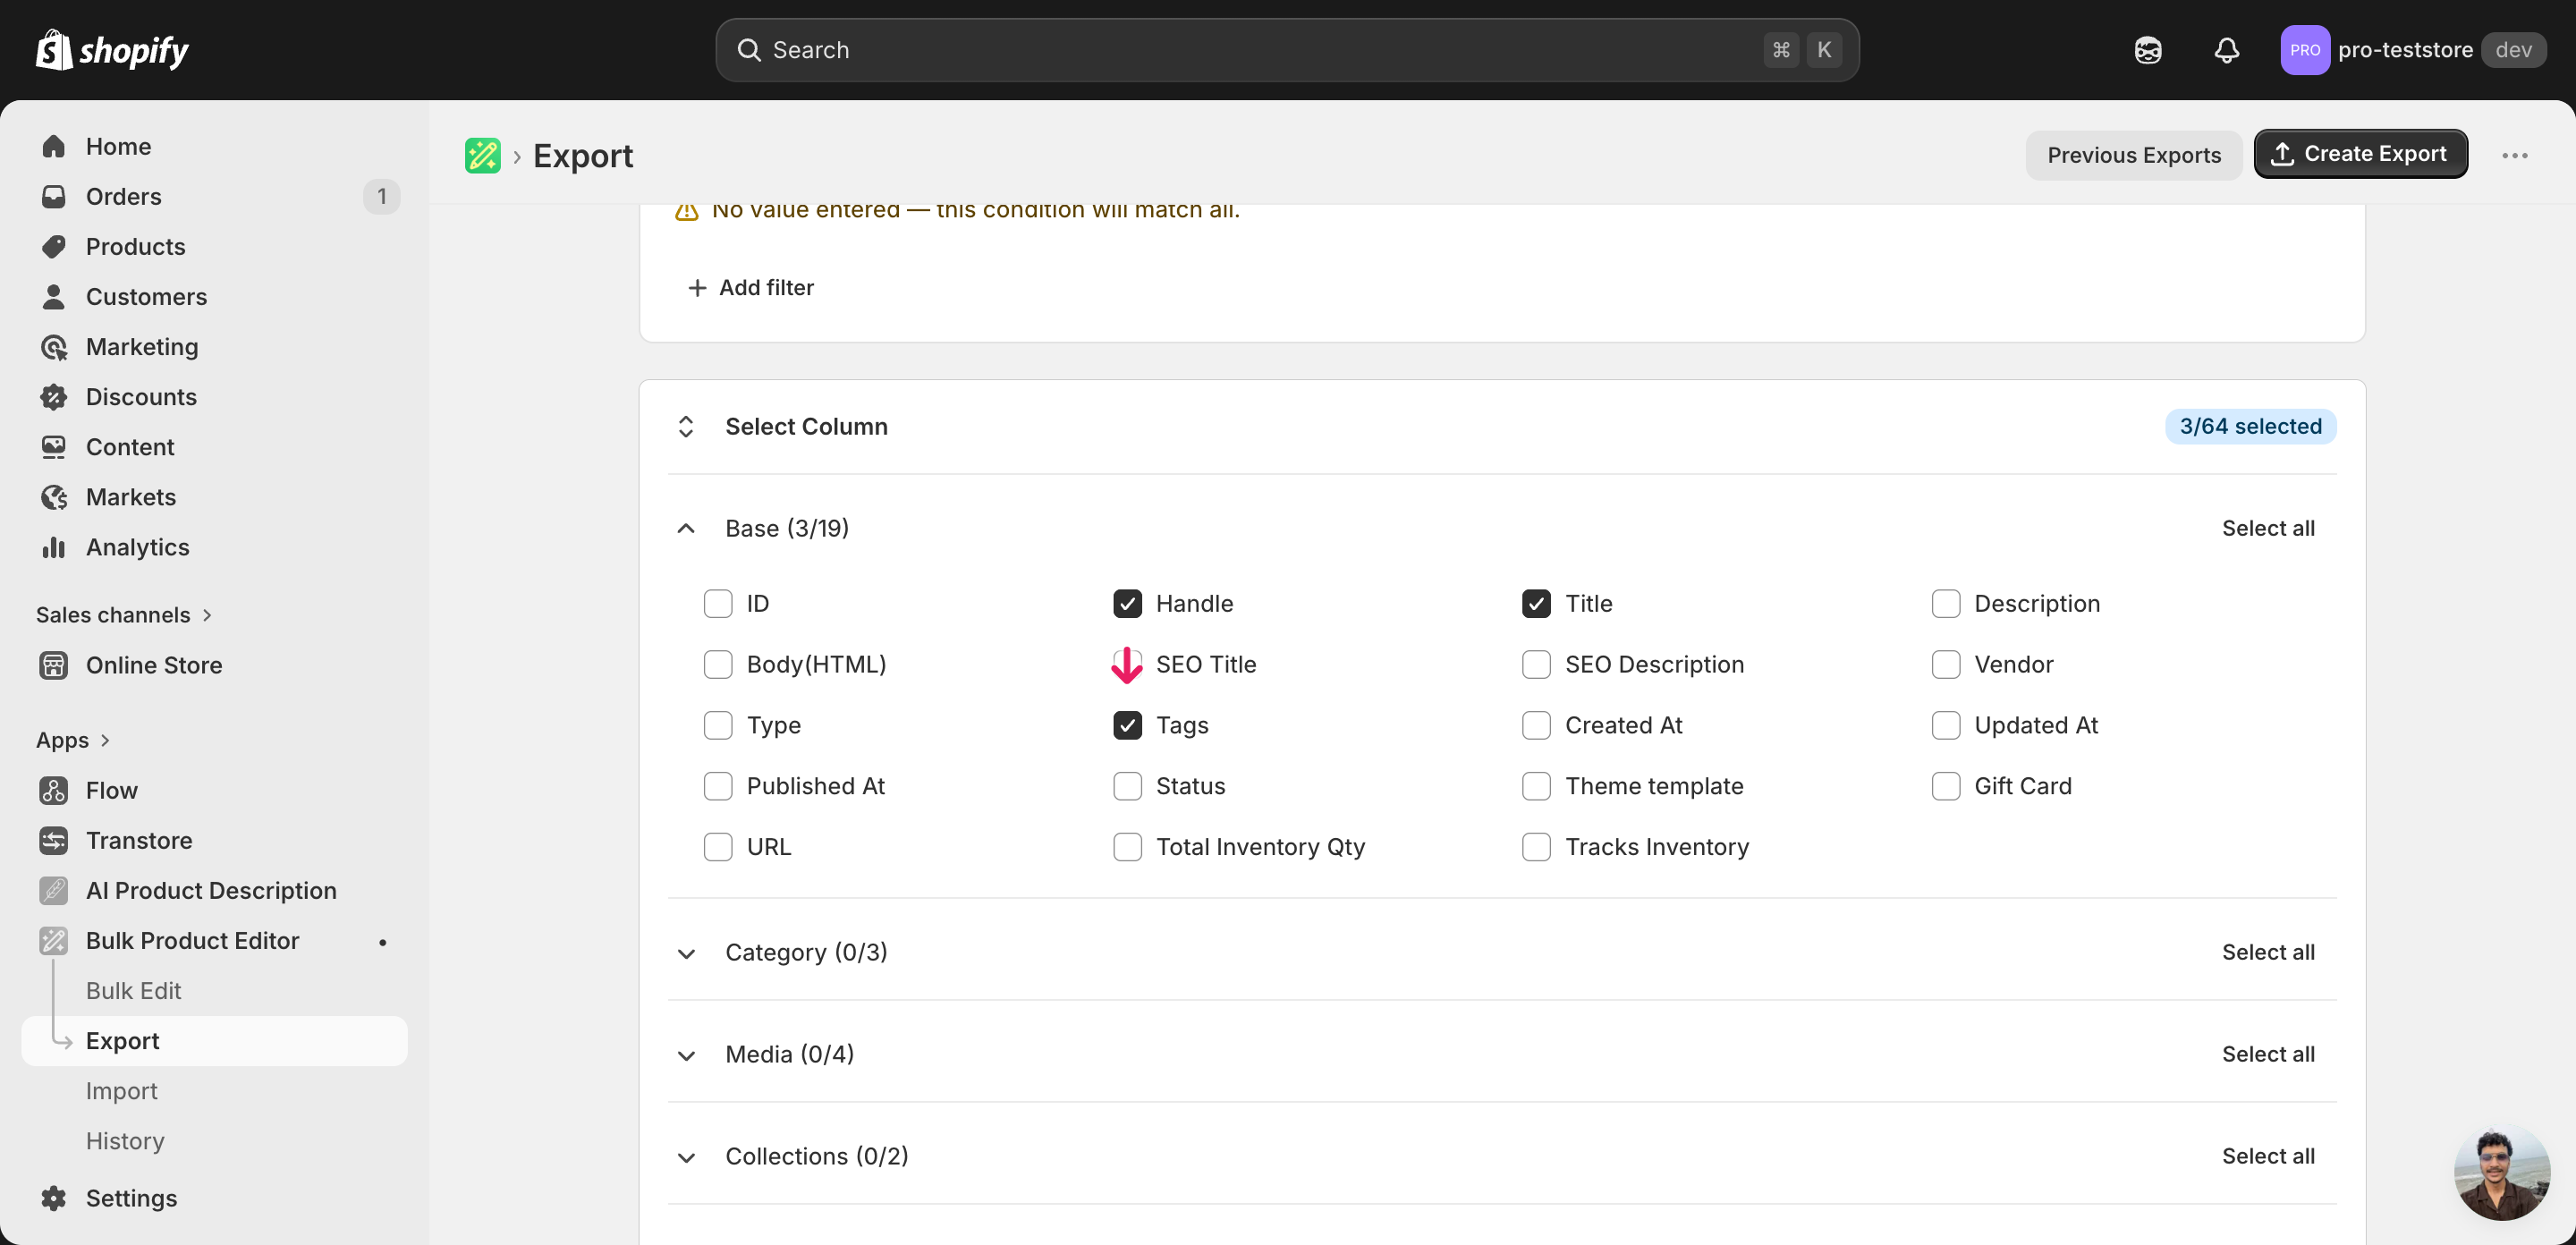
Pick the right columns
- Handle — the unique product identifier the importer uses to match each row back to the right product.
- Title — context only, so you can see which product a row belongs to while editing — it is not modified by this workflow.
- Tags — the column you'll edit. Holds every tag on the product as a single comma-separated string, and is the value that gets overwritten on import.
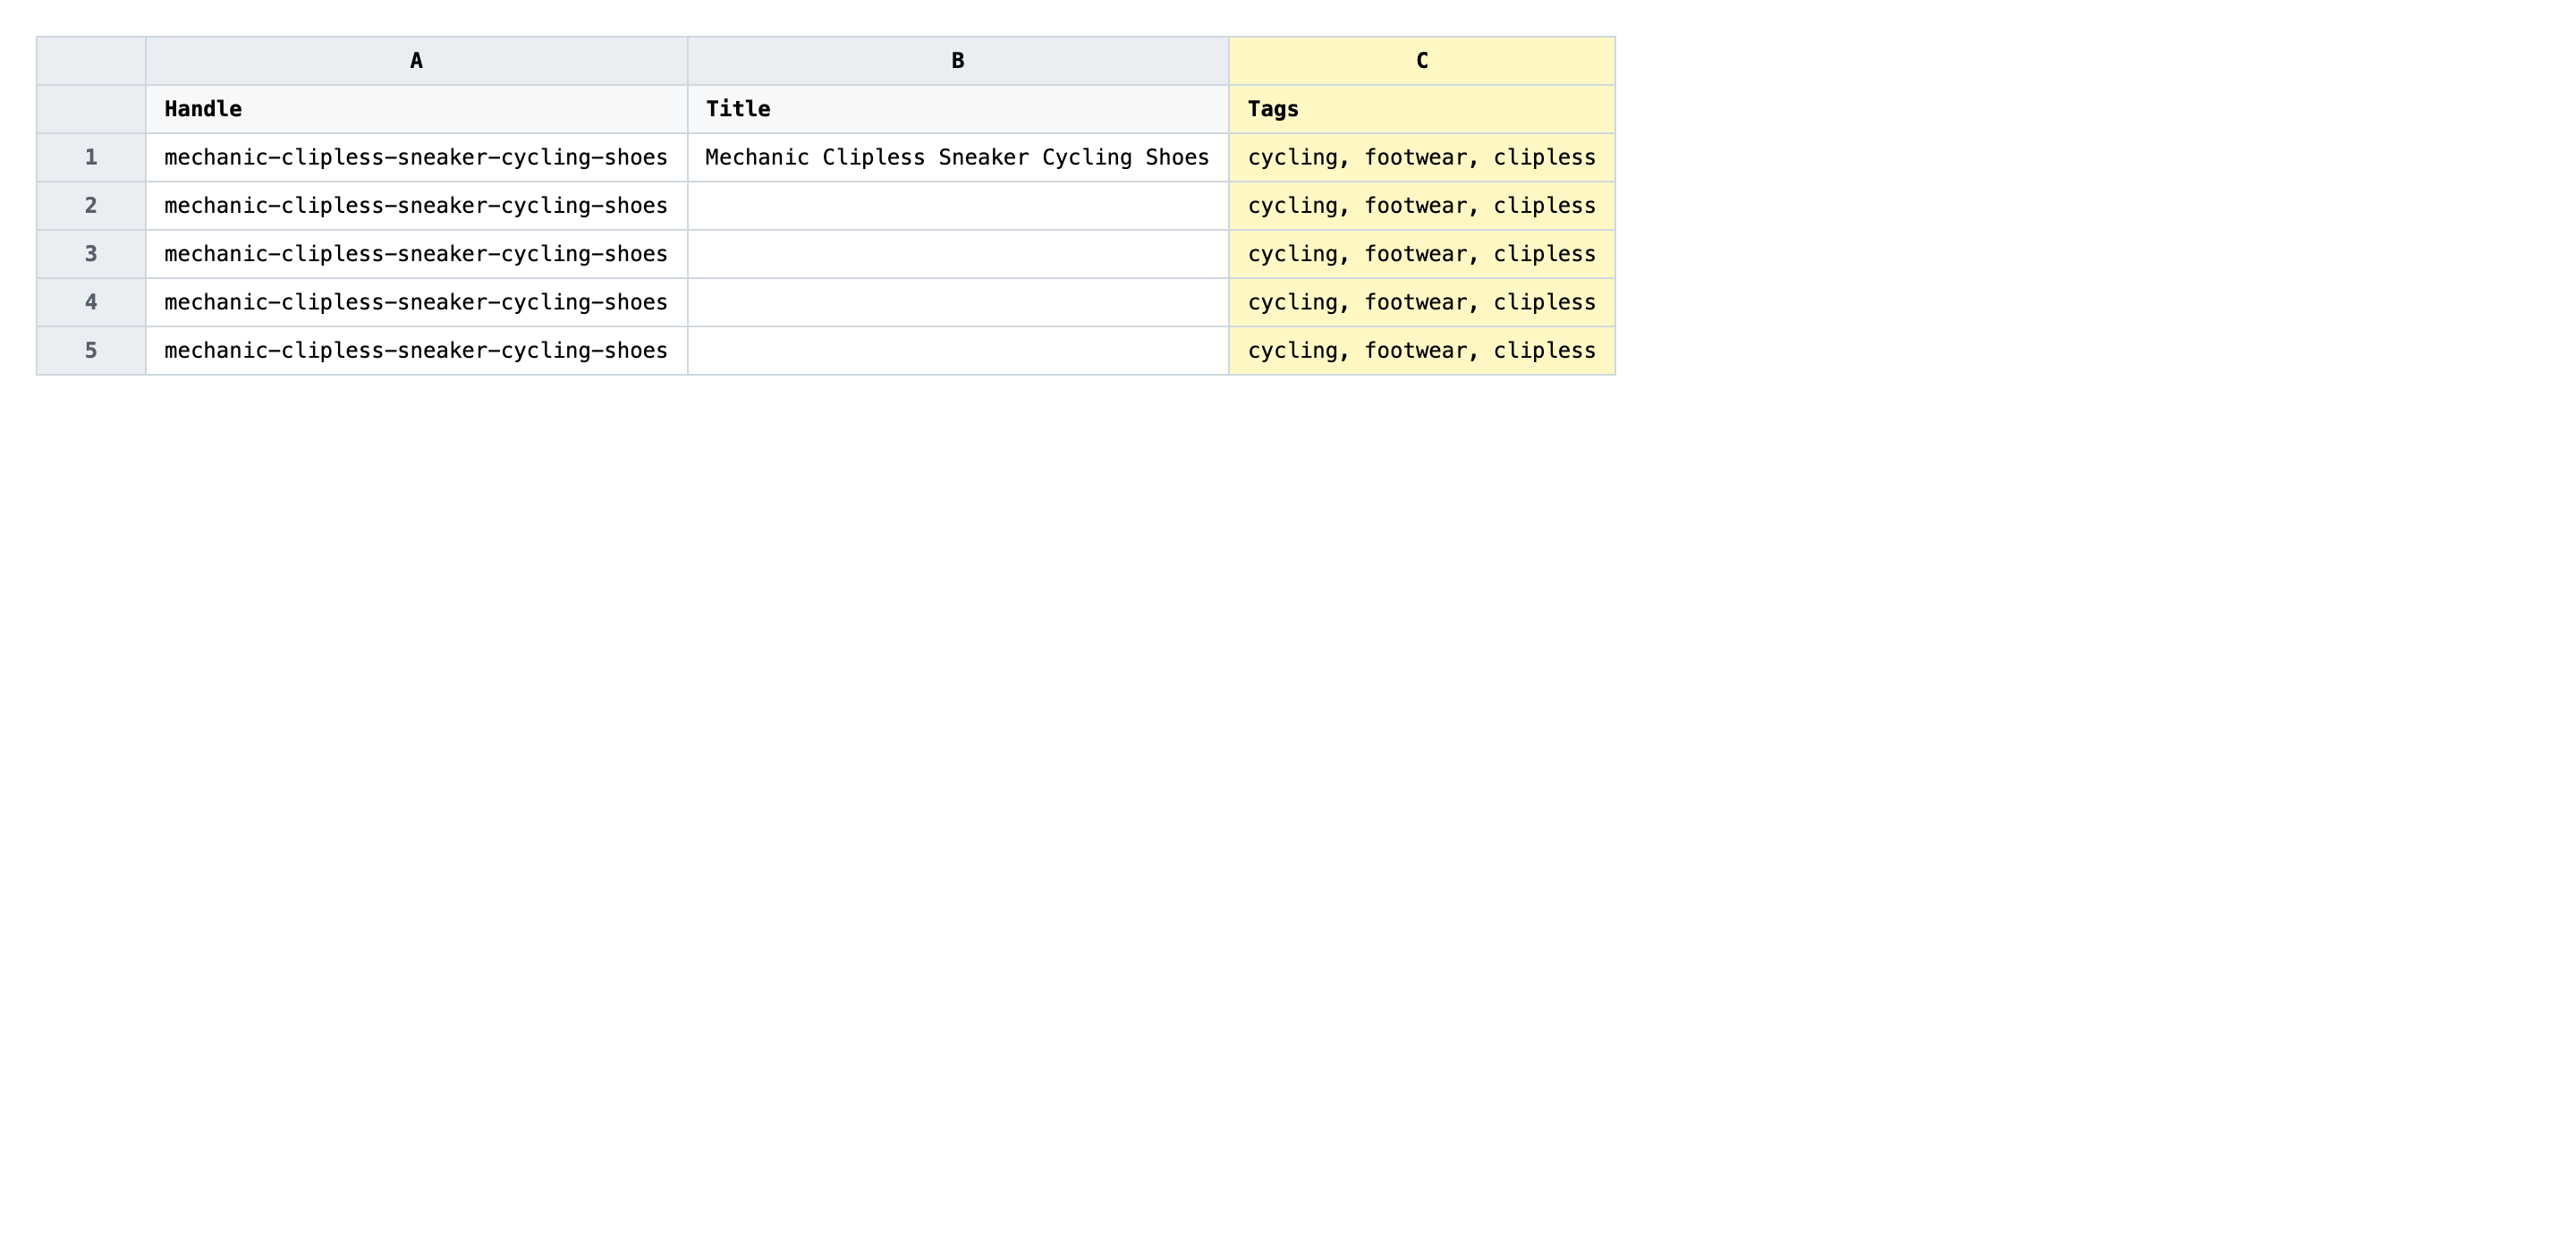
When the export completes, click Download. You'll get one row per product with all of that product's tags packed into the Tags cell as a comma-separated string — for example summer, sale, mens.
New to exporting? This guide assumes you know how to run an export and focuses only on the columns and edit unique to this workflow.
Step 2 — Bulk replace Shopify tags per product in your spreadsheet
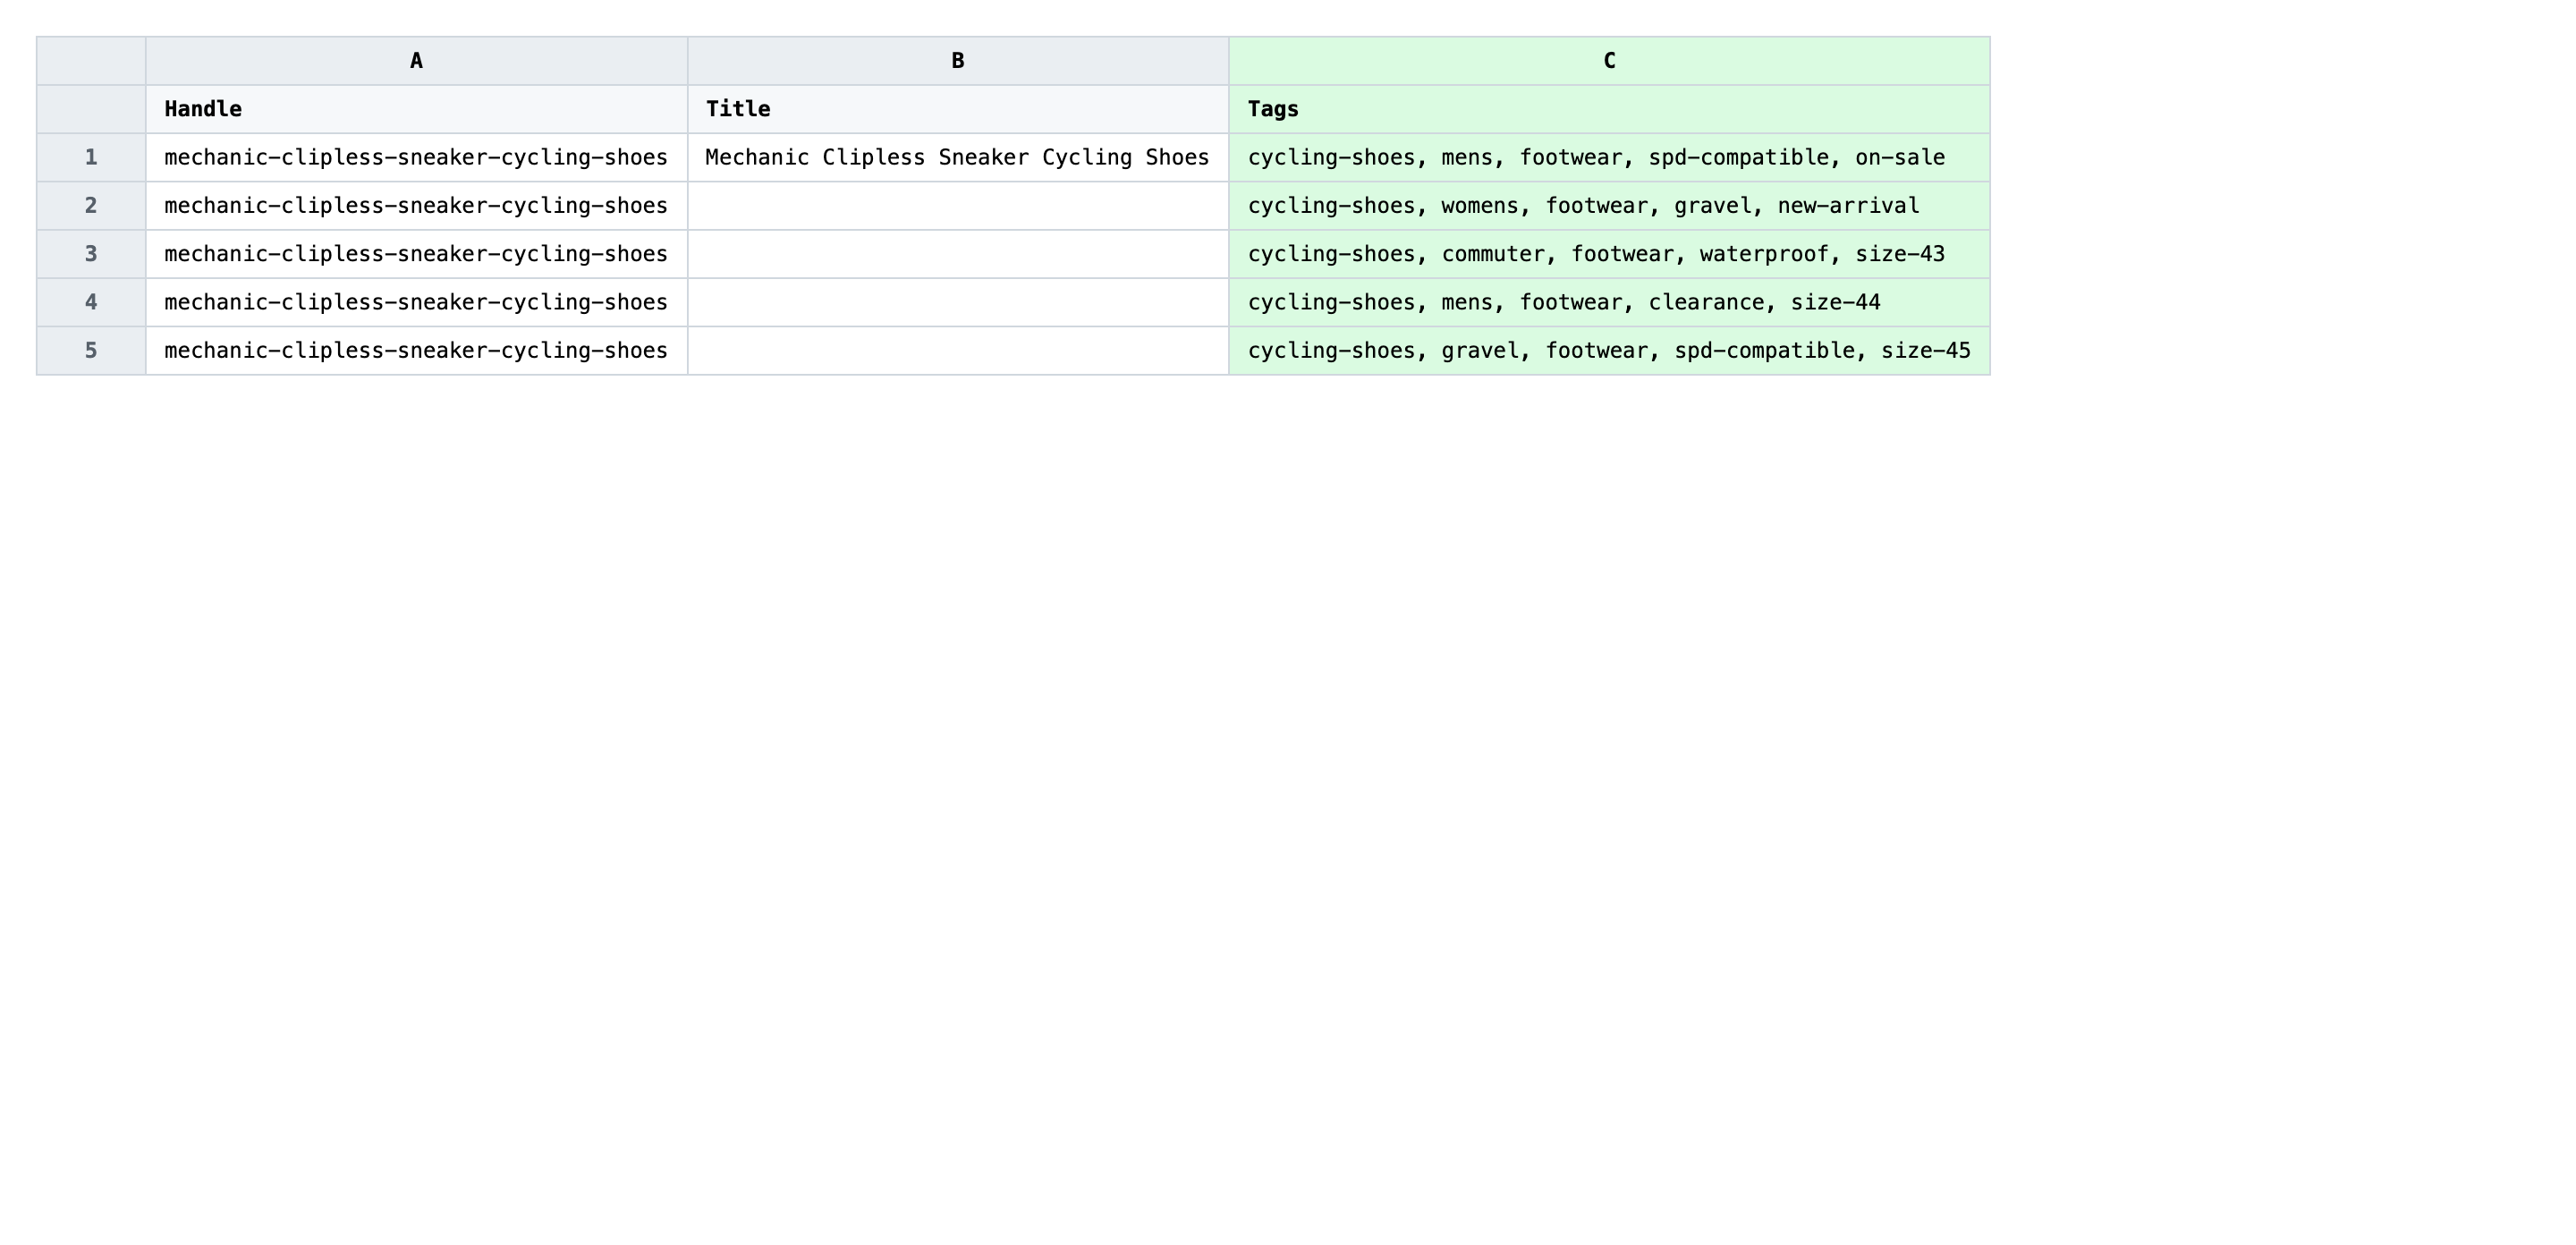
Open the downloaded CSV in Excel or Google Sheets. The Tags column holds the current comma-separated tag string for each product, and it is the only column you'll edit.
Rewrite the Tags cell on each row with the full tag set that product should end up with. Separate tags with commas, and keep the whole list in a single cell — do not split across columns. Whatever you type is what the product will have after import, so include every tag you want to keep (this is a replace, not an add).
- ✅
summer-2026, mens, footwear, on-sale, size-42 - ❌
summer-2026 mens footwear (no commas — Shopify reads this as one giant tag)
Leave the Handle column exactly as exported — it's the matching key, and renaming it will either create a new product or fail the row. Do not split tags into multiple columns or wrap the cell in extra quotes; one comma-separated string per row is what the importer expects. If you want a product's tag set wiped clean, leave the Tags cell empty rather than typing a placeholder like none.
Save the file as CSV when you're done, and keep the original export handy in case you want to revert.
Tip: Pick a tag naming convention before you start — lowercase, hyphenated, no trailing spaces — and apply it consistently across every row, because Shopify treats
Summer Saleandsummer-saleas two different tags.
Step 3 — Import the edited file back to Shopify
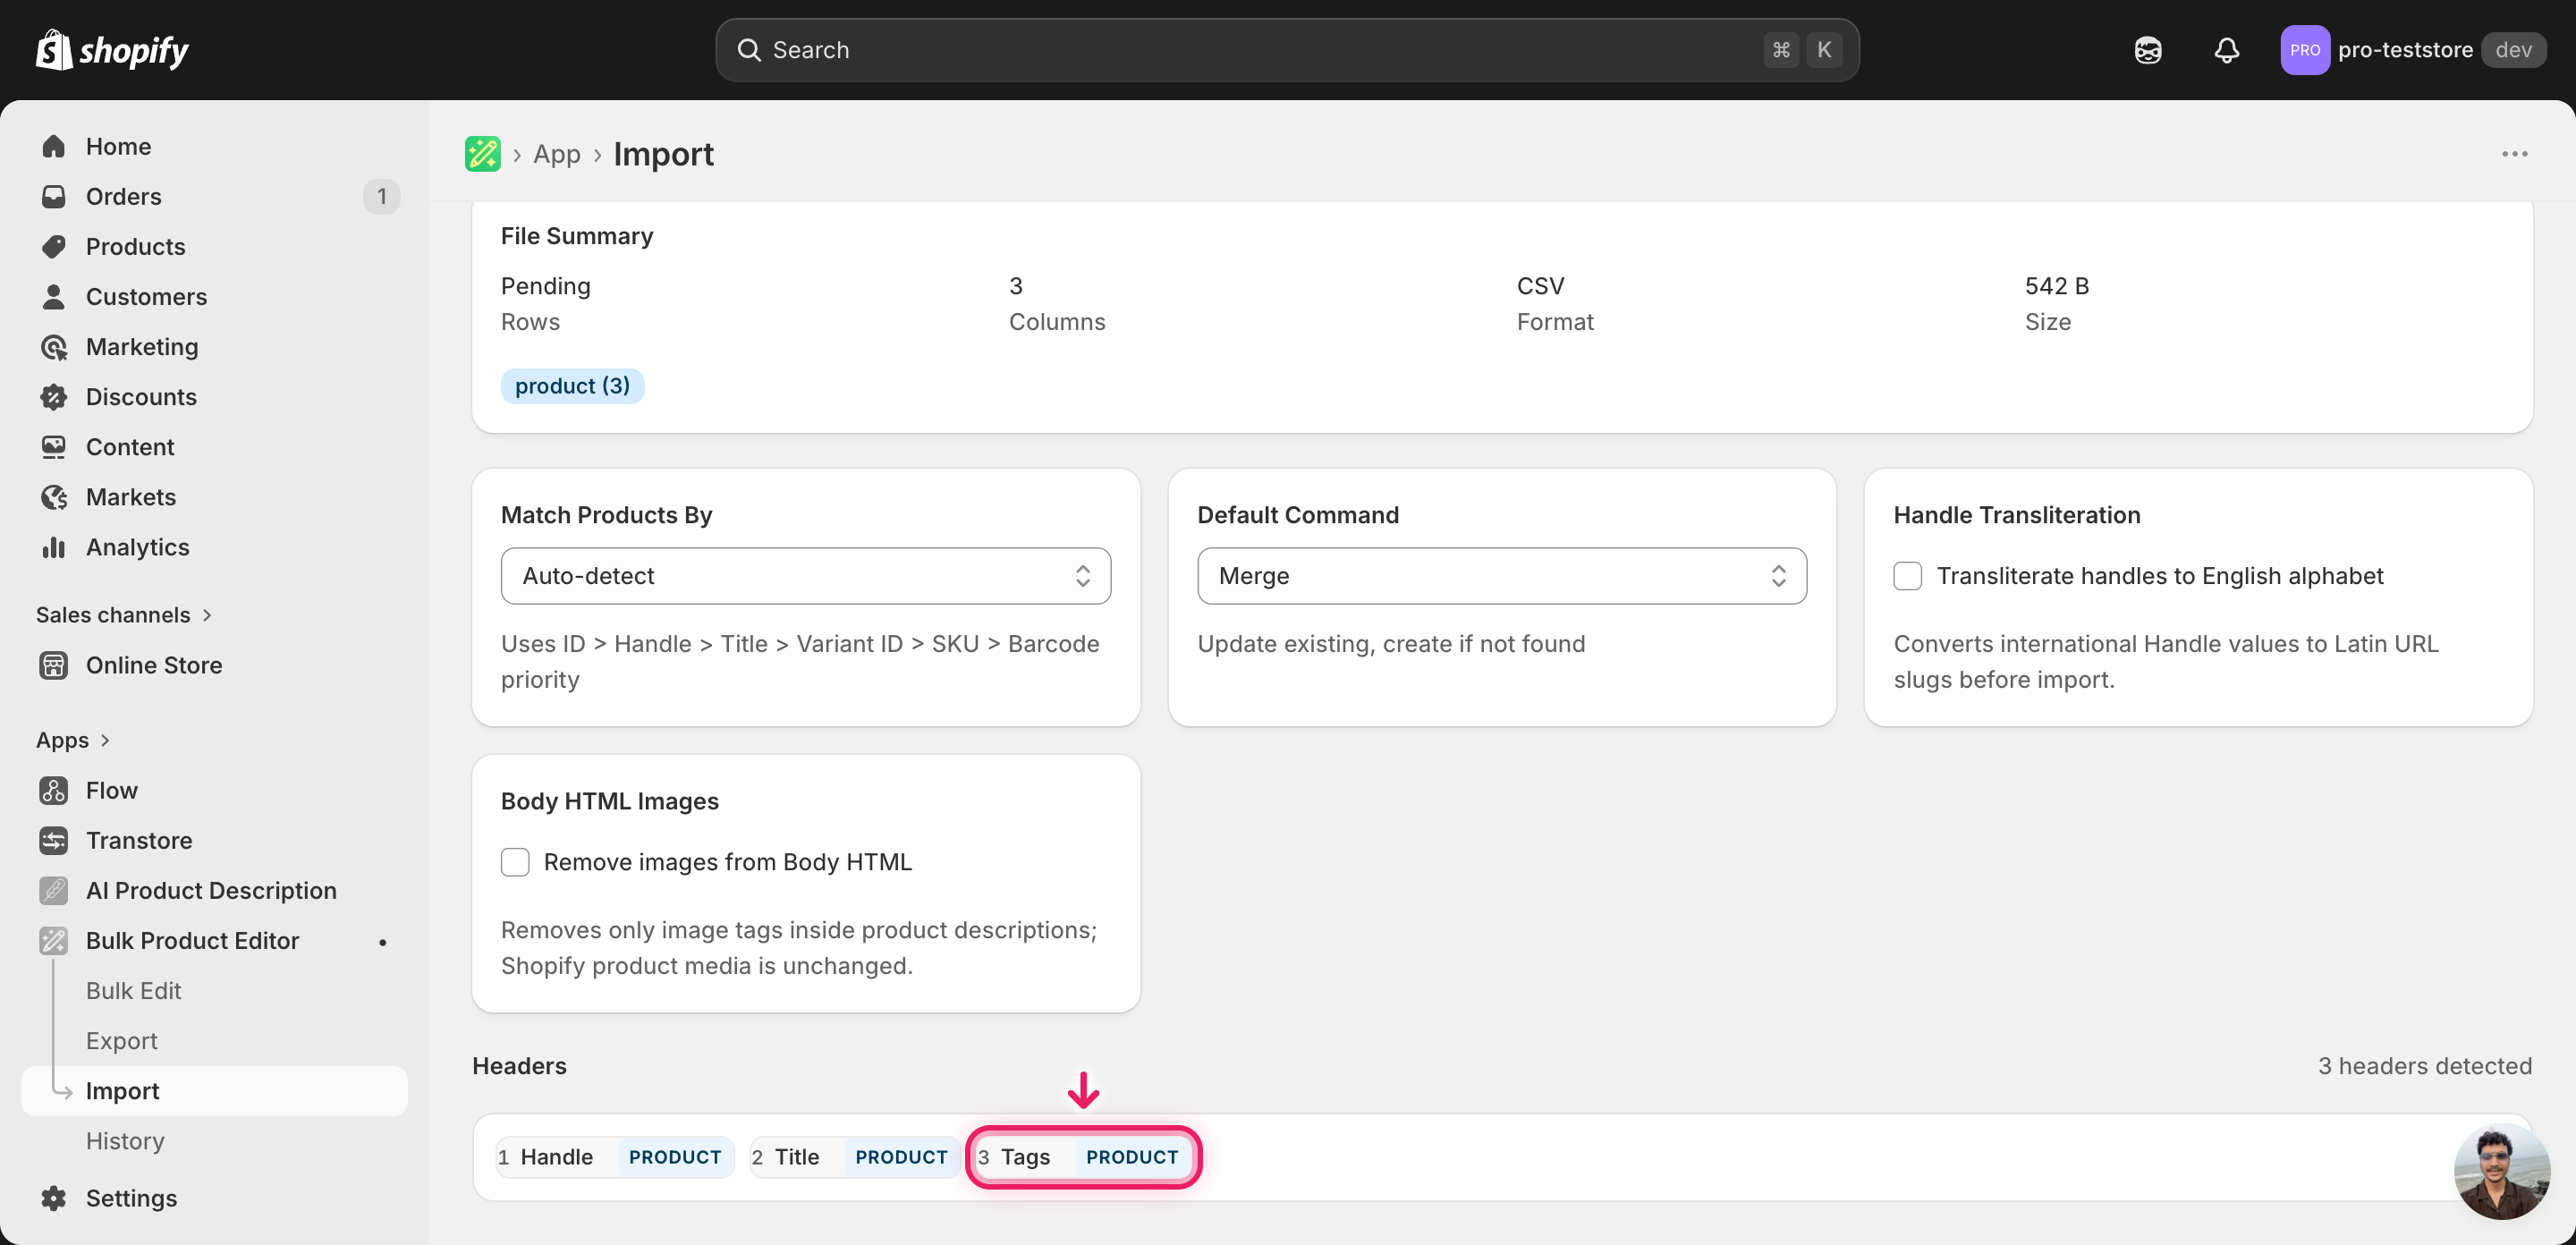
Open EditEngine → Import and select Advanced import. Then upload the file you just edited.
EditEngine reads the file and shows a summary. Check the Headers panel: Handle should be detected as the product key and Tags should appear as a recognized column. Leave Match Products By on Auto-detect, and confirm the Tags column is set to replace (not merge) so the new string overwrites the old tag set rather than appending to it.
Note: This is a destructive edit — every tag you leave out of the Tags cell is removed from the product. Run a first import with just two or three rows, open those products in the Shopify admin, and confirm the new tag set is exactly what you intended before importing the rest. If the advanced import offers a dry-run toggle, use it on the full file too; if not, the small-batch test is your safety net.
Click Start Import and wait for the job to finish — a small file takes seconds, larger catalogs a couple of minutes. When it completes, EditEngine shows a per-row summary.
Download the results CSV. It lists every row with a pass/fail status — that file is your proof the change went through, and the new values are now live in your Shopify admin.
Tips and troubleshooting
Replace overwrites the entire tag set. This workflow does not add tags on top of what's already there — it rewrites the Tags string in full. Any tag that's on the product today but missing from your spreadsheet cell will be gone after import. If you only want to add a handful of tags without touching the rest, use the Tags Command column workflow with MERGE. If you need to remove one tag, export the full tag list, remove that tag in the spreadsheet, and use REPLACE with the remaining tags.
Tags live in one cell, comma-separated. Shopify stores all of a product's tags as a single string. Keep them in one cell and separate with commas — summer, sale, mens is three tags, summer sale mens is one tag with spaces in it. Spreadsheet apps sometimes try to be helpful and split on commas; if yours does, wrap the cell in quotes when saving as CSV so the comma list survives the round-trip.
Test on a tiny batch before the full catalog. Because this flow replaces rather than merges, a typo or a missed tag affects every row you import. Export ten products, edit their Tags cells, import, and check those ten products in the Shopify admin. Once you're confident the result matches what's in your spreadsheet, run the full file — the small test costs five minutes and saves an hours-long re-tag if something is off.
Keep the original export as your rollback. There's no undo button for a tag replace. The original CSV that came out of EditEngine is the only record of each product's previous tag set, so save it somewhere safe before you start editing. If anything goes wrong, re-importing that file restores every product to its pre-edit state.
Frequently asked questions
How do I bulk replace tags in Shopify?
Export your products from EditEngine with the Handle and Tags columns, rewrite the Tags cell for each product in a spreadsheet, then import the file back through the advanced import flow. That round-trip lets you bulk replace Shopify tags per product without touching one product at a time in the admin.
Can I edit Shopify tags in a spreadsheet?
Yes. EditEngine exports each product's tags as a single comma-separated string in the Tags column, which you can rewrite in Excel, Google Sheets, or any CSV editor before importing back. Shopify itself does not offer a built-in spreadsheet editor for tags, which is why merchants use EditEngine to bulk replace Shopify tags per product.
How long does a bulk tags import take in Shopify?
A few dozen products import in seconds. A few thousand typically finishes in one to three minutes, and EditEngine streams larger files so even ten-thousand-product catalogs complete without timing out. The results CSV records the exact duration for your job.
What format does Shopify accept for tags imports?
A CSV (or XLSX) with a Handle column to match the product and a Tags column holding all of that product's tags as one comma-separated string — for example summer, sale, mens. EditEngine's advanced import reads this format directly when you bulk replace Shopify tags per product.
Can I undo a bulk Shopify tags update?
There's no one-click undo, but the workflow is its own backup: keep the original export and re-import that unedited file to restore the previous tag set on each product. Because this flow replaces tags rather than adding to them, the original export is the only reliable rollback for a bulk replace Shopify tags per product job.
Related tutorials
About EditEngine: EditEngine Bulk Product Editor helps Shopify merchants bulk edit, bulk import, and bulk export their product catalog in minutes instead of days. Install on Shopify →