Collections
How to Bulk Create New Shopify Collections From a CSV
Last updated
Want to bulk update Shopify new collections from the csv and have brand-new collections created automatically during the import? With EditEngine Bulk Product Editor, you export your products to a spreadsheet, type the collection titles you want each product in — including ones that don't exist yet — and import the file back. EditEngine creates any missing collection through collectionCreate and assigns the product in the same pass, so you skip the click-by-click work in the Shopify admin.
What you'll learn
- Export every product with its current new collections
- Edit new collections per row in a spreadsheet
- Import the updated file back to Shopify
What you'll need
- The EditEngine Bulk Product Editor app installed in your Shopify store
- Permission to create new collections in your Shopify admin (the Manage products app permission)
- A clear naming convention for the new collections so you don't accidentally create near-duplicates (e.g., "Summer 2026" vs "summer 2026")
- The Advanced import flow — collection membership and collection creation run through the advanced importer
- A spreadsheet editor (Excel, Google Sheets, Numbers — anything that opens CSV)
A Shopify manual collection is just a named group of products. Normally you create the collection in the admin first, then add products to it — two separate steps for every new group. EditEngine collapses that into one import: when you write a collection title in the Collection column that doesn't match any existing collection, the importer creates it on the fly before adding the product.
Step 1 — Export your Shopify new collections
Open EditEngine and go to the Export page. This is where you pick which product fields land in your spreadsheet.
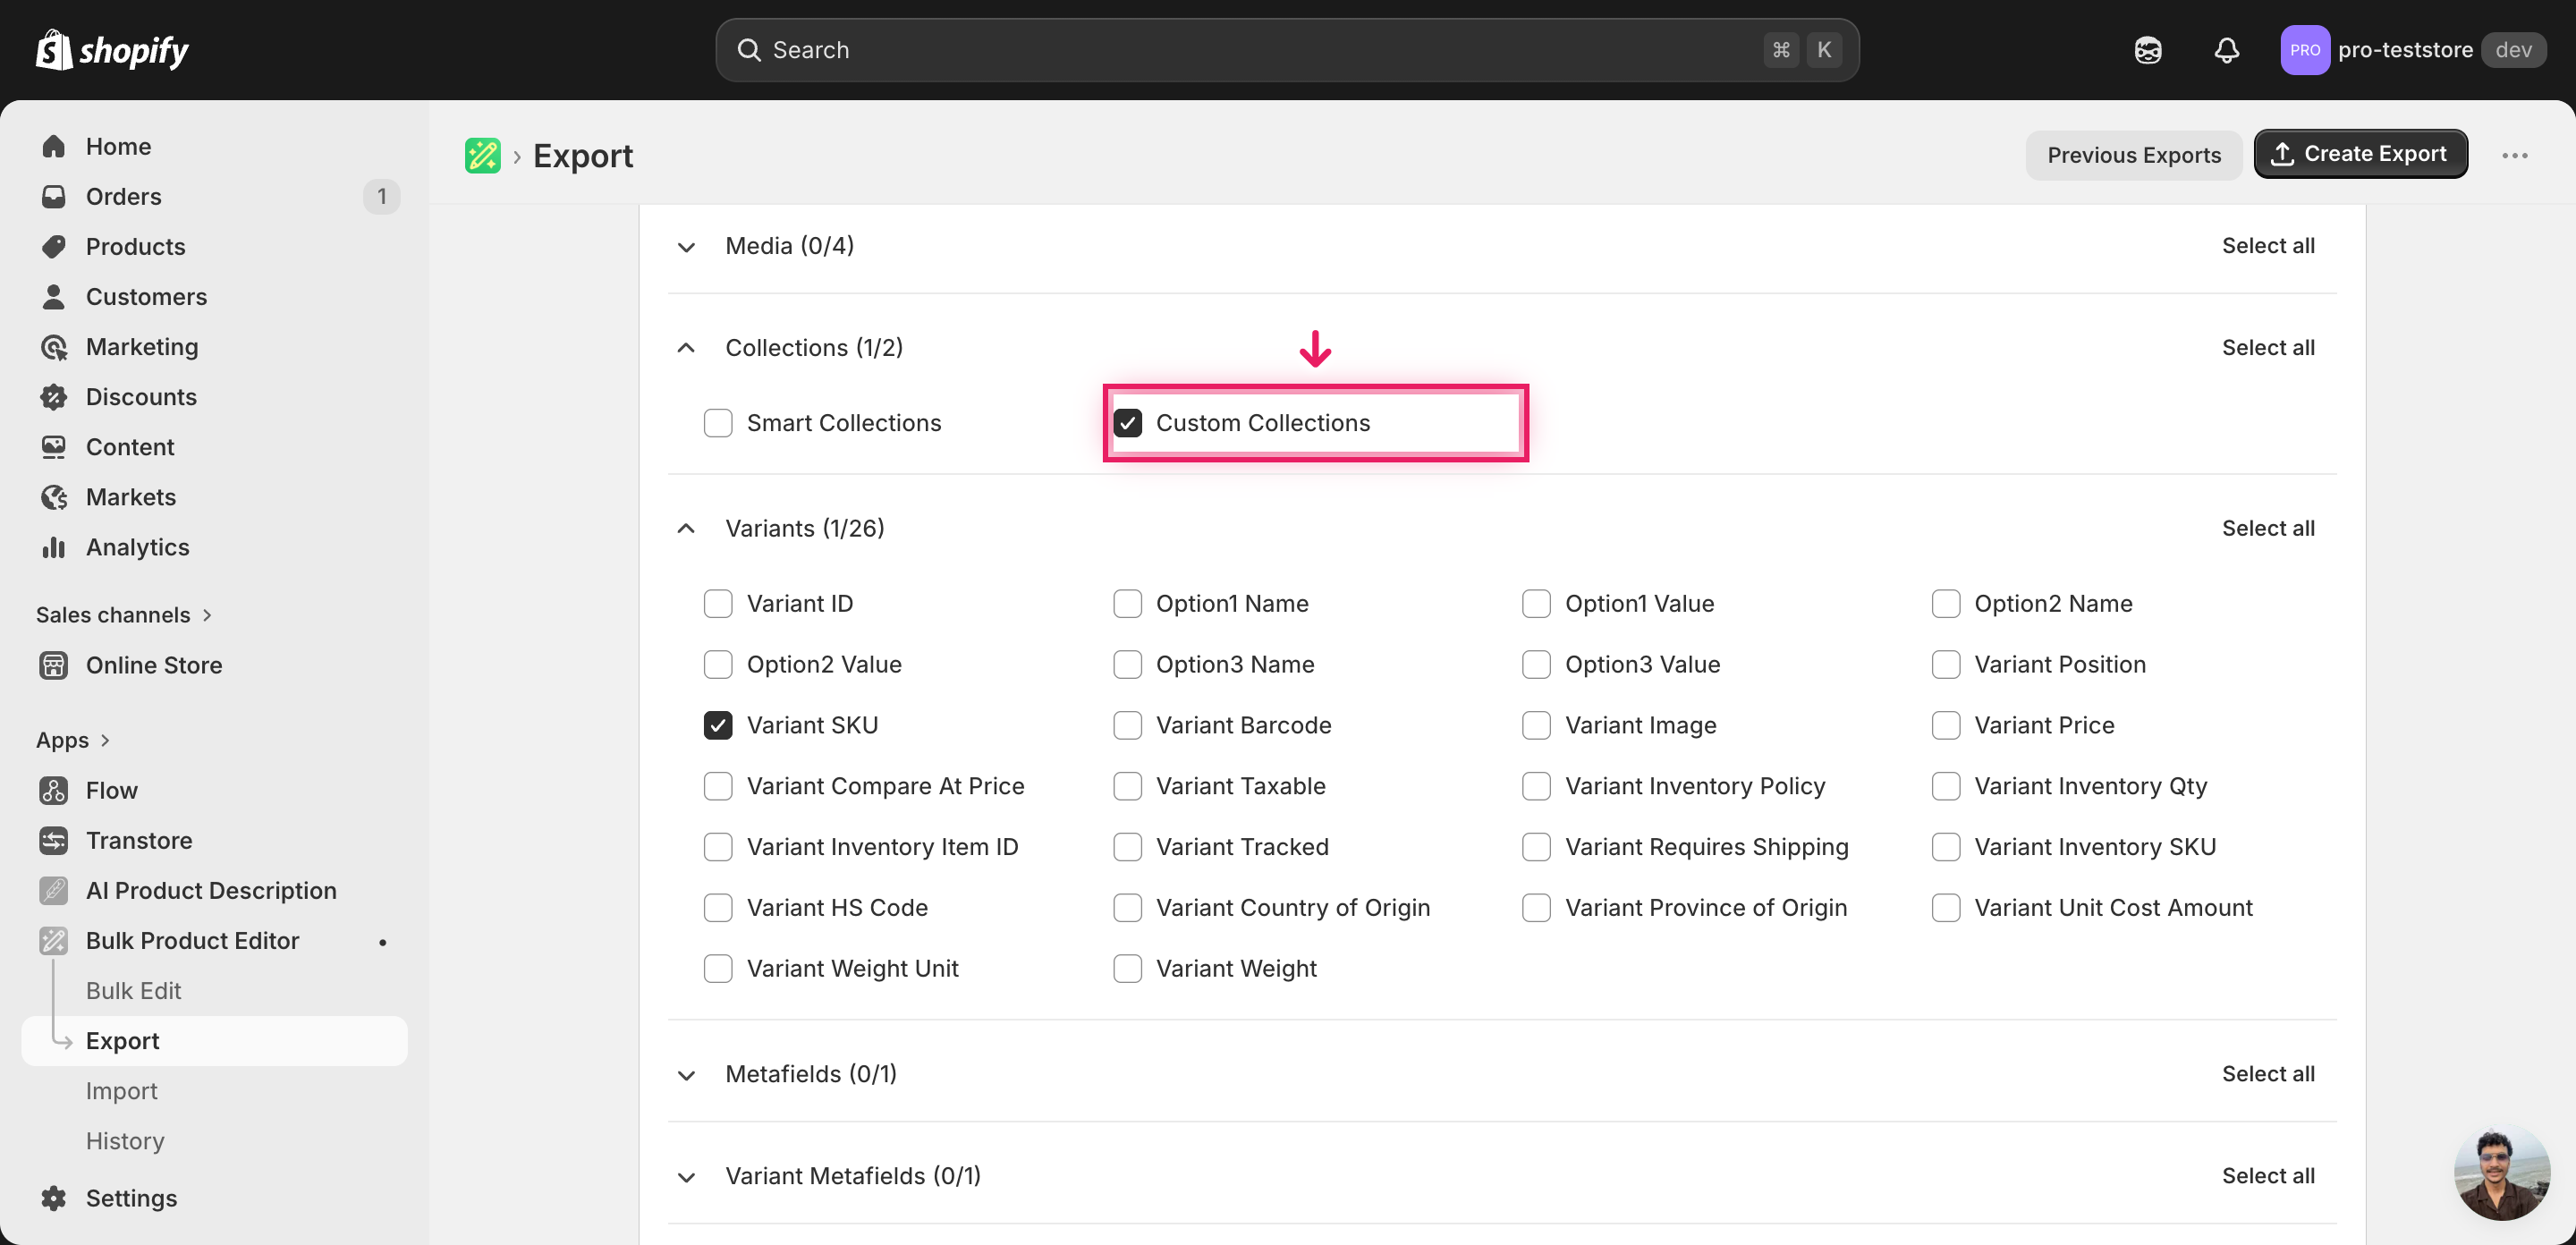
Pick the right columns
- Handle — the unique product identifier the importer uses to match each row back to the right product in your Shopify store.
- Variant SKU — context for distinguishing variants while you edit; the collection assignment itself is product-level, not variant-level.
- Collection — the column you'll edit. Lists the collection titles each product belongs to; type any new title here and EditEngine creates the collection during import.
When the export completes, click Download. You'll get one row per variant with the current collection memberships in the Collection column — a product that belongs to several collections shows them pipe-separated (e.g., Summer | Sale).
New to exporting? This guide assumes you know how to run an export and focuses only on the columns and edit unique to this workflow.
Step 2 — Bulk update Shopify new collections from the CSV in your spreadsheet
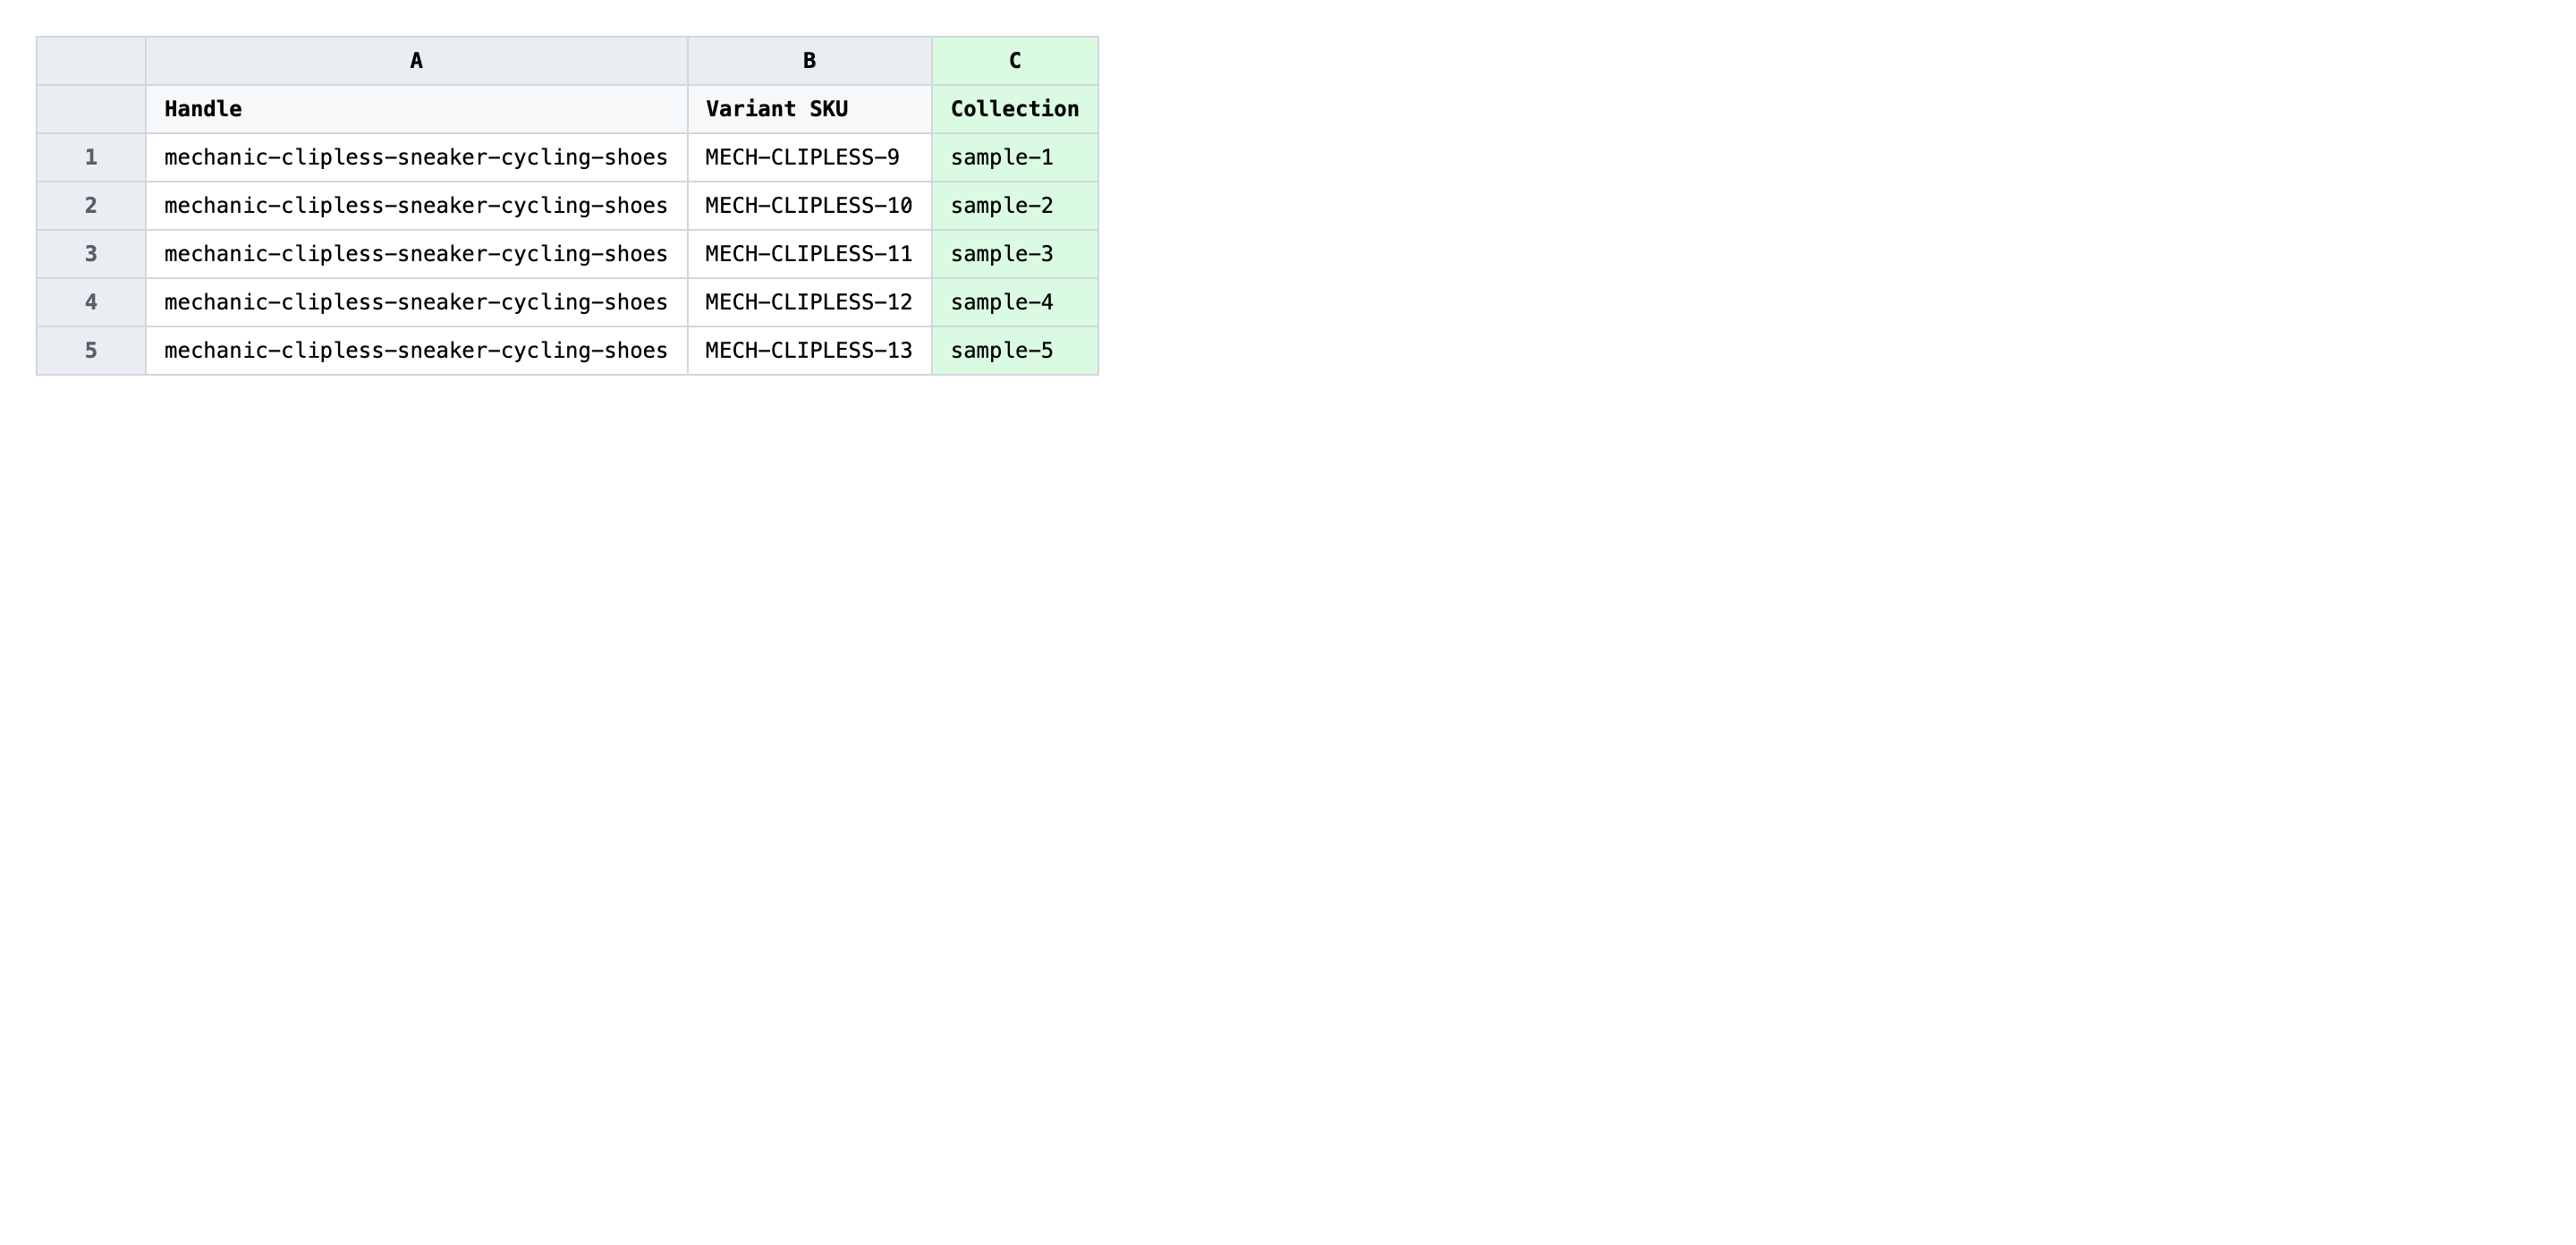
Open the downloaded CSV in Excel or Google Sheets. The Collection column shows the collection titles each product is in today; this is the column you'll add new collection names to.

Type the target collection titles in Collection for every product row, separated by | if a product belongs to more than one. Use the exact title you want to appear in your Shopify admin — EditEngine matches existing collections case-sensitively and creates a brand-new collection for any title it doesn't recognize. Keep titles short and human-readable; they become the page heading shoppers see.
- ✅
Summer 2026 | New Arrivals | Cycling Footwear - ❌
summer 2026 , new-arrivals,Cycling Footwear (mixed casing, commas instead of pipes, and trailing spaces all create duplicate collections)
Leave Handle and Variant SKU exactly as exported — Handle is the matching key, so changing it points the row at a different product or none at all. Any title you type in Collection that isn't already in Shopify will be created as a new manual collection with no products inside it except the ones from this import, so double-check spelling before saving. If you want to remove a product from every collection, clear the Collection cell entirely.
Save the file as CSV when you're done, and keep the original export handy in case you want to revert.
Tip: Decide your naming convention before you start typing. "Summer 2026", "summer 2026", and "Summer-2026" each create a separate collection — pick one shape and stick to it across every row.
Step 3 — Import the edited file back to Shopify
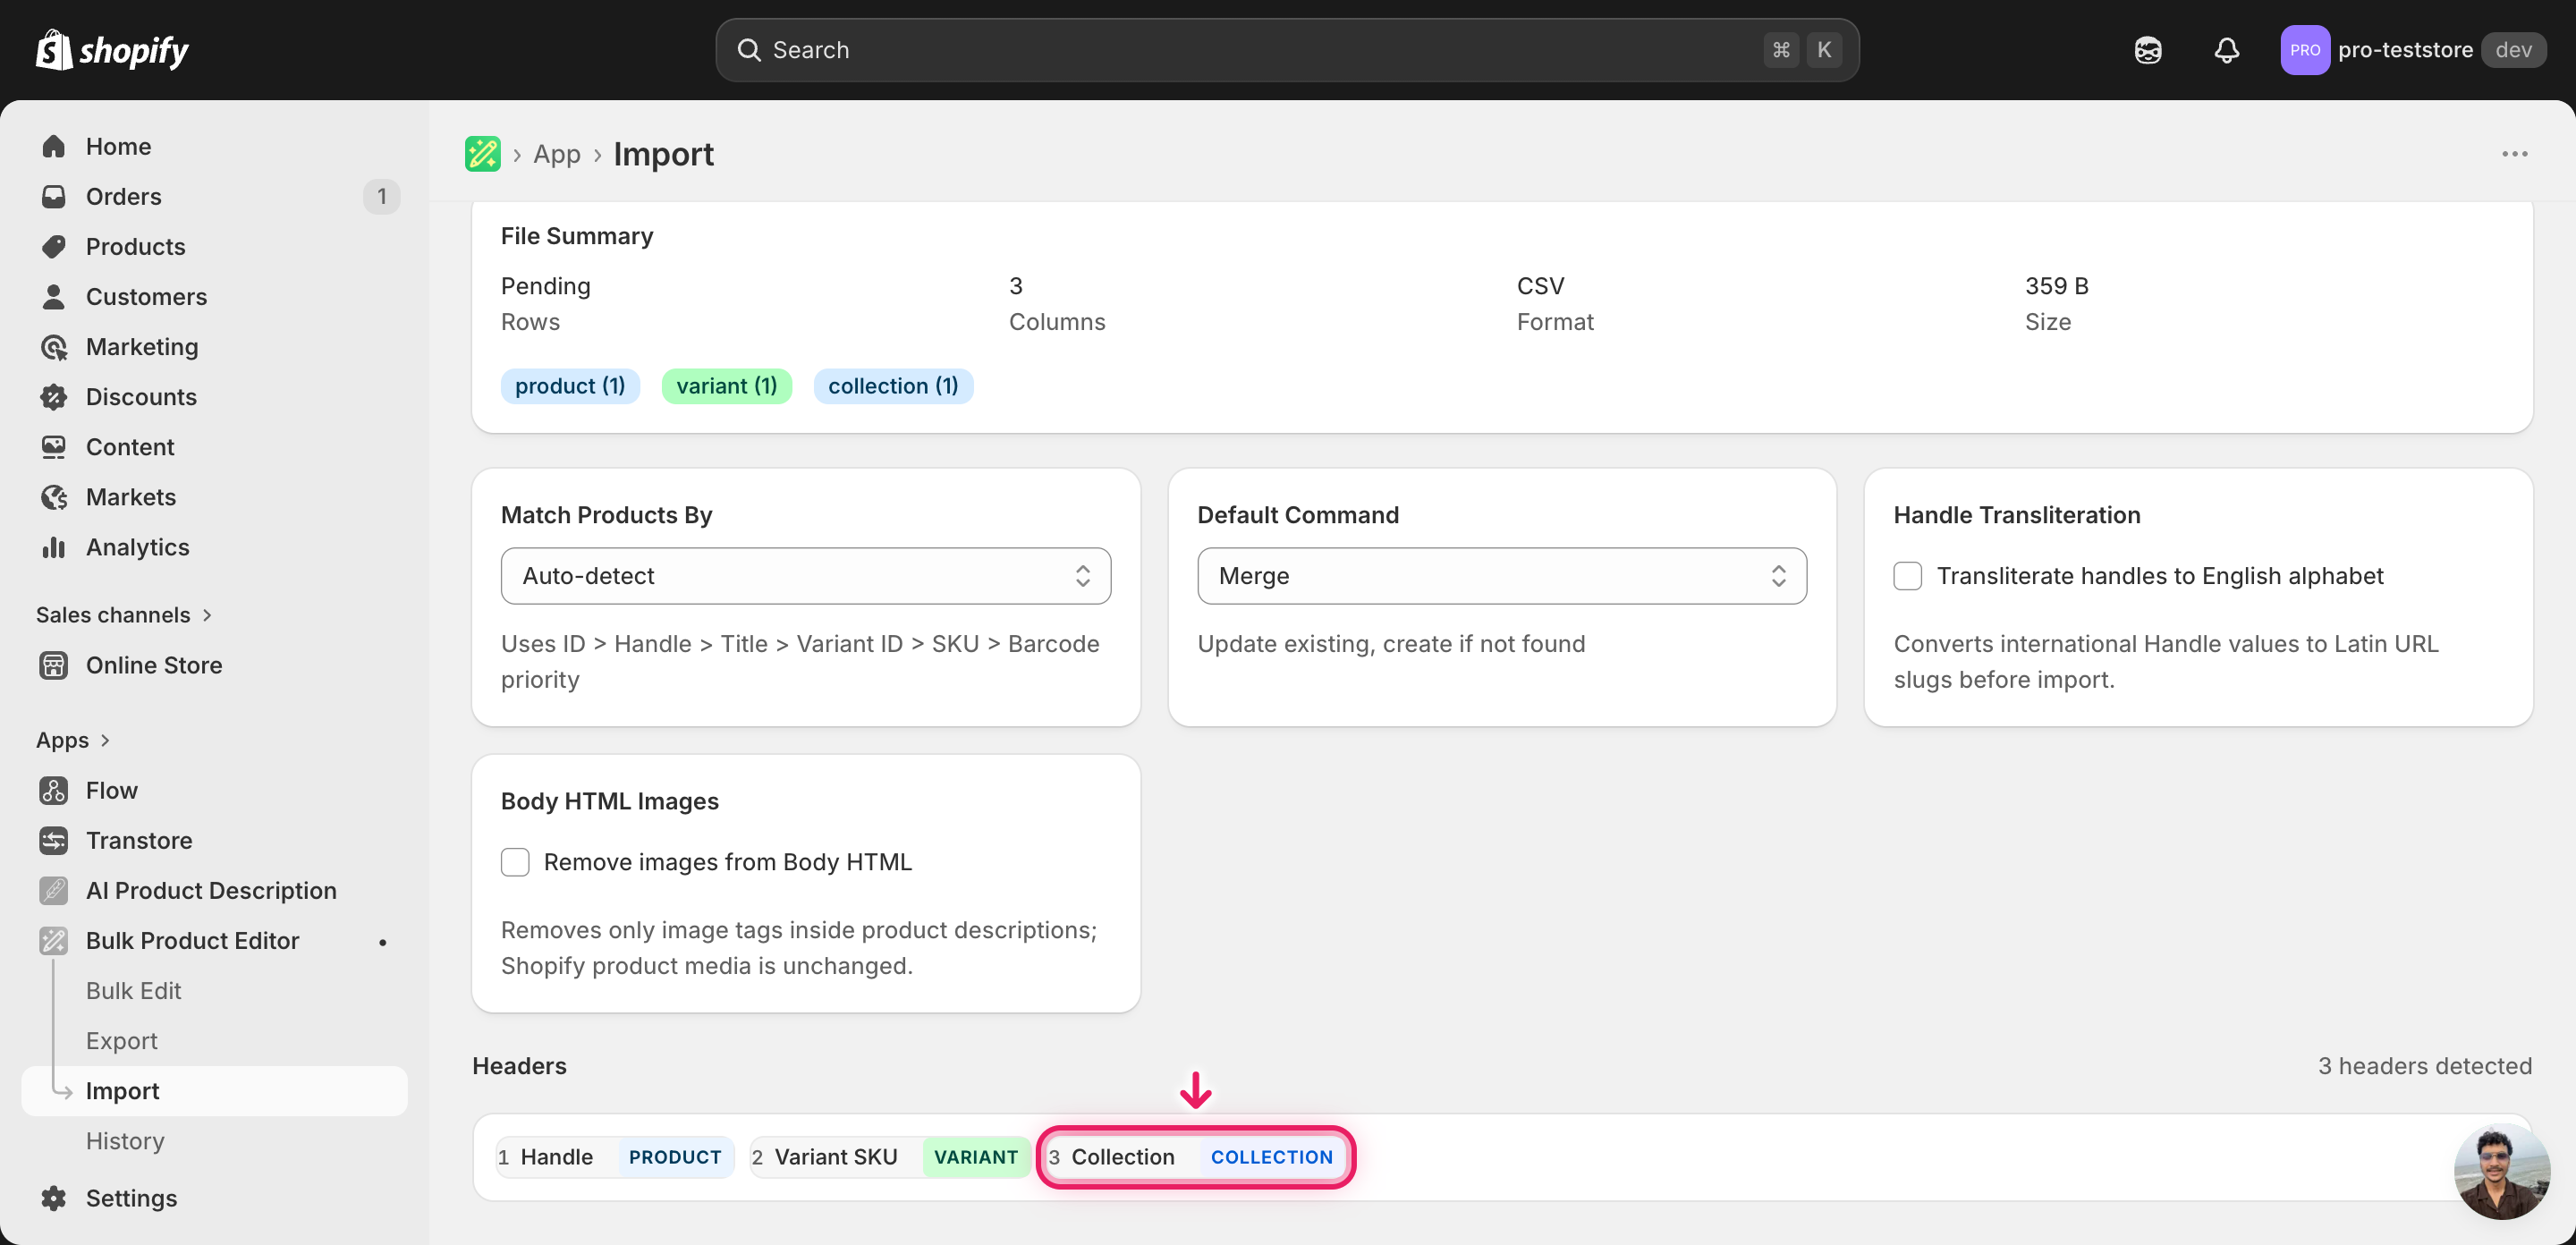
Open EditEngine → Import and select Advanced import. Then upload the file you just edited.
EditEngine reads the file and shows a summary. Check the Headers panel: Collection should carry the collection badge, which confirms the importer recognized it as a collection-membership column. Leave Match Products By on Auto-detect (it will use Handle) and Default Command on Merge so existing memberships aren't wiped.
Note: This advanced import does not have a dry-run toggle, and the workflow is destructive in one sense — every new collection title you typed becomes a real collection in your admin the moment the import runs. Test on a tiny batch first: import 3–5 rows with one new collection title, confirm the collection appears under Products → Collections with the right products inside, then run the full file. That catches a typo before it creates fifty empty duplicate collections.
Click Start Import and wait for the job to finish — a small file takes seconds, larger catalogs a couple of minutes. When it completes, EditEngine shows a per-row summary.
Download the results CSV. It lists every row with a pass/fail status — that file is your proof the change went through, and the new values are now live in your Shopify admin.
Tips and troubleshooting
Casing and whitespace create duplicate collections. EditEngine matches existing collections by exact title. "Summer Sale", "summer sale", and "Summer Sale " (trailing space) all look like different collections to the importer, so the first two get created as new ones alongside the original. Run a find-and-replace in your spreadsheet before importing to normalize casing and trim trailing spaces.
Use the pipe separator for multi-collection products. A product that belongs in several new collections goes on one row with the titles joined by | — for example, New Arrivals | Cycling Footwear | Summer 2026. Commas and semicolons aren't recognized as separators and will be read as part of a single, oddly-named collection.
Run a 5-row trial before the full import. Because the importer creates collections you type that don't exist, a typo in row 12 of a 2,000-row file will leave a misnamed empty collection in your admin. Import 3–5 rows first, open Products → Collections, confirm the new collections look right, then import the rest. The minute you spend here saves a cleanup session later.
Merge mode preserves existing memberships. Leave Default Command on Merge so the import only adds the collections you typed — it won't remove a product from a collection that isn't listed in the row. If you actually want to replace every membership with only what's in the CSV, switch to Replace and re-export first so you know exactly what each product will end up in.
Frequently asked questions
How do I bulk update new collections in Shopify?
Export your products with the Handle and Collection columns from EditEngine, type the collection titles you want each product in — including brand-new ones — and import the file back through the advanced import. When you bulk update Shopify new collections from the csv this way, EditEngine creates any collection title it doesn't already find in your store.
Can I edit Shopify new collections in a spreadsheet?
Yes. EditEngine exports one row per product with the current collection memberships in the Collection column, and you edit that column in Excel or Google Sheets. When you bulk update Shopify new collections from the csv and re-import, the importer reads each value and either matches an existing collection or creates a fresh one.
How long does a bulk new collections import take in Shopify?
A few dozen products with new collection assignments finish in under a minute. A catalog of several thousand rows that creates a handful of new collections typically completes in a couple of minutes, since each new collection only costs one extra GraphQL call. The results CSV shows exact timing for your job.
What format does Shopify accept for new collections imports?
A CSV or XLSX with a Handle column to match each product and a Collection column listing the target collection titles, separated by a pipe (|) if a product belongs to more than one. EditEngine's advanced importer reads this shape directly when you bulk update Shopify new collections from the csv.
Can I undo a bulk Shopify new collections update?
There's no one-click undo, but the original export is your rollback file — re-import it and every product reverts to its previous memberships. The auto-created collections stay in your admin as empty collections; delete them manually from Products → Collections if you don't want them around.
Related tutorials
- How to Bulk Add Shopify Products To Collections
- How to Bulk Reorganize Products Across Many Collections In One Import
About EditEngine: EditEngine Bulk Product Editor helps Shopify merchants bulk edit, bulk import, and bulk export their product catalog in minutes instead of days. Install on Shopify →