Inventory
How to Bulk Update Shopify Inventory Policy (Continue / Deny) Per Variant
Last updated
Need to bulk update Shopify inventory policy (continue / deny) per variant — letting backorder-friendly SKUs keep selling at zero while locking down the ones that should never oversell? With the EditEngine Bulk Product Editor, you export every variant to a spreadsheet, set one column per row, and import the file back in a single pass. The Shopify admin only exposes the When sold out setting one variant at a time, which is exactly the friction EditEngine removes.
What you'll learn
- Export every product with its current inventory policy (continue / deny)
- Edit inventory policy (continue / deny) per row in a spreadsheet
- Import the updated file back to Shopify
What you'll need
- The EditEngine Bulk Product Editor app installed in your Shopify store
- Products with variants already in your Shopify catalog
- Inventory tracking enabled on the variants you want to control — the policy only fires when Shopify is counting stock
- The Advanced import flow in EditEngine — Variant Inventory Policy is a variant-level field handled by advanced import
- A spreadsheet editor (Excel, Google Sheets, Numbers — anything that opens CSV)
Shopify stores the oversell setting as a per-variant value called the inventory policy. When it is continue, the storefront keeps the variant buyable past zero — useful for made-to-order, preorder, or printed-on-demand SKUs. When it is deny, the add-to-cart button disables the moment available stock hits zero. Flipping that one field across a catalog one variant at a time in the Shopify admin is the slow path; the spreadsheet round-trip below is the variant-level fix.
Step 1 — Export your Shopify inventory policy (continue / deny)
Open EditEngine and go to the Export page — this is where you pick the variant fields you want in the spreadsheet.
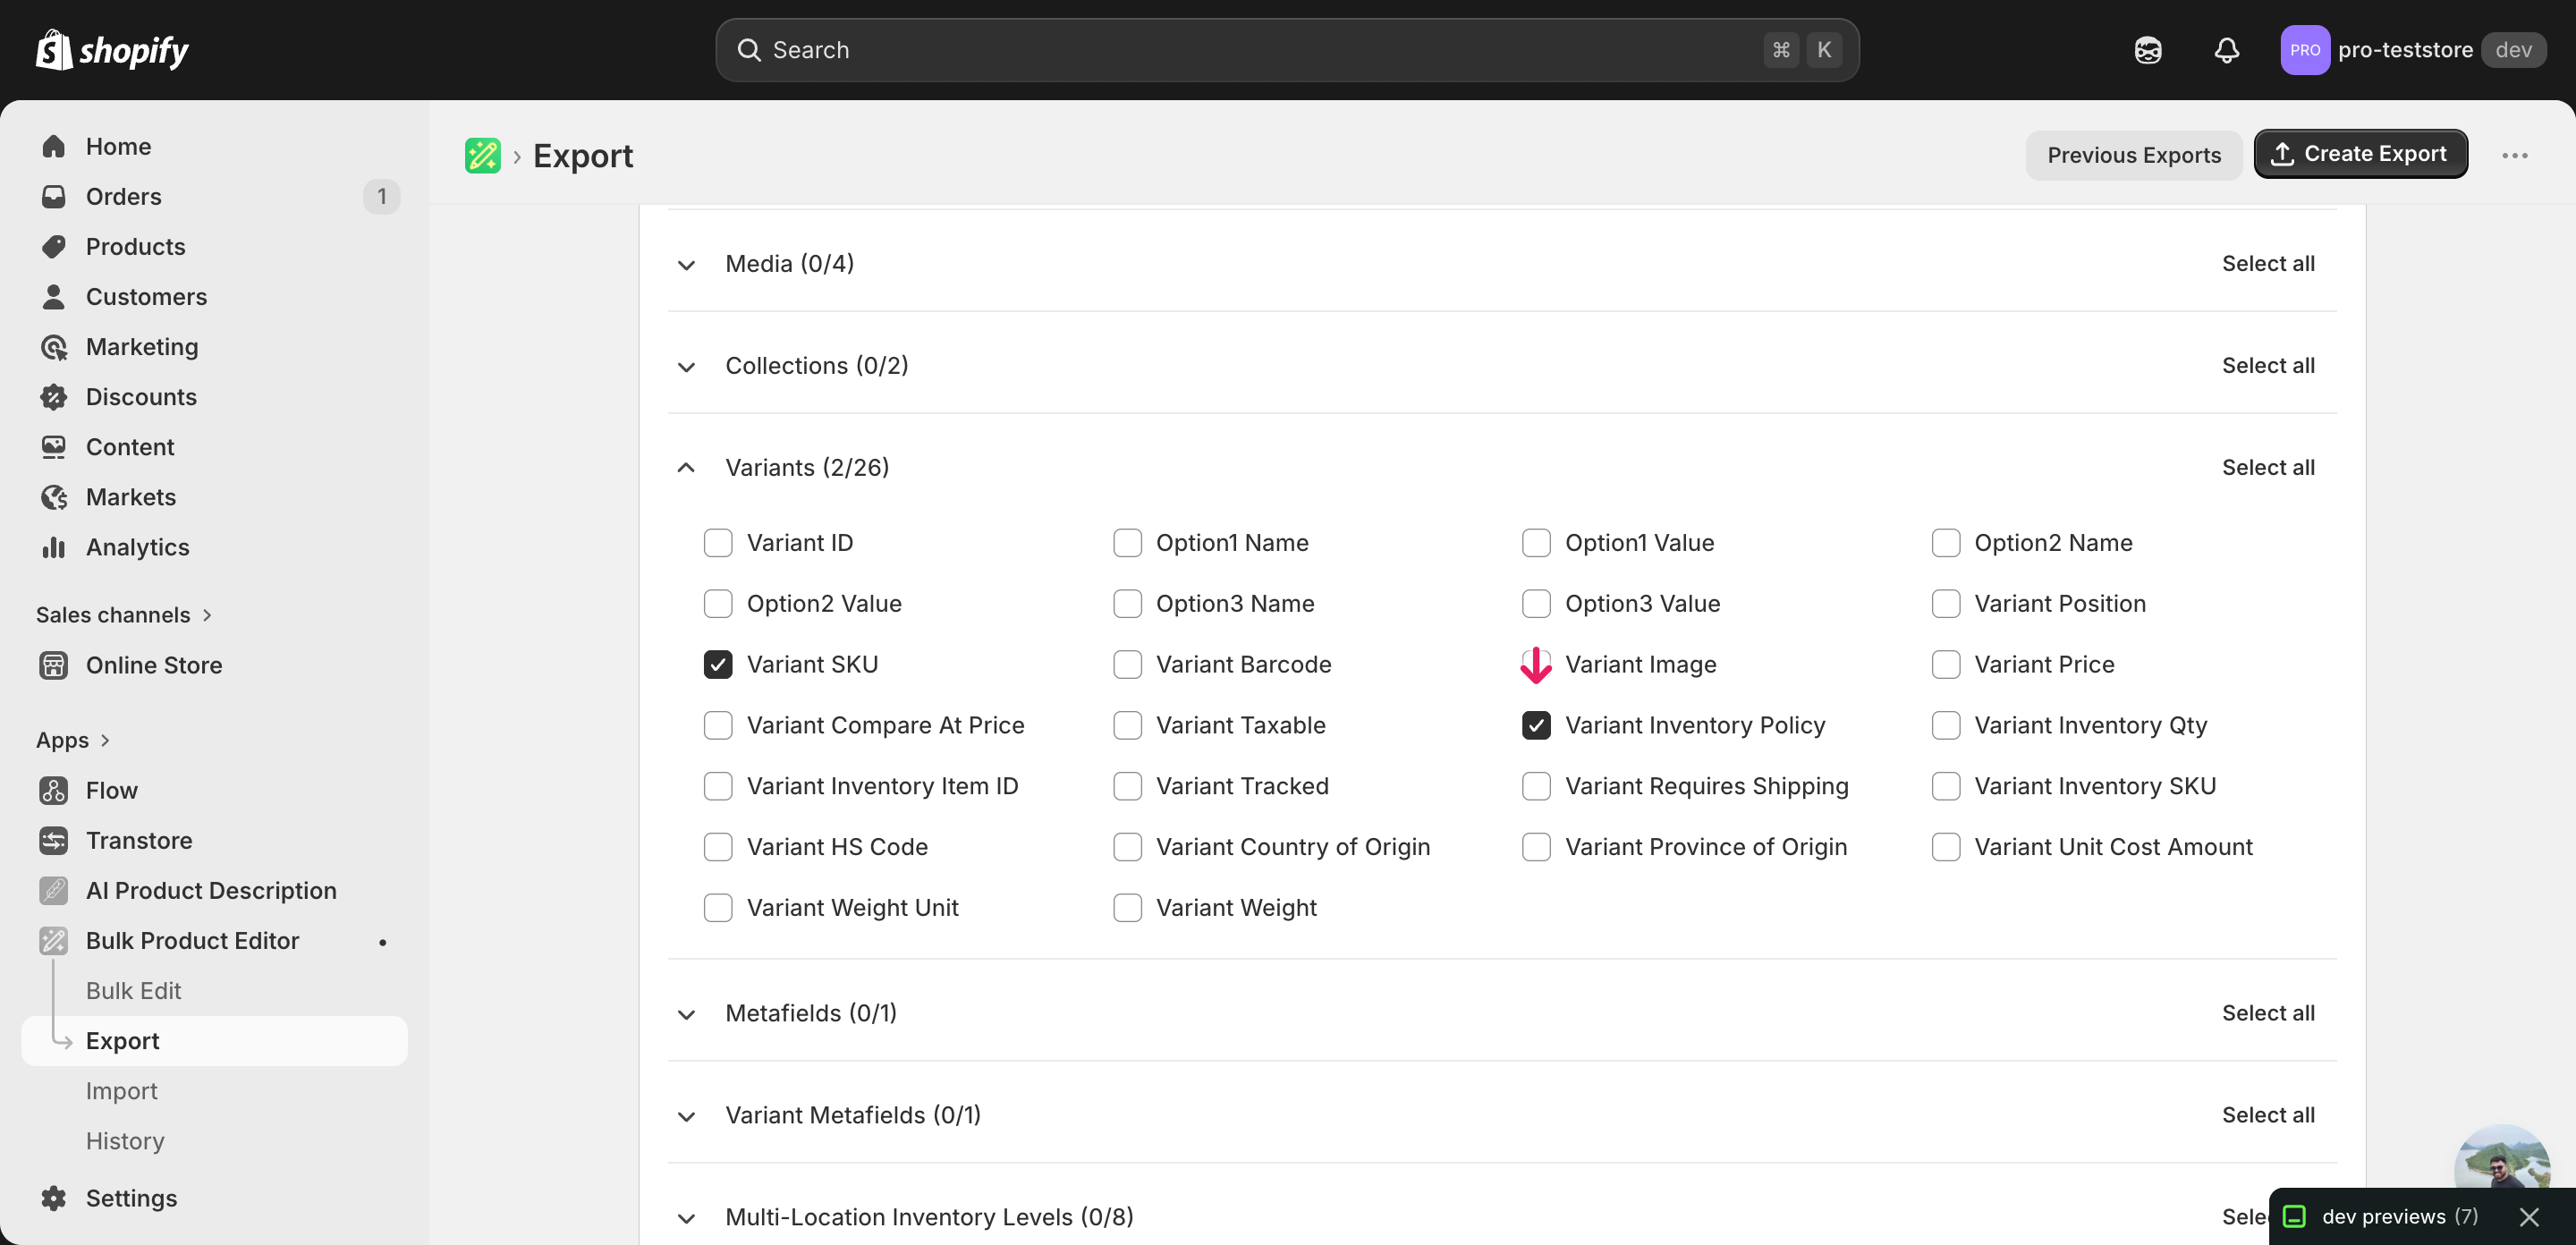
Pick the right columns
- Handle — the unique product identifier the importer uses to match each row back to the right product.
- Variant SKU — the per-variant identifier. EditEngine pairs Handle and Variant SKU to land each edit on the exact variant, so leave both columns untouched.
- Variant Inventory Policy — the column you'll edit. Expand the Variants group and tick Variant Inventory Policy — its value is
continuewhen overselling is allowed anddenywhen the variant should block sales at zero stock.
When the export finishes, click Download. You will get one row per variant: a product with five variants shows up as five rows, and the rows after the first leave most product-level columns blank — that's expected, and the importer matches them back via Handle plus Variant SKU.
New to exporting? This guide assumes you know how to run an export and focuses only on the columns and edit unique to this workflow.
Step 2 — Bulk update Shopify inventory policy (continue / deny) per variant in your spreadsheet
Open the downloaded CSV in Excel or Google Sheets. The Variant Inventory Policy column holds the current setting for each variant — either continue (keep selling at zero) or deny (block sales at zero).
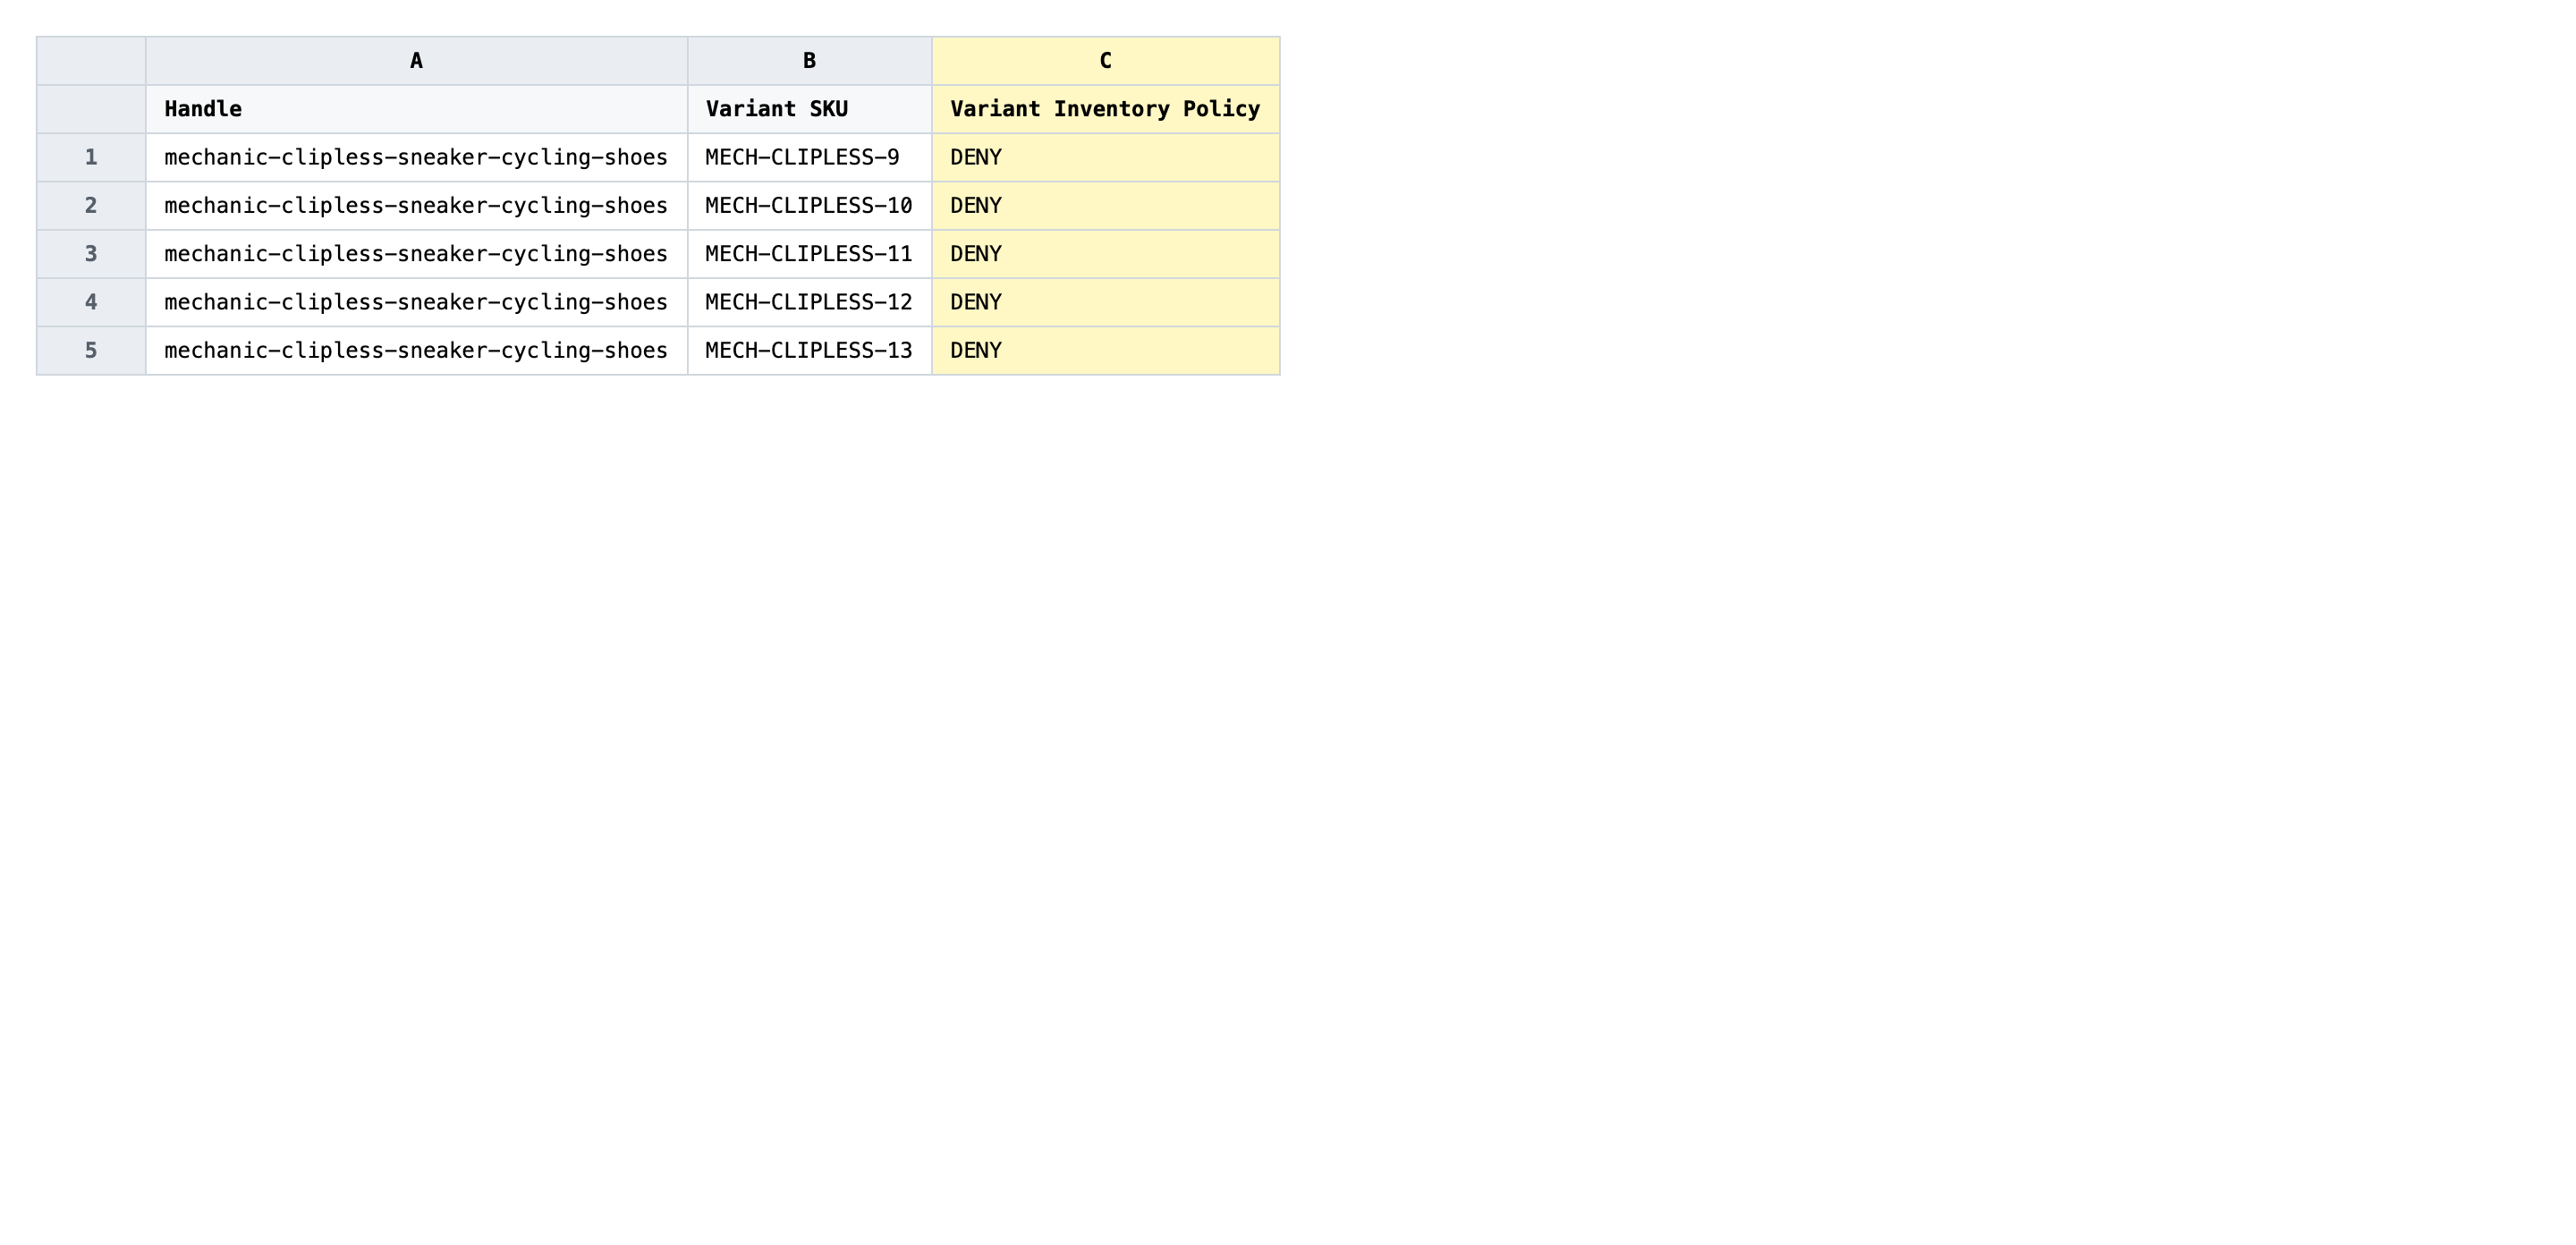
Now decide which way each variant should go. Type continue in the Variant Inventory Policy cell for SKUs that should remain buyable when stock runs out (preorder, made-to-order, dropship). Type deny for SKUs that should stop selling the moment available stock hits zero. Those are the only two values Shopify accepts — anything else is rejected or silently ignored. Use a spreadsheet filter or find-and-replace to flip large groups in one pass.
- ✅
continue - ❌
yes, allow, true, backorder, or leaving the cell blank — none of those map to a Shopify policy and the row will be ignored or rejected
Leave every other column exactly as exported. Do not edit Handle or Variant SKU — together they are the matching key, and changing either points the row at the wrong variant or fails the match entirely. If you only want to flip a subset of variants, that's fine: rows you don't change still need their Variant Inventory Policy value to round-trip unchanged, so don't strip the column or clear cells you didn't mean to touch.
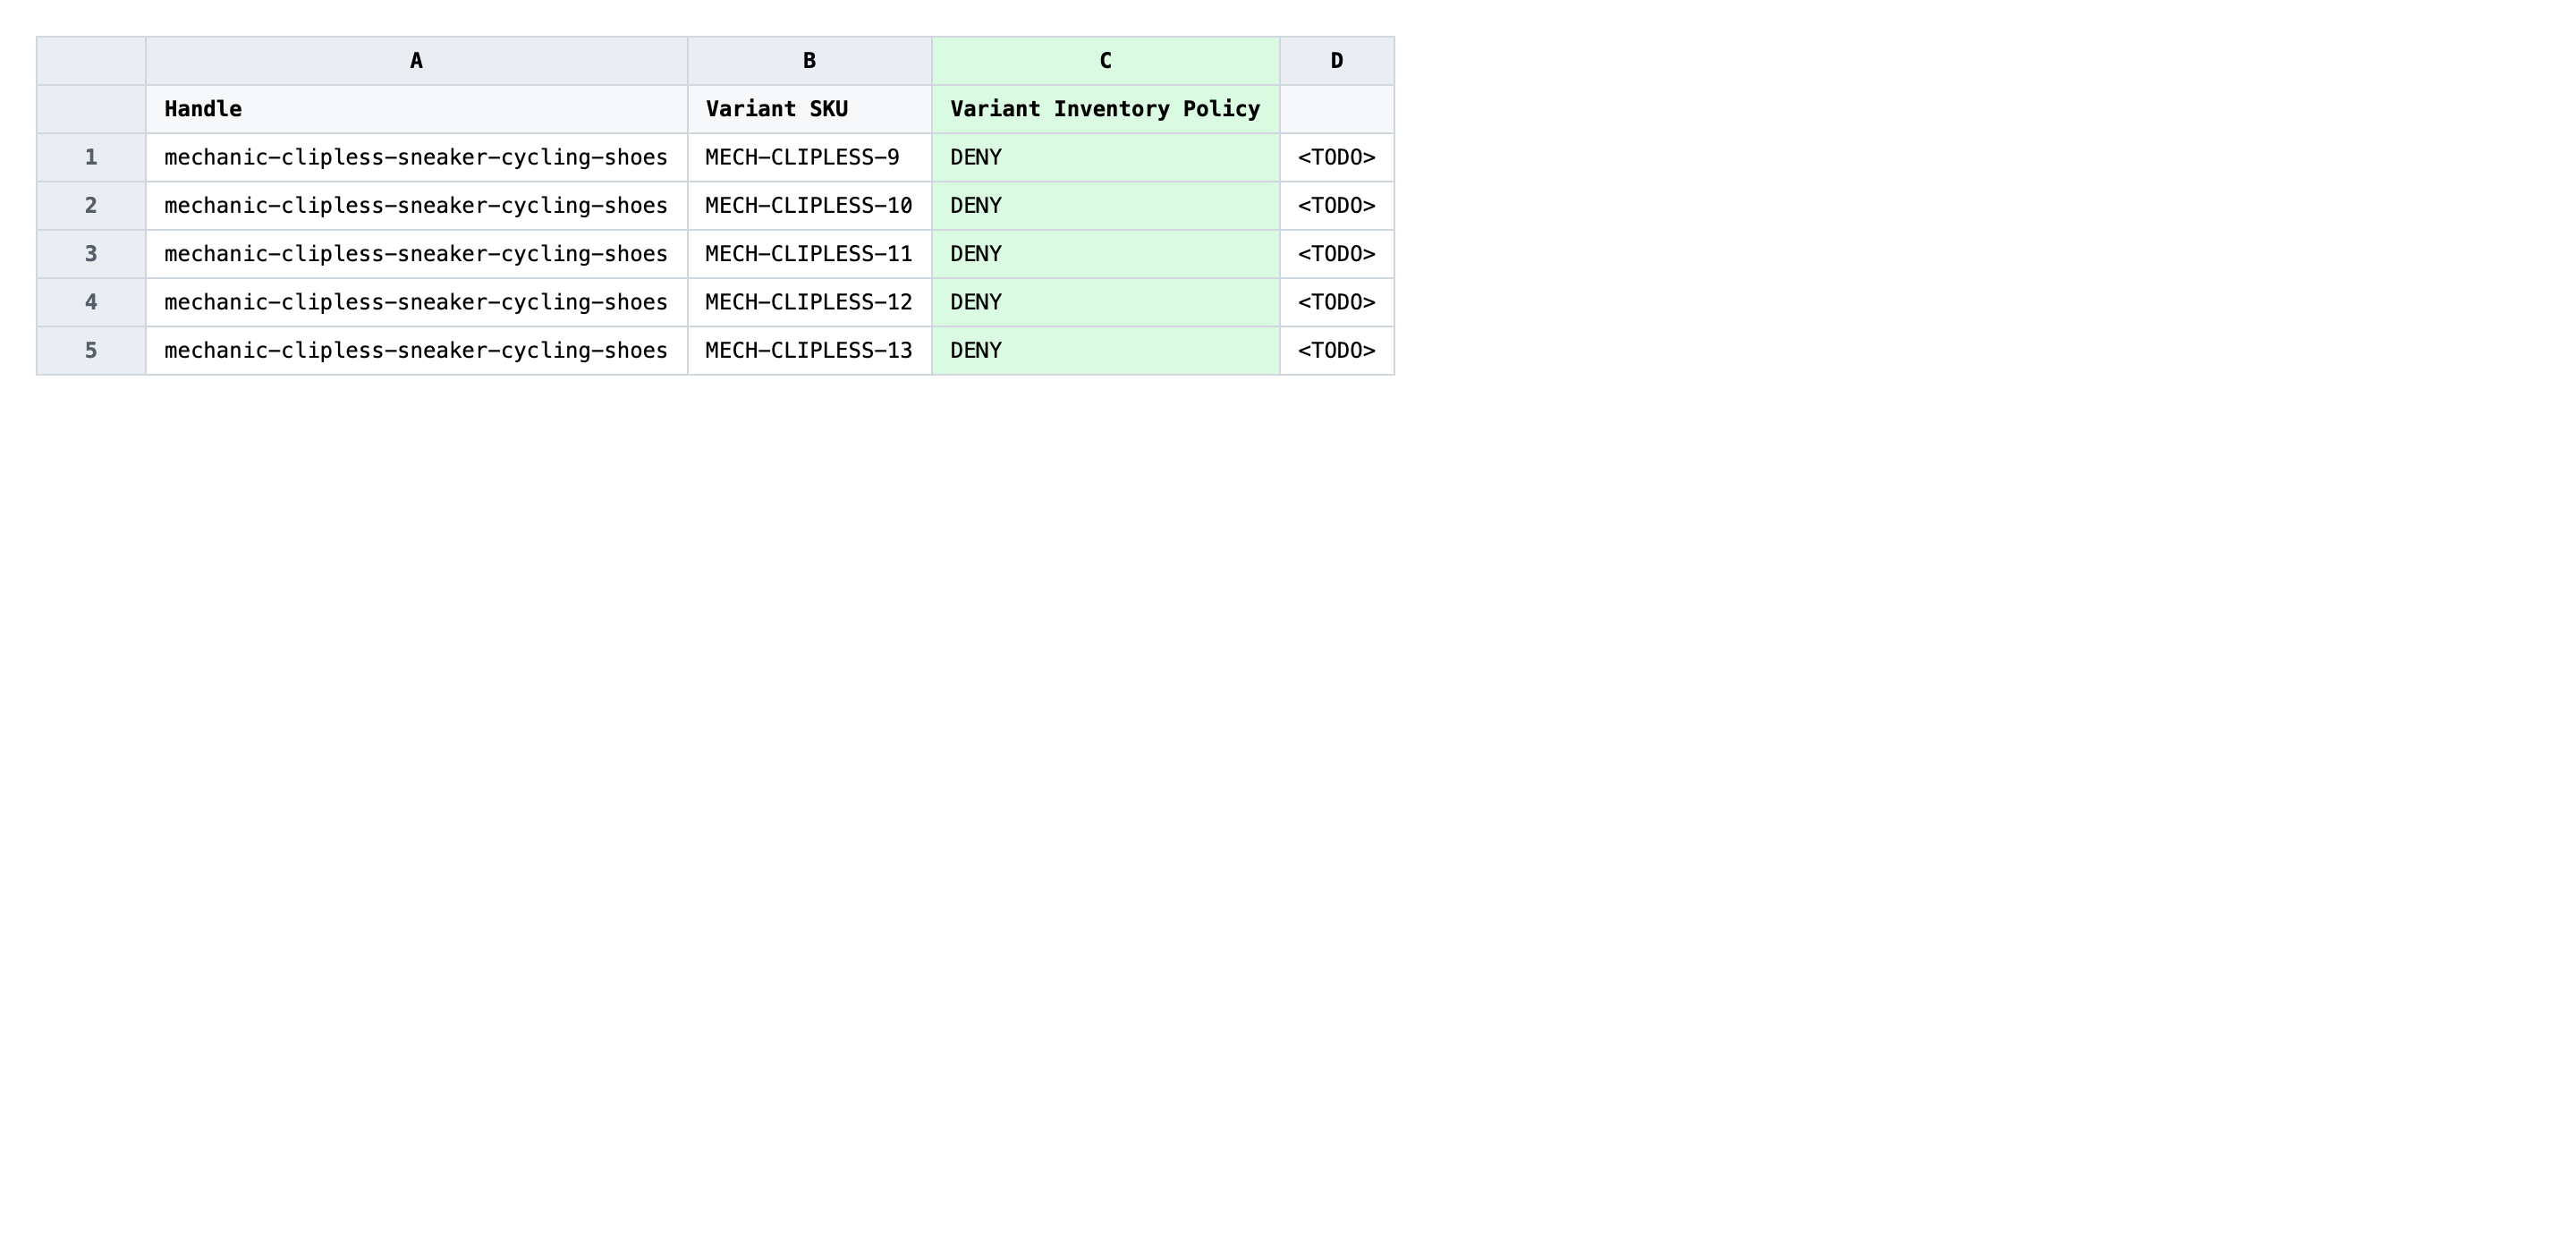
Save the file as CSV when you're done, and keep the original export handy in case you want to revert.
Tip: Inventory policy only kicks in when Shopify is actually tracking the variant. If Variant Inventory Tracker is blank, the storefront treats the variant as always available regardless of whether the policy says
continueordeny— so check the tracker column first if adenysetting doesn't seem to be holding.
Step 3 — Import the edited file back to Shopify
Open EditEngine → Import and select Advanced import. Then upload the file you just edited.
EditEngine parses the file and shows a mapping summary. In the Headers panel, confirm that Variant Inventory Policy is recognized as a variant-level column and that Handle plus Variant SKU are both detected as match keys. Leave Match Products By on Auto-detect and Default Command on Merge so existing variants are updated rather than recreated.
Note: This advanced import does not have a dry-run toggle. Flipping the policy is a setting change rather than a destructive one — no stock numbers or orders are touched — but you are still changing whether customers can or can't buy a variant at zero stock. Run a first import with three or four variants, open one in the Shopify admin and confirm the When sold out radio flipped the way you expected, then come back and import the full file.
Click Start Import and wait for the job to finish — a small file takes seconds, larger catalogs a couple of minutes. When it completes, EditEngine shows a per-row summary.
Download the results CSV. It lists every row with a pass/fail status — that file is your proof the change went through, and the new values are now live in your Shopify admin.
Tips and troubleshooting
Don't change Handle or Variant SKU while you're flipping the policy. EditEngine matches each row to its variant using Handle plus Variant SKU together. If you renumber, reformat, or even trim trailing whitespace from an SKU in the same pass, the importer either applies the policy to the wrong variant or fails the match outright. Do SKU edits as a separate import, then export again and update Variant Inventory Policy on the fresh file.
continue and deny are the only two values — nothing else applies. Shopify recognizes the literal strings continue and deny in Variant Inventory Policy. Common guesses like yes, no, allow, block, true, or false are silently dropped, and a blank cell is treated as no change rather than as a deny. If a sales channel rule depends on this field, that silent drop is worse than an error — eyeball the column with a spreadsheet filter before you import.
Inventory policy only matters when tracking is on. If Variant Inventory Tracker is blank, Shopify treats the variant as infinitely available no matter what Variant Inventory Policy says. So a deny setting on an untracked variant looks broken — it never blocks sales because there's no stock counter for it to compare against. Flip tracking on first (see the related track-quantity tutorial), then come back and run this policy update.
Test on a handful of variants before flipping the whole catalog. Because the import has no dry-run, the safest pattern is a two-stage rollout: stage one is three or four rows you can spot-check in the Shopify admin afterwards, stage two is the rest. That catches a renamed header, an accidental column deletion, or a typo like continuee before any of those issues touch a thousand variants.
Frequently asked questions
How do I bulk update inventory policy (continue / deny) in Shopify?
Export your variants from EditEngine with the Variant Inventory Policy column, set each cell to continue to keep selling at zero or deny to block the sale, then import the file back through Advanced import. That round-trip is the cleanest way to bulk update Shopify inventory policy (continue / deny) per variant without opening each product in the admin.
Can I edit Shopify inventory policy (continue / deny) in a spreadsheet?
Yes. Shopify exposes the setting as the Variant Inventory Policy column in its CSV format, and EditEngine reads and writes that same column. Open the export in Excel or Google Sheets, change one cell per variant, and reimport — that is the bulk edit Shopify inventory policy (continue / deny) workflow.
How long does a bulk inventory policy (continue / deny) import take in Shopify?
A few hundred variants finish in under a minute, and several thousand typically complete in two or three minutes. EditEngine streams the file row by row, so a bulk update of Shopify inventory policy (continue / deny) per variant scales without timing out and the results CSV reports the exact duration.
What format does Shopify accept for inventory policy (continue / deny) imports?
A CSV or XLSX with a Handle column to match the product, a Variant SKU column to identify the specific variant, and a Variant Inventory Policy column holding either continue or deny. EditEngine's Advanced import reads this Shopify inventory policy (continue / deny) CSV format directly.
Can I undo a bulk Shopify inventory policy (continue / deny) update?
There is no one-click undo, but the round-trip is its own safety net: keep the original export, and to revert just reimport that unedited file. Because the bulk update of Shopify inventory policy (continue / deny) only flips a setting, no stock counts or orders are touched when you reverse it.
Related tutorials
- How to Bulk Toggle Shopify Requires Shipping Per Variant
- How to Bulk Toggle Shopify Taxable Update Tax Code Per Variant
About EditEngine: EditEngine Bulk Product Editor helps Shopify merchants bulk edit, bulk import, and bulk export their product catalog in minutes instead of days. Install on Shopify →