Variants & options
How to Bulk Toggle Taxable and Update Tax Code Per Variant in Shopify
Last updated
Need to bulk toggle Shopify taxable + update tax code per variant so every SKU charges the right tax at checkout? With EditEngine Bulk Product Editor, you export your variants to a spreadsheet, flip the TRUE/FALSE flag and stamp the correct tax code per row, then import the file back. Because taxable and tax code live on the variant — not the product — the spreadsheet round-trip is the right tool for this job.
What you'll learn
- Export every variant with its current taxable flag and tax code
- Toggle taxable and set the tax code per row in a spreadsheet
- Import the updated file back to Shopify and confirm every variant applied
What you'll need
- The EditEngine Bulk Product Editor app installed in your Shopify store
- At least one product with variants already in Shopify
- Tax rates configured for the regions you sell to (Settings → Taxes and duties)
- Your Avalara / Shopify tax codes ready if you plan to override the default — the Advanced import flow is required for variant-level fields
- A spreadsheet editor (Excel, Google Sheets, Numbers — anything that opens CSV)
Variant Taxable is a per-variant flag that tells Shopify whether to apply tax at checkout. Variant Tax Code is the Avalara category (or Shopify product category code) that decides which rate applies — clothing, food, digital goods, and so on. Setting both correctly across a catalog matters because the wrong combination means under- or over-charging customers in every region you sell to.
Step 1 — Export your Shopify taxable + update tax code
Open EditEngine and go to the Export page. This is where you pick the variant fields that land in your spreadsheet.
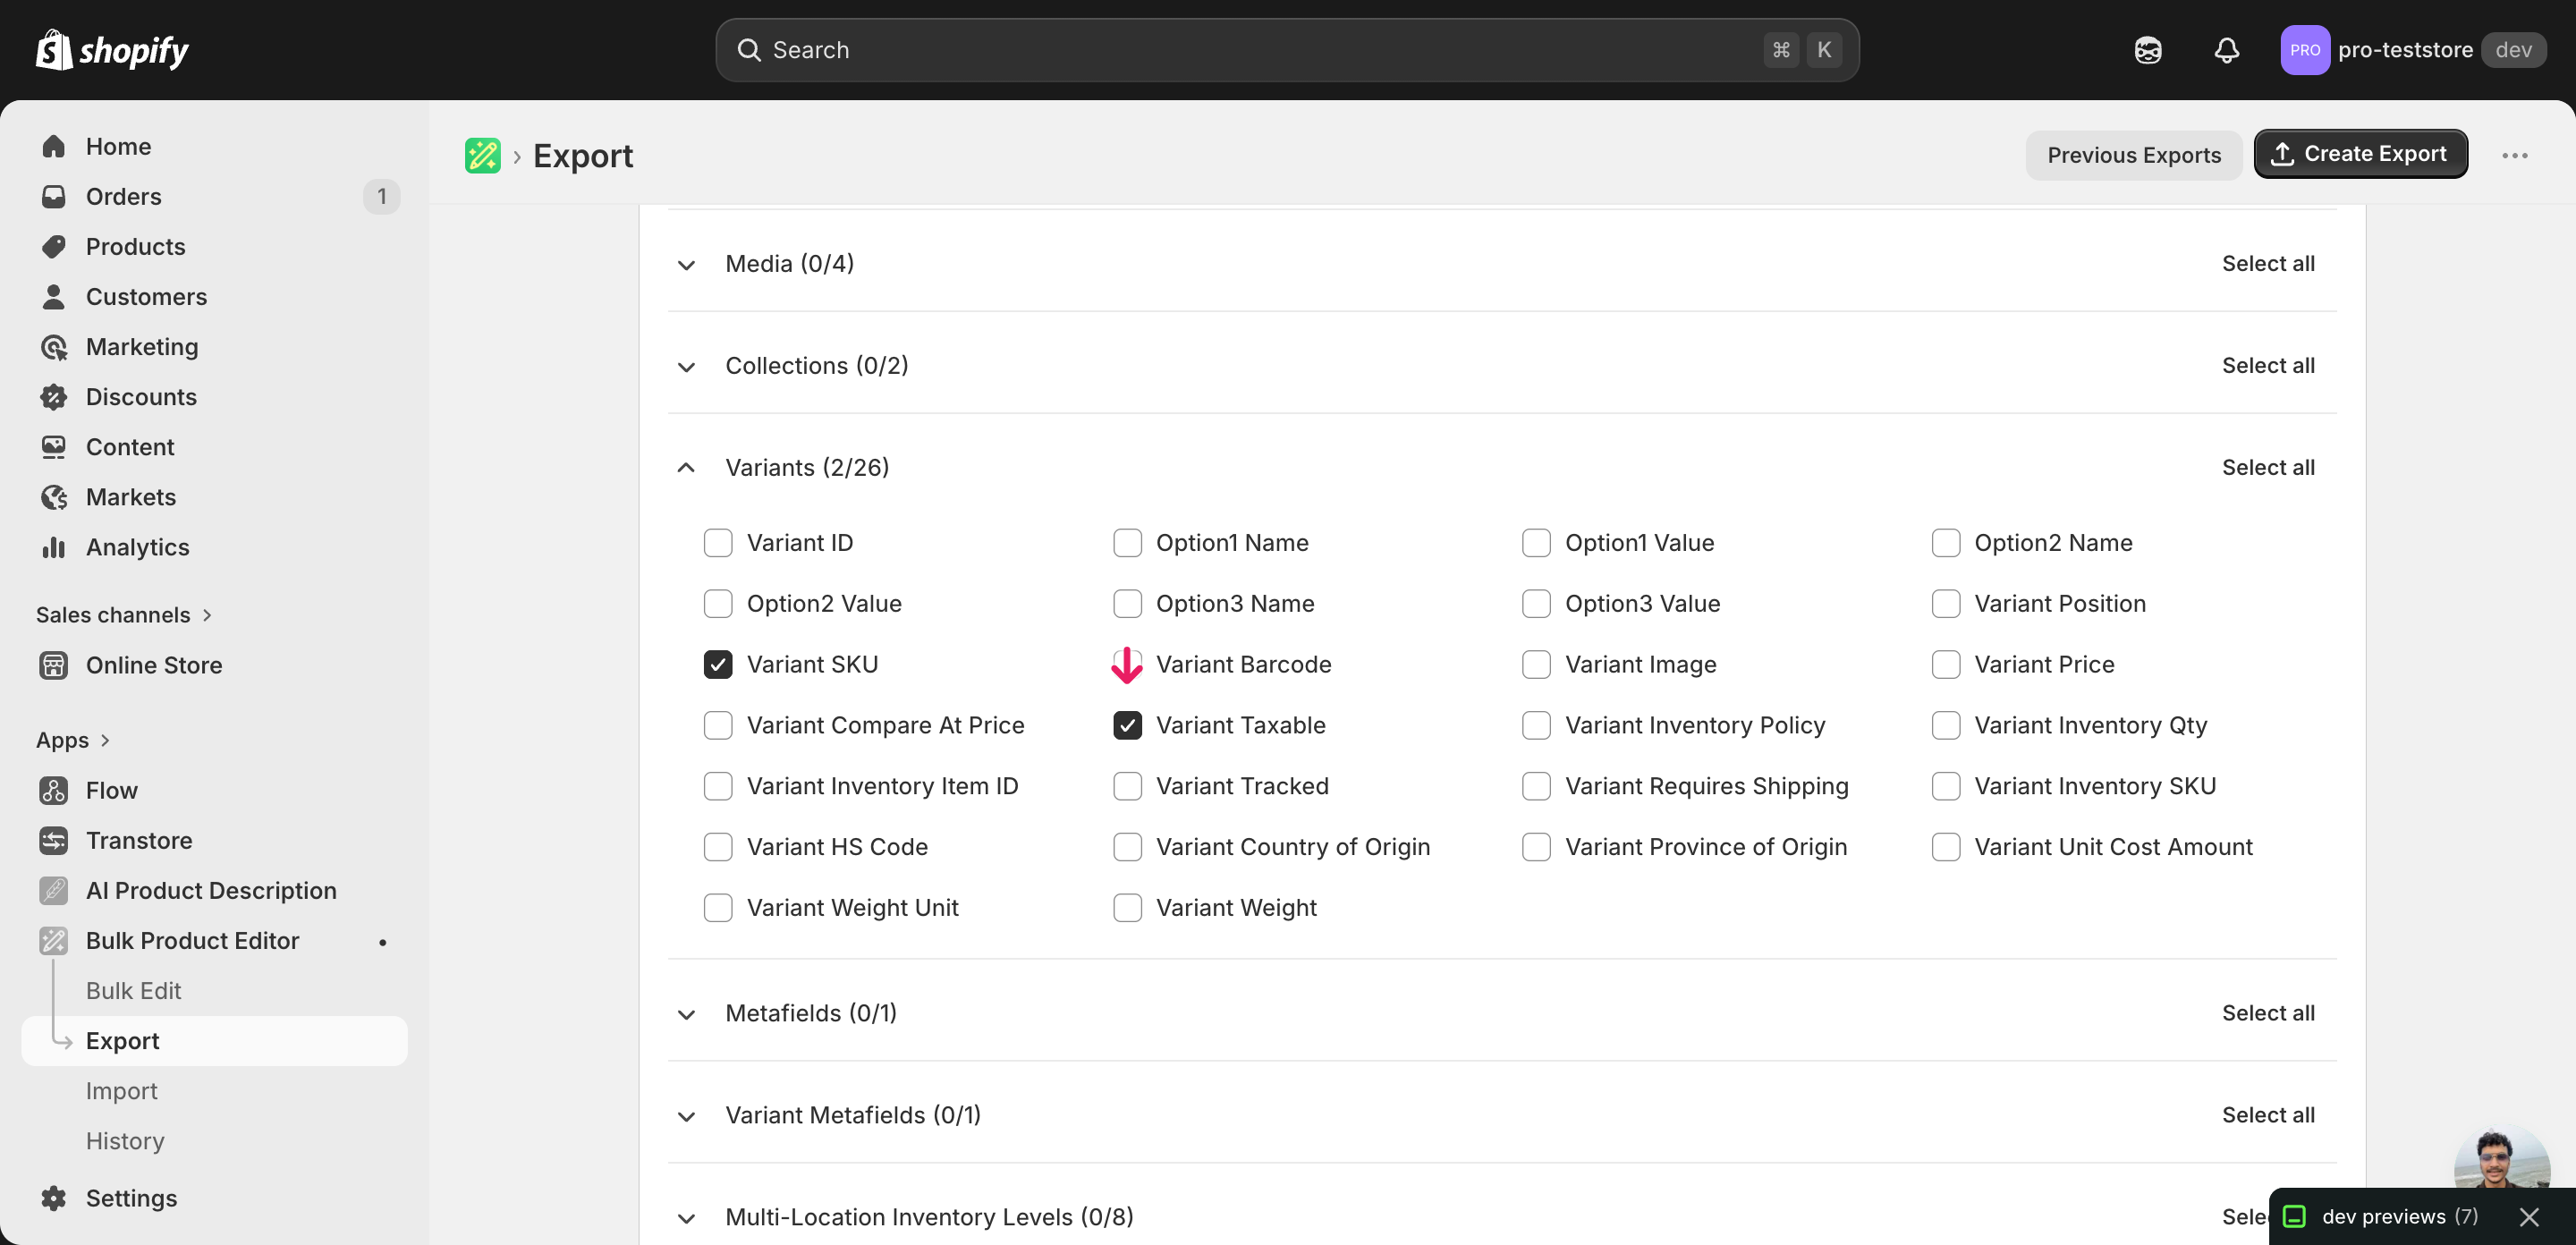
Pick the right columns
- Handle — the unique product identifier the importer uses to match each row back to the right product.
- Variant SKU — the per-variant matching key. EditEngine uses Handle + Variant SKU to find each variant, so this column has to stay intact.
- Variant Taxable — the TRUE/FALSE flag that controls whether Shopify charges tax on this variant at checkout. This is the column you'll toggle.
- Variant Tax Code — the Avalara or Shopify tax category code (for example
PC040100for clothing). Leave it blank to fall back to the product category default.
When the export completes, click Download. You'll get one row per variant: a product with three sizes exports as three rows, and the second and later rows leave Title blank — that's normal.
New to exporting? This guide assumes you know how to run an export and focuses only on the columns and edit unique to this workflow.
Step 2 — Bulk toggle Shopify taxable + update tax code per variant in your spreadsheet
Open the downloaded CSV in Excel or Google Sheets. The Variant Taxable column holds TRUE or FALSE today, and Variant Tax Code holds whatever tax category the variant currently uses (often blank).
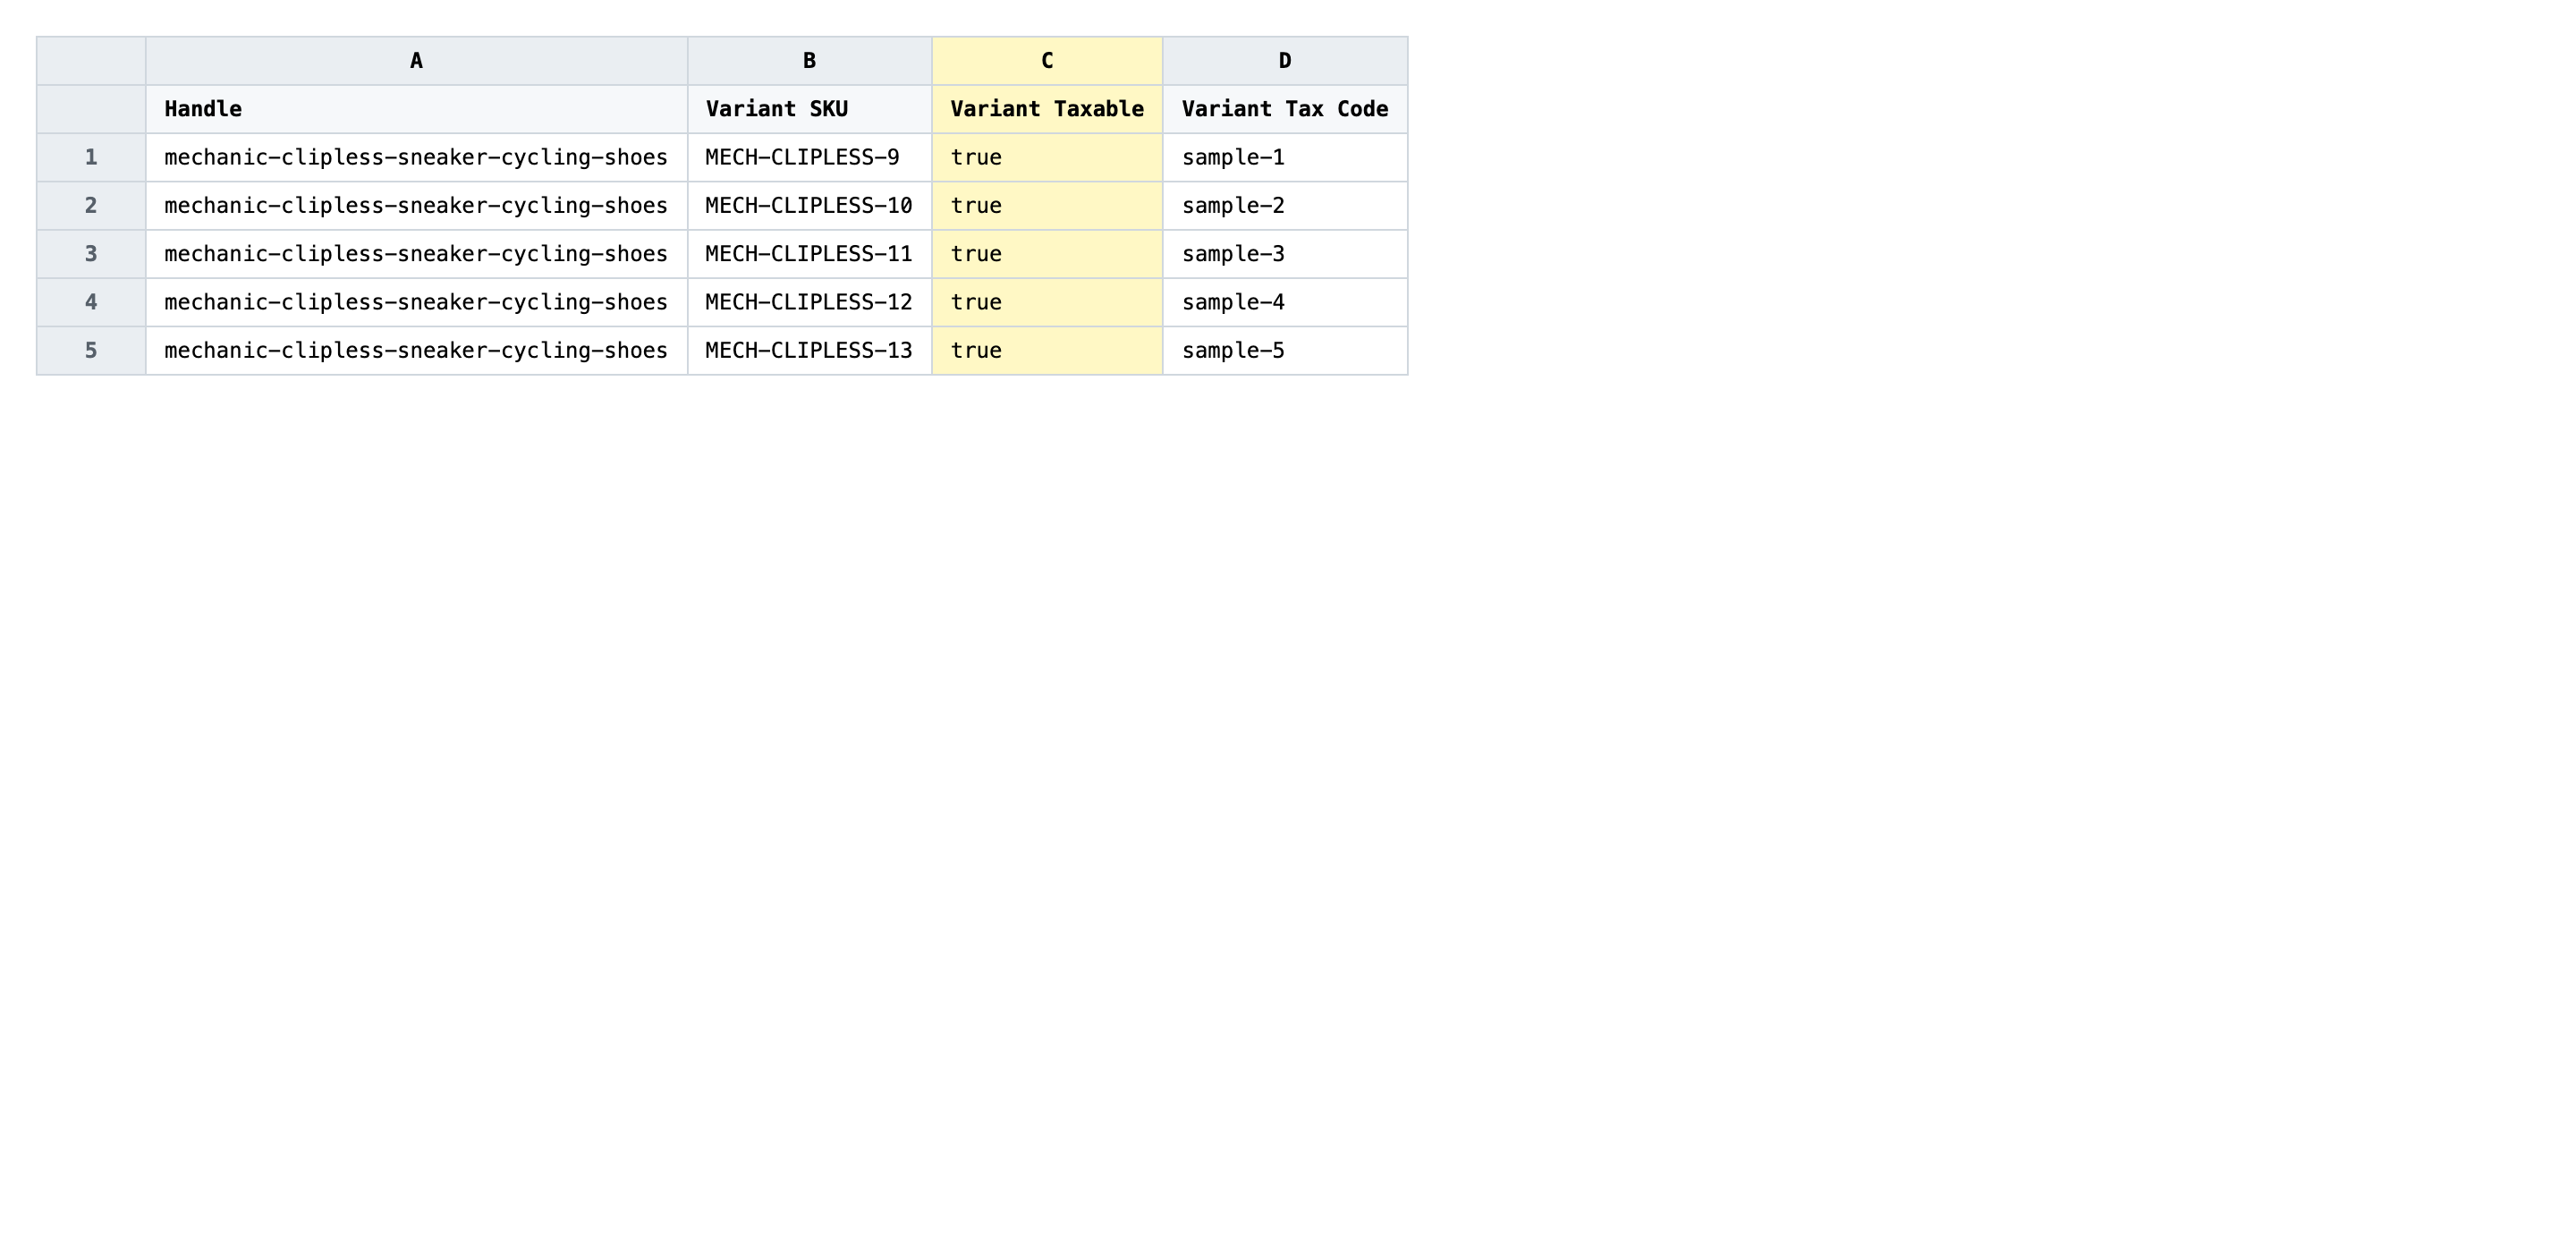
Set Variant Taxable to TRUE for variants Shopify should tax and FALSE for variants that are exempt (gift cards, certain food items, B2B-only SKUs). Then set Variant Tax Code to the right Avalara or Shopify category code for each row — for example PC040100 for general clothing or PC030302 for children's clothing. Leave the code blank if you want Shopify to use the product category default.
- ✅
Variant Taxable:FALSE/ Variant Tax Code:PC040100`` - ❌
Variant Taxable:Yes,1, ortaxable/ Variant Tax Code:clothing``
Leave Handle and Variant SKU exactly as exported — those two together are the matching key, and changing either points the row at a different variant (or none at all). Don't paste a free-text label like clothing into Variant Tax Code; Shopify only accepts the official category codes. Rows where Variant SKU is blank are usually products without variants — set those at the product level instead.
Save the file as CSV when you're done, and keep the original export handy in case you want to revert.
Tip: Taxable and tax code are independent. A variant can be
Taxable: TRUEwith no tax code (Shopify falls back to the product category) orTaxable: FALSEwith a code set — the FALSE wins and no tax is charged regardless of the code.
Step 3 — Import the edited file back to Shopify
Open EditEngine → Import and select Advanced import. Then upload the file you just edited.
EditEngine reads the file and shows a summary. Check the Headers panel: Variant Taxable and Variant Tax Code should both appear with the VARIANT badge, which confirms the importer recognized them as variant-level fields. Leave Match Products By on Auto-detect (it'll pick Handle + Variant SKU) and Default Command on Merge so existing variant data isn't wiped.
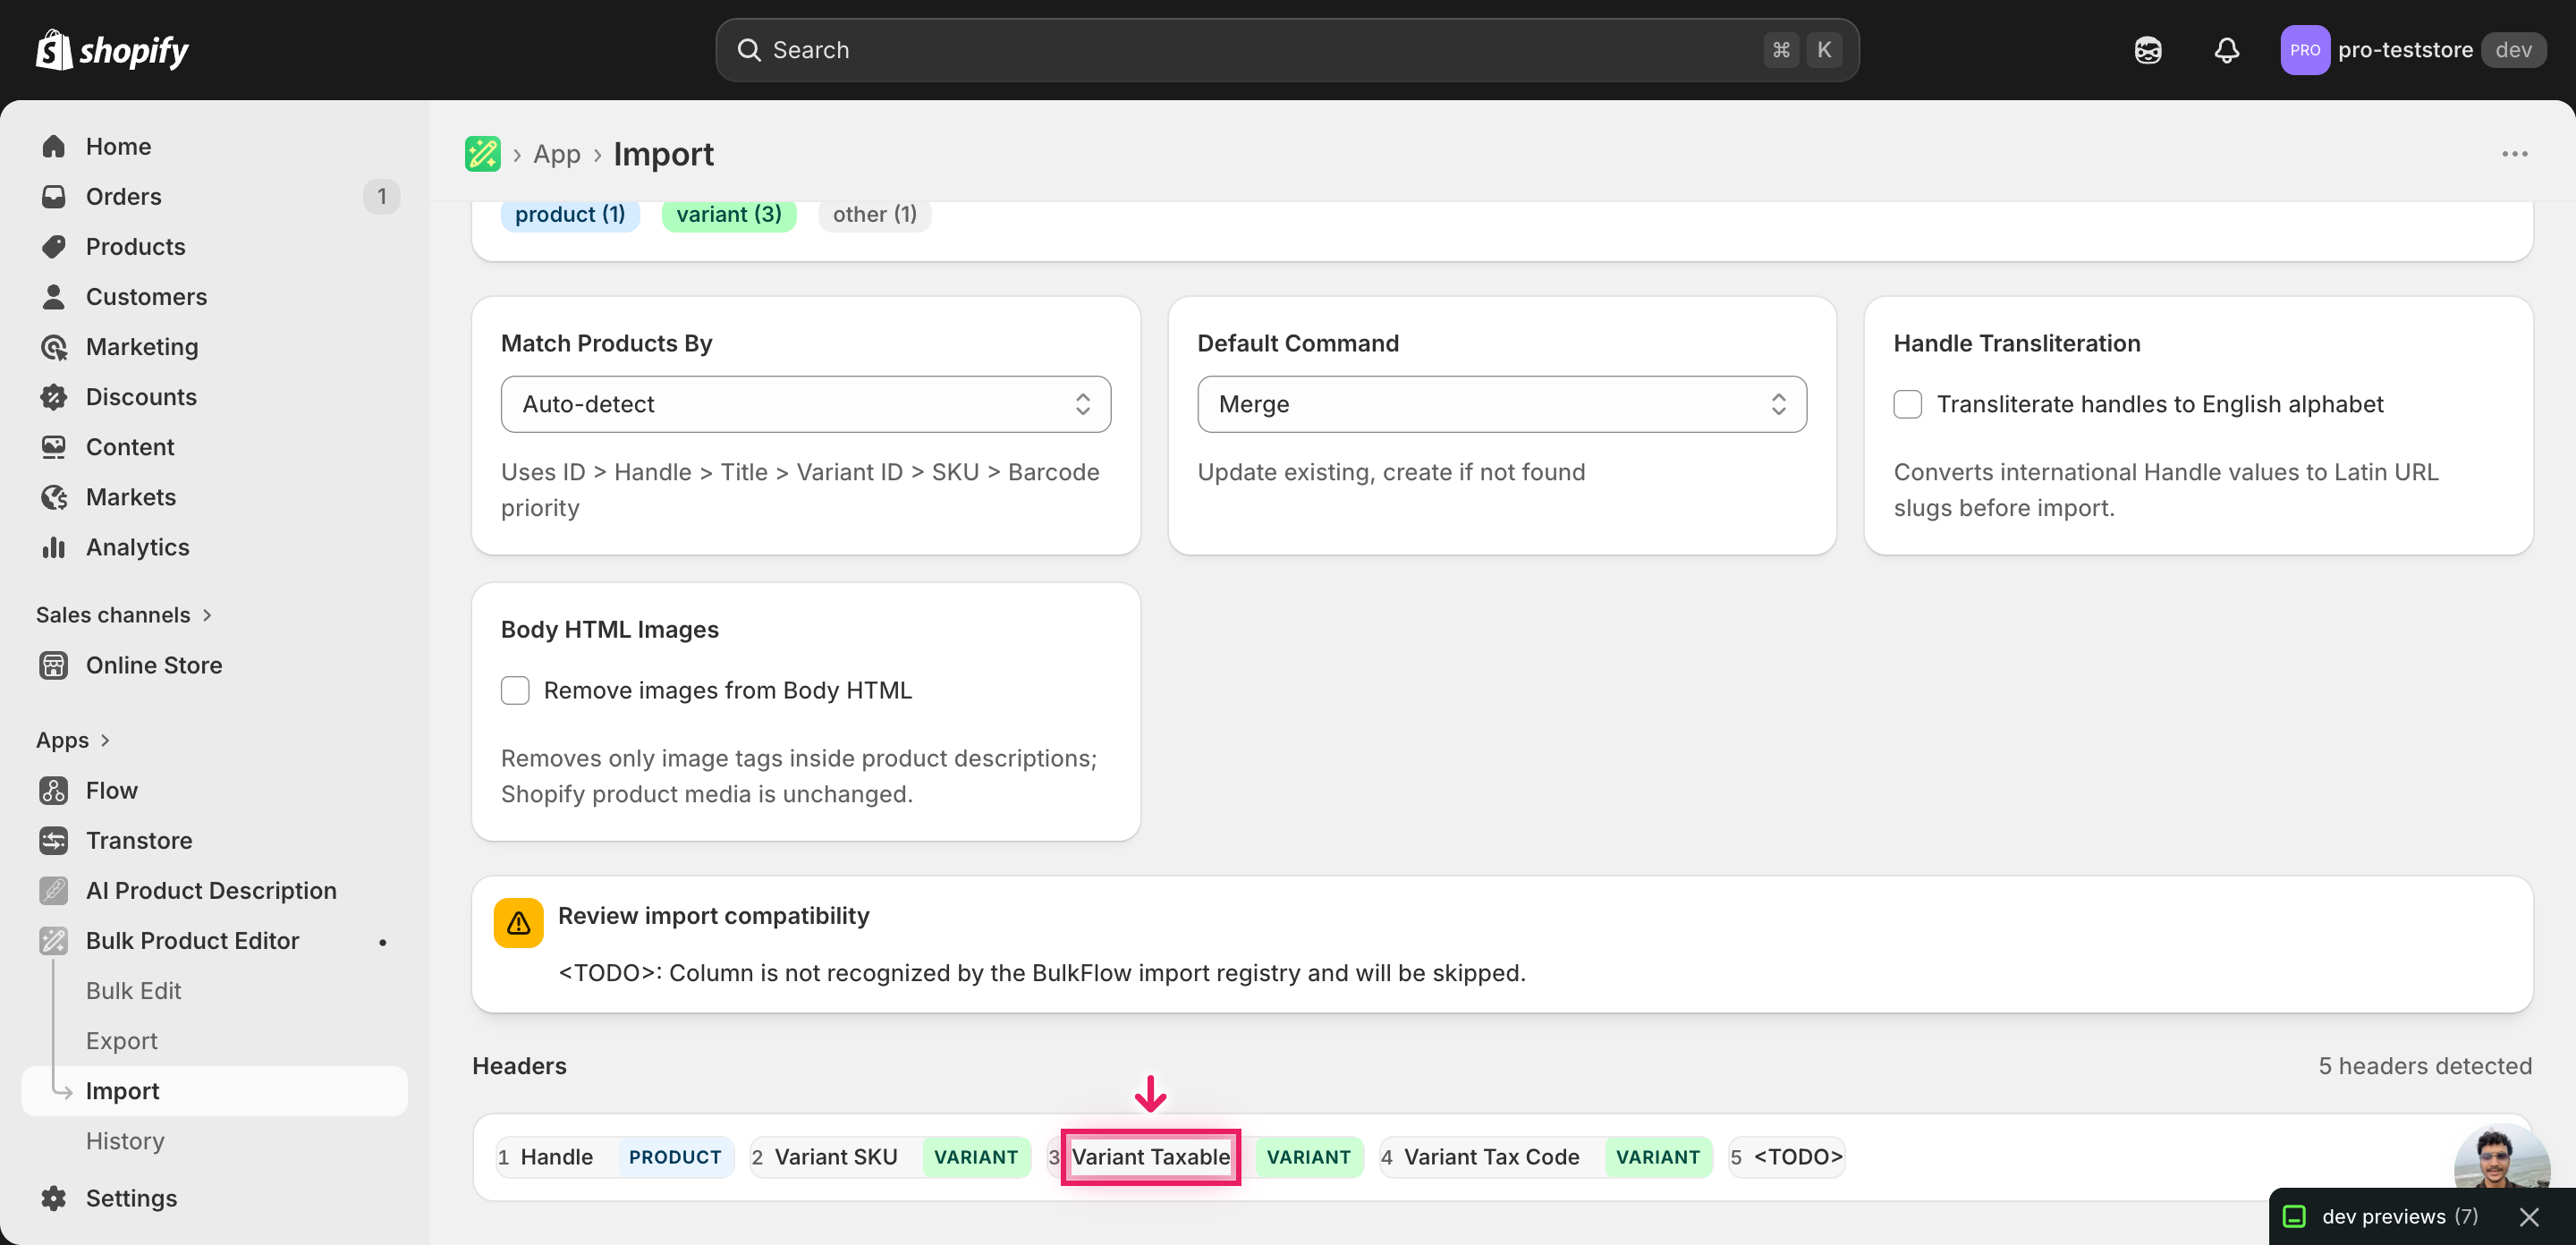
Note: The advanced import doesn't have a dry-run toggle, and a wrong tax code or flipped TRUE/FALSE will start charging (or not charging) tax on the next checkout. Run a first import with just two or three rows, open one of those variants in Shopify admin to confirm the taxable flag and tax code applied as expected, then import the rest of the file.
Click Start Import and wait for the job to finish — a small file takes seconds, larger catalogs a couple of minutes. When it completes, EditEngine shows a per-row summary.
Download the results CSV. It lists every row with a pass/fail status — that file is your proof the change went through, and the new values are now live in your Shopify admin.
Tips and troubleshooting
Don't rename or reorder Variant SKU. EditEngine matches each row to its variant by Handle + Variant SKU. Edit either column and the importer either skips the row or — worse — writes the new taxable flag and tax code onto the wrong variant. If a SKU has changed since your last export, re-export to get the current values before editing anything else.
Use TRUE/FALSE, not Yes/No or 1/0. Shopify's variant taxable field is a boolean. The importer accepts TRUE and FALSE (case-insensitive). Spreadsheets sometimes auto-format TRUE into 1 or convert it to a checkbox — paste-special as values or set the column format to plain text before saving the CSV, or you'll see mapping errors on import.
Tax codes are exact strings. Variant Tax Code accepts the official Shopify Tax / Avalara category codes (PC040100, PC030302, etc.), not friendly names. A value like clothing or apparel will either be rejected or ignored, and the variant falls back to the product category default. Pull the code list from Shopify's tax category settings before you start editing.
Test on two rows before the full catalog. Tax changes hit revenue directly — over-charging refunds itself in complaint emails, under-charging shows up in your monthly remittance. Import a two-row file, place a test order or check the variant in admin to confirm tax behaviour, and only then run the full file. The thirty seconds you spend on a sanity check saves a thirty-minute reversal later.
Frequently asked questions
How do I bulk toggle taxable + update tax code in Shopify?
Export your variants from EditEngine with the Variant Taxable and Variant Tax Code columns, edit each row in a spreadsheet, then import the file back through the advanced flow. That's how you bulk toggle Shopify taxable + update tax code per variant without clicking into every variant in the admin.
Can I edit Shopify taxable + update tax code in a spreadsheet?
Yes. EditEngine exports one row per variant with the current TRUE/FALSE taxable flag and any tax code already set. Open the file in Excel or Google Sheets, change Shopify taxable + update tax code as needed, and import it back — the Shopify admin has no native spreadsheet editor for these fields.
How long does a bulk taxable + update tax code import take in Shopify?
A few hundred variants finishes in under a minute. Catalogs in the tens of thousands typically complete in a few minutes, and EditEngine streams the file so a bulk taxable + update tax code per variant import won't time out on larger stores. The results CSV reports the exact duration.
What format does Shopify accept for taxable + update tax code imports?
A CSV (or XLSX) with a Handle column, a Variant SKU column to match each row, a Variant Taxable column with TRUE or FALSE, and a Variant Tax Code column with the Shopify or Avalara code. EditEngine's advanced import reads the Shopify taxable + update tax code format directly.
Can I undo a bulk Shopify taxable + update tax code update?
There's no one-click undo, but the workflow is its own backup. Keep the original unedited export, and to revert a bulk toggle Shopify taxable + update tax code per variant change just re-import that file. Taxable and tax code only overwrite text values, so nothing is deleted or unlinked.
Related tutorials
- How to Bulk Toggle Shopify Requires Shipping Per Variant
- How to Bulk Update Shopify Inventory Policy Continue Deny Per Variant
About EditEngine: EditEngine Bulk Product Editor helps Shopify merchants bulk edit, bulk import, and bulk export their product catalog in minutes instead of days. Install on Shopify →