Products
How to Bulk Delete Shopify Products by SKU / Handle / Barcode
Last updated
Need to bulk delete Shopify products by sku / handle / barcode without opening each product page in the admin? With EditEngine Bulk Product Editor, you export the products you want gone, mark every row with Command = DELETE in a spreadsheet, and import the file back. EditEngine matches each row by Handle, so a discontinued SKU list or a barcode-based recall becomes one import job instead of hundreds of clicks.
What you'll learn
- Export the products you want to remove with their Handle and Variant SKU
- Mark each row with the DELETE command in a spreadsheet
- Import the file back and confirm every product was removed from Shopify
What you'll need
- The EditEngine Bulk Product Editor app installed in your Shopify store
- A current backup or fresh export of the products you plan to delete — deletion in Shopify is permanent
- The Advanced import flow — the DELETE command is only honored by advanced import
- Confirmation that the products are not referenced by active orders or draft orders you still need
- A spreadsheet editor (Excel, Google Sheets, Numbers — anything that opens CSV)
Shopify's product CSV import only supports creating or updating products — it has no native way to delete them in bulk. EditEngine's advanced import adds a Command column on top of the same file format: set it to DELETE and the importer removes the matching products through Shopify's API. The match key is Handle, so any list you can resolve to handles (by SKU, by barcode, by collection) becomes a deletable file.
Step 1 — Export your Shopify products
Open EditEngine and go to the Export page. The goal here is to pull only the products you actually want to delete — nothing more.
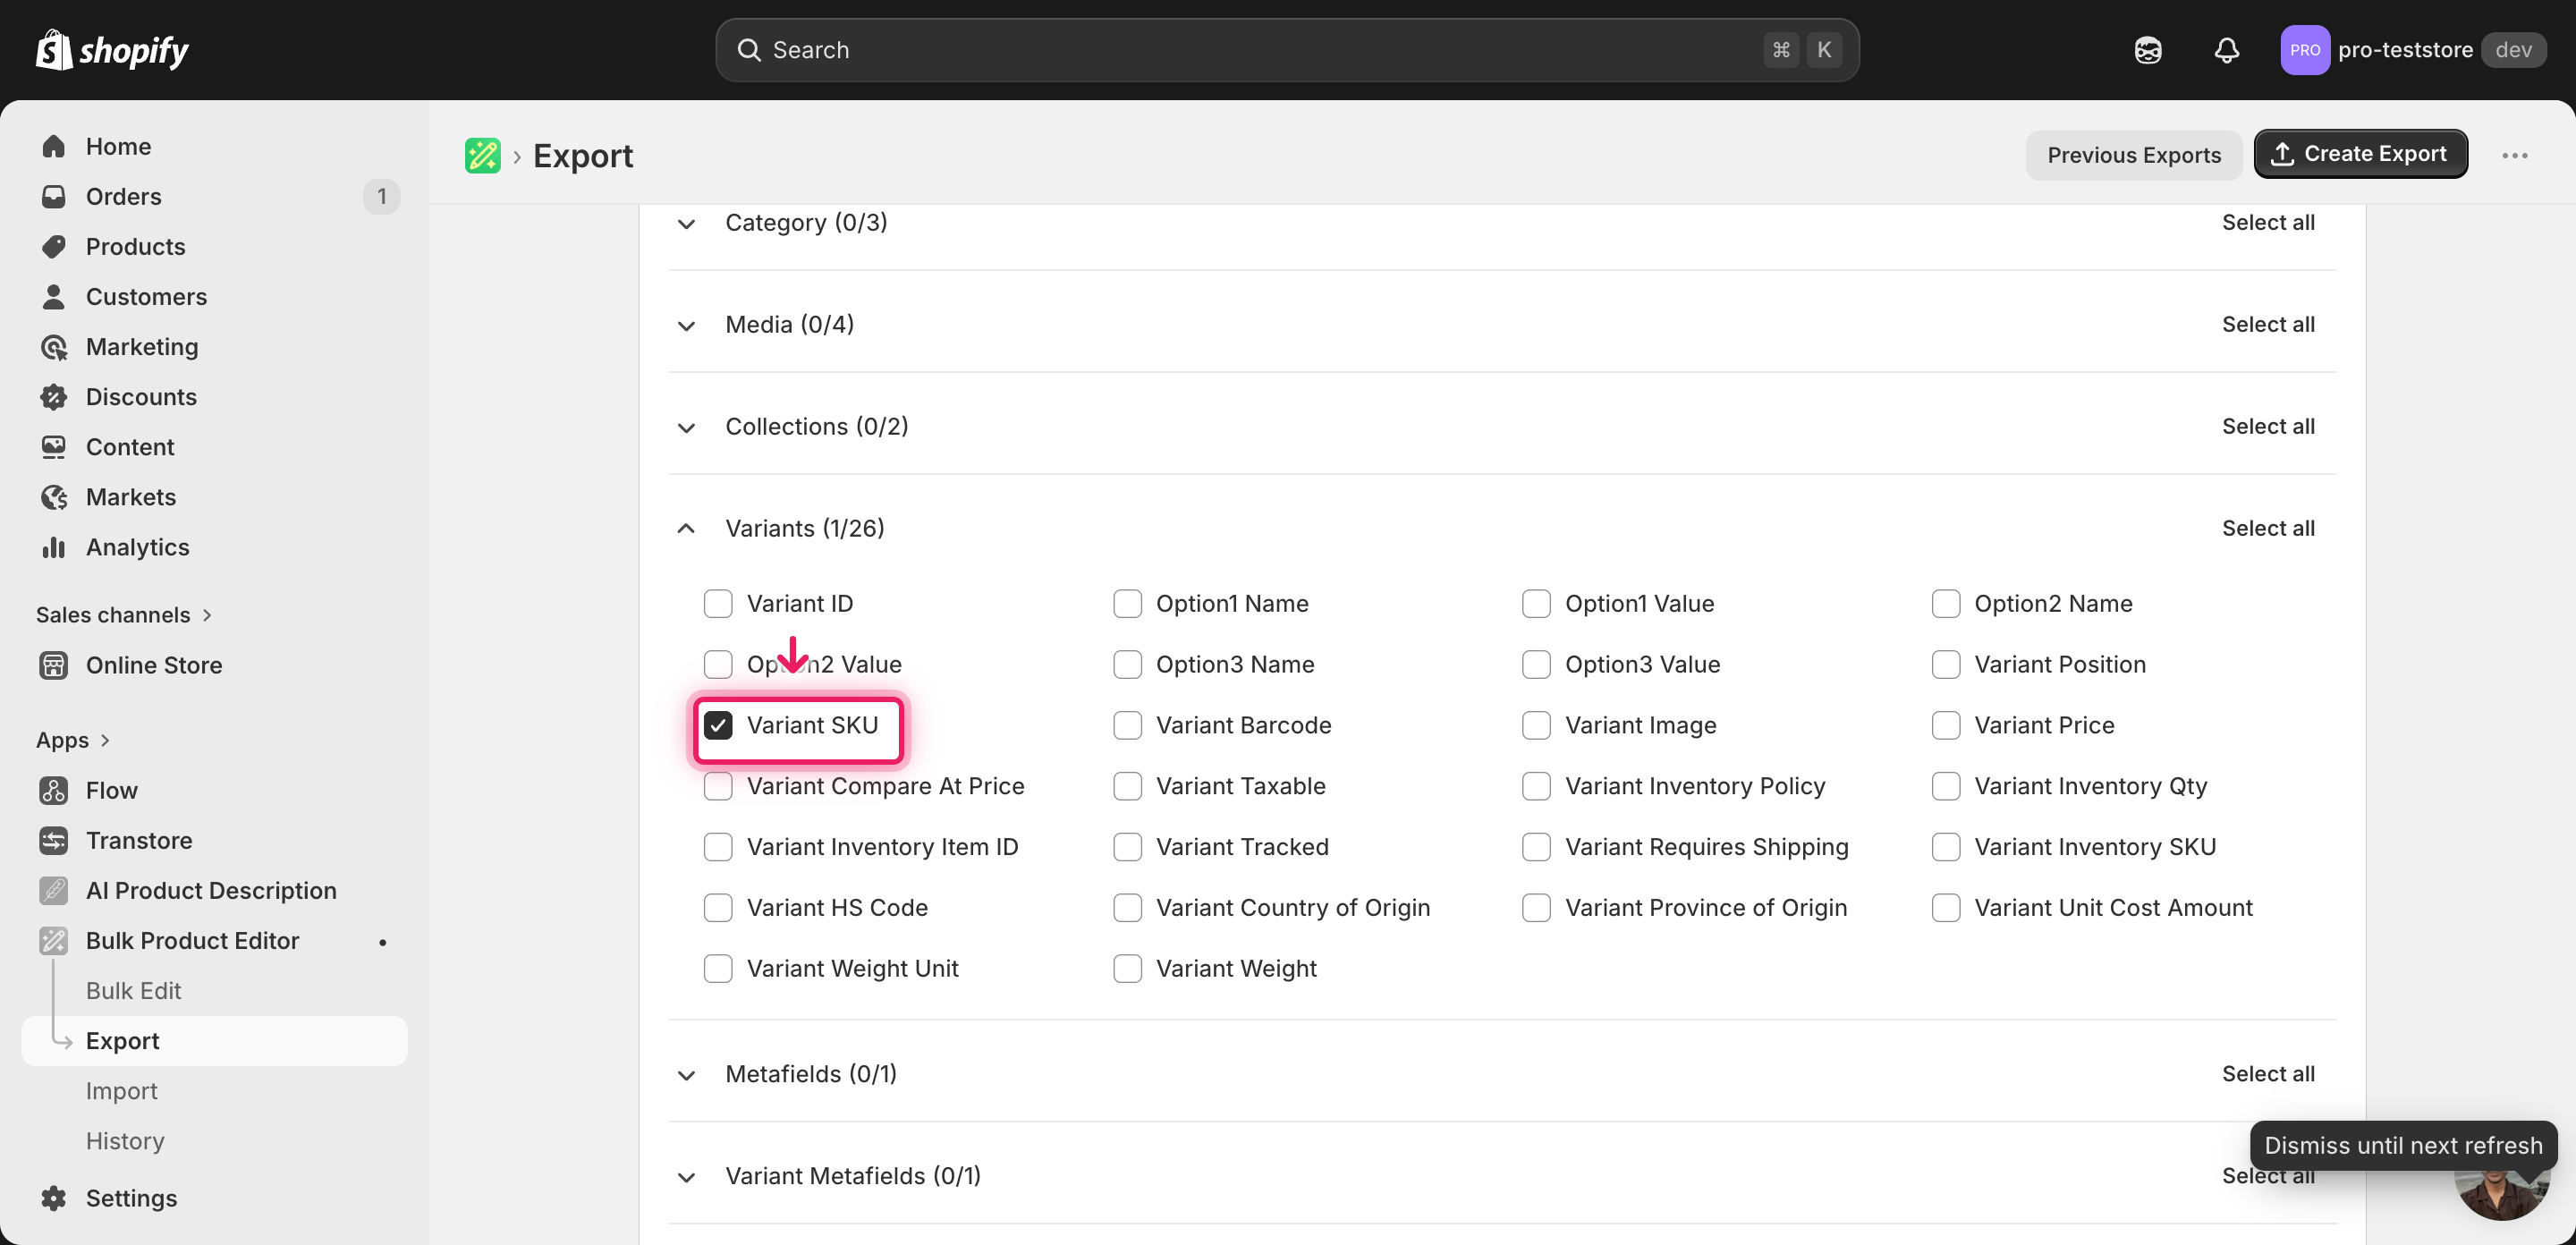
Pick the right columns
- Handle — the unique product identifier EditEngine uses to match each row back to the product Shopify will delete. This is the match key — if Handle is wrong or blank, the row is skipped.
- Variant SKU — context so you can verify you're deleting the right products. If your delete list came from a SKU report or barcode scan, this column lets you spot-check before adding the DELETE command.
- Title — optional but recommended — gives you a human-readable label for each row so you don't accidentally delete the wrong product when reviewing the file.
Use the filter on the Export page to narrow the export to exactly the products you plan to delete — by collection, vendor, status, or a SKU list. Click Download when the export finishes, and immediately save a second copy of the unedited file in a separate folder. That untouched export is the only thing standing between you and a permanent loss if the delete goes wrong.
New to exporting? This guide assumes you know how to run an export and focuses only on the columns and edit unique to this workflow.
Step 2 — Bulk delete Shopify products by SKU / handle / barcode in your spreadsheet
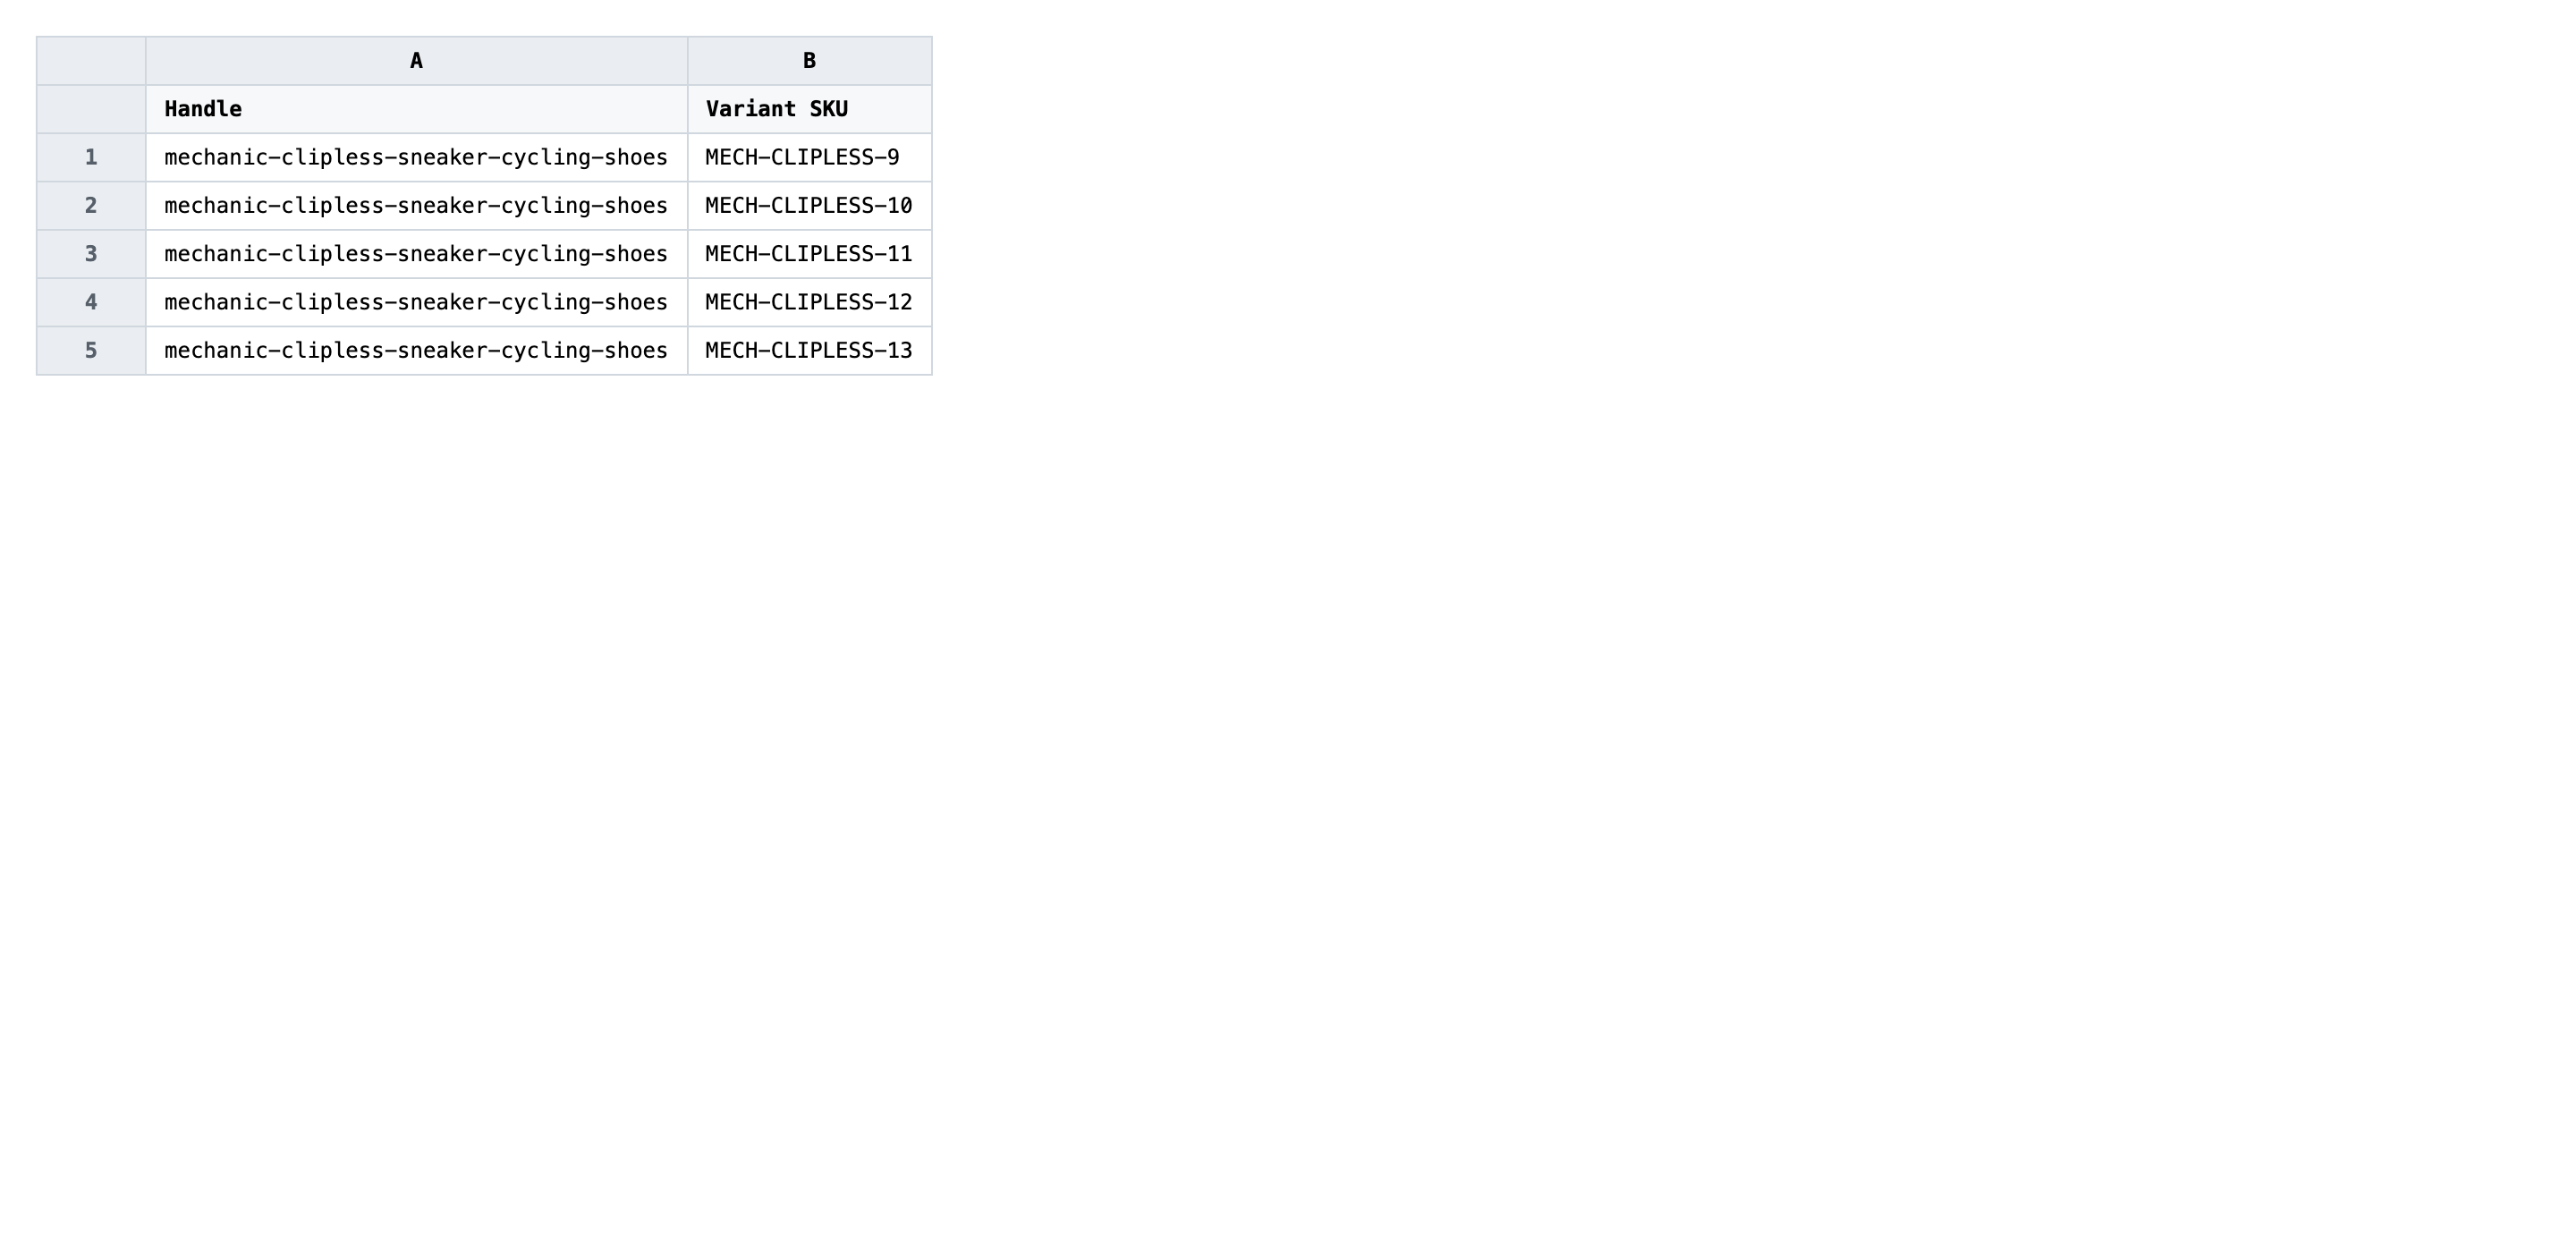
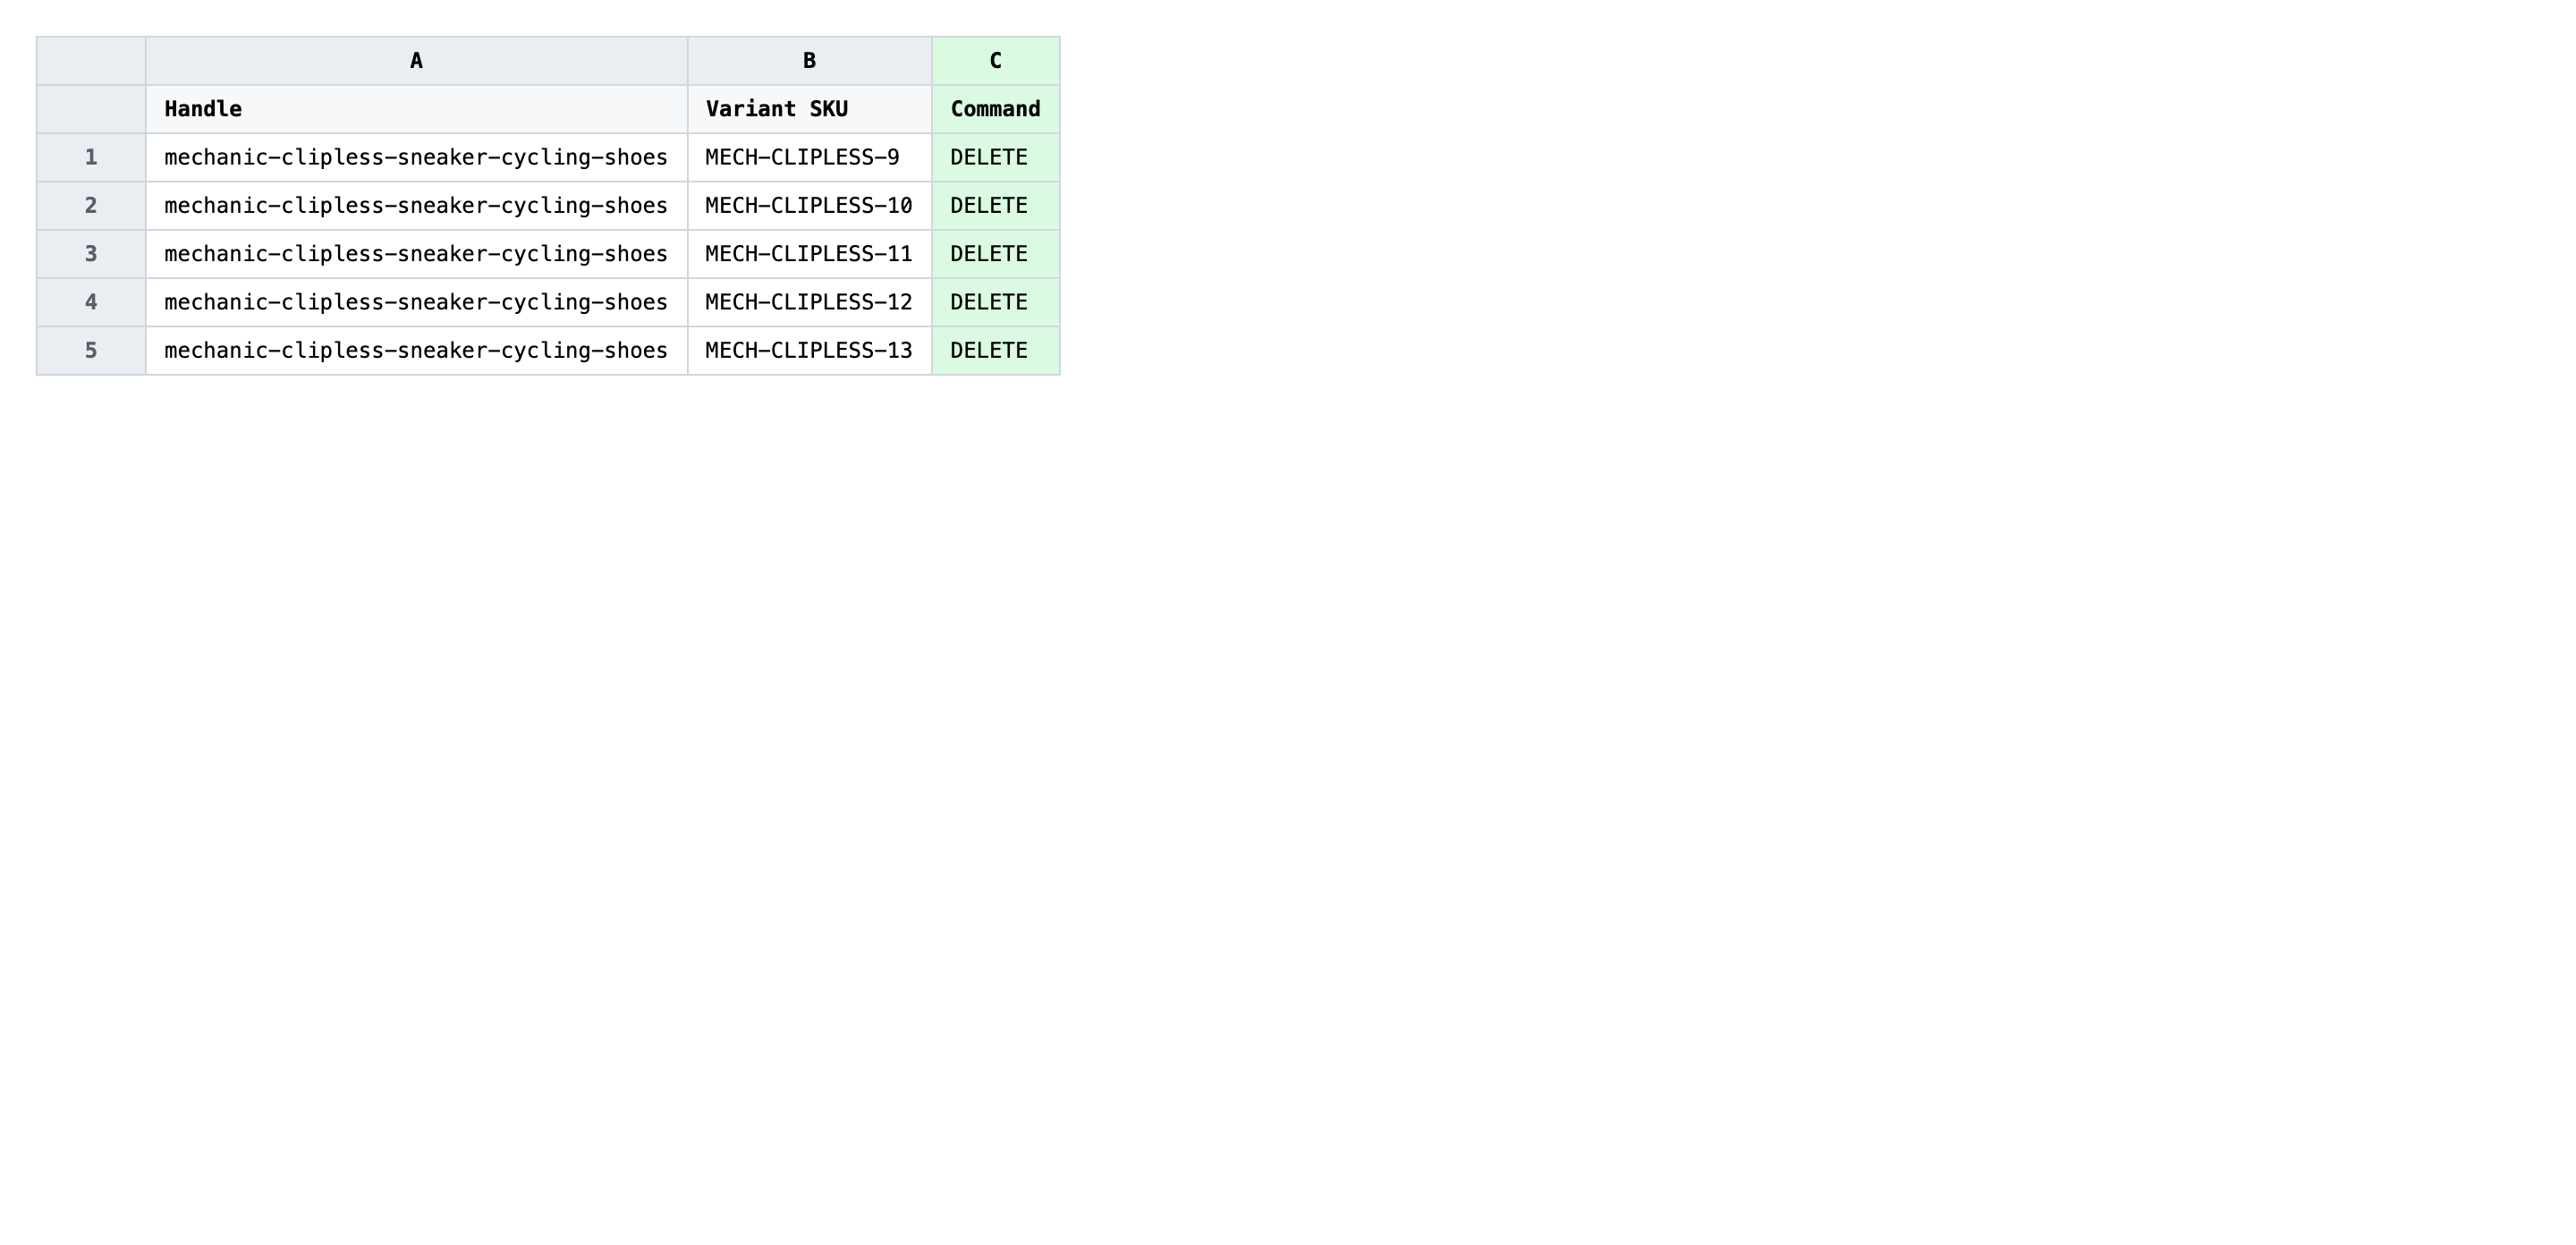
Open the downloaded CSV in Excel or Google Sheets. You'll see one row per variant with the Handle and Variant SKU you exported. Add a new column called Command at the right-hand end of the header row.
In the new Command column, type DELETE on every row whose product you want removed. The value is case-insensitive but uppercase is the convention. Because Shopify deletes at the product level (not the variant level), every variant row of a multi-variant product must carry DELETE — or none of them. The importer dedupes by Handle, so the product is removed once even when ten variant rows ask for it.
- ✅
DELETE - ❌
delete this product, Remove, X, or leaving the cell blank on some variant rows of the same product
Do not edit the Handle column — it is the match key, and a typo points the row at a different product (or none at all). If you want to spare a product from the delete, remove its entire row from the file rather than blanking the Command cell. Rows without Handle are skipped silently, which makes it easy to miss a product you meant to delete.
Save the file as CSV when you're done, and keep the original export handy in case you want to revert.
Tip: Sort the spreadsheet by Handle before adding DELETE so you can see every variant row of the same product grouped together — that makes it obvious when one variant of a product still has a blank Command cell.
Step 3 — Import the edited file back to Shopify
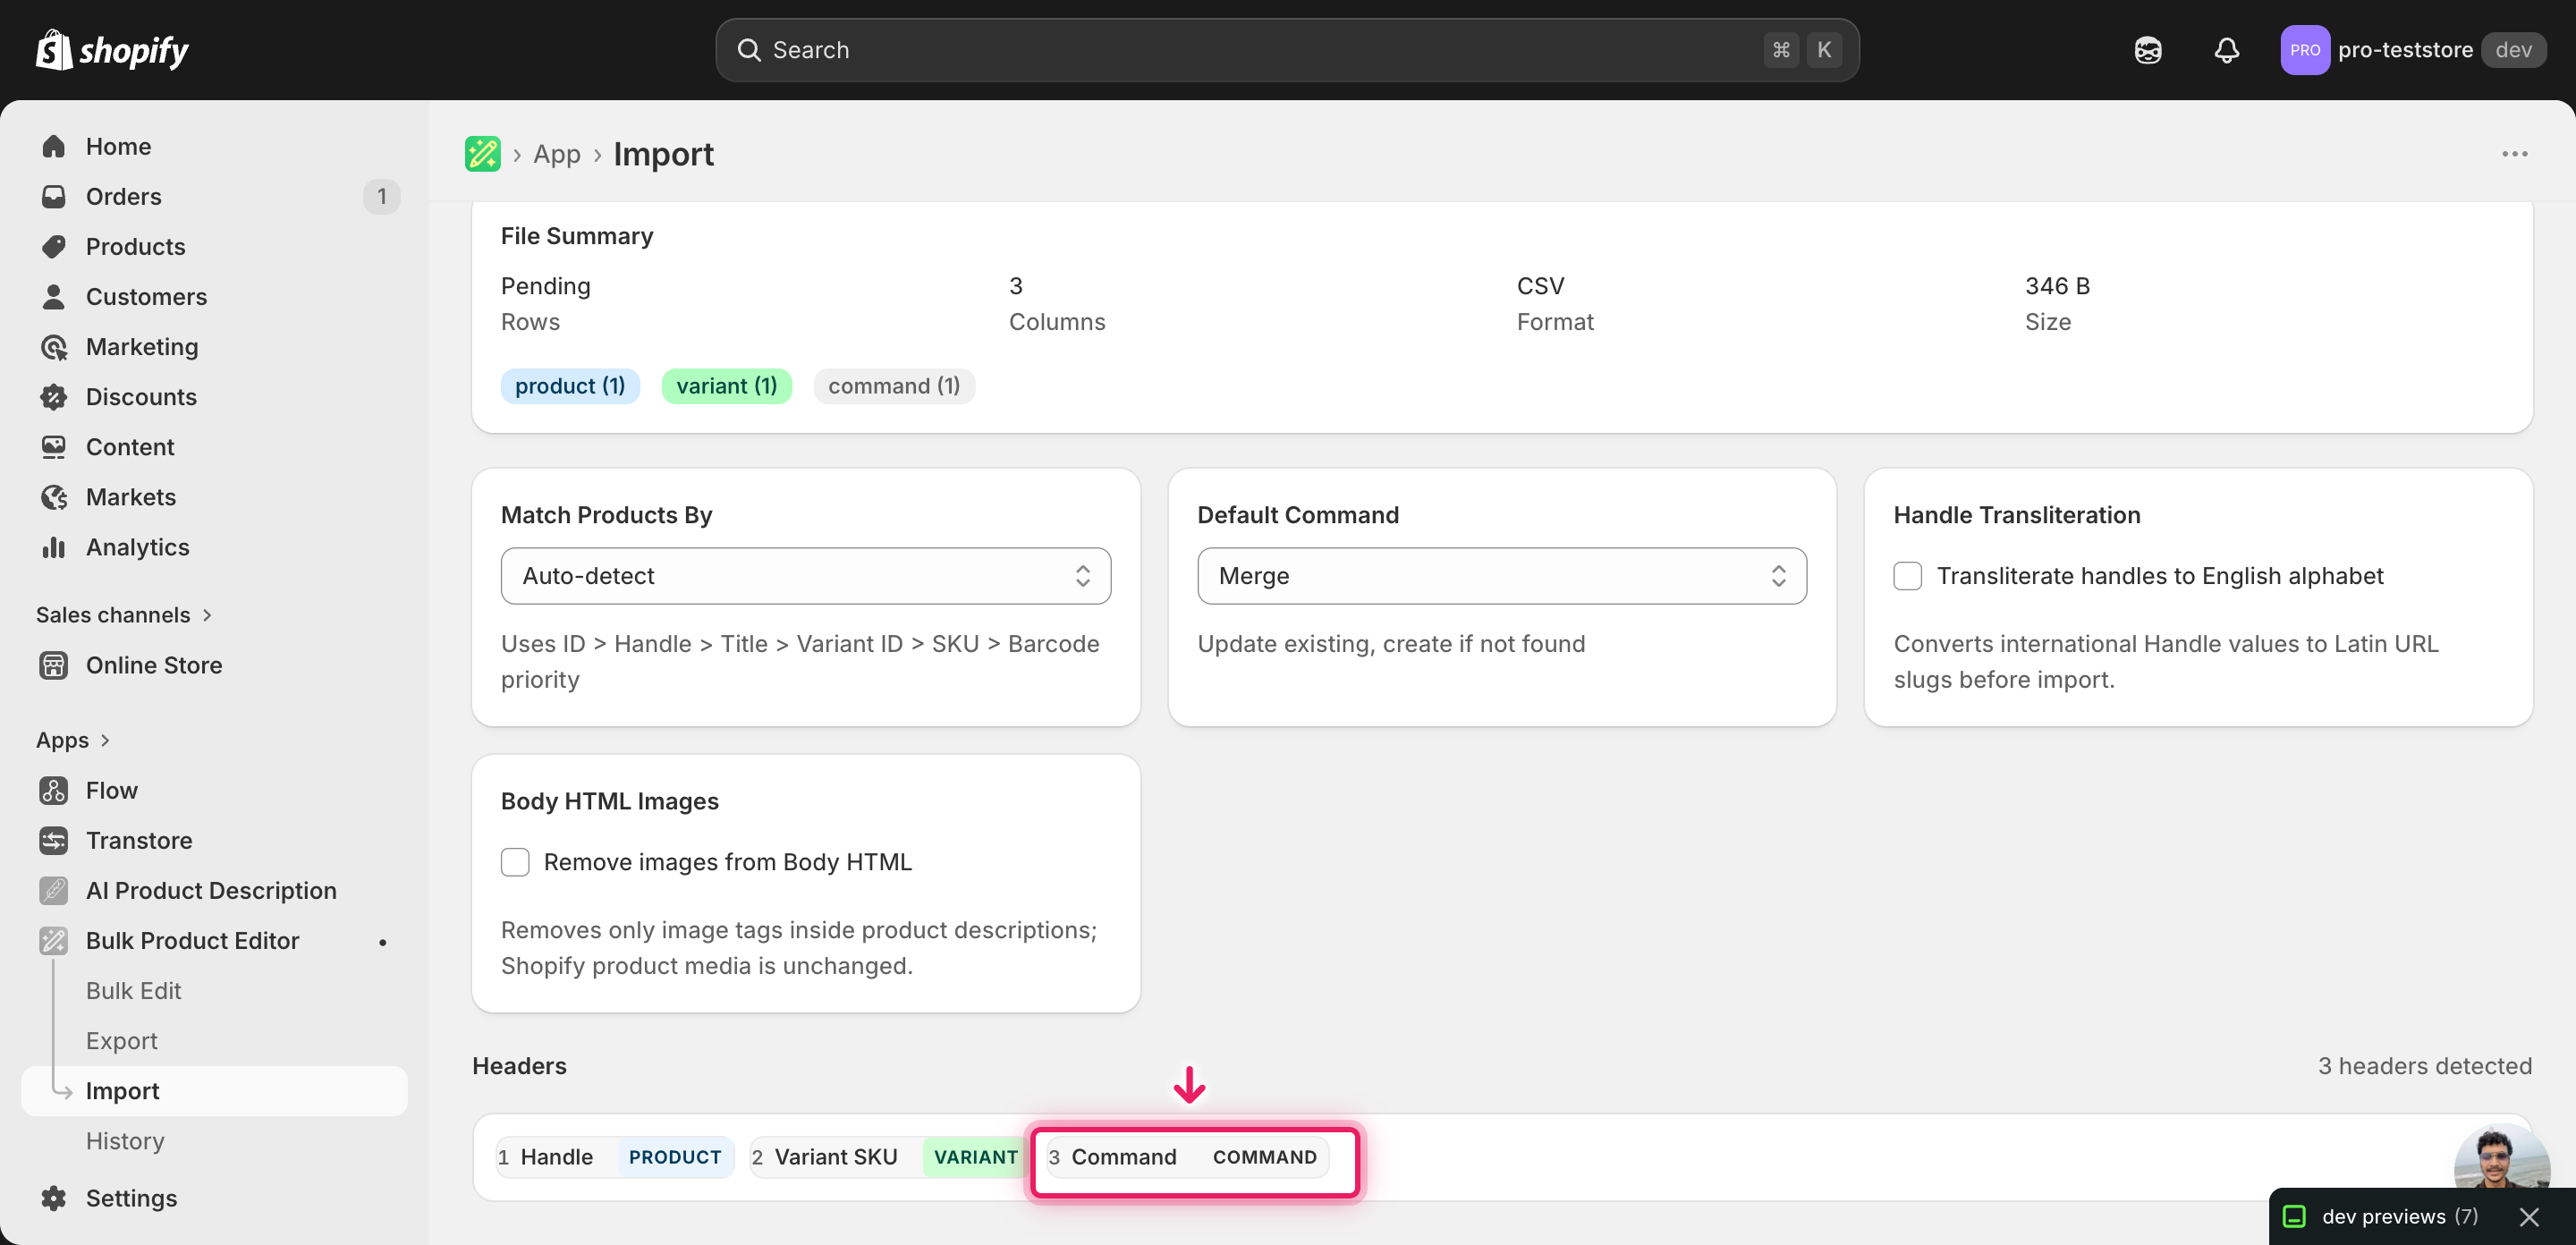
Open EditEngine → Import and select Advanced import. Then upload the file you just edited.
EditEngine reads the file and shows a header summary. Confirm the Command column is detected and that Match Products By is set to Handle. Set Default Command to Merge (not Delete) — you want the per-row Command column to drive deletion so any row missing the DELETE value is left alone instead of being wiped.
Note: Deletion is permanent — there is no undo once the import finishes, and Shopify does not move deleted products to a trash bin. Before running the full file, copy two or three rows into a separate test CSV, import that first, and verify in the Shopify admin that exactly those products disappeared. Only after the small batch behaves correctly should you import the rest. If your file is large, also consider archiving the products first as a reversible alternative and confirming the catalog still works before you come back to delete.
Click Start Import and wait for the job to finish — a small file takes seconds, larger catalogs a couple of minutes. When it completes, EditEngine shows a per-row summary.
Download the results CSV. It lists every row with a pass/fail status — that file is your proof the change went through, and the new values are now live in your Shopify admin.
Tips and troubleshooting
Filter your export before you ever type DELETE. The most common way merchants delete the wrong products is editing a full-catalog export and trusting themselves to mark only the right rows. Use the EditEngine Export filter (by collection, vendor, tag, or status) to pull only the products you intend to delete, so the file you open in the spreadsheet is already pre-scoped. If a row is in the file, it's getting DELETE — no exceptions.
Treat the pre-delete export as your only backup. Shopify has no built-in product recycle bin, and the delete EditEngine sends is the real Shopify API delete. Save the unedited export in a folder named with today's date before you add the Command column. If something goes wrong, re-importing that file with Command = NEW recreates the products — but variant GIDs, image IDs, and order history references will not return, so this is recovery, not undo.
Always run a two-row trial before the full delete. Copy any two rows from your edited file into a new CSV, import it through advanced import, and open the Shopify admin to confirm those two products are gone and nothing else moved. This takes under a minute and catches header typos, wrong match keys, and a misconfigured Default Command before they affect hundreds of products. Skip this only if you enjoy explaining to your team why the catalog shrank by a thousand SKUs.
Archive instead of delete when in doubt. If the products might be reactivated later — seasonal lines, paused suppliers, recall holds — set Status = archived with Command = MERGE instead of deleting. The products vanish from the storefront and most reports but stay restorable from the Shopify admin with one click. Reserve DELETE for products you are certain will never come back.
Frequently asked questions
How do I bulk delete products in Shopify?
Export the products you want to remove from EditEngine, add a Command column set to DELETE on every row, and import the file back through the advanced import flow. That is the round-trip merchants use to bulk delete Shopify products by sku / handle / barcode without clicking through the admin one product at a time.
Can I delete Shopify products from a spreadsheet?
Yes. EditEngine exports your catalog as a CSV with one row per variant, including Handle, Variant SKU, and Barcode. You edit the rows in Excel or Google Sheets and import the file back — which is the same mechanism that lets you bulk delete Shopify products by sku / handle / barcode in a single pass.
How long does a bulk product delete import take in Shopify?
A handful of products deletes in seconds and a few hundred typically finishes inside a minute. EditEngine streams larger files, so even multi-thousand-row deletes complete without timing out, and the results CSV records the exact duration for the bulk delete Shopify products by sku / handle / barcode job.
What format does a Shopify bulk product delete file need?
A CSV or XLSX with a Handle column to identify each product and a Command column set to DELETE for the rows you want to remove. EditEngine's advanced import reads that format directly when you bulk delete Shopify products by sku / handle / barcode.
Can I undo a bulk Shopify product delete?
Deletion is permanent in Shopify — there is no one-click undo once the import finishes. The original export you saved before adding DELETE is your only restore path: re-import it as a NEW command to recreate the products, though variant IDs and order history references will not come back.
Related tutorials
- How to Bulk Create Shopify New Products From A Spreadsheet
- How to Bulk Replace Shopify Entire Product Records
About EditEngine: EditEngine Bulk Product Editor helps Shopify merchants bulk edit, bulk import, and bulk export their product catalog in minutes instead of days. Install on Shopify →