
Store content
Bulk Update Shopify File Alt Text
Published by Profitonium Apps · Last updated
Availability: Files export is available with the required Shopify access. Files Advanced Import is currently restricted to internal test shops, not enabled for ordinary merchant stores. The update steps below describe that restricted workflow. A signed-in test-shop image does not establish public import availability.
Change the alt text of existing images in Shopify Admin → Content → Files, using a focused EditEngine Bulk Editor spreadsheet. Keep the file's ID and omit its Link and File Name so this task does not request a content replacement or rename.
For example, replace Red shirt with Red linen shirt with short sleeves on a wooden hanger. Write a useful description of the actual image, not a list of search keywords.
Before you start
- Work in the same Shopify store that owns the file IDs.
- Choose one existing, non-critical image whose status is Ready for the first test.
- Keep an untouched export with the old alt text. Advanced Import has no one-click undo.
- This is a Files task, not a Products
Image Alt Textimport. Do not mix the two sets of headers.
Step 1 — Export the intended images
Open EditEngine → Export, choose Files, and choose Excel or CSV.
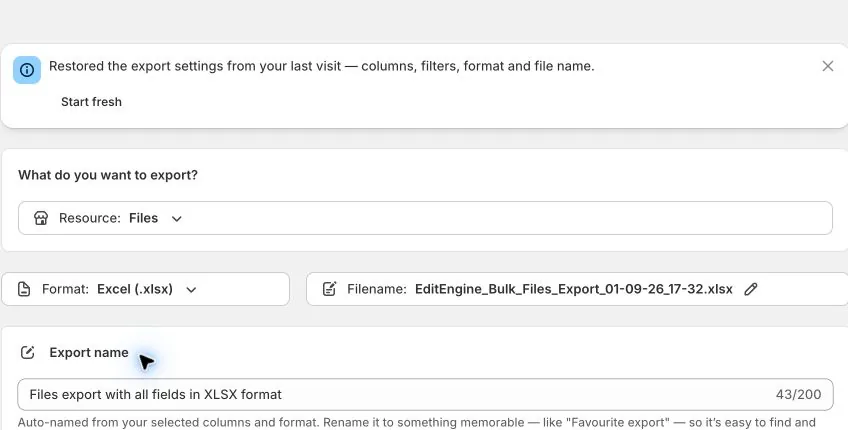
Use Add filter to narrow the set by File Name or ID. For example, use File Name contains any of red-shirt. Review every matching filename in the downloaded export: a contains filter can include several images. You can also filter by Type to limit the set to images.
The total Files count shown in the panel does not decrease with filters; the output file is filtered. Do not treat that total as your test-batch size.
Keep the Files columns for the untouched reference copy, including ID, File Name, Command, Link, Alt Text, Type, and Status.
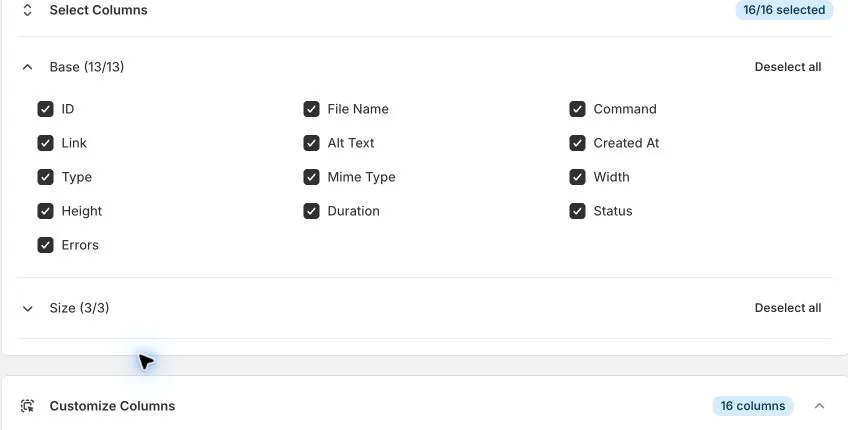
After reviewing your selection and filters, create and download the export. Save an unchanged copy before editing.
Step 2 — Make an alt-text-only working file
Keep only three columns and one row per intended file:
| Column | What to put in it |
|---|---|
ID | The unchanged File ID from your same-store export, stored as text. |
Command | UPDATE, to update an existing file rather than create one. |
Alt Text | The complete new, nonblank description. |
Remove Link and File Name from this working file. File Name is editable; keeping an old name could rename the file. A different external Link on an UPDATE row requests a content update. Neither belongs in an alt-text-only task.
Remove Type and the status, size, timestamp, and dimension columns from the working copy too. Keep them in the untouched export for comparison. If several rows identify the same file, resolve them to one intended update before proceeding.
Step 3 — Enter the descriptions
ID,Command,Alt Text
33351235212327,UPDATE,Red linen shirt with short sleeves on a wooden hanger
33351235212328,UPDATE,"Blue ceramic mug, viewed from above"
The IDs and descriptions are illustrative. Use IDs from your own export, never these sample IDs. EditEngine accepts exported numeric IDs and full Shopify File IDs. Keep numeric IDs formatted as text so a spreadsheet does not round them.
A comma inside an alt-text value must be quoted in CSV, as in the second row. Keep the Excel worksheet named Files, or save CSV as Files.csv and verify detection after upload.
Blank Alt Text does not clear existing alt text in EditEngine. Remove rows you do not want to change. If your goal is to remove an existing description, use an appropriate Shopify Admin edit instead of a blank import cell.
Step 4 — Review a one-file Advanced Import
Only continue if this shop is eligible for the restricted Files import. Save a test file containing the header and one row. Open EditEngine → Import → Advanced import and upload it.
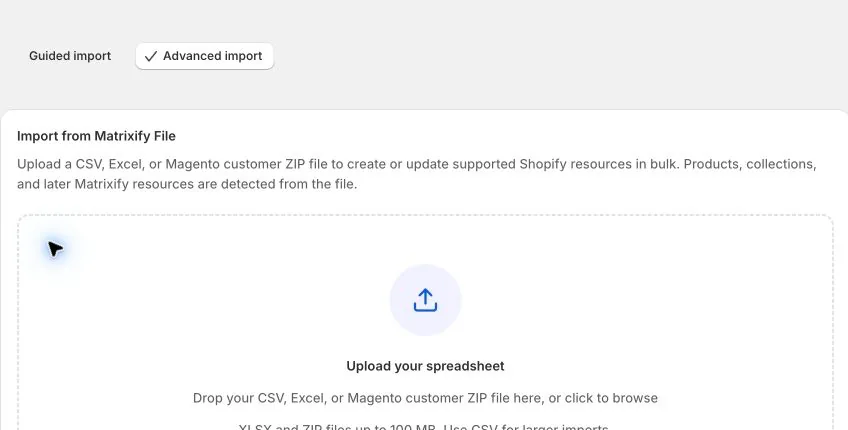
After analysis, confirm:
- The resource is Files, not Products or another resource.
- Only
ID,Command, andAlt Textare included. - The row uses
UPDATEand a correct same-store ID. - Required Files access is granted and no blocking compatibility error remains. Shopify scopes alone do not unlock a restricted resource.
If Alt Text is marked unknown: some app versions can show a misleading skipped-column warning for this exact header, although the Files importer reads it. Keep Alt Text unchanged; do not map it to Products Image Alt Text or remove it. Confirm that Files is the detected resource and resolve other errors. If the warning persists, ask support to confirm your app version before running the one-file test. This exception does not apply to arbitrary unknown columns.
Review the detected headers and any sample rows shown. A sample is not a full-file or before-and-after validation. Check the ID and complete description in your spreadsheet before running anything. Do not add Link just because a creation workflow requires it; this task updates an existing file's metadata.
Step 5 — Test and verify the image
When the checks are correct, run the one-file test. Download the result and read Import Status and Import Comment. A failed or unknown ID is a reason to refresh the export, not to switch to NEW or MERGE.
Open Shopify Admin → Content → Files and inspect the test image. Confirm its alt text matches the new description and that its filename, content, and preview are unchanged.
Create a fresh focused Files export. Compare by ID: Alt Text should change; ID, File Name, and Link should remain unchanged. Keep the original export, result file, and verification export together. Then apply the remaining reviewed rows in a small batch.
Check any relevant storefront image too. Themes can supply their own alt text; updating the file record is not proof that every theme image uses that value.
Recovery and Matrixify differences
Restore a previous nonblank description with the same three-column UPDATE file. If the original value was blank, clear it through Shopify Admin; a blank import cannot restore that state. Do not reimport Link or use REPLACE to undo a metadata-only edit.
This uses the Matrixify Files column names. Matrixify's URL import tutorial supplies Link to upload content; this task deliberately omits Link because the file already exists. Its product-media alt-text tutorial instead uses a Products sheet and different headers.
EditEngine also differs on Files REPLACE: it attempts an in-place source update, while Matrixify documents delete-and-create behavior. Neither replacement workflow is needed to change alt text.
Related tutorials
- Files export and import — file identity, URL imports, replacement, and deletion.
- Import and export resource availability — check restricted versus publicly enabled imports.
- Products export and import — a separate workflow for product media and product-level fields.