
Orders and fulfillment
Bulk Update Shopify Order Tracking
Published by Profitonium Apps · Last updated
Use EditEngine to correct tracking numbers, tracking URLs, and carrier names on existing Shopify fulfillments. Export the order and fulfillment IDs, prepare one focused row per shipment, and upload it through Advanced Import. The example keeps customer notifications off.
This task updates an existing fulfillment. It does not create a shipment, change purchased quantities, or set a delivery event such as Delivered. Public Orders imports also do not permit order deletion/replacement, refunds, order cancellation, or fulfillment cancellation; a destructive-operation option does not unlock those actions.
The file shape has been compared with the official Matrixify tracking-update tutorial and Orders reference. Matrixify documents additional fulfillment fields; EditEngine only applies the tracking number, URL, carrier, and notification choice in this workflow. Its Shipment Status and Location columns are reporting fields.
Step 1 — Export the existing fulfillments
Open EditEngine → Export, select Orders, and choose CSV or Excel. Select the Update tracking numbers template. It selects ID, Name, Command, Line: Type, and the Fulfillment columns.
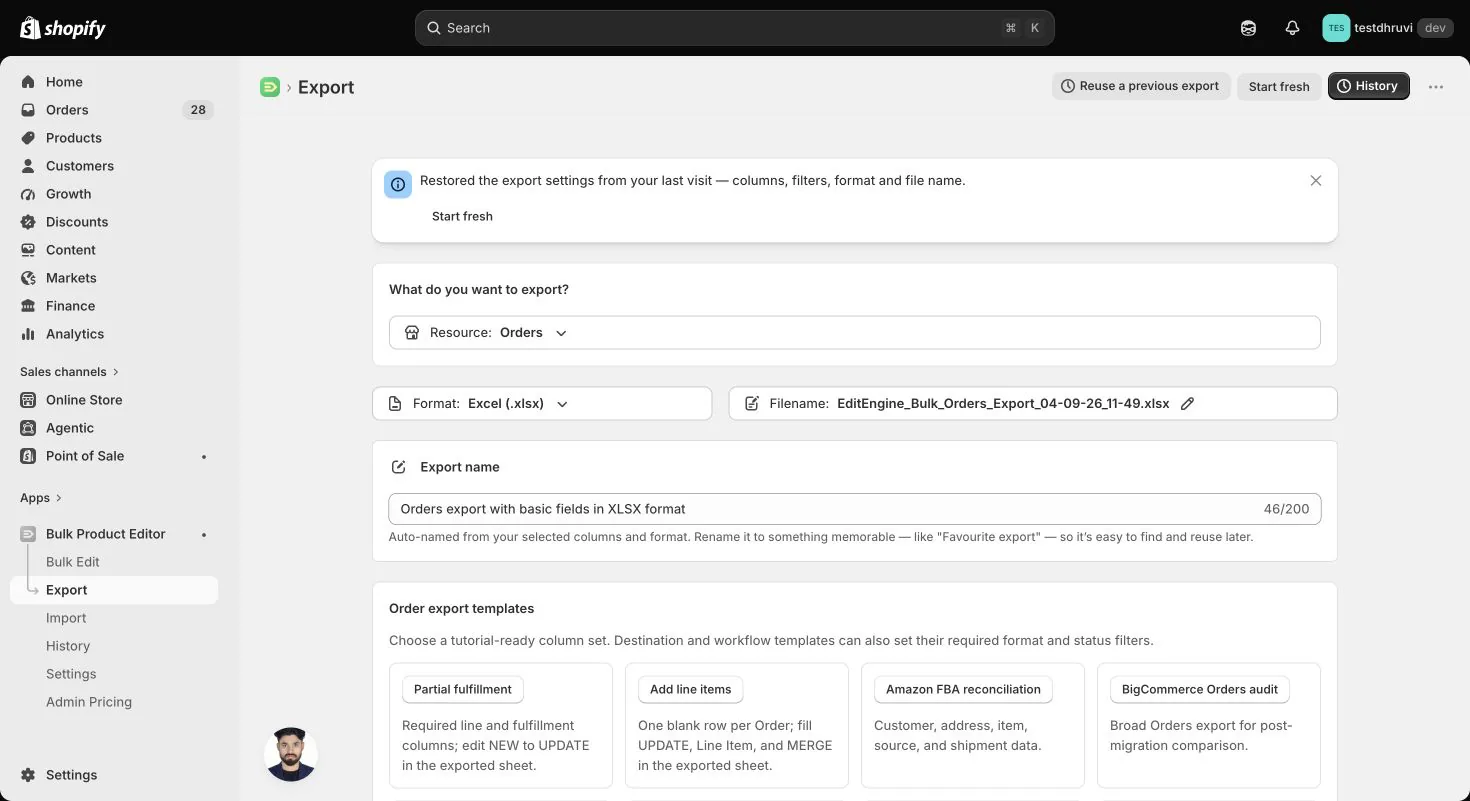
Use Add filter → ID to target one non-critical order for the first test. Choose an order that already has the fulfillment you need to correct. You can also narrow by the exact order Name. Review all existing filters before exporting.
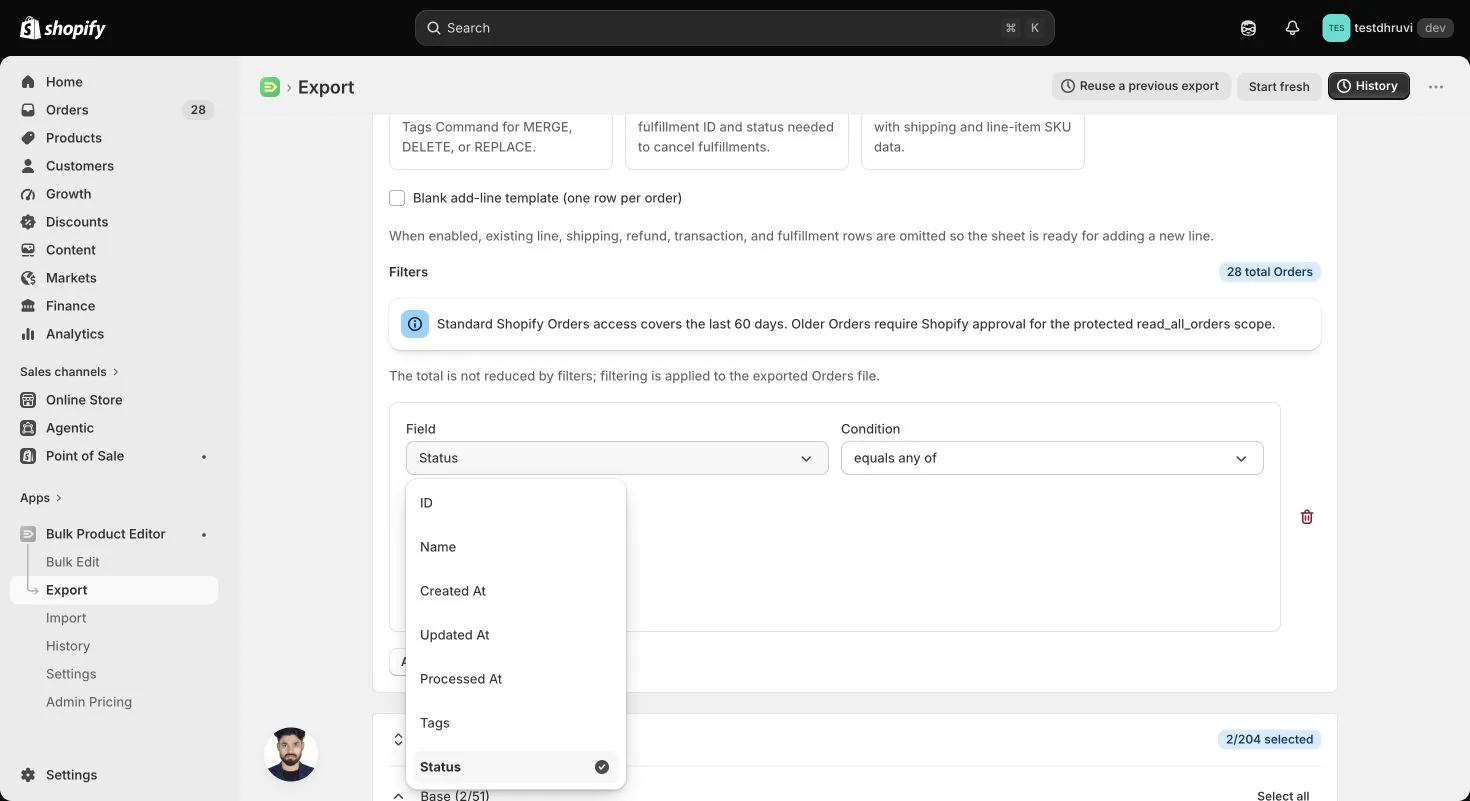
The total badge is unfiltered, so it will not shrink when you add a filter. Standard order access covers the last 60 days; older orders need Shopify-approved all-orders access. If your target is absent, resolve its identity or access before importing.
Create your filtered export, download it, and keep an untouched copy. This records the original tracking values and identifies which fulfillment belongs to which order. Do not use a made-up fulfillment ID or an ID copied from another store.
Step 2 — Keep one intentional tracking row
Work in a copy of the export. Keep only the intended Fulfillment Line rows with a real Fulfillment: ID. A shipment containing several products can appear on several export rows; reduce those repeated rows to one row per fulfillment for this update. Preserve separate rows for distinct shipments.
Retain only these columns in the import file:
| Header | What to put in the cell |
|---|---|
ID | The existing Order ID from your export. |
Command | UPDATE. This requires an existing order. |
Line: Type | Fulfillment Line. |
Fulfillment: ID | The existing fulfillment ID from that order. |
Fulfillment: Tracking Number | The intended tracking number. |
Fulfillment: Tracking URL | The intended carrier tracking link, if changing it. |
Fulfillment: Tracking Company | The intended carrier name, if changing it. |
Fulfillment: Send Receipt | FALSE to avoid requesting a customer notification for this correction. |
Remove other line fields such as Line: ID, Line: Title, Line: Variant ID, Line: Quantity, and Line: Price. Do not include any Line Item rows. Remove Fulfillment: Status, Shipment Status, Location, and other unrelated order fields as well.
The IDs, tracking number, carrier name, and URL below are placeholders. Replace them with values for your own existing order and fulfillment before uploading:
ID,Command,Line: Type,Fulfillment: ID,Fulfillment: Tracking Number,Fulfillment: Tracking URL,Fulfillment: Tracking Company,Fulfillment: Send Receipt
1234567890,UPDATE,Fulfillment Line,3456789012,TRACKING-NUMBER,https://carrier.example/track/TRACKING-NUMBER,CARRIER-NAME,FALSE
Save the file as Orders.csv, or put the same headers and values in an XLSX worksheet named Orders. Keep IDs and tracking numbers as text so your spreadsheet does not round them or remove leading zeros.
Step 3 — Review multi-package and blank values
For multiple tracking numbers on the same fulfillment, put the intended list in one cell separated by semicolons, such as TRACK-ONE; TRACK-TWO. Tracking URLs use the same separator. Keep the number and URL lists in the matching order, and include any existing tracking entries you intend to retain. Supply one carrier name for the fulfillment.
Blank tracking cells do not clear the existing number, URL, or carrier. If you are changing only the number, omit the URL and Company columns. At least one number, URL, or carrier must be supplied; Fulfillment: Send Receipt alone does not request an update.
Use TRUE for Send Receipt only when you deliberately want Shopify to notify the customer. A notification that has been sent cannot be undone by restoring spreadsheet values.
Step 4 — Test through Advanced Import
Open EditEngine → Import, select Advanced import, and upload the one-fulfillment test file.
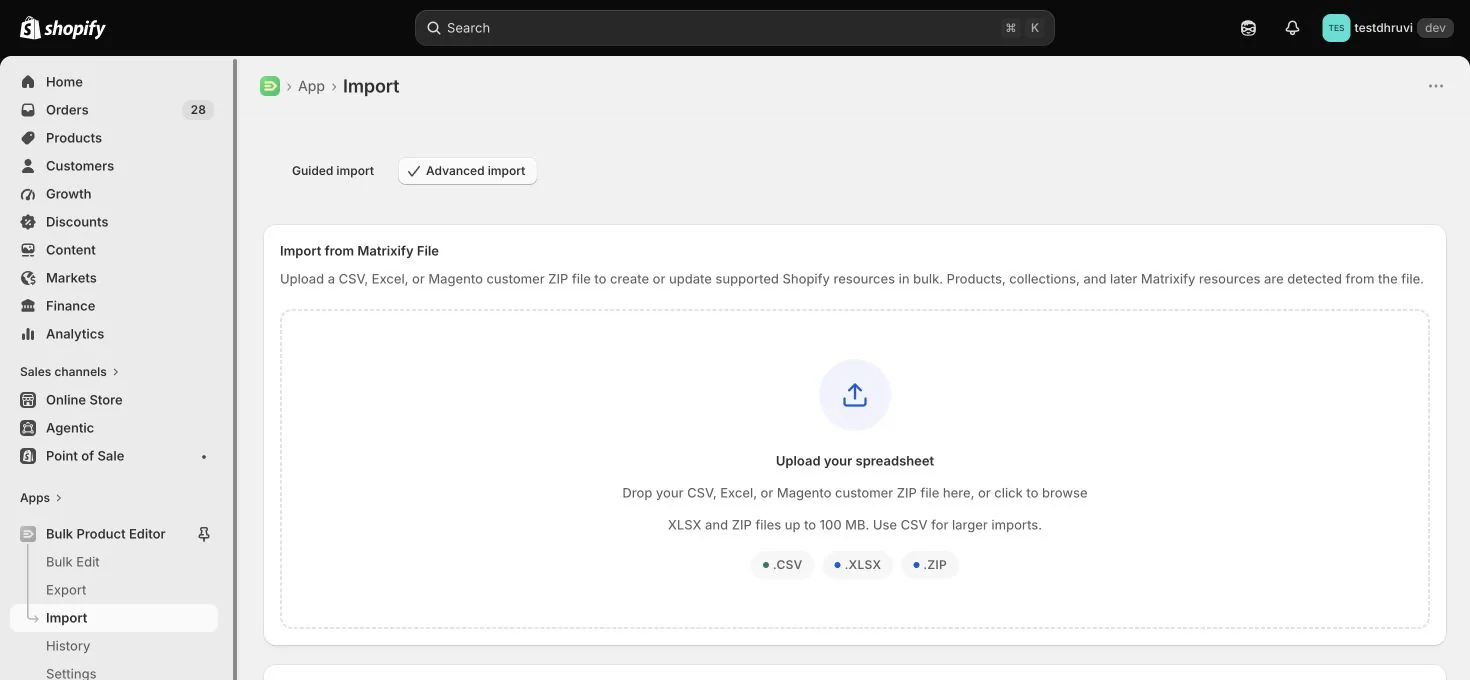
Before starting your import, confirm that EditEngine detects Orders, uses the intended sheet, and shows your expected headers. Check the row-count information, explicit UPDATE command, and notification flag. Grant the order and fulfillment access requested by the app if it is missing.
Review the detected headers and any sample rows shown. A sample is not a full-file or before-and-after validation. Open your spreadsheet to inspect all tracking values and confirm the existing order/fulfillment pairing before starting the single-record import.
Step 5 — Verify before expanding the batch
After completion, download the result file and investigate any error or warning. Open the order in Shopify Admin, then inspect the exact fulfillment: check its carrier, every tracking number, each tracking link, and the notification choice. Confirm that no extra order lines or fulfillments were added.
Re-export the same Order ID and compare tracking against the intended values. When the test is correct, prepare the remaining fulfillment rows using the same minimal format. Public Orders imports are limited to 50,000 data rows per file.
Advanced Import does not provide the bulk editor's one-click undo. To correct a tracking value later, prepare another focused UPDATE using a fresh export and the original nonblank values from your backup. Re-check the fulfillment ID before doing so. Blank cells cannot remove tracking information, so a previous blank state may require a manual correction in Shopify. Restoring tracking cannot retract an email already sent.
Related tutorials
- Orders export and import — other supported order updates and export filters.
- Orders column reference — all export controls and their public import treatment.
- Change Draft Order line quantities — edit quantities while an order is still a draft.