
Collections
Shopify Custom Collections: Export and Import
Published by Profitonium Apps · Last updated
Current Matrixify compatibility: Matrixify now documents a unified Collections sheet and deprecates its separate Custom/Smart sheets. EditEngine still exposes Custom Collections and Smart Collections, not the unified
Collectionsimport schema. Source, inclusion/exclusion, and condition columns from that new sheet are not supported here; renaming its tab does not convert it.
Use the Custom Collections resource when you need to edit the collections themselves: their titles, descriptions, images, publication state, metafields, SEO, product membership, or manual product order. Shopify calls these manual collections.
This is different from exporting Products with the Custom Collections column. The product workflow is convenient when you only need to assign products to collections. When linked products are selected, the resource workflow in this guide gives you one spreadsheet row per collection-product link and lets you manage the collection record itself.
Before you start
- Install EditEngine Bulk Product Editor in your Shopify store.
- Use Advanced import for the edited file.
- Keep one untouched copy of the export. Advanced imports do not have one-click undo.
- Test destructive changes on one or two collections before importing the complete file.
EditEngine's headers follow the widely used Matrixify Custom Collections spreadsheet format, with EditEngine's supported command set and import behavior described below.
Step 1 — Export Custom Collections
Open EditEngine → Export, choose Custom Collections as the resource, and select the fields you need.
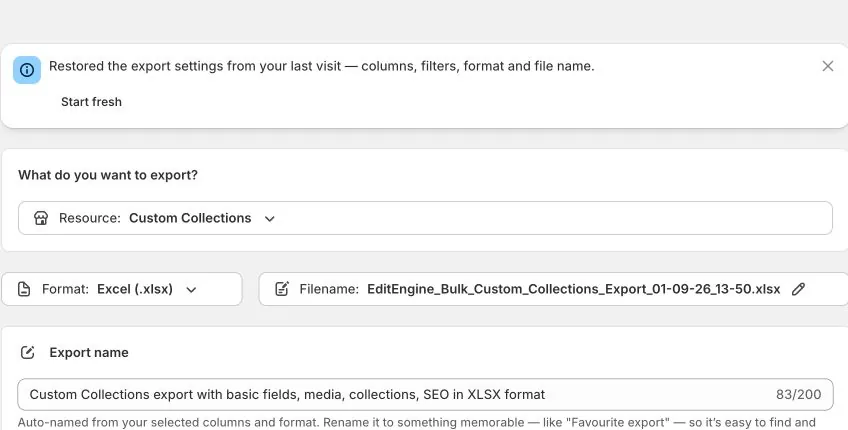
Always keep these columns in a round-trip file:
- ID — the safest identifier for an existing collection.
- Handle — the collection's URL handle and the next matching key if ID is unavailable.
- Command — controls how each collection is processed. EditEngine exports
MERGE. - Title — required when creating a collection and when using collection-level
REPLACE.
Add collection fields only when you plan to review or edit them:
- Body HTML, Sort Order, Template Suffix
- Published, Published Scope
- Image Src, Image Alt Text
- SEO — exports Metafield: title_tag [string] and Metafield: description_tag [string]
- Any collection metafields you need
To edit which products belong to each manual collection, also select:
- Product: ID or Product: Handle
- Product: Command
- Product: Position if the collection uses Manual sort order
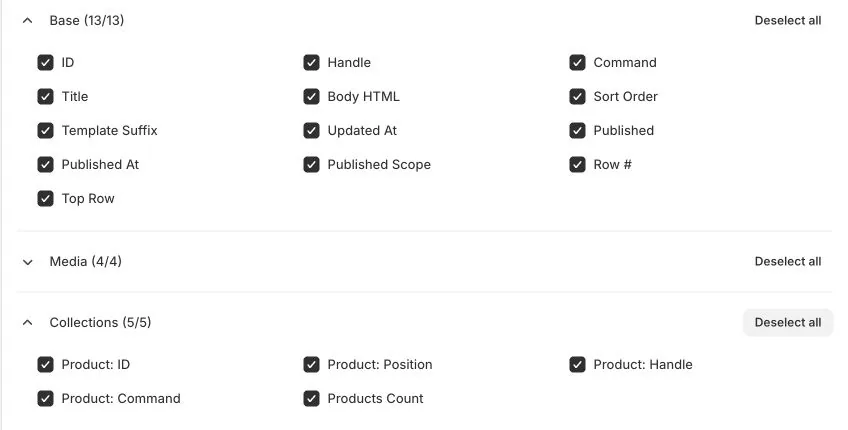
Columns such as Updated At, Published At, Image Width, Image Height, Row #, Top Row, and Products Count are export context. Do not rely on them to change Shopify data.
Download the CSV or XLSX, then make a duplicate before editing. That untouched export is your recovery reference if you need to reverse a change manually.
Step 2 — Edit the spreadsheet
An exported collection can occupy several rows—normally one row for each linked product. EditEngine groups rows by ID, then Handle, then Title. Keep the same identifier on every row for the same collection.
Keep collection-level values such as Title, Body HTML, Sort Order, and Published consistent across repeated product rows, or fill them only on the first row. If two rows for one collection contain conflicting non-blank values, EditEngine fails the group instead of choosing one arbitrarily.
Choose the collection command
| Command | What EditEngine does |
|---|---|
MERGE | Updates the existing collection, or creates it if no match is found. This is the normal round-trip command. |
NEW | Creates a collection and fails if the identified collection already exists. A Title is required. |
UPDATE | Updates an existing collection and fails if it cannot find one. |
REPLACE | Deletes the existing collection and recreates it from the row data. A Title is required and the Shopify collection ID changes. |
DELETE | Deletes the identified collection. Products are not deleted. |
IGNORE | Skips the collection group without changing Shopify. |
If the Command cell is blank, EditEngine uses the Default Command selected on the import screen; that screen defaults to Merge. For a safer audit trail, keep the exported MERGE values instead of clearing them.
Use IGNORE to retain a collection group in your working file without applying it. The other command cells should remain explicit so that skipped and active groups are easy to review.
Update or create collection details
For an ordinary update, keep the exported ID and MERGE, then change only the fields you intend to update:
ID,Handle,Command,Title,Body HTML,Sort Order
1234567890,summer-sale,MERGE,Summer Sale 2026,"<p>Seasonal offers.</p>",Manual
For a new collection, leave ID blank and use NEW with a unique Handle and a Title:
ID,Handle,Command,Title,Published,Published Scope
,new-arrivals,NEW,New Arrivals,TRUE,web
EditEngine matches existing collections in this order: ID → Handle → Title. Title-only matching works when one collection has that title; if several collections share it, the row fails rather than guessing. Use ID whenever possible.
Add or remove products
Use the collection's own Command for the collection record and Product: Command for each linked product:
ID,Handle,Command,Title,Product: Handle,Product: Command
1234567890,summer-sale,MERGE,Summer Sale 2026,linen-shirt,MERGE
1234567890,summer-sale,MERGE,Summer Sale 2026,wool-cap,DELETEMERGEin Product: Command adds the product if it is not already a member.DELETEorREMOVEremoves that product from the manual collection.- A blank Product: Command behaves like
MERGEfor that product row.
If a product handle cannot be found, an add operation is skipped with a warning. Review the downloadable results file after the import.
Replace the complete product membership
Set Product: Command to REPLACE when the products listed for that collection should become its complete membership. Products currently in the collection but absent from the file are removed.
ID,Handle,Command,Title,Sort Order,Product: Handle,Product: Position,Product: Command
1234567890,summer-sale,MERGE,Summer Sale 2026,Manual,linen-shirt,1,REPLACE
1234567890,summer-sale,MERGE,Summer Sale 2026,Manual,canvas-bag,2,MERGE
One REPLACE product row marks the whole grouped collection as a full membership replacement; every product row for that collection becomes part of the desired final list. If any listed product cannot be resolved, EditEngine fails the replacement rather than removing products from an incomplete list.
This is different from collection-level REPLACE: Product: Command = REPLACE rewrites membership while keeping the collection, whereas Command = REPLACE deletes and recreates the collection itself.
Set the order while adding products
Product positions apply only when Sort Order is Manual. Use positive integers starting at 1:
ID,Handle,Command,Title,Sort Order,Product: Handle,Product: Position,Product: Command
1234567890,summer-sale,MERGE,Summer Sale 2026,Manual,linen-shirt,1,MERGE
1234567890,summer-sale,MERGE,Summer Sale 2026,Manual,canvas-bag,2,MERGE
EditEngine orders the listed products by Product: Position before adding them. This is verified for new collections and newly added membership rows. It does not provide Matrixify's full “reorder products already in a collection” workflow: adding a product that is already linked does not reliably move it to a new position. Reorder existing members in Shopify Admin, or remove and re-add them in a carefully tested batch.
For other sort orders—such as Best Selling, Alphabet, Created, or Price—Shopify controls the order and ignores manual positions.
Be careful with blank cells
Blank cells do not all mean “leave unchanged”:
- A present but blank Body HTML cell clears the collection description.
- A present but blank Template Suffix cell clears the template suffix.
- A present but blank Published cell is treated as false and unpublishes the collection from Online Store.
- A blank dynamic Metafield: namespace.key [type] cell deletes that metafield.
- Omitting one of these columns leaves that field unchanged.
For publication scope, web means Online Store only. global also publishes to Point of Sale when that publication is available to the app.
Step 3 — Import through Advanced import
Open EditEngine → Import, choose Advanced import, and upload the edited CSV or XLSX.
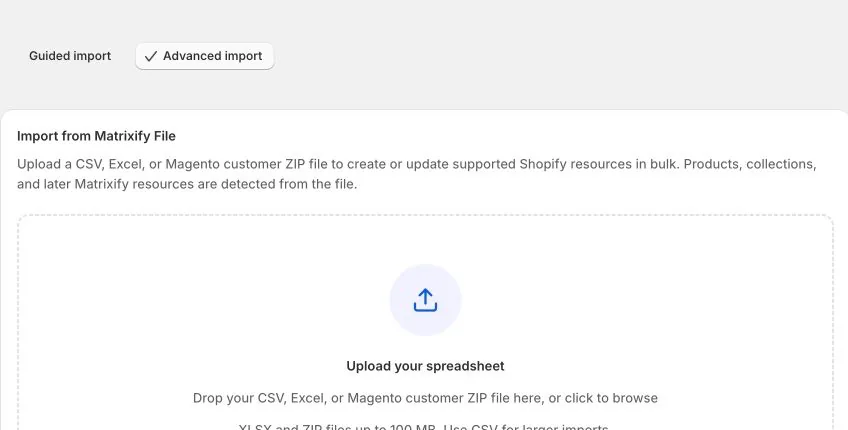
Before starting the job, verify:
- The detected resource says Custom Collections.
- Default Command is Merge, unless you deliberately prepared the entire file for another command.
- The row count and detected headers look reasonable.
- Any destructive
DELETEor collection-levelREPLACErows are intentional.
Then click Start Custom Collections import. When the job finishes, download the results file and review failed rows and warnings. A completed job can still contain row-level warnings, such as an unresolved product handle that was skipped.
Step 4 — Verify the round trip
Do not treat “Import completed” as the only check. Verify the result in two places:
- Open the affected manual collections in Shopify Admin and spot-check their details and products.
- Run a fresh Custom Collections export with the same columns and compare it with your intended spreadsheet.
For a destructive membership replacement, compare the new export's Product: Handle list and Product: Position values with your edited file. For collection deletion or collection-level REPLACE, verify a small batch first; re-importing the untouched export is not a guaranteed automatic rollback because recreated collections receive new Shopify IDs.
Common mistakes
Using the Product resource by accident.
The Custom Collections column on a Products export manages product-to-collection assignments. It does not expose the complete collection record. Choose the Custom Collections resource for collection details, images, publication, metafields, SEO, and linked-product fields.
Confusing the two REPLACE commands.
Command = REPLACE recreates the collection. Product: Command = REPLACE keeps the collection and makes the file's product rows its full membership.
Removing identifier values from continuation rows.
When a collection has several product rows, keep its ID or Handle consistent on every row so EditEngine can group them safely.
Trying to manage an automated collection's membership.
Custom Collections are manual collections. Smart Collections are rule-based, so their product membership changes when the rules or matching product data change.
Related tutorials
- Export and import Shopify Smart Collections — the legacy automated-rule format and flexible-collection limitations.
- Products column reference — distinguish All Collections reporting from writable manual memberships.
- Bulk add Shopify products to collections — use the Products spreadsheet when membership is the only thing you need to add.
- Reorganize products across many collections
- Add or remove products from a collection with Bulk Edit
About EditEngine: EditEngine Bulk Product Editor helps Shopify merchants bulk edit, import, and export store data from spreadsheets. Install on Shopify →