
Pricing
Shopify Discounts: Export and Import in Bulk
Published by Profitonium Apps · Last updated
Use the Discounts resource to export Shopify discounts into a Matrixify-shaped CSV or XLSX file, edit the definitions or redeem-code sets, and import the file through EditEngine's Advanced Import. It supports code and automatic discounts across Amount off Order, Amount off Products, Buy X Get Y, and Free Shipping.
This guide follows the official Matrixify Discounts column reference, bulk discount import tutorial, multiple-code tutorial, and bulk-delete tutorial. Where EditEngine differs, this guide states the EditEngine behavior explicitly.
Before you start
- Keep an untouched export as your rollback reference, especially before
REPLACEorDELETE. - Test a small, non-critical discount set before importing a large file.
- Keep repeated rows for the same discount together and preserve
Row #if you sort the sheet. - Remove source-store IDs before a cross-store import. Shopify IDs belong to the source store.
- New code discounts require
Code; new automatic discounts requireTitleand a blank Code cell. - Use Advanced Import only. The worksheet may be named Discounts or Discount.
Step 1 — Select Discounts
Open EditEngine → Export, choose Discounts, and select CSV or Excel format.
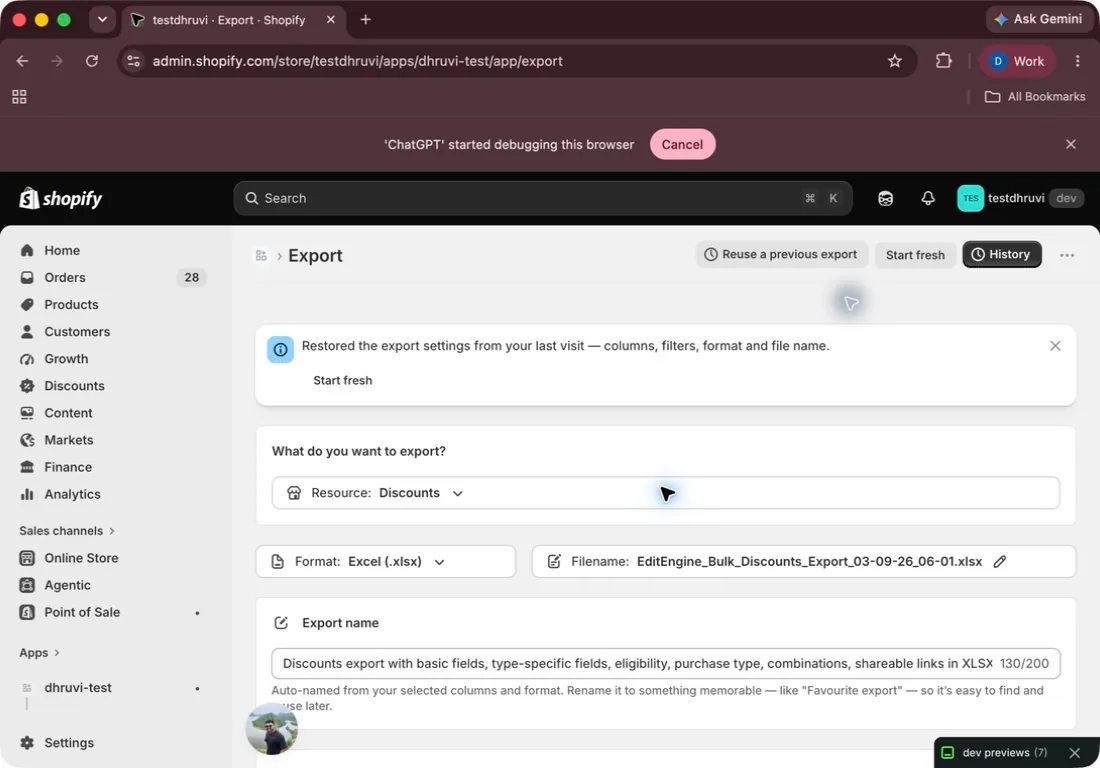
EditEngine displays the uncapped discount count returned by Shopify. The count represents discount definitions, not redeem codes or expanded spreadsheet rows, and adding filters does not change the displayed total. A filter with no matches can still produce a valid header-only file.
Step 2 — Choose the columns
EditEngine exposes 63 Discounts columns. The 44 current columns are selected by default; the 19 legacy compatibility columns are available but deselected.
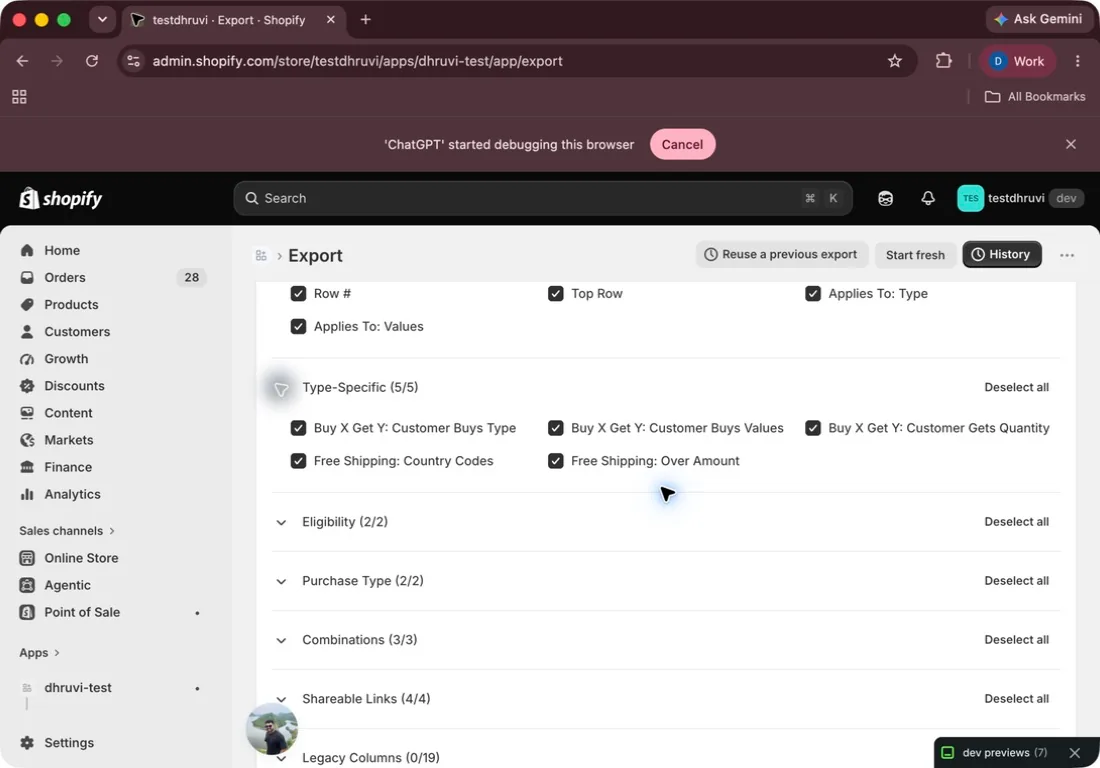
| Group | Default | What it contains |
|---|---|---|
| Base | 28/28 | Identity, commands, code and usage counts, method, type, value, minimums, limits, status, tags, dates, row markers, and target values |
| Type-Specific | 5/5 | Buy X Get Y buy targets and get quantity; Free Shipping country codes and minimum amount |
| Eligibility | 2/2 | Customer eligibility type and values |
| Purchase Type | 2/2 | One-time/subscription applicability and recurring subscription limit |
| Combinations | 3/3 | Whether the discount combines with product, order, or shipping discounts |
| Shareable Links | 4/4 | Link target, title, URL, and image URL |
| Legacy | 0/19 | Older Matrixify-compatible columns derived from the current discount definition |
ID is always written to the export even if you deselect it. The four Shareable Link columns and fields such as Status, usage counts, timestamps, Summary, Row #, and Top Row are reporting fields; editing them does not change the Shopify discount during import.
Step 3 — Filter the export
Select Add filter to narrow the exported discount definitions.
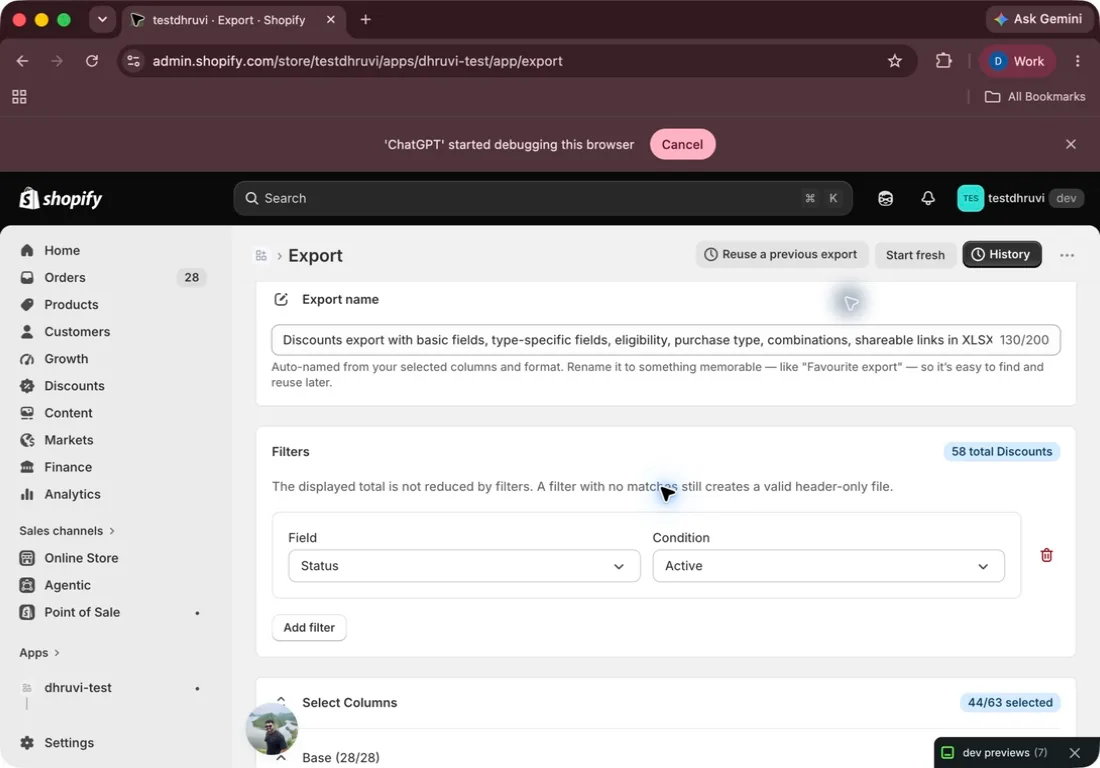
EditEngine provides these 11 fields:
| Field | Available matching |
|---|---|
| ID | equals any, does not equal any |
| Title | equals any, contains any, matches pattern, contains none |
| Discount Code | equals any, does not equal any |
| Tags | contains/equal variants, starts with, empty/not empty, pattern |
| Status | Active, Scheduled, Expired |
| Method | Code, Automatic |
| Starts At, Ends At, Created At, Updated At | on/after, on/before, range, relative date |
| Total Used Count | equals, comparisons, between |
Multiple conditions can match all or any. Text and code comparisons are case-insensitive, * is supported by pattern matching, and Discount Code checks all redeem codes belonging to a discount. Automatic discounts have no redeem codes.
Date boundaries use the store's time zone. Relative dates use full days, weeks, or months. A blank condition matches everything and shows a warning; an unusable numeric condition or incomplete Between value is ignored instead of silently removing rows.
Matrixify's current Discounts filter list does not include Discount Code. This is an EditEngine addition. EditEngine may push safe all filters into Shopify's query, then evaluates every condition again while building the file so the final rows follow the chosen logic.
Step 4 — Understand methods, types, and values
| Type | Method | Key fields |
|---|---|---|
| Amount off Order | Code or Automatic | Percentage or Fixed Amount; no product targets |
| Amount off Products | Code or Automatic | Product/variant or collection targets; Percentage, Fixed Amount, or Amount Off Each |
| Buy X Get Y | Code or Automatic | Buy targets, get targets, get quantity, and Free/Percentage/Amount Off Each value |
| Free Shipping | Code or Automatic | Country codes and optional over-amount minimum; Value Type and Value stay blank |
For Applies To: Values, use product handles, handle|SKU for variants, or collection handles. The referenced resources must already exist in the destination store. A country code is a two-letter code; * means all or the rest of the world.
Buy X Get Y requires a Quantity or Amount minimum, buy/get targets, a positive get quantity, and One-Time Purchase. Free has a blank Value; Percentage must be greater than 0 and no more than 100; Amount Off Each must be positive.
Purchase Type accepts One-Time Purchase, Subscription, or Both where Shopify supports it. Use the recurring subscription limit only with Subscription or Both. Combination flags are still subject to Shopify's rules for the selected discount class.
EditEngine can export Shopify Function-backed discounts as Type App, but their definition is owned by another app. EditEngine can delete such a discount when requested; it cannot recreate or edit the function-owned configuration. Manage it in the owning app instead.
Step 5 — Understand rows and identity
A single discount may occupy several rows. EditEngine emits enough rows to represent its redeem codes and shareable links, repeats discount identity on continuation rows, marks the first with Top Row = TRUE, and numbers the rows with Row #. Progress and the resource count still count one discount definition, not each spreadsheet row.
For a code discount, EditEngine resolves the existing definition in this order:
IDwhen present;- exact
Codematch; - for
UPDATEonly, an exact, unambiguous Title fallback when the listed code does not exist.
MERGE deliberately does not use that Title fallback: a missing Code can create a new code discount. Automatic discounts resolve by ID, then exact unambiguous Title. If an ID is present but does not match, MERGE and UPDATE fail instead of creating an accidental duplicate.
Do not change a discount's Type with MERGE or UPDATE. Use REPLACE after reviewing its destructive identity behavior.
Step 6 — Choose the discount Command
| Command | EditEngine behavior |
|---|---|
NEW | Creates only when no matching discount exists; otherwise fails |
MERGE | Updates a match or creates when the supported identity is missing |
UPDATE | Updates an existing match and never creates |
REPLACE | Validates the new payload, deletes the matched discount, then recreates it |
DELETE | Deletes the entire matched discount |
IGNORE | Skips the row group |
Exports contain Command = MERGE, which is the normal round-trip setting. However, if the Command cell and file-level default are both absent, Advanced Import defaults the row to UPDATE.
MERGE and UPDATE are partial: omitted columns preserve existing values. This is different from supplying a column with an invalid value. REPLACE is not an in-place edit—it creates a new Shopify ID and loses the old discount's usage history. EditEngine validates the replacement before deleting the existing record, but you should still test it on a disposable discount first.
This discount-level REPLACE behavior matches Matrixify's documented delete-and-create model.
Task: extend a discount's end date
For an existing, editable Shopify discount, an expiry extension needs only the exported ID, its unchanged Method, Command=UPDATE, and the new Ends At. Keep the full export as your backup, then make a separate Discounts worksheet with one row per definition. This example uses illustrative IDs; replace them with your store's exported values and retain Code or Automatic exactly as exported.
ID,Command,Method,Ends At
gid://shopify/DiscountCodeNode/91001,UPDATE,Code,2026-10-31 23:59:00 +0530
gid://shopify/DiscountAutomaticNode/91002,UPDATE,Automatic,2026-10-31 23:59:00 +0530
Use a timestamp with an explicit timezone, later than both the current end date and Starts At. The existing discount determines its type, so a Type, Value, Code, target, or eligibility column is not required for this date-only update. Leave those columns out rather than copying a whole create-discount template. Do not use this recipe for Type App discounts.
A blank Ends At on an update leaves the existing expiry unchanged in EditEngine; it does not remove the end date. This differs from Matrixify's documented blank-cell removal behavior. To remove an expiry, use Shopify Admin and verify the discount there.
Upload through Advanced Import and confirm Discounts detection, the Method, and one intended definition per row. Test one discount first; afterwards check that Ends At changed while its value, targets, eligibility, redeem-code set, and usage history stayed intact. Extending a date does not reset usage limits or guarantee the discount is usable in every checkout.
Matrixify's discount import tutorial explains using an export as a template for new discounts and removing their IDs. For this EditEngine update task, keep the existing ID and use UPDATE so a missing match fails instead of creating a new promotion.
Step 7 — Manage multiple redeem codes
For one code discount with several redeem codes, use one compatible row per code and keep the rows adjacent. The discount Command manages the definition; Code Command independently manages its redeem-code set.
| Code Command | Result |
|---|---|
MERGE | Add listed codes that do not already exist |
REPLACE | Add missing listed codes, then remove every unlisted code |
DELETE | Remove only the listed codes |
Blank Code Command defaults to MERGE. EditEngine adds before it deletes during a code-set replacement so the discount is not left temporarily without a code. Shopify processes bulk code deletion asynchronously, and EditEngine waits for that job to finish.
Re-importing an unchanged multi-code export is safe: EditEngine recognizes the grouped rows and does not try to rename the primary code. Code Command = DELETE cannot create a new discount.
Step 8 — Set eligibility and tags
Eligibility supports:
Allcustomers;Customers, identified by email; andSegments, identified by exact segment name.
Matrixify also documents Markets eligibility. EditEngine does not currently support Markets eligibility in Discounts imports, so remove or redesign those rows before importing them.
Tags Command defaults to MERGE when the Tags column is present. Use MERGE to add listed tags, DELETE to remove them, or REPLACE to make the list complete. A blank Tags value with MERGE makes no tag change.
Step 9 — Import through Advanced Import
Open EditEngine → Import, choose Advanced import, and upload the edited CSV or XLSX file.
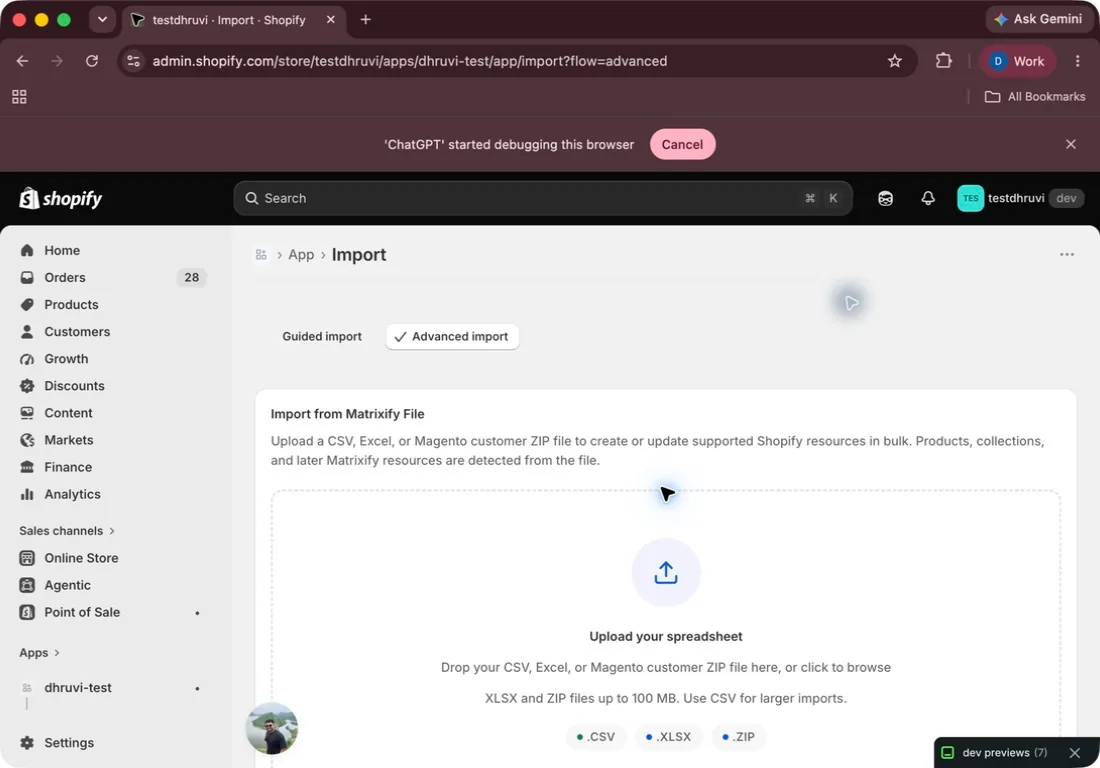
Before starting an import:
- Confirm that EditEngine detects the Discounts resource.
- Review the detected headers and row count.
- Confirm the file-level default command and every explicit Command cell.
- Check that repeated code rows still form one adjacent discount group.
- Review every
REPLACEandDELETErow separately. - Import a small test file first, then inspect its result rows and the discount in Shopify Admin.
EditEngine requires read access to discounts, customers, and products to resolve definitions, eligibility, and targets, plus write access to discounts for the mutations. Missing products, variants, collections, customers, or segments fail with an actionable row result instead of silently changing the target.
Step 10 — Verify the round trip
After the import completes:
- Download and review the result file; investigate every failed or warning row.
- Open the affected discounts in Shopify Admin and verify method, type, value, minimum, dates, targets, eligibility, purchase type, and combinations.
- For code discounts, test a newly added code in a safe checkout and confirm removed codes are absent.
- Re-export the same discount IDs and compare the new sheet with your intended values.
- Remember that Status is derived from dates and Shopify state; it is not directly imported.
- For REPLACE, record the new Shopify ID and do not expect the previous usage history to move with it.
Common mistakes
Leaving Command blank and expecting MERGE. A fresh export says MERGE, but a missing row and file default resolves to UPDATE.
Keeping source-store IDs in a cross-store file. Remove IDs so EditEngine can resolve or create records in the destination store.
Counting redeem-code rows as separate discounts. Several rows can belong to one discount definition.
Sorting away the row grouping. Keep related rows together and use Row # to restore their order.
Using REPLACE for a simple field edit. REPLACE deletes and recreates the discount; use MERGE or UPDATE for normal partial edits.
Editing report-only fields. Status, usage counts, timestamps, Summary, row markers, and Shareable Link fields do not mutate the discount.
Supplying Code for an automatic discount. Automatic creates use Title and leave Code blank.
Using Fixed Amount for a Buy X Get Y effect. Use Amount Off Each, Percentage, or Free.
Using Markets eligibility. Matrixify documents it, but EditEngine does not import it.
Trying to edit a Type App definition. Function-backed discounts must be managed in their owning app; EditEngine only supports deleting the Shopify discount record.
Related tutorials
- Update Shopify discount end dates — extend existing promotions with a four-column file and explicit timezones.
- Bulk markdown Shopify sale prices — change catalog prices instead of creating discount definitions.
- Roll out Shopify pricing tiers — coordinate price changes separately from checkout discounts.
- Export and import Shopify customers — prepare customer identities used by customer-specific eligibility.
- Export the Shopify Admin Activity log — audit discount-related events after a rollout.
About EditEngine: EditEngine Bulk Product Editor helps Shopify merchants bulk edit, import, and export store data from spreadsheets. Install on Shopify →