
Store content
Shopify Redirects: Export and Import
Published by Profitonium Apps · Last updated
Availability: Redirects export is available to merchant stores with the required Shopify access. Redirects Advanced Import is currently restricted to internal test shops; it is not enabled for ordinary merchant stores. The import steps below describe that restricted workflow, not a publicly available import feature.
Use the Redirects resource to export, audit, create, update, replace, or delete Shopify URL redirects through a CSV or XLSX spreadsheet. These are permanent 301 redirects that send a visitor from an old URL in your store to a new store path or an external URL.
Redirects help preserve working links after a migration, a deleted page, or a URL-handle change. They can prevent old bookmarks and search-engine links from ending at a 404 page.
Before you start
- Install EditEngine Bulk Product Editor in your Shopify store.
- Use Advanced import for the edited spreadsheet.
- Keep one untouched copy of the export. Advanced imports do not have one-click undo.
- Test path changes,
DELETE, andREPLACEon one or two non-critical redirects before importing the complete file. - Make sure every source Path is intentional. Redirect loops and chains can make storefront navigation and SEO harder to diagnose.
EditEngine follows the main columns and commands in the Matrixify Redirects spreadsheet format. This guide calls out the EditEngine-specific matching, normalization, and recovery behavior that matters during a round trip.
Step 1 — Export Redirects
Open EditEngine → Export, choose Redirects as the resource, and use CSV or Excel format.
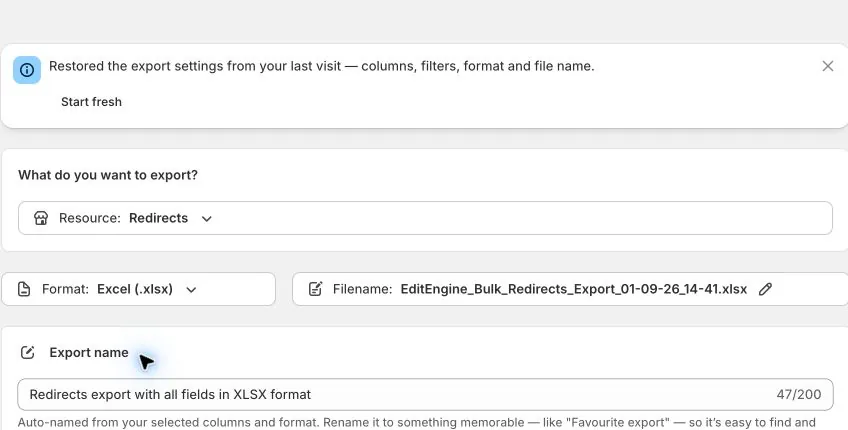
A Redirects export has exactly four editable columns:
| Column | Purpose |
|---|---|
| ID | Shopify's store-specific identifier and the safest key for updating an existing redirect. |
| Path | The old store path that visitors request, such as /collections/summer-sale. |
| Command | The operation EditEngine performs. Exports contain MERGE. |
| Target | The destination, either a store-relative path or a full external URL. |
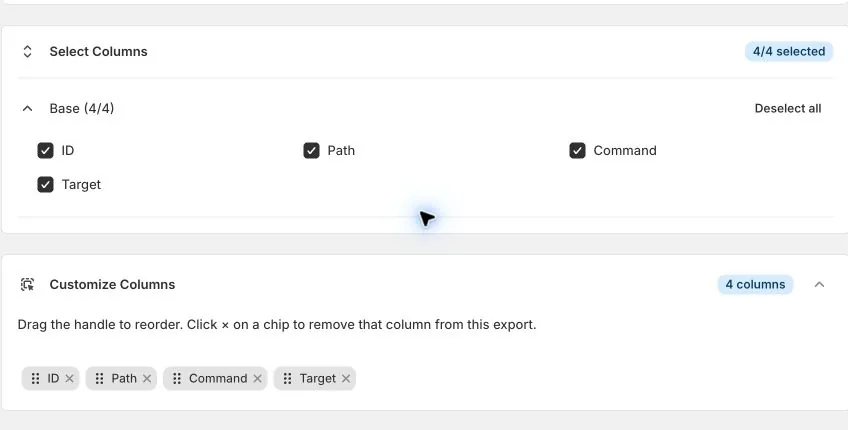
Keep all four columns for a normal same-store round trip. Download the file, duplicate it, and edit only the duplicate. Keep the original unchanged as your comparison and recovery reference.
Matrixify's Redirect export tutorial recommends keeping ID for bulk updates and reviewing Path and Target in the exported file. The same practice applies in EditEngine.
Step 2 — Understand Path and Target
Path is the old location inside your Shopify storefront. Prefer a relative path beginning with /:
ID,Path,Command,Target
,/old-sizing-guide,NEW,/pages/size-guide
EditEngine also accepts a full URL in Path. During import it removes the scheme and domain, adds a leading slash when needed, and keeps the query string or fragment:
https://old.example.com/catalog/item?q=1#details
→ /catalog/item?q=1#details
The domain in a full Path is not used to choose a store. The import always changes the Shopify store in which EditEngine is running.
Target can be either:
- a relative path in the same store, such as
/collections/new-arrivals; or - a complete external URL, such as
https://example.com/new-location.
EditEngine keeps a full external Target unchanged. Path and Target are required for create and update operations, and they cannot be the same.
Do not use a storefront URL that already redirects back to the original Path. EditEngine rejects an identical Path and Target, but it cannot detect every multi-step redirect loop in advance.
Step 3 — Identify an existing redirect
EditEngine uses ID first. When ID is blank, it looks for an existing redirect by the normalized Path.
For the safest update in the same store, keep the exported ID:
ID,Path,Command,Target
44920047631,/old-sizing-guide,UPDATE,/pages/size-guide
Important identity rules:
- A stale or incorrect ID does not fall back to Path. Shopify returns an error for that row.
- A Path lookup must find at most one redirect. If more than one matches, the row fails instead of choosing one.
- When moving redirects to another Shopify store, remove the source store's IDs. Shopify IDs are store-specific.
- If the same normalized Path appears more than once in one import file, the first valid row can run and each later duplicate row fails by itself.
For a new redirect, leave ID blank and use NEW, as shown in Matrixify's Redirect import tutorial.
Step 4 — Choose the right Command
| Command | What EditEngine does |
|---|---|
MERGE | Updates the matching redirect, or creates one when no ID/Path match exists. This is the exported round-trip command. |
NEW | Creates a redirect and fails when the supplied ID or Path already exists. |
UPDATE | Updates an existing redirect and fails when EditEngine cannot find it. |
REPLACE | Deletes the matching redirect, then creates a new one from Path and Target. The Shopify ID changes. |
DELETE | Deletes the redirect matched by ID or Path. Target may be blank. The row fails if no redirect is found. |
IGNORE | Skips the row without changing Shopify. |
Important: blank Command follows the import-screen default
For Redirects, a blank Command cell uses the Default Command selected on the Advanced import screen. That screen defaults to Merge, so a blank Redirect command normally behaves as MERGE in EditEngine.
This differs from Matrixify's documented blank-command default of UPDATE. Keep the explicit MERGE values from an EditEngine export, or write the intended command into every important row.
Use REPLACE only when you need a new record
REPLACE is destructive. EditEngine checks that Path and Target are present before deleting the matched redirect, but the operation still deletes first and creates second. If Shopify rejects the create request, the original redirect has already been removed.
Use MERGE or UPDATE for routine Path and Target edits. Use REPLACE only when a changed Shopify ID is acceptable and your untouched export is ready for recovery.
Step 5 — Prepare common spreadsheet operations
Create new redirects
Leave ID empty, enter a unique Path and Target, and use NEW:
ID,Path,Command,Target
,/products/old-linen-shirt,NEW,/products/linen-shirt
,/retired-campaign,NEW,https://example.com/current-campaign
Update existing redirects
Keep ID whenever possible. You can change Path, Target, or both:
ID,Path,Command,Target
44920047631,/guides/sizing,UPDATE,/pages/size-guide
When ID is blank, Path is both the lookup key and the submitted Path. Use ID when you need to rename the Path itself.
Delete redirects
Keep ID or Path, set Command to DELETE, and leave Target blank if you want:
ID,Path,Command,Target
44920047631,/obsolete-page,DELETE,
,/retired-campaign,DELETE,
Review every deletion row against the untouched export before importing. A successful delete cannot be undone with one click.
Step 6 — Import through Advanced import
For XLSX files, name the worksheet Redirects or Redirect. For a single CSV, use a clear resource filename such as redirects.csv so the importer can detect it correctly.
Open EditEngine → Import, select Advanced import, and upload the edited CSV or XLSX.
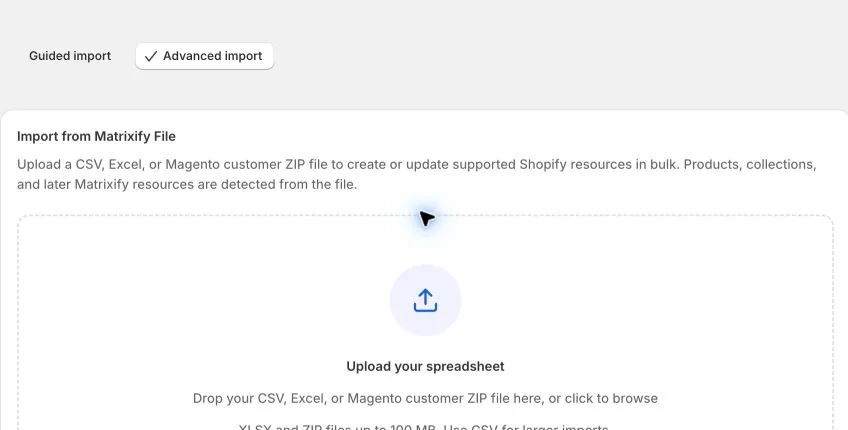
After upload, verify:
- The detected resource says Redirects.
- Existing redirects keep the correct ID, unless this is a cross-store import.
- Every Path is the source URL and every Target is the intended destination.
NEW,UPDATE,REPLACE, andDELETEare explicit wherever their behavior matters.- Every destructive row belongs in this import.
Start with a small test file. When the job finishes, download the results file and review every failed row. Invalid rows and duplicate Paths fail independently, so other valid rows can still succeed.
Step 7 — Verify the round trip
Verify the result both in the storefront and with a fresh export:
- Open each old Path in a private browser window and confirm that it reaches the intended Target.
- Check that the destination returns the expected page instead of another unexpected redirect or a 404.
- Run a new Redirects export and compare its Path and Target values with your intended spreadsheet.
- Review the results file for rows that failed even when the overall import completed.
For REPLACE, Shopify assigns a new redirect ID. For DELETE, the old ID no longer exists. To reconstruct either redirect from the untouched export, copy the original Path and Target into a recovery file, clear the obsolete ID, and use NEW or an intentional MERGE. Re-importing an old deleted ID unchanged can fail.
Redirect imports versus handle-change redirects
The Redirects resource directly manages Shopify's redirect records. It is separate from EditEngine's Create redirects for changed handles Advanced import option.
When that option is enabled, an ID-matched Product, Collection, Page, or Blog Post handle change can ask Shopify to create the corresponding old-to-new URL redirect automatically. Use the Redirects resource when you need to audit those records, import migration mappings, point to an external site, or manage redirects independently of another resource update.
Common mistakes
Putting the new URL in Path.
Path is the old incoming location; Target is where the visitor should land.
Keeping source-store IDs during a migration.
Redirect IDs belong to one Shopify store. Clear them before creating redirects in another store.
Clearing Command because the import screen says Merge.
Blank normally follows the screen's default, but explicit commands make a destructive spreadsheet reviewable and portable.
Changing Path without keeping ID.
Without ID, EditEngine searches by the new Path. Keep ID when renaming an existing redirect's Path.
Using REPLACE as a normal update.
It deletes and recreates the redirect with a new ID. Use MERGE or UPDATE for an in-place edit.
Assuming the untouched export is an automatic rollback.
Advanced import has no one-click undo. After DELETE or REPLACE, clear the obsolete IDs and use a deliberate recovery command.
Repeating a Path in the same file.
Only the first valid occurrence is planned; later rows with the same normalized Path fail as duplicates.
Related tutorials
- Import and export resource availability — check public, restricted, and export-only workflows.
- Export and import Shopify Pages — round-trip Online Store pages and handle-change redirects.
- Export and import Shopify Blog Posts — round-trip articles, parent blogs, comments, and article redirects.
- Export and import Shopify Custom Collections — round-trip manual collections and direct product membership.
About EditEngine: EditEngine Bulk Product Editor helps Shopify merchants bulk edit, import, and export store data from spreadsheets. Install on Shopify →