
Store content
Update Shopify Menu Branches in Bulk
Published by Profitonium Apps · Last updated
Change a link inside one Shopify navigation branch without rebuilding the other top-level links. This tutorial exports one menu, changes the Shipping link beneath Help, and imports the complete Help branch through Advanced import.
The important distinction is that EditEngine's menu MERGE is not a recursive merge of individual children. It preserves top-level links omitted from your spreadsheet, but replaces the complete subtree of each top-level link you include. Keep every child and grandchild you want beneath that parent—even when you are changing only one URL.
For all Menus columns, commands, resource types, and cross-store rules, see the Menus export and import guide.
What this example changes
Suppose your non-default menu has this structure:
Shop                     position 1 — unchanged, omitted from import
About                    position 2 — unchanged, omitted from import
Help                     position 3 — include this complete branch
  FAQ                    position 1 — keep its current link
  Shipping               position 2 — change its link to /pages/delivery
The file will contain Help, FAQ, and Shipping. It will not contain Shop or About. MERGE keeps those unlisted top-level links and replaces Help with the complete branch supplied in the file.
If your real Help branch has additional children or grandchildren, the three-row example is not complete for your menu. Include those descendants too. Omitting FAQ would remove FAQ from the resulting Help branch.
Before you start
- Test on one non-default menu first. Check it under Shopify Admin → Content → Menus before importing changes into navigation used by your storefront.
- Keep an untouched export in an access-controlled location. Advanced imports do not have one-click undo.
- Confirm that
/pages/deliveryexists and opens the intended page. Replace every sample ID, handle, title, and URL below with your store's actual values. - Use an existing menu from the same store. This tutorial is not a cross-store migration or a new-menu recipe.
- Do not use menu-level
UPDATEorREPLACEfor this partial-tree file.UPDATEtreats the file as the entire menu;REPLACEdeletes and recreates the matched menu.
Export requires Shopify's read_online_store_navigation permission. Import also requires write_online_store_navigation. Review any access request shown by the app before proceeding.
Step 1 — Export one complete menu and keep the backup
Open EditEngine → Export, select Menus, and choose CSV or Excel.
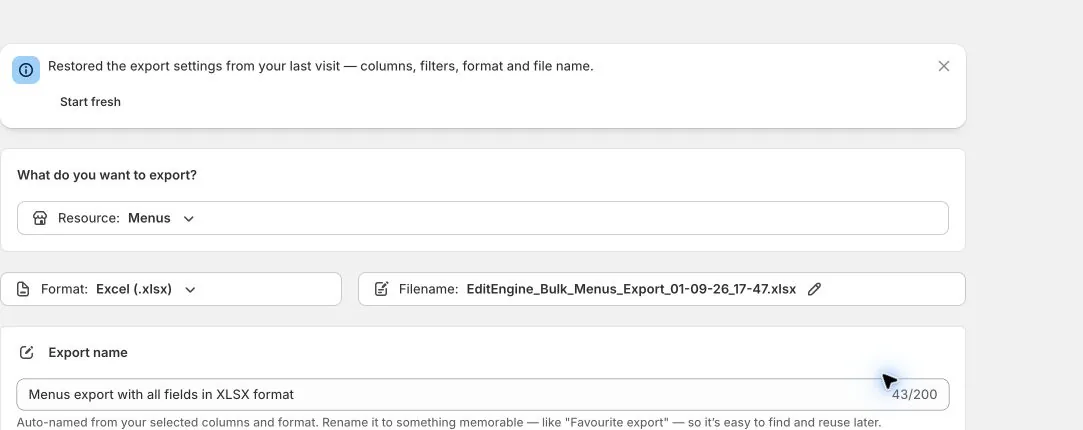
Menus is selected as the export resource, with Excel format and an export filename visible.
Use a Title or ID filter to select the menu you want to test. An ID filter is the most precise choice when you know the menu's ID. Filters select complete menus, not individual branches. Fill in the filter value; a blank filter does not narrow the export.
The displayed total remains the store's total number of menus after filters are added. Check the downloaded spreadsheet itself to confirm that it contains only the intended menu.
For the initial backup, keep all 18 columns selected: the seven Base columns and eleven Menu Items columns. This preserves the menu identity, item identity, resource destinations, parent relationships, and positions you need to reconstruct the branch.
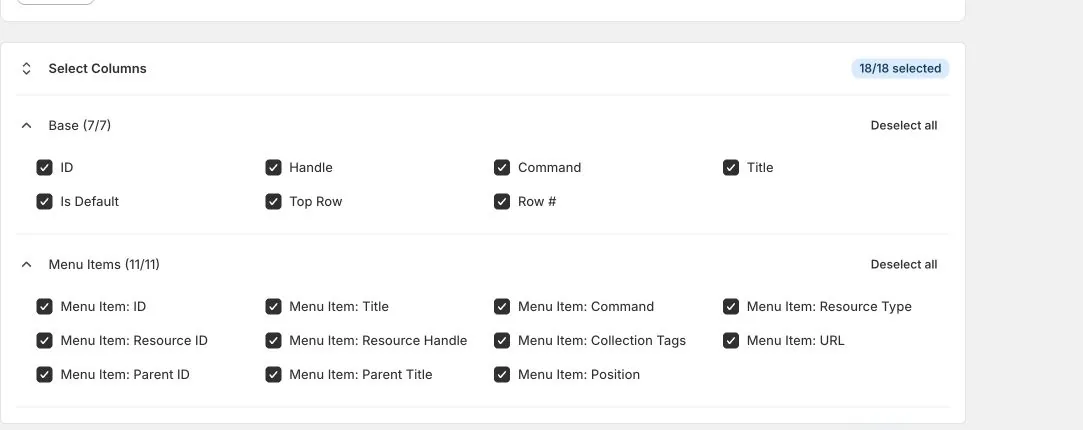
All 18 Menus columns are selected, including item IDs, resource types, parent IDs, and sibling positions.
Create the export and download the result. Excel uses the Menus worksheet; keep that sheet name. For CSV, use a filename such as Menus-branch-update.csv for your later working copy.
Save the original download unchanged. Make a separate working copy. Menu item rows are exported in tree order, with a parent before its descendants and the menu identity repeated on each row.
Step 2 — Keep the complete branch, not just the edited child
In the working copy, locate Help and retain its row plus every descendant you want to keep. Remove the Shop and About rows from this working copy only. Leave the untouched backup intact.
Keep the existing menu ID, Handle, and Title on every retained row. Use menu-level Command = MERGE. Do not clear the menu ID or change its handle as part of this edit.
For every retained item, preserve:
- its existing item ID and title;
- its resource type and valid destination;
- its exact parent relationship;
- its sibling position, including Help's original top-level position.
For a URL link with Menu Item: Resource Type = HTTP, the destination is Menu Item: URL. For links such as PAGE, PRODUCT, or COLLECTION, keep their resource type and resource ID or supported resource handle. Do not convert resource-linked rows to HTTP just to follow the example.
Convert existing item IDs consistently
EditEngine exports numeric IDs. For example, an exported Menu Item: ID might be 5001, not gid://shopify/MenuItem/5001.
For this ID-based update, convert every retained existing item ID to its full Shopify MenuItem GID. Convert each matching Menu Item: Parent ID in exactly the same way:
| Exported value | Value in this working import |
|---|---|
Menu ID = 9001 | 9001 — a numeric menu ID is accepted |
Menu Item: ID = 5001 | gid://shopify/MenuItem/5001 |
A child's Menu Item: Parent ID = 5001 | gid://shopify/MenuItem/5001 |
| Blank parent ID on a top-level item | Keep blank |
Do not add the prefix again if an item ID is already a full GID. Keep IDs as text in your spreadsheet so long numbers are not rounded.
This matters because EditEngine does not normalize numeric item IDs into GIDs before matching an existing branch. A full item GID matches the existing top-level item by ID and is retained in the update. Without a full item GID, the top-level match falls back to the item's exact title. Full IDs avoid depending on that title match and preserve existing item identities throughout the branch.
Parent IDs must match the item IDs inside this working file exactly. Do not leave numeric parent pointers after converting the item IDs. Include each referenced parent row; do not rely on an omitted parent being looked up from Shopify.
Step 3 — Change the destination and preserve positions
The following CSV is the smallest complete branch for the three-row example. It assumes Help is an HTTP link with exactly two HTTP children. Its menu ID is 9001, and its existing item IDs are 5001, 5002, and 5003.
ID,Handle,Command,Title,Menu Item: ID,Menu Item: Title,Menu Item: Command,Menu Item: Resource Type,Menu Item: URL,Menu Item: Parent ID,Menu Item: Position
9001,help-menu,MERGE,Help menu,gid://shopify/MenuItem/5001,Help,MERGE,HTTP,/pages/help,,3
9001,help-menu,MERGE,Help menu,gid://shopify/MenuItem/5002,FAQ,MERGE,HTTP,/pages/faq,gid://shopify/MenuItem/5001,1
9001,help-menu,MERGE,Help menu,gid://shopify/MenuItem/5003,Shipping,MERGE,HTTP,/pages/delivery,gid://shopify/MenuItem/5001,2
Only Shipping's URL changes. Help remains third at the top level. FAQ and Shipping remain first and second beneath Help. Positions are one-based and apply among siblings, not across the entire spreadsheet.
For your store, start from the exported values rather than copying the sample identifiers. Keep existing titles unchanged unless you also intend to rename them. Use the same menu identity and command throughout the block.
If the branch includes grandchildren, retain each row with its own direct parent's full item GID. If it includes Shopify resource links, retain Menu Item: Resource ID, Menu Item: Resource Handle, or Menu Item: Collection Tags as needed for those destinations; the HTTP-only sample does not need those columns.
Why not use a position-only spreadsheet?
The official Matrixify menu-position tutorial demonstrates a small selection of identity, parent, and position columns. Its Menus resource reference explains the underlying sheet format.
In EditEngine, a listed root replaces its whole subtree, and each included item needs a valid title, resource type, and destination. Do not copy the position-only column selection into this workflow: retain the complete named branch and its link details, even for a position-only change. The spreadsheet format is familiar, but this EditEngine behavior determines what you must include.
Step 4 — Review the file in Advanced Import
Open EditEngine → Import → Advanced import and upload the working CSV or Excel file.
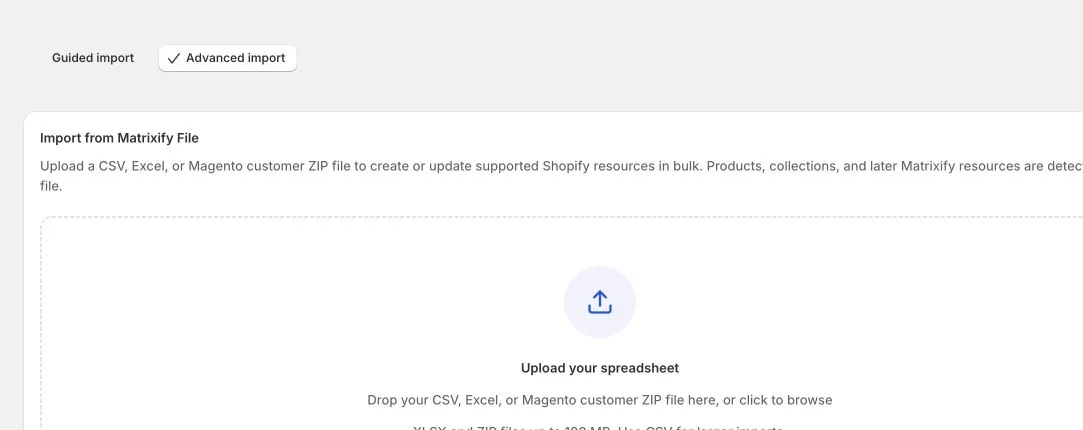
Advanced import is selected and the spreadsheet upload area is ready. Menus use this import workflow.
Review the detected resource and file before starting:
- Confirm that the resource is Menus. If the CSV is not detected correctly, select Menus explicitly; for Excel, retain the Menus sheet name.
- Confirm that the recognized headers include the menu identity, both Command columns, item IDs, titles, resource types, destinations, parent IDs, and positions used by your file.
- Confirm that only your one test menu is included. The example has three item rows belonging to one menu, not three separate menus.
- Resolve any compatibility or access warning. A header review does not validate every destination or parent relationship in the rows.
Review the detected headers and any sample rows shown. A sample is not a full-file or before-and-after validation. Check the actual CSV or worksheet separately; do not expect the preview to prove that your three rows contain the correct IDs and links.
When those checks are complete, run the one-menu test before expanding the task to additional menus.
Step 5 — Check the complete menu after the test
Open the import result and review the result file's Import Status and Import Comment columns. Investigate every item warning or failure before using the same approach more widely.
An invalid item can be skipped while valid items are imported. Its descendants can be skipped too. If Help is valid but one child fails validation, the submitted replacement Help branch can be missing that child. A completed job is not proof that the full branch survived.
In Shopify Admin → Content → Menus, inspect the entire test menu:
- Shop and About still exist, with their original destinations and top-level positions.
- Help is still third and contains every expected descendant.
- FAQ and Shipping remain in the correct order.
- Shipping opens
/pages/delivery; FAQ and Help still open their original destinations. - No child has accidentally become a top-level link, and no duplicate branch was added.
Check the storefront navigation too if this menu is assigned to your theme. Then export the menu again and compare its complete hierarchy, destinations, IDs, and positions with the intended result. Numeric item IDs in that verification export are normal.
If anything is missing or misplaced, stop before editing other menus. Use the untouched backup to work out the intended full tree, correct the file, and test again. Do not assume re-importing a partial backup branch with UPDATE is a safe recovery: UPDATE replaces the entire menu tree.
Troubleshooting
Other top-level links disappeared. Check the menu-level Command. This partial-tree workflow needs MERGE; UPDATE uses the file as the complete menu.
A child disappeared beneath Help. Check whether you included it and all its descendants, and inspect its result comments. MERGE does not preserve unlisted children beneath a listed root.
A child became a top-level item. Compare its Parent ID with the actual parent item's ID in the file, including the GID prefix. Both must match exactly, and the parent row must be present.
A duplicate root appeared after a rename. Check that the existing root has its full MenuItem GID. A numeric item ID does not trigger ID-based root matching; the fallback title will no longer match after a rename.
Positions changed unexpectedly. Restore the existing one-based positions from the backup for both the root and its children. Top-level positions are applied against the menu that includes the preserved roots.
Related tutorials
- Export and import Shopify Menus — full column reference, commands, linked resources, and cross-store rules.
- Export and import Shopify Pages — prepare page destinations before editing navigation links.
- Export and import Shopify Custom Collections — prepare collection destinations used by resource-linked menu items.
About EditEngine: EditEngine Bulk Product Editor helps Shopify merchants bulk edit, import, and export store data from spreadsheets. Install on Shopify →